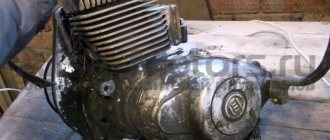
In matters of choosing one or another engine repair strategy. When it comes to repairing Soviet two-stroke motorcycles, it is advisable to adhere to a strategy that involves the complete restoration of original parts. And if this is not possible, with a creaky heart, you are forced to buy counterfeit goods or look for a used option.
- In the case of piston engines, a good repair involves, first of all, boring the cylinder to the repair size and installing a new piston, rings and pin. If you are lucky enough to find a Soviet-made cylinder, the best option would be to bore it to repair size, install a new piston, albeit a counterfeit one, and then such a piston is guaranteed to last for several seasons. And what’s most important is that boring costs only 400 rubles + a new piston, rings, pin, the total cost is no more than 1000 rubles
There is little point in dwelling on the boring process in detail. Boring involves restoring the geometry of the cylinder by increasing its diameter. You don't need to know more about boring. There are turners, let them bother with these subtleties
- If you don’t bother, as they used to like to do on collective farms: choosing a larger piston for a worn-out cylinder, then such a “repair” will be enough to take you to the neighboring collective farm for moonshine a couple of times...
- The fastest repair option is to buy a new piston. Our prices for piston engines for Soviet motorcycles start at 3,000 and more. To buy or not to buy is up to you. But if you buy it, be prepared for surprises.
Photo report: Installing a piston on a motorcycle “Izh”, “Ant”, “Voskhod”
In matters of choosing one or another engine repair strategy. When it comes to repairing Soviet two-stroke motorcycles, it is advisable to adhere to a strategy that involves the complete restoration of original parts. And if this is not possible, with a creaky heart, you are forced to buy counterfeit goods or look for a used option.
- In the case of piston engines, a good repair involves, first of all, boring the cylinder to the repair size and installing a new piston, rings and pin. If you are lucky enough to find a Soviet-made cylinder, the best option would be to bore it to repair size, install a new piston, albeit a counterfeit one, and then such a piston is guaranteed to last for several seasons. And what’s most important is that boring costs only 400 rubles + a new piston, rings, pin, the total cost is no more than 1000 rubles
There is little point in dwelling on the boring process in detail. Boring involves restoring the geometry of the cylinder by increasing its diameter. You don't need to know more about boring. There are turners, let them bother with these subtleties
- If you don’t bother, as they used to like to do on collective farms: choosing a larger piston for a worn-out cylinder, then such a “repair” will be enough to take you to the neighboring collective farm for moonshine a couple of times...
- The fastest repair option is to buy a new piston. Our prices for piston engines for Soviet motorcycles start at 3,000 and more. To buy or not to buy is up to you. But if you buy it, be prepared for surprises.
Photo report: Kolkhoz repair of piston “Ant” – Alisa-motors
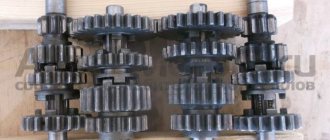
Why collective farm? Until because the repair as such will not be shown today. And instead it will be shown a classic overkill a la: washed, wiped and put back in place. That’s what the owner of “Ant” wanted. One can understand him: what is the point of investing money in an old, barely farting pile of manure, when there are about 50 cylinders and the same number of pistons with rings lying around in the barn?
From all this magnificent variety you need to collect one workable option
Where to begin?
Starting with the most difficult thing for garage repairs and collective farm tuning - the cylinder. There is only one criterion: a minimum of damage to the mirror and a minimum of production there, everything else is not that important.
The first cylinder that came to hand had severe damage to the mirror and a large output
The production on the second cylinder turned out to be even greater than on the first. We also reject this option.
The third cylinder has already been bored to the second repair size, the mirror is intact, there is practically no wear, but it is heavily rusted. Let's put this option aside for now.
The fourth cylinder turned out to be the worst: there was wear, a worn mirror and corrosion...
Of all four options, the third seemed the most acceptable. Since we are doing collective farm repairs today, we knock off the corrosion from the mirror with regular sandpaper. There is no need to tear it too much: just knock off the rusty coating a little and that’s enough
Pistons
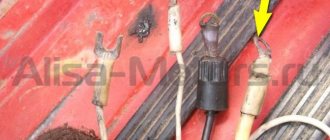
The stopper of one of the pistons has fallen out
The other two pistons were in good condition, but the wrong size. The fourth piston was the right size and fit perfectly into the cylinder, but it was pulled up and beaten with a hammer
We sand the burrs on the piston with sandpaper.
We straighten clogged bosses with a reamer
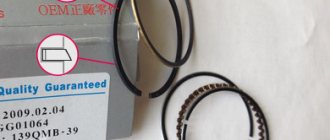
We managed to find factory rings with markings
What's the result?
As a result, the piston was successfully installed on the engine, run-in and serves its owner to this day. The owner was more than pleased with the result of the repair: zero investment, excellent result. If anyone decides to repeat this, go for it, everything is in your hands.
Quality of parts
The “quality” of parts for Soviet motorcycles that are currently on sale does not correspond to even the worst Soviet models. The Soviet one was not ideal either - believe me. The only thing there were no complaints about was the quality of the metal, but the manufacturing accuracy of Soviet manufacturers was lame and very, very bad
Rings
When purchasing new rings, insert them into the cylinder (new or after boring) and check for clearance
- If the rings fit tightly, we buy
- If the rings do not fit the mirror, try others
An example of a perfect fit of a ring to a mirror (“Ant”)
After checking for fit, we put the rings on the piston and measure the gap between the ring and the piston groove with a feeler gauge.
- If the gap is greater than 0.01-0.02 mm, try another ring
- If after several tried rings the gap is larger than expected, we try another piston
Voskhod piston with a gap clearly exceeding all conceivable standards
“Ant” piston with permissible clearance
Piston
One of the most dangerous and common problems in new pistons is the incorrect position of the ring stoppers. Customers have already brought pistons several times that had problems with the location of the stoppers
- Before purchasing a piston, use some pliers to tug on the stopper
- If the stopper is wobbly, we debug this piston and take the next one for check
Consequences of a flying stopper (“Ant”)
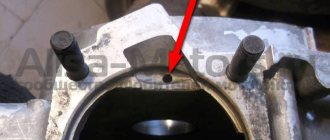
If the stopper fits tightly, place marks opposite the stoppers and insert the piston into the cylinder so that it does not reach the windows. Afterwards, we turn the piston so that it becomes exactly the same as in the engine. That is, the arrow is forward, and the axis of the finger is strictly along the axis of the crankshaft and look:
- If at least one risk has become opposite the windows or next to the window, we debug the piston and take another
- If there are risks between the windows, we buy
An example of the incorrect placement of stoppers on the assembled Voskhod engine. If the ring lock is in this position, the ring will inevitably break
An example of the correct position of the stoppers (“Ant”)
Review of the new piston for Ant
What is better, buy a new piston or buy a used Soviet-made cylinder and then bore it to repair size? It is impossible to answer this question unequivocally. Since everything depends on many factors, the main one of which is access to a good repair base and access to good used parts. Everything depends on this.
There are still good craftsmen, and if you know a turner at some military factory, then the best option for you would be to go through all the surrounding sheds, choose a cylinder that is more or less acceptable in condition and give it to “Uncle Vasya” at the factory for boring. And buying a new piston, pin and rings will be the best option. If you don’t know “Uncle Vasya”, there is only one way: buy homemade bullshit in the store and then fuss with it for a long time and tediously.
A complete set of a new piston engine of unknown origin “before the increase” cost 4,000 rubles:
- Head — 600 rub.
- Cylinder with piston, pin and rings - RUB 3,000
- Reed valve assembly with body and gaskets - 400 rubles
Pistons for TMZ engines, which are now on sale, most likely factory-made. And most likely ours. Some parts show traces of factory processing, in some places there are even stamps, but the piston pin is clearly Chinese: it shines and is packaged: our factories don’t do that.
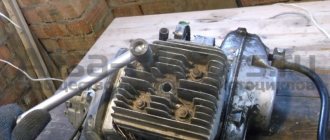
By default, the cylinder head comes with a solid “jamb”: the plane with which it rests on the cylinder is curved. Such a head cannot ensure the tightness of the connection. Fortunately, the problem is easily solved: grind the head on the stove and voila!
Dark places indicate leaks through which gases escaped from the combustion chamber. The head is not new, it was a little similar, but it is from the same opera as the cylinder
At first glance, the cylinder looks solid, but has a serious “jamb”: the liner is pressed flush with the cooling jacket. It would seem nonsense, in fact it is, there would be more than one “but” to eat. They did it this way so that the flat surface of the head rests on both the sleeve and the shirt at the same time. Over time, the liner sags a little and a decent gap forms between the head and the cylinder through which it siphons like something from Niagara Falls...
Even a new cylinder has a difference between the sleeve and the jacket, while a used one becomes even larger
Honing is applied to the cylinder mirror. The mirror itself is made with high quality, it is clear that the metal from which the sleeve is made is good, and not raw. It’s just a pity that the manufacturing accuracy is poor
There are many casting flaws on the vent windows. Before installation, it is advisable to remove all this disgrace
The piston is of very good quality: the locking pins do not fly out, the piston pin fits into the bosses with the required tension, the position of the locking pins fully corresponds to the position of the windows in the cylinder
There is a factory mark on the piston
The gap between the groove and the piston ring is within normal limits
The position of the piston ring locking pins is ideal: marks are drawn opposite the locking pins, the cylinder is installed on the engine
The piston rings are also of good quality
The fit of the rings to the cylinder mirror is ideal, the gap in the lock is minimal
In general, if you do not take into account the problem with the difference between the sleeve and the jacket, then this piston could easily be called good.
Preparation
Russian is Russian, so until we process all the parts properly with a file before installation, nothing will work out...
Insert the cylinder rings and use a feeler gauge to measure the gap in the lock.
- If the gap is less than normal, file the ends of the rings with a file
To reduce engine noise and speed up the ring grinding process, remove small chamfers on their working edges (preferably)
To improve lubrication of the piston pin, use a 5-6 mm drill to drill through holes in the piston bosses (optional)
We remove flashes and deposits of metal in the cylinder windows and round the edges along which the rings go
After finishing work, we thoroughly wash all the parts, prepare a clean work area and begin assembly.
Making a “cutter”
In this operation we will need: a birch log, calipers, a marker, a chisel, a saw, a cylinder (the one we are going to sharpen), a piston (new and old), a rasp (you can use a file), a drill, a long bolt with a nut or a hairpin with two nuts , sandpaper sheets “10”, “6”, “5” and “0” (on a fabric basis - not suitable on paper). There are a few caveats - the stud or bolt must be at least 8mm in diameter. The best solution would be 12mm. Sandpaper is selected independently, depending on the type of boring. It is advisable to go through the “rough process” and bring it “to clean water”, and not to drive the rough one until you are blue in the face. Then fix the finishing one, and buy and select a new piston.
Let's start - measure the sleeve with a caliper:
Let's take an allowance of 10mm and measure it on the already trimmed log:
Let's outline approximately where we have “more meat”, and set some simple markings there and drill:
Immediately take a larger chisel and chop off the excess “meat”. Shape it into a cylinder.
But the shape of a cylinder will not work, it will turn out something like an oval:
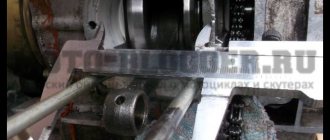
The next step is to tighten the resulting cylinder onto the stud/bolt. Tighten until your teeth creak. When inserted into the drill, tighten until your teeth creak - it will unwind with a bang. If you tighten it harder, it won’t run away. Now secure the drill, make a stop for the chisel, and unwind the cylinder by pressing the gas on the drill. Take technology breaks more often. During breaks, tighten all nuts. If it comes loose, the results could be disastrous.
By substituting a chisel (smoothly substituting a chisel!) we ensure that we first get an oval:
Then the shape will remind us of a cylindrical object:
Later you will get a natural, perfect cylinder. I think there is no need to explain that the fine-tuning was no longer carried out with a chisel, but with a rasp, and later even with a file.
You should now have a long wooden piston for the cylinder.
. Only well weakened. Somewhere by 0.3-0.6 mm.
Something like that:
This is an example of relaxation.
Next, we will make a technological cut in a wooden blank:
And you need to make a “latch” for it, that is, a latch. So that the sandpaper does not run away from us somewhere far away. Here I honestly admit that I stepped in the wrong place.
I made it wooden:
But when I started refilling, I realized that it didn’t hold well. The answer did not take long to arrive - a 3mm welding electrode worked perfectly as a clamp.
Make a fastener for the drill - it tends to run away from you!
Now let's see how we will have a working area:
Well, we have made our workplace. We can start taking measurements.
Assembly
Insert the retaining ring into the piston boss. The ring should fit into the boss tightly and evenly around the entire circumference
- If the ring is not seated tightly, straighten it or replace it with a new one.
We heat the piston with a technical hair dryer and insert the piston pin into the boss so that it extends slightly inside the piston
Lubricate the upper connecting rod bushing with any engine oil. We turn the piston with the arrow towards the exhaust (on Jupiters - towards the inlet). We put the piston on the connecting rod, insert the extended pin into the hole in the upper head, drive the pin in and fix it with the second lock ring
We install the gasket and, from some clean container, bury engine oil into the bearing of the lower head of the connecting rod and the oil channels of the main bearings
Lubricate the piston thoroughly with oil, install the rings and tighten them with a clamp. We make a clamp from tin: cut out a strip of the required width, use it to make a clamp and voila!
After the rings go into the cylinder, remove the clamp and push the cylinder all the way
After installing the cylinder, hold it with your hand and try to turn the crankshaft:
- If the piston moves easily in the cylinder without crunching or jamming, install the gasket and screw on the cylinder head
- If the piston moves tightly with a crunching sound, or sticks, remove the cylinder and see what you did wrong
Refinement of the Ant scooter. Page 2 of 2
I remember an ant like a bad dream, and it didn’t travel 60 km. If it’s only downhill, then you think that the wheels won’t fly off.
Well, if you don’t regulate it correctly, then of course it won’t work. Here in Tula they still run. And I, Ant and Tula had them in our youth. And they ran without problems. It’s just that there was such a technique back then, you had to put your hands to it, to any one. Now I’m moving out of town, I’m picking up an Ant for the summer, an irreplaceable thing in the household. And by the way, for a vehicle, in order to make a sleeping kung, it is not necessary to increase the platform. You can simply make the front wall fold down and get a full-fledged sleeping place.
The walk-behind tractor drives quietly, right? Oh well
Hi all . Please tell me! You can put a piston from an old-style ant onto a new-style ant. I ask because on the old-style ant the piston has 3 rings, and on the new-style ant the piston has 2 rings and a window on the carburetor side. I can’t take a photo because my friend’s ant is far from me.
Hi all . Please tell me! You can put a piston from an old-style ant onto a new-style ant. I ask because on the old-style ant the piston has 3 rings, and on the new-style ant the piston has 2 rings and a window on the carburetor side. I can’t take a photo because my friend’s ant is far from me.
Cylinder boring at home
Hi all. Every owner of gasoline equipment has encountered (or will encounter in the future) a problem - cylinder wear. Here they do everything they can - either buy a new cylinder and piston, or buy a new piston and go to a turner. Grandmas pay him, but he is miserable. Many turners love blue (alcohol) and the straightforwardness of some leaves much to be desired. I suggest boring the cylinder yourself! It's pretty simple.
General provisions and safety precautions:
The author is not responsible for injuries, accidents during repetition, for “jambs” and defects obtained when trying to repeat the contents of this article.
- If you are under 16 years old, work should be carried out with adults (preferably a male assistant).
- Remember, you are working with rotating parts, do not wear gloves! Work with bare hands. There should be no sleeves on work clothes. Even if there is, roll up your sleeves to at least the elbow.
- What is in the photographs is the author’s work process.
- ANY cylinder can be sharpened using THIS method. The first one that came to hand was taken.
- For the sake of writing this article, a cylinder from the D-6 engine was taken.
- For boring you will need a drill with a power of at least 350 watts. In this article I used a 1050 watt drill.
- The lower the speed, the better. I have 550 rpm.
MY MOTORCYCLE
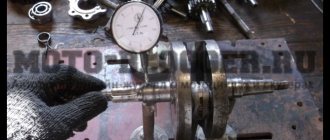
Everyone knows that: the power and “thrust” of the engine directly depend on the condition of the parts of the cylinder-piston group. You also know that the friction surfaces of these parts wear out due to dust, the use of low-quality oils, and simply from prolonged use. Since it is practically impossible to measure engine power in everyday conditions, many use an indirect indicator - maximum speed, while others measure compression in the cylinder. The second method of assessing power is more preferable, because the speed capabilities of the device may decrease, for example, due to the fact that the exhaust system is coked, the ignition control is disrupted, or the carburetor malfunctions. If the engine is really stuck, do not rush to immediately bore the cylinder to the repair size. Experienced people usually adhere to the following sequence of actions: the first time they change the rings, the second time - the rings and the piston (both times - to nominal sizes), then they change the rings again (also to nominal sizes) and only then bore the cylinder for the first repair with subsequent installation of a repair piston with rings. When to start these replacements depends mainly on the operating conditions. The first replacement of the rings may be necessary after six to seven (and up to 25 for large-capacity devices) thousand kilometers, and the piston after 15-40. The degree of wear can be assessed by disassembling the cylinder-piston group. When disassembling, you need to firmly remember two things.
First, don't drop the retaining ring into the crank chamber. To avoid this trouble, immediately cover the camera with, say, a rag.
And second, don’t bend the connecting rod when you start knocking out the pin with a hammer. It is best to use a puller. So, the piston is in your hands. Carefully remove the rings from it (use three or four shims (Fig. 1) and insert them into the top of the cylinder.
“Align” the rings with the piston - insert it into the cylinder from below and measure the gaps in the ring locks (Figure 2). If they exceed 3 mm, the rings must be replaced. Gaps in the locks of new rings should not exceed 0.2-0.4 mm.
Immediately evaluate the condition of the piston: if the gap between it and the cylinder is more than 0.3-0.4 mm, the piston requires replacement. When selecting a new piston, it is convenient to follow the “old-fashioned” method: a washed and lubricated cylinder lies on the table, and you lower the piston into it. A “good” piston should lower under its own weight for about one second. If it fails with a knock or, even worse, gets stuck “halfway,” look for another piston. Each motorcycle model has from two to four size groups of pistons; their difference in diameter can be from 0.01-0.025 mm. The group marking is usually stamped on the top of the piston and on the lower end of the cylinder. Make sure these numbers match. Pay special attention to the condition of the used piston. Inspect it for cracks and, if there are any, throw it in the trash. As a rule, cracks appear in the area of the bosses on the inner surface of the piston and in the corners of the purge ports. One way or another, cracks always form in places of increased stress concentrations (Fig. 3).
general information
The Soviet cargo scooter has a reliable metal trike, made in the form of a platform with a tailgate. Ant's trike is quite roomy. The platform's carrying capacity is 250 kilograms, which allows the Ant scooter to be actively used for household needs. Thus, a cargo scooter allows you to transport:
Motor vehicles are distinguished by maneuverability and unpretentiousness. In the garage, the Ant scooter takes up about the same space as a bulky motorized vehicle with a sidecar. Ant's turning radius is about 3.5 meters.
Characteristics of the Ant scooter
In winter, a cargo moped operates using a mixture of M6/3-10G/1 engine oil and A-76 gasoline, and in summer it requires the M8B grade.
If we compare the Ant scooter with a sidecar motorcycle, then in terms of operational fuel consumption the advantages will be on the side of the former. A cargo moped “eats” 8 liters/100 kilometers. It is also much lighter than a motorcycle with a sidecar - its weight is 240 kilograms.
Refinement of the Ant scooter. Page 2 of 2
I remember an ant like a bad dream, and it didn’t travel 60 km. If it’s only downhill, then you think that the wheels won’t fly off.
Well, if you don’t regulate it correctly, then of course it won’t work. Here in Tula they still run. And I, Ant and Tula had them in our youth. And they ran without problems. It’s just that there was such a technique back then, you had to put your hands to it, to any one. Now I’m moving out of town, I’m picking up an Ant for the summer, an irreplaceable thing in the household. And by the way, for a vehicle, in order to make a sleeping kung, it is not necessary to increase the platform. You can simply make the front wall fold down and get a full-fledged sleeping place.
The walk-behind tractor drives quietly, right? Oh well
Hi all . Please tell me! You can put a piston from an old-style ant onto a new-style ant. I ask because on the old-style ant the piston has 3 rings, and on the new-style ant the piston has 2 rings and a window on the carburetor side. I can’t take a photo because my friend’s ant is far from me.
Hi all . Please tell me! You can put a piston from an old-style ant onto a new-style ant. I ask because on the old-style ant the piston has 3 rings, and on the new-style ant the piston has 2 rings and a window on the carburetor side. I can’t take a photo because my friend’s ant is far from me.
at least five rings. as long as the joints of the rings do not touch the windows.
I mean on the piston from the old model, there is no window at all.
well why not. If the geometric dimensions of the pistons are the same, then they can be installed. window in the piston for better filling of the crank chamber with the mixture. There is also a membrane on the suction pipe for this purpose too. I wanted to buy it, but it costs about 400 rubles. The toad is strangling.
how to correctly install the piston on an ant scooter? | Topic author: Nikolay
Nadezhda If the piston is severely worn, it is necessary to bore the cylinder.
You should definitely pay attention to this when installing; the top one is thinner and ground at an angle. Also pay attention to the inscription on the Artem ring, the inscription should always be on top, that is, opposite from the finger. First you need to put on the bottom, then the top. There is no need to stretch or bend them. These manipulations must be carried out carefully. There are locks in the grooves for the rings that prevent the rings from turning during operation, so the ring gap must be in these locks, otherwise you will not stick the piston into the cylinder.
And the last important point is the Dmitry arrow on the bottom of the piston or the inscription EX. Both the arrow and the inscription must be directed towards the Gregory exhaust. In this case, the ring locks will be located on the side of the reed valve. If the locks are placed towards the exhaust, the piston will not last long, the rings will be pulled into the exhaust port and gradually grind it down.
During all manipulations with the piston, it is imperative to put a rag in the crankcase window so that nothing inadvertently gets in there; we still need a crankshaft with bearings. When installing the piston pin, pay attention to the condition of the Jan separator; it may need to be replaced. Before installing the piston pin, install the stop ring on one side before installing the piston Alina. Then place the pin with the bearing and the second stop ring; when it is fixed in the groove, it will make a certain click. That's all, now put on the cylinder, not the piston Yaroslav, the cylinder head and tighten the bolts one by one in a cross pattern.
motor from a walk-behind tractor | Topic started by: Zaiah
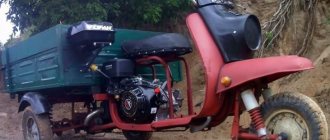
Here are my successes to date, 4-stroke Lifan engine, volume 270 ml, rushes like crazy, pulls great, drives fast, starts “without foam”, consumes very little pure AI92 gasoline. It remains to complete the cosmetic repairs (fenders, painting.) Maybe in the future the 4-wheeled Murik will become
Maxim (Rhiain) Leonid, and if the speed change from the Chinese engine to the original engine is 1/1, will the power of the Chinese engine be enough?
Ramadan (Vilasa) no
Evgeniy (Aghounig) Maxim, grab the TMZ engine, which is used as a gearbox. And the gear ratio depends on the sprockets on the gearbox and on the rear axle.
Leonid (Aodhfin) YES, everything is correct, it’s not directly to the gearbox, but through the box! So I'm fine..
Petka (Hastini) Ruzal, hello. What kind of diaeter is the pulley on motors? Very nada.
Ruzal (Harimani) Petka, 80 mm on both the engine and gearbox
Valentin (Abhaydatta) Leonid, hello, is it possible to put a motor from a walk-behind tractor on an ant scooter and connect it directly to the gearbox
Valentin (Abhaydatta) Will there be cravings or not?
Valentin (Abhaydatta) Will there be cravings or not?
Valentin (Abhaydatta) Ruzal, how did you install 2 wheels
Ruzal (Harimani) Valentin, between the wheels there are 6 tubes, each 11cm long, diameter approximately 15mm, the tubes are tightened with 12mm studs
Valentin (Abhaydatta) Ruzal, hello, is it possible to put a motor from a walk-behind tractor on a murovey scooter and connect it directly to the gearbox
Ruzal (Harimani) Valentin, It is possible, if you attach a centrifugal clutch (variator) to the engine of a walk-behind tractor (Lifan, Honda..), you purchase it separately
Valentin (Abhaydatta) What about you?
Valentin (Abhaydatta) Ruzal
Valentin (Abhaydatta) Ruzal, how did you install the engine?
Valentin (Abhaydatta) Ergash, does your scooter pull well or not with a load?
Ergash (Tanesha) Valentin, carried about 500 kg of sand. and you're driving empty! you don't feel the load.
Valentin (Abhaydatta) Ergash, can you install it without a clutch?
Which winch to buy for UAZ Bukhanka
Do-it-yourself winch installation on a Chevrolet Niva video
Installation of engine 402 on UAZ 469
Specifications
The Soviet moped, which has recently enjoyed great popularity, has the following technical characteristics:
- Length - 2680 millimeters.
- Width - 1250 millimeters.
- Height - 1075 millimeters.
- Dry weight - 240 kilograms.
- Load capacity - 250 kilograms.
- Speed - 25-35 kilometers per hour.
- Engine type is 2-stroke, power is 11 l/s.
- Transmission - 4-speed gearbox.
- The brakes have a diameter of 15.0 centimeters. Drum-type, each wheel has a mechanical drive.
Many fans of Soviet motorcycles are sincerely convinced that the technical characteristics of the Ant are practically in no way inferior to the characteristics of Western models.
Trailer
You can make a trike for the modern Ant yourself. In addition to this model, a homemade trike is also suitable for a sidecar motorcycle.
A standard trike is a connection:
- stroller frames (side trailer);
- a bracket curved from a steel pipe (L-shaped);
- clamps (2 pcs.);
- tubular struts.
When making a trike, it is important to ensure that the body shell does not touch the bracket. In order to give the frame more rigidity, it is necessary to weld a gusset made of steel.
A homemade trike requires a welded trailer frame. The trike must also have an easily opening and freely removable tailgate. The sides and bottom of the body are covered with boards (tongue and planed).
The trike must be equipped with up-to-date lighting devices: turn signals, side lights and brake lights.