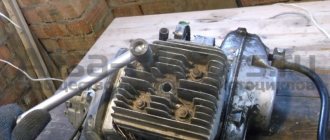
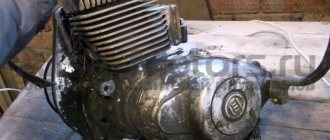
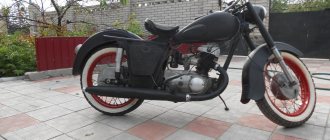
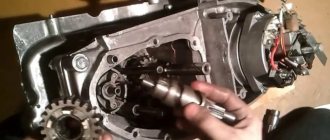
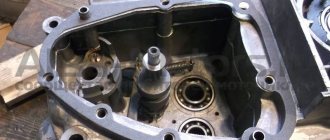
An old acquaintance approached me with a request to repair the gearbox of his Tula or Ant - I still didn’t understand. The engine was half disassembled: without a cylinder and clutch. To be honest, I had nothing to do with the “Tula” in terms of repairs; I only repaired the “Ants” all the time. I only heard that the “Tula” shifts gears like a regular motorcycle, and not like the “Ant”
As for the problems with this particular checkpoint, I can only guess what problems it had. The client himself did not fully understand everything: either the third and second gears were knocked out, or these gears were slipping - I still didn’t understand... However, this is not the point. Another thing is important: the client, knowing my dislike for “left-handed” spare parts, brought a bunch of used parts in addition to the engine, which actually could not but make me happy and reassuring about the expected result of my intervention in this gearbox
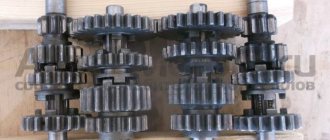
From all the heaps of used spare parts, I managed to assemble two fully functional gearboxes, which, by the way, have some differences. That gearbox (on the right) which has a wider third gear intermediate gear is clearly not “Muravyovskaya” - I’ll assume that it’s either from Tula or from the old “Muravyov” or I don’t understand something anymore...
In that pile there were two serviceable copying shafts with different “daisies”. The left shaft, judging by the “daisy”, is clearly not “Ant”. I'm guessing he's from Tula. Again, I could be wrong, since I always repaired only “Ants” and I have never seen a copy shaft with such a “daisy” in them
And so I thought and this way: the “Tula” gearbox does not give any advantages and it is not very familiar to me in terms of repairs, and I decided to stop at the “Muravyinnaya” and, as for me, the gear shift algorithm of the “Ant” is much more convenient
Ant scooter gearbox. Ant scooter repair
An old acquaintance approached me with a request to repair the gearbox of his Tula or Ant - I still didn’t understand.
The engine was half disassembled: without a cylinder and clutch. To be honest, I had nothing to do with the “Tula” in terms of repairs; I only repaired the “Ants” all the time. I only heard that the Tula shifts gears like a regular motorcycle, and not like the Ant. As for the problems with this particular gearbox, I can only guess what problems it had. The client himself did not fully understand everything: either the third and second gears were knocked out, or these gears were slipping - I still didn’t understand... However, this is not the point. Another thing is important: the client, knowing my dislike for “left-handed” spare parts, brought a bunch of used parts in addition to the engine, which actually could not but make me happy and reassuring about the expected result of my intervention in this gearbox
From all the heaps of used spare parts, I managed to assemble two fully functional gearboxes, which, by the way, have some differences. That gearbox (on the right) which has a wider third gear intermediate gear is clearly not “Muravyovskaya” - I’ll assume that it’s either from Tula or from the old “Muravyov” or I don’t understand something anymore...
In that pile there were two serviceable copying shafts with different “daisies”. The left shaft, judging by the “daisy”, is clearly not “Ant”. I'm guessing he's from Tula. Again, I could be wrong, since I always repaired only “Ants” and I have never seen a copy shaft with such a “daisy” in them
And so I thought and this way: the “Tula” gearbox does not give any advantages and it is not very familiar to me in terms of repairs, and I decided to stop at the “Muravyinnaya” and, as for me, the gear shift algorithm of the “Ant” is much more convenient
Adjusting the tightening of nuts
We tighten the adjusting nuts to approximately the same limit as in the photo. I delay all my clients in approximately the same way - no more and no less. After tightening the nuts, press the lever and watch how the pressure plate comes off.
- If the disk comes off skewed, tighten the required nut half a turn and check with a new one
- If half a turn is not enough, turn the nut another half turn until the disc comes off perfectly straight.
- If you are transporting large loads and the clutch cannot cope with the increased load and slips, tighten the nuts a few turns
- If the force on the lever is high for you and you operate the scooter without a load or alone, for example, “Tula” - loosen the nuts
Malfunctions
Due to the fact that when starting the engine, the force from the kickstarter is directly transmitted to the first gear gear, the bushing with which the gear rests on the input shaft wears out and wears out so that the gear simply begins to dangle on the shaft
- Before assembly, we put the first gear gear in its place and try to swing it. If the gear is loose, replace it with a new one, or, if you have experience in this area, change only the bushing and leave the gear
- The second typical malfunction is due to the fact that the roller that fixes the copy shaft does not always work exactly on the “daisy”, but often jumps off it and instead of the roller, the “daisy” is fixed by the locking bar, as in my case. Such a malfunction leads to the fact that the gears begin to knock out, fail to engage or jump over one
Notice how the contact with the “chamomile” erased the bar and cut off one tendril of the cotter pin
- This malfunction can be eliminated very easily and simply: place the retainer bar along with its spring on the gearshift shaft and insert the shaft into the crankcase. Then insert the copy shaft there and turn it several times and see where the roller runs.
- If the roller does not run along the “daisy”, use pliers to bend the clamp bar in the desired direction so that the roller runs strictly along the “daisy” of the copy shaft
Correct roller position
All other malfunctions that this gearbox suffers from are typical for Soviet-made motorcycle gearboxes and consist of wear on the working edges of the cam clutches, gear teeth and gear shift forks
For clarity, I dug out for you from a pile of rubbish the input shaft with truly extreme wear on the teeth of the first gear drive gear. Its tooth wear is about 1mm. It seems that the only thing they were doing with this scooter was that they were “pulling GAZelles”... Such wear on the gears is critical and the shaft is not subject to further use
No matter how many times I went through TMZ engines, I never came across gears with worn cam couplings, and I went through a couple of cars of them, if not more... I dare to suggest that wear on cam couplings is not a typical problem with TMZ engines, unlike Izh, Zid and other engines
The gear claw couplings should be in approximately this condition. Unfortunately, I was never able to find gears with worn couplings even in a pile of rubbish. So there's nothing to show
All gearboxes, including this one, suffer from wear on the working surfaces of the forks. If the wear is no more than about.5mm, then this is quite acceptable
Assembly
We look inside the right half of the crankcase for a copier on which the pawl of the gear shift mechanism moves, and with several clicks we check its functionality
We take the copy shaft in our hand so that its “daisy” looks at you and turn the gear shift forks clockwise until it stops
Without changing the position of the gearshift forks, we assemble the gearbox and insert the forks into it along with the copy shaft in the order shown in the picture
Without disturbing the position of the parts, we install the gearbox assembly with the tracking shaft in the right half of the crankcase and install the gear shift shaft there along with the locking bar. After installing the retainer bar, do not forget to insert its return spring into a special slot inside the crankcase
The procedure for installing a gearbox, with the necessary skill, is very easy and quick. If you are unable to install the gearbox this way, disassemble it and install the parts separately
To be extra sure that the copy shaft did not accidentally turn during assembly, turn it as far as possible clockwise
We install a sector of the gear shift mechanism on the gear shift shaft, making sure that it is its last tooth that engages with the gear of the copy shaft, and not some other one. After installing the sector, we put a return spring on the gearshift shaft
And we enjoy the impeccable performance of the manually assembled gearbox.
Just a couple of months ago, an old client asked to overhaul the engine of his Ant for the season. He is not greedy for money - he promised to buy everything needed for repairs. We agreed, the client brought it for repairs. The piston, crankshaft, motor chain and almost all bearings were worn out.
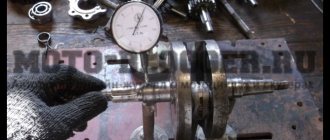
The customer insisted on purchasing a new crankshaft. They are now in abundance in any store - I don’t want to take them, but their quality is still good... I resisted for a long time and in the end the client found a used engine from which I pulled the crankshaft. Of course, it was slightly worn out, but the bearing of the lower head of the connecting rod was intact and intact, and we didn’t need anything more.
hello, please help me after overhauling the engine, the clutch does not engage, I assembled it as you show the release is normal, but the clutch does not engage the adjusting screw, no emotions before disassembling the engine led a little. I put in an old ball, I’m wondering if it’s because of it since it’s not quite a ball anymore, I’d say there was nothing to replace the square with
Andrey, did I understand correctly that the clutch does not engage? That is, you turn on the gear, but the scooter doesn’t go anywhere. If so, then it is possible that during assembly the last disk did not fit or flew out of the groove of the basket. Describe your problem in more detail, or, what would be best, remove the clutch cover and take a photo of how it is assembled there and then we will advise you something.
no speed, they turn on, but when the clutch is depressed, the gearbox does not disengage; the adjusting bolt tightens the crankshaft and piston; they don’t move at all; I loosen things up a bit; everything works, but when I press it, again there is zero emotion
Andrey, I just can’t get to the bottom of the problem. First you say the clutch won't engage, now you say it won't disengage. Explain in more detail what's wrong with your clutch. If it drives (does not turn off), then when the gear is engaged, the scooter will move even with the clutch lever fully depressed. If the clutch slips (does not engage), then when the gear is engaged the scooter will not go anywhere - even if you release the lever or not. The “Ant” clutch is very reliable and unpretentious, and when serious problems arise with it, in most cases, this moment indicates to me that it was assembled incorrectly (“hello, help, please, after reassembling the engine, the clutch does not engage”) or damaged. Try taking it apart again, and then reassembling it.
the clutch means it drives, I assembled it as you showed, this is what I remembered, I put the thickest disk with the chamfer down (is it correct), maybe because of this I’ll take it apart well again, I’ll check everything, I’ll write it down for you, it’s just that this is my first scooter, I want it to work like a clock, but here such an opportunity, the ignition is still ignition, the spark is acting up, that is, no, the coil is new, the capacitor is also the spark plug, I want to convert it to a magnet
Andrey, everything is correct: the thick disk is chamfered to the engine, and the clutch can drive not only due to improper assembly. And for example, because of a bad cable, crooked disks and many other reasons.
The clutch on my ant is slipping, the bike is barely moving. Adjustment does not help, friends advised me to replace the discs, are they right?
Nikolay, you need to disassemble the clutch in any case and have a look. Maybe the discs are worn out or crooked, or maybe the cable is bent or rusted somewhere, anything can happen.
Excellent guide. Very intelligible. Please tell me the play on the basket, it is allowed without an internal drum. Judging by the photo, you don't bother about it. Because together with the inner drum, the play disappears. I have the following problem. The engine is on a motorized winch and since the clutch was assembled with a skew, it was impossible to adjust it (it was moving, sometimes it was slipping, but the speeds were engaged). I decided to rebuild the clutch (so that neutral could be engaged with the engine running). It's a pity I didn't read your manual before. The basket is a new type, I put new type discs (with cuts) in there, adjusted the uniform waste, the first one turns on and off easily, but the second one doesn’t turn on and there is a growl. It also looks like I overtightened the springs and the clutch was a bit tight. Now I disassembled the basket, started checking the parts and there is play on the basket (I installed the inner drum without springs and tightened it). It also looks like the springs have sagged because with a gap of 2-3 turns on the bolt (as YOU do), the springs are weakened (I think the clutch will slip) and the bolt wobbles. I was thinking, tightening the springs so that the end of the bolt would not touch the drum. Now I realized that it's not scary. What do YOU think? Thank you in advance.
Build errors
In most cases, the right main bearing of the crankshaft fails due to an assembly error almost in the first season after repair. The engine that we are now repairing is no exception. The bearing has practically crumbled and in any case needs to be replaced with a new one.
The mistake is that when installing the flange on which the dynostarter stator is attached, the oil channel through which lubricant flows to the main bearing and oil seal is sealed.
To ensure that the main bearing lasts at least several seasons, cut the gasket under the flange a little along the contour of the oil channel and when you put the flange in place, do not smear anything with sealant there.
Assembly
I bought this main bearing. It seems to be our production. There are Chinese analogues in stores - they are more expensive, but I don’t know what their quality is... I try to buy something that may not be of such super-duper quality, but at least one that has been proven over the years.
The quality of production is such that there is essentially nothing to complain about. The price is quite reasonable - 350 rubles.
We press the inner race of the main bearing onto the right crankshaft journal. External - screw the stator flange of the dynostarter and press it into the crankcase until it rests against the flange.
We install the oil seal, retaining ring and main bearing into the left half of the crankcase. I'm installing a new main bearing. It is closed, but it doesn’t matter: we open it, wash out the factory grease and install it in the crankcase.
Lubricate all bearings and working edges of oil seals with clean engine oil. And very carefully, so as not to accidentally wrap the edge of the oil seal - insert the crankshaft into the left half of the crankcase, and knock out the crankcase guides by 5-6mm.
We degrease the crankcase connector, install a new gasket and install the second half of the crankcase.
Tighten the bolts and immediately so that nothing gets into the crankcase -. I'm installing a new piston, cylinder head and reed valve body. The piston one, like everything else, is of no particular origin - most likely Rostov, but clearly not Chinese. I didn’t want to get involved with this counterfeit, but the owner didn’t want to wait until they bore the cylinder and put a liner in the cylinder head and insisted on buying it. You see the prices for spare parts - it’s up to you to decide whether to contact this new product or not.
We install the second main bearing into the crankcase and secure it with a retaining ring.
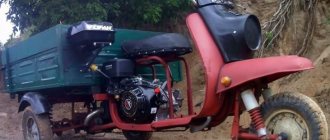
It's no secret that the engineers of the Tula plant have created equipment with which the average owner has to feel like a mechanic. To this day, having found another problem, Ant’s owner has to pick up a tool, remembering the would-be engineers. One of the main problems is the engine of the Ant scooter, which is repaired in most cases of breakdowns.
general information
The Soviet cargo scooter has a reliable metal trike, made in the form of a platform with a tailgate. Ant's trike is quite roomy. The platform's carrying capacity is 250 kilograms, which allows the Ant scooter to be actively used for household needs. Thus, a cargo scooter allows you to transport:
Motor vehicles are distinguished by maneuverability and unpretentiousness. In the garage, the Ant scooter takes up about the same space as a bulky motorized vehicle with a sidecar. Ant's turning radius is about 3.5 meters.
Characteristics of the Ant scooter
In winter, a cargo moped operates using a mixture of M6/3-10G/1 engine oil and A-76 gasoline, and in summer it requires the M8B grade.
If we compare the Ant scooter with a sidecar motorcycle, then in terms of operational fuel consumption the advantages will be on the side of the former. A cargo moped “eats” 8 liters/100 kilometers. It is also much lighter than a motorcycle with a sidecar - its weight is 240 kilograms.
Operation Y or how I registered the Ant scooter — DRIVE2
Two months ago I bought a scooter. I decided to register it, passed the inspection, signed up for the MTPL policy, received the policy a month later, and now the time has come for its registration. It all took three days and a little patience.
I went to the MREO station on a scooter, wrote a statement, went through an inspection, took a ticket (the time was not right). I went home, I think after lunch. I went to the inspector and asked how much the state duty would cost and whether it was possible to register. Inspector's answer Yes 2800.
I arrived at 9 and took a ticket. It’s 10-30. The time has come, I go to the window and hand over the documents. And the inspector (another) issues a refusal to register with the wording 605 of the order, lack of documents for ownership. I give him my application for the head of the MREO. He doesn’t have the plant’s seal here. I pick up the docks and go to the head of the MREO, he sends it to the deputy. The deputy, having looked at everything, calls the inspector and says that he should read the order and some point well, and supposedly I (motorcycle) will drive up. I’ll go to the inspector. He accepted the documents, made copies, and said I’ll consult with the boss and call back. I called and made an appointment for tomorrow.
In the evening he calls and says he needs a purchase and sale agreement. OK
In the morning I received a letter from the manufacturer’s plant about my request to issue a title. The content is as follows: Documents on the scooter were archived and destroyed three years later. The production of motorcycles was discontinued in 1995. Signature. Tarpan.
I immediately went to the head of the MREO. He said we’ll figure it out, they fumbled for 1.5 hours and gave the go-ahead. After another 1.5 hours I had a brand new title in my hands with the first owner, STS, and license plates.
Dynastarter
However, it is not only the engine that can make a motorcyclist clearly see all the components of his motorcycle. The most common problem is a problem with the dynastarter.
. The engineers of the Tula plant installed it in Muravya, instead of a conventional alternating current generator.
Why is it so important? If you notice a red light on the instrument panel while the moped is running, it means you are running out of charge. This happens because the generator is not producing alternating current. To begin with, in such a situation, it is necessary to check the integrity of the wires connected to the dynastarter and the relay regulator. If everything is in order, then the problem lies directly in the dynastarter. There may be three main causes of problems:
- difficulty in rotor operation (dirt getting into the collector or dust accumulation);
- freezing or wear of brushes;
- violation of the integrity of electrical equipment.
Since in most cases the operation of the dynastarter is difficult due to contamination of the collector, it is worth carrying out a simple disassembly according to the instructions described in the moped operating book. The main rules when working are neatness and cleanliness. After disassembly, be sure to thoroughly rinse all parts in gasoline and lubricate the rubbing parts, and under no circumstances throw away the parts.
Ant scooter device
During the Soviet years, this bloodsucker Ant was bought only for its body. Since nothing like this was produced in the USSR in those years. And people needed to either go to the garden or feed the farm, so they took him.
The body in the Ant is really good; you can easily load 10 bags of mixed feed, 500 kilograms of coal or half a cubic meter of firewood and it will safely trample all this junk home. On the two-seater version, the body was significantly smaller and moved far back, causing the overloaded scooter to tip over backwards on bumps. But on the two-seater version it was possible to ride together
The tailgate opens like a regular truck
In stock, the body does not have extensions. On collective farms this feature was ignored and the sides were sewn to some unrealistic size.
Control
The steering is standard for Soviet motorcycles: on the right is the gas handle, on the left is the clutch lever, and what else is needed.
Engine
The Ant engine is somewhat different from Soviet engines of that time. The most significant difference is in the starting system: here it can be done using an electric starter (this was very cool in the 50s) or using a manual kickstarter. There was no trace of an electric starter on any Soviet motorcycle of those years.
The engine is started with the starter just like a regular car: insert the key into the ignition, turn the key all the way to the right and the engine starts.
The second difference is the forced cooling of the engine
The fan drives air through the casings, cooling the cylinder and cylinder head. The cooling system works tolerably
Mechanical clutch with cable drive from a lever on the steering wheel
The gearbox is manual, the shift lever is located on the left directly under the driver’s foot. The switching algorithm is as follows: first, second, third and fourth gears are switched up. Neutral gear is at the very beginning and to engage it you need to push the gear lever down. Controversial decision, but that's how it's done here
Twin-shaft gearbox with constant gear meshing
The engine is as simple as a broom
Transmission
The rear wheels are driven by a chain
The chain transmits torque to the lowering reverse gearbox and then, through axle shafts and rubber couplings, the torque is distributed between the rear wheels. A characteristic feature of this gearbox is the presence of reverse
The reverse lever is located on the right side
Electrics
The most problematic part of the Ant has always been considered its electrics, in particular the voltage regulator relay and dyno starter (generator and starter rolled into one). Due to their design features, the dyno starter and relay regulator require constant attention and qualified maintenance. If the dyno starter is not serviced on time, then it begins to undercharge the battery literally in the first season
On older models, the relay-regulator was of a mechanical type
On the latter, more advanced - electronic type
Contact ignition. The contacts are located in the cooling casing
The ignition coil and capacitor are located on the frame. In terms of repair and maintenance it is very convenient
Fuel system
The power system consists of a fuel tank, carburetor and air filter
Fuel supply by gravity, supply control by mechanical fuel tap
The latest scooters were equipped with a more advanced K-65G carburetor. In general, the carburetor is very good, if only because it has two systems that make starting easier in cold weather: a manual enricher on the steering wheel and a float suppressor. All these systems together ensure reliable engine starting in any frost
To increase low-end thrust, a reed valve was added to the engine design. The valve is installed in the cylinder and blocks the reverse emission of fuel from the crank chamber
The cylinder is purged with three channels. Three-channel purge ensures better cylinder filling
The cylinder head has a displacer. The displacer itself is useless, but in combination with a three-channel purge and a reed valve it significantly adds traction at the bottom
Specifications
The Soviet moped, which has recently enjoyed great popularity, has the following technical characteristics:
- Length - 2680 millimeters.
- Width - 1250 millimeters.
- Height - 1075 millimeters.
- Dry weight - 240 kilograms.
- Load capacity - 250 kilograms.
- Speed - 25-35 kilometers per hour.
- Engine type is 2-stroke, power is 11 l/s.
- Transmission - 4-speed gearbox.
- The brakes have a diameter of 15.0 centimeters. Drum-type, each wheel has a mechanical drive.
Engine assembly
Unlike a dynastarter, repairing an Ant scooter engine with your own hands is difficult to do according to the operating book. Therefore, it is worth seeking the advice of experienced motorcycle owners. Most often, the engine has to be disassembled when there are problems with the clutch mechanisms, the operation of the gearbox, as well as wear on the crankshaft, bearings or oil seals. The most important rule is not to be afraid to disassemble the engine yourself. Using these instructions, disassembling and assembling the engine of the Ant scooter will not be difficult.
So, the procedure for disassembling the engine:
You can see how to assemble an Ant scooter engine in more detail in the visual video at the end of the article. The essence of assembly is in the reverse order, but it is important to tighten the parts with a certain force and synchronize the parts with the marks. Under no circumstances should you assemble an engine without detailed instructions written by the manufacturer.
With frequent breakdowns, owners think about what engine can be installed on the Ant scooter. Instead of the original motor, you can use Chinese analog motors
. Since the Ant has many copies in Asian countries, replacing the engine can be a great option to save money in case of irreversible damage. True, you will have to make the fastenings yourself and, in some cases, remake the bridge for the left-hand arrangement of the chain. This is not very difficult, considering that the Tula plant provided for the possibility of rearranging the bridge.
Adjusting the free play of the cable
On the left side of the engine, remove the cover, unscrew the locknut on the adjusting bolt and, depending on what problems you had with your clutch, adjust the free play of the clutch lever.
- If the clutch was moving, tighten the adjusting bolt
- If the clutch is slipping, unscrew it
We tighten and unscrew the adjusting bolt exactly until the free play at the end of the clutch lever is 5-10mm. After adjusting the bolt, fix it with a screwdriver and tighten the locknut
Source
