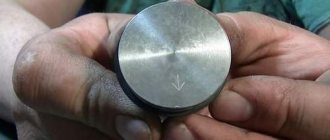
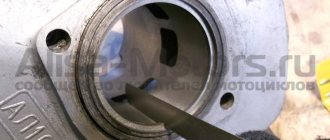
Installing a piston with a larger volume than stock is perhaps the simplest, most affordable, affordable and effective way to significantly increase the maximum speed and power of a scooter. There are, of course, even more effective ways to increase maximum speed and power, but these methods, or rather the hardware, cost simply unrealistic money...
If you charge the engine of the same 139QMB to the maximum, then such tuning before the “increase” cost the client about 35,000 rubles and this does not include work.
It is clear that not everyone can afford such amounts. Yes, even if it’s affordable, what’s the point? It’s easier to buy an old branded scooter and ride it than to charge the “Chinese” and then throw it in the trash after a season. But that's what I think.
Preparation
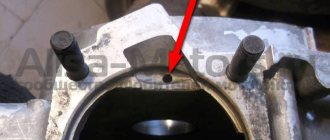
So that you don’t have green snot later about the fact that the tuning piston does not fit into the crankcase and you were allegedly deceived here - remove the old piston from the engine and measure the hole for the liner with a caliper. If the hole is smaller than the tuning piston sleeve, the “meat” of the crankcase allows it, hands grow from where it is needed - a round file will help you (only before boring - disassemble the engine, assemble the empty crankcase with bolts, bore the hole, make sure that the piston enters the crankcase without problems - wash the parts from shavings and reassemble the engine. Or, as a last resort, coat the crankcase and file with grease to at least somehow protect yourself from sawdust getting into the inside of the engine.)
The hole for the 162QMK engine sleeve (such engines are installed on Chinese scabs, more popularly known as “Leika”) in stock is 65 mm. Without boring, a piston of 57mm (150CC), 61mm (1700CC) and 62mm (180CC) easily fits into this crankcase. You won’t find a 62mm piston on sale during the day, so it was decided to install a regular 61mm piston on this engine.
By the way, for those who do not know, a piston with a diameter of 61 mm can be easily installed not only on the Leica engine, but also on any other Chinese 150 equipped with a 157QMJ series engine. There, if you put your hands to it, you can stick a piston at 62mm, but only if the “meat” of the crankcase allows it. Everything is individual, you need to look at the place. In any case, the distance along the studs is the same for both the 61mm piston and the 62mm piston.
From left to right: 61mm, 57mm
On the 139QMB series engine from a regular Chinese 80-six, you can easily install a piston 39mm (45CC), 47mm (72CC), 50mm (84CC)
From left to right: 39mm (45CC), 47mm (72CC), 50mm (84CC)
Where to do repairs
The 4t piston system can be replaced either in a specialized workshop or independently. The cost of repairing the piston will be considerable, but you can fix the moped yourself. The process of replacing a 4t piston on a Suzuki Sepia moped is quite painstaking and complex, so it must be approached with maximum attention and accuracy. Before you start disassembling the moped, you need to accurately diagnose the malfunction, that is, determine one hundred percent that it is the piston on the Suzuki Sepia scooter that has become unusable .
If you have doubts about your own abilities, it is better to immediately turn to specialists. The price for their services can be very different, you just need to find out how much it will cost. In a specialized station, technicians will not only correctly diagnose a faulty Suzuki Sepia moped, but will also replace the piston in accordance with all the rules. In order to return the 4t piston system to high-quality working condition, you may need special equipment that only professionals have, so you will need to drive the Suzuki Sepia moped to the station. But if you choose to replace the 4t piston system on a scooter yourself, then you should adhere to some rules, since the piston system on a scooter is a very complex mechanism.
Installing piston rings
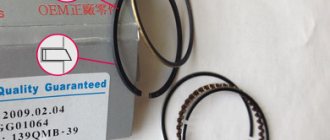
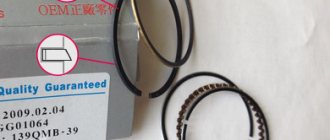
Remove the set of piston rings from the box. A piston ring set for a Chinese four-stroke scooter usually consists of five items. Three of which are a single assembled oil scraper ring, the other two: upper and lower compression.
A typical set of piston rings looks something like this
Or so
Carefully unpack the kit with perfectly clean hands.
In the kit you will find two of the thinnest rings and one thick corrugated ring (expander) - this will be an assembled oil scraper ring that needs to be installed on the piston first.
We place an expander in the lowest groove of the piston
We place thin oil scraper rings in the same groove - one under the expander, the second on top of the expander
We find the lower and upper compression rings in the kit and install them, respectively, in the middle and upper grooves of the piston - with marks on the side surface to the cylinder head (cylinder head). The lower compression ring differs from the upper one in color (not always) and the shape of the working edge (always). In most kits, the lower compression ring is painted black, and its working edge has a slight bevel.
Tags
The top compression ring in the vast majority of piston ring sets is a uniform light color. But this is in most cases, and in practice it happens that the kit comes with upper compression rings that are black or even red. By and large, the color is not particularly important to us, something else is important to us: the working edge of the upper compression ring has small roundings (chamfers) on the sides, and the working surface of the edge of the upper compression ring is covered with a shiny protective coating.
For example, in this kit both compression rings are black. But the working surface of the upper compression ring is covered with a layer of protective coating, and small chamfers are removed on the edges of the working surface.
The lower compression ring has a matte working surface, and the working edge is beveled at a slight angle. All these moments are clearly visible in the photo.
The compression rings in this kit are red and black. As in the first case, the upper compression ring has chamfers on the working edge and a protective coating, and the lower one has a matte working edge beveled at an angle.
On classic piston ring sets, the upper compression ring has a light color and a rounded working edge. The bottom is dark in color and the working edge is beveled at a slight angle.
When installing the piston rings, do not forget about the marks. The marks on the rings after installation on the piston should be oriented towards the cylinder head (cylinder head).
We remove 50 and put 72. Replacing the piston on a scooter.
Scooter tuning, how to properly tune a scooter Scooter tuning using the example of Honda Dio AF-18 Remove 50 - put 72. Replacing the piston on a scooter CVT tuning. Adjusting the weight of the variator weights using available materials
Let's start the analysis.
1.
First, let’s free up access to the engine by dismantling the “toilet bowl” and the plastic underneath it. Now it’s the carburetor’s turn - let’s free it from all the tubes and disconnect the pipe coming from the filter. Next, we unscrew the fastening bolts of the inlet pipe (just be careful that no debris or dirt settled at the junction gets into the cylinder through the opened inlet hole), and now the carburetor is in a free state. Also, the scooter engine itself may have a plastic casing, which also needs to be removed. And finally, the muffler also needs to be removed; the mounting bolts are located near the oil filler neck and on the exhaust pipe.
Next you need to clean the dirt at the junction of the cylinder head and its cover. Disconnect the tubes from the cover.
Disconnect the spark plug wire and unscrew the spark plug.
2.
Using a 8-mm socket, carefully loosen and unscrew the cylinder head cover mounting bolts. We remove the cover and here is the timing belt - the gas distribution mechanism of the scooter. Now, in order to be able to carefully remove the mechanism with the rocker arms, you need to set the TDC of the piston (top dead center). How this is done is described in the article Adjusting scooter valve clearances. Next, use a 10mm head to unscrew the timing belt mounting nuts, gradually loosening them crosswise (the nuts are marked with an arrow). After this, carefully remove the bracket with the valve rocker arms, holding the camshaft and sprocket (there is no need to remember the position of this bracket relative to the valves, since you can’t put it upside down anyway).
3.
Now attention. Before removing the chain from the sprocket and the camshaft, you can mark some chain link so that during the assembly process you can hook it onto the same sprocket tooth on which it was before disassembly - although you may have to move the chain later, this will help immediately put it on more accurately. To do this, it is convenient to use the tooth located above the large hole of the star (it is marked in the figure with a red arrow, and the tooth with a line). In addition, the chain needs to be tied with something so that the insidious piece of iron does not fly into the crankcase. In my case, this “something” turned out to be tin wire that came to hand. The other end of the wire was tied to the frame.
4.
You can mark a link using a thin wire, as in the figure. From now on, there is no need to rotate the crankshaft unnecessarily - there will be no unnecessary hassle during assembly.
5.
Next, unscrew the two cylinder mounting bolts, and you can remove the cylinder head. This is done carefully, gradually loosening it to the sides. We also keep an eye on our chain; the wire will have to be untied from the frame (namely the wire from the frame, not the chain from the wire).
6.
And here it is, the holy of holies of the scooter. The soot-covered piston saw the light of God. But it’s too early to rejoice. We need to get even further. To do this, remove the cylinder block itself.
7.
This is what the cylinder head looks like from the inside. If desired, you can clean the carbon deposits with a solvent, but it is advisable not to touch the valves and the area around them, this can lead to “depressurization” of the valves. The fact is that during running-in and general work, the valves are rubbed against the surface of the cylinder head so that the closed state of the valve ensures complete tightness. And if you start cleaning the carbon deposits around, there is a danger of damaging this seal. In this case, the valves will have to be ground in manually. There are special liquids for removing carbon deposits from internal combustion engines. But sometimes mechanics use household liquids designed for cleaning ovens and gas stoves - they are much more effective. But this efficiency may be excessive. Such products, having “eaten” carbon deposits, are capable of “biting” the aluminum of engine parts. There is such a method: heat the part with a hairdryer to ~ 60°C, spray the contaminated surface with a household spray bottle and after two or three minutes, as soon as the carbon deposits soften (check the hardness with a wooden stick), immediately clean it off and rinse the part with water. Polished parts after such cleaning become matte gray or matte brown.
8.
We check whether the gasket is caught on anything, and very carefully (!!!), holding the connecting rod (when a sufficient gap appears), pull out the cylinder block. And we follow the chain. It is necessary to hold the connecting rod so that the piston, when it slips out of the cylinder, does not hit the edge of the crankcase and is not deformed. Although some here advise to first set the piston to BDC, we didn’t bother pulling the crankshaft with the chain again.
9.
Here is the piston, free from the sleeve, on the connecting rod. The naked eye can see what a considerable layer of carbon deposits is on the surface of the piston. After removing the piston, this deposit can also be very carefully removed with a solvent.
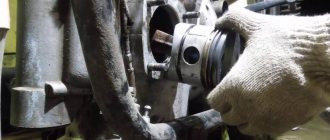
Now we will remove the piston itself from the connecting rod. It is held in place with a finger secured on the sides with fastening rings. When removing and installing them, you should be very careful, as the ring can spring and fly into the crankcase. You can’t leave it inside, you know. Of course you can get it, but it will take a lot of time - you will have to drain the oil, try to hook this ring with a magnet, or you will even have to disassemble the engine. To prevent all this from happening, plug the crankcase neck with a rag. To remove the pin, it is usually sufficient to remove one retaining ring. But not with a screwdriver, as is often done, but with narrow pliers. It happens that the rings on some engines have very small antennae, and sometimes there are no antennae at all - then only an awl will help. When installing, the ends of the ring must be located in the same plane - check it by placing it on the table, straighten it if necessary - straighten it with pliers. The rings are removed, you need to squeeze out your finger. It may be easy, or you may have to work hard. Some strongmen manage to bend the crankshaft when they squeeze out their finger, and the bend may not be noticeable by eye.
10.
Here it is, a handsome piston removed from the connecting rod. Carefully clean it of carbon deposits, then wipe it with a rag soaked in gasoline. Also, with a soft cloth soaked in gasoline or carburetor cleaner, we wipe the sooty area inside the liner, which the piston rings do not reach.
11.
Once you get to the crankshaft, you can check it for play. The verification process is described in the article Repairing a scooter - checking the condition of the scooter's crankshaft.
What's in our tuning kit? It includes: a piston with rings (piston and retaining rings), a cylinder and a set of gaskets. When assembling, lubricate all parts with engine oil. Do not skimp on oil: the first minutes of engine operation after assembly are the most critical, and parts should not run dry!
The compression rings of a 4-stroke engine should not be pushed into the grooves at random. Due to their shape, they, like scrapers, scrape oil from the cylinder walls into the crankcase - they help the oil scraper ring. There is a designation on the top surface of the rings, usually the letter A, but it happens that something else is stamped into the marking. Make it a rule: any inscription on the ring should be directed towards the cylinder head.
Feel the difference!
Be sure to separate the joints of the rings by 120° from each other. Moreover, if the oil scraper ring is assembled, the upper and lower of its constituent rings must be moved apart relative to the place where the gap should be by 20 mm in each direction. Exactly how the gaps are located relative to, for example, the plane of rotation of the crankshaft is not important.
Install the retaining ring so as not to deform it. Otherwise, it will not fix the finger and may jump out, damaging the cylinder wall. You can check whether the rings fit well in the grooves like this: take them by the tendril with narrow pliers and try to turn them. In the direction towards its gap, the ring should move with little resistance, and in the opposite direction - not move at all.
Remove the centering bushings from the old cylinder and install them into the new one. Find the cylinder gasket in the tuning kit and place it on the crankcase studs. In any case, when assembling the motor, use only new gaskets. As a last resort, thoroughly clean the joint between the mating parts and lubricate with silicone sealant. It can be painlessly used (in accordance with the instructions on the tube) in almost all components, except for the joint under the cylinder head and in the carburetor. When the cylinder is put on the piston, you need to compress the piston rings using, for example, a simple crimp made from a beer can. It happens that without such a device the piston cannot be inserted into the cylinder at all. Don’t forget to lubricate the cylinder bore with engine oil first. It’s good to work together: while one, squeezing the rings with his fingers, pushes the piston into the cylinder, the other pulls the timing chain.
12.
Well, then the order is reversed. It is not necessary to change the cylinder head for a 72 piston or smaller. If we are talking about a larger cubic capacity, then replacing the head is necessary. There should be no difficulties during reassembly in reverse order. Let's dwell on just a few points. Before installing the cylinder head, we “pull” the piston to the very top, at TDC. But only so that our mark on the chain does not dive into the crankcase, but remains on top.
When installing the cylinder head, you need to monitor the “skis”—chain vibration dampers—so that they lie flat, without distortions or snags.
In paragraph 3, it was noted that, to simplify, you can mark a certain chain link so that during assembly you can throw it on the same sprocket tooth on which it sat before. Here we had to tinker a little during assembly - it was difficult to immediately put on this necessary link, the chain kept slipping. By the way, it turned out that it was not necessary to first remove the yellow wire-tag from the chain - the chain went on with it, and the wire was easily removed afterwards. And one more thing - the chain was put on only in one “initial position”, that is, first it must be thrown over the camshaft axis, inserting the shaft into the loop of the chain (unfortunately, I did not take a photo). In other words, you need to not just place the shaft, resting the bearings in the grooves, but first insert it from right to left through the chain. The same effect will occur if you throw the chain on the sprocket to the left (relative to the observer) side.
13.
Finally the chain is on. However, it is still too early to dance about this. Now it is necessary to check the correctness of what was done, that is, to make sure that the valves will actually open and close on time, and not rest against the piston every 2 strokes. To do this, we turn the camshaft as in the figure in point 3, that is, so that the large hole on the sprocket is located “on the 3rd stroke” (see the figure in the article Adjusting the valve clearances of a scooter).
Now is the time to look at the generator flywheel - the “T” mark on it should coincide with a special protrusion in the housing. This means that the piston is now really at the very “top”, at TDC, and there will be no conflicts with the valves. If suddenly there is no such correspondence, then you need to manually set it by rotating the flywheel clockwise. However, let me remind you that the desired piston TDC position is achieved only with every SECOND such mark match, and not with every first one - a four-stroke engine has two TDCs, at the beginning of the 1st and 3rd strokes. So, we screwed the flywheel to the mark. It’s clear that the holes in the camshaft star are no longer in place, and now our task is to align them correctly without disrupting the alignment of the marks on the flywheel.
14.
In general, you can not mark the chain link, but when installing the sprocket, calculate the “middle” link (that is, pull the chain evenly with a finger or a nail, then this link will be at the top), and throw it on the tooth above the large hole of the sprocket. Let me remind you first by pulling the piston up. And then, double-check as described in paragraph 13.
After all this, you can dance.
15.
We carefully place the bracket with the rocker arms, making sure that these rocker arms lie on top, and do not rest against the valves with their cams on the side. We tighten the fastenings conscientiously. There are various recommendations for tightening the head nuts, but the simplest and most reliable is to tighten them crosswise (in general, the same as unscrewing them).
16.
I don’t know whether it is necessary to explain why it is now necessary to check and adjust the thermal clearances of the valves. By the way, if after the adjustment there is a desire to tighten the timing belt mounts again, then the desire should be eliminated, but there is no need to tighten them, otherwise why did we just adjust the gaps? Close the lid and screw it on.
We change the oil and filter. That's all, further assembly is a matter of technique. If the scooter does not start the first time after assembly, carefully check that everything is connected correctly. Is the spark plug connected, for example, or is fuel flowing? If the engine is clearly not working correctly, then, most likely, the timing belt is set incorrectly - return to step 13. That’s it, you can start it! The new “voice” of our horse is immediately noticeable. Already during the running-in, the engine made it clear that it now has more torque. And after running-in, the maximum speed increased by 15 km/h.
See also Scooter tuning
Material used from www.moto.zr.ru - MOTO Magazine
Scooter tuning, how to properly tune a scooter Scooter tuning using the example of Honda Dio AF-18 Remove 50 - put 72. Replacing the piston on a scooter CVT tuning. Adjusting the weight of the variator weights using available materials
Tweet
#1 maxim
25 February 2010 16:26
and the cylinder head needs to be placed tighter or at 72
#2 Igor
25 February 2010 20:24
not necessary. By the way, I forgot to write about this right away in the article
#3 Romario
26 February 2010 10:48
you can find out the diameter of the tuning piston
#4 Vasil-Samara.
05 March 2010 18:36
how to position the rings on the new 72nd cylinder. And please tell me what is the distance of the rings between the two ends.—
#5 Boris Citi gx
06 March 2010 13:03
And if I forgot to mark this position on the chain, what should I do, please tell me
#6 earring
14 March 2010 20:30
Who put the picture from Most Wanted??????????????????? It turned out great. RESPECT:)
#7 Igor
14 March 2010 22:40
Seryoga, you are the first to appreciate it))
#8 Igor...
20 March 2010 22:20
but it doesn’t work out so, we change the piston, the crankshaft goes to hell?
#9 Igor
20 March 2010 23:56
How could this happen? This only describes the process of replacing the piston. But everyone decides for himself whether to do such things for him or not, based on the condition of the scooter as a whole, including the crankshaft
#10 Igor
March 21, 2010 00:01
Vasil-Samara seems to be written here in the article... find it. Between the ends there can be up to 2 mm.
#11 Igor
21 March 2010 00:02
oris Citi gx point 13
#12 Active
21 March 2010 10:41
Igor I have a Chinese scooter (looks like a 125cc rocket, only I have a 50cc scooter from Zongshen) 2007. running 5k is worth changing the piston at all, I’m just saying that the crankshaft will immediately have a cover...
#13 Igor
21 March 2010 19:48
Active, well, you can check the crankshaft first (if you install up to 70 cc piston) https://www.scooter-tronix.ru/problems_koleno.php but in general it’s better to replace it with a reinforced one
#14 NIKITA
24 March 2010 04:46
HOW CAN YOU ORDER A PISTON 72C
#15 Igor
24 March 2010 14:21
NIKITA, nothing is ordered on this site (at least not yet). You can advertise in the Motor Market section
#16 Ilmir (Chet)
25 March 2010 09:19
Thanks a lot. Very accurately and clearly written...
#17 @lex
26 March 2010 19:54
Yes, thank you very much for everything that was said and described, but I decided to do it myself, thanks to you, once in my childhood I revived the Carpathians and deltas, I hope that we can do this too.
#18 Forum 163
31 March 2010 08:01
People, help with the “WIND” scooter, write something about it, please... you’re a pro =) at least tell me
#19 Seryoga April 1, 2010. 20-45
01 April 2010 20:48
I need to know how much rings cost for a two-stroke scooter
#20 Linar
04 April 2010 08:12
I have a Chinese 4-stroke scooter that doesn’t go more than 40 km/h, what could be the problem? and at high speeds the scooter literally shakes very much, is this normal?
Home Scooter tuning We remove 50, - put 72. Replacing the piston on a scooter
Piston installation
Insert a retaining ring into any boss of the piston pin. It is most convenient to insert the ring with small round nose pliers. After installation, check how well and tightly the retaining ring fits.
- If the retaining ring does not cover the entire surface, but only a small part of it, replace it with a new one.
- If the retaining ring does not lie tightly in the groove and dangles, straighten it a little
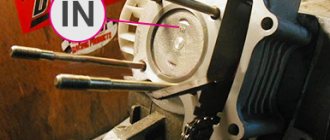
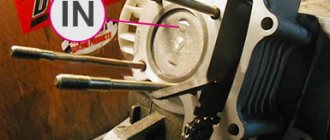
Lubricate the bearings of the lower and upper connecting rod heads and the piston pin bosses with clean engine oil. We put the piston on the connecting rod, orienting it with the “IN” mark to the inlet port; if there is an “arrow” on the piston instead of the “IN” mark, orient the arrow to the exhaust port. We insert the piston pin into the boss - orient the piston on the connecting rod so that the pin hits the connecting rod - install the pin all the way into the locking ring and secure it from falling out with the second locking ring.
We install the cylinder guide bushings on the studs and put on the gasket. It is advisable to place the gasket on the sealant, but without fanaticism.
How to replace rings on a scooter cylinder
Sooner or later, the owner of a scooter is faced with wear on the piston rings. You can change them yourself. There is nothing complicated about installing rings on a piston; you just need to know how to do it correctly. Despite the fact that there are quite a lot of installation recommendations on the Internet, I decided to join them and tell you how I do it.
First of all, you need to determine where the ring is down and where the top is. By top we mean the part facing the piston head. The first way to determine: you need to inspect the ring and find some kind of letter or number engraving on it, for example, UP or N. The engraving is always applied to the upper side of the ring.
If there is no engraving (this can also happen), you need to follow the second method. The cross-section of the ring is not flat, but slightly curved. If you place the ring so that its outer rim is slightly higher and the inner rim is slightly lower (as in the picture), then this is the correct position of the ring. That is, the imaginary continuation of the cone should be directed upside down.
Rings can be of different thicknesses, for example, 1.3 mm and 1.5 mm. Before you put the rings on the cylinder, measure which ring fits which groove. It may also happen that you bought 1.3 mm and 1.5 mm rings, but on the cylinder both grooves have a size of 1.3 mm. In this case, the thick ring is unsuitable for installation. You can buy another set of the same and use a thin ring from it. It doesn’t matter which ring goes up and which goes down – there is no difference between the rings.
Cylinder installation
Fill the rings and piston with clean engine oil. We tighten the piston rings with a clamp. We cut the clamp from a piece of any sheet metal - cut out a strip of the required length, give it a profile along the piston and make a retainer from the same piece of sheet metal.
Lubricate the cylinder mirror with clean engine oil
We hook the timing chain with a piece of wire, pull the chain through the cylinder and put the cylinder on the studs.
Very carefully and slowly insert the piston into the cylinder. After the rings are completely inserted into the cylinder, unfasten the clamp and install the cylinder into the crankcase.
Let's get started.
First you need to buy a complete piston or just rings. There should be five rings in total - an oil scraper ring, 2 thin ones and 2 responsible for compression.
But the piston has only 3 ring grooves. Where to put 2 more rings? It’s simple - two thin rings and an oil scraper ring need to be installed in the lowest groove so that the oil scraper ring is between the thin ones. Those. thin rings act as retaining rings.
Before putting on the rings, lubricate the piston well with engine oil. Wear the rings sequentially, one after the other, starting from the bottom one. The oil scraper ring is easy to distinguish from the rest - it has a wavy shape.
Compression rings must be put on in the same way. The sequence doesn't matter to them. Rings must be put on carefully, only with your fingers, without using foreign metal objects (screwdrivers, chisels, etc.). This can damage both the rings and the piston. In this case, you will have to go to the store again and buy another set.
If the compression rings are of different shapes (often round and square), then the round one should be installed in the upper groove, and the square one in the lower one. This way we get a gradual expansion towards the bottom of the piston.
When installing the piston into the cylinder, the ring locks (section) must be moved in different directions. They shouldn't be next to each other. It is recommended to move the locks so that they form an angle of 120 degrees.
Setting the valve timing ch1 (in collective farm style - ignition)
We push the cylinder all the way into the crankcase and set the piston to top dead center (TDC). It is best to set the piston at TDC using an indicator or, at worst, visually/touch. You can also align the piston according to a special mark on the generator rotor, but I have more than once encountered the fact that the marks on some engines are stamped incorrectly and, in order to avoid troubles, I advise you to use them only as a last resort, for example, when the cylinder head is not removed and you need to adjust valve
We insert the cylinder head guide bushings and the lower timing chain guide into the cylinder, degrease the surface and install the gasket.
We install the cylinder head, insert the valve bed guide bushings.
Setting the valve timing ch2 (in collective farm style - ignition)
Without knocking the piston off from TDC, we orient the camshaft so that the large hole and marks on its sprocket become as shown in the photo and, while putting on the chain, install the camshaft in bed.
Ideally, the marks on the sprocket should be strictly parallel to the plane of the valve cover connector. In practice, unfortunately, such accuracy is difficult to achieve. And this is mainly due to the stretching of the timing chain. And there’s nothing you can do about it - either change the timing chain to a new one or catch the phase by switching the teeth, but this method of setting the valve timing is not acceptable to me personally.
We orient the camshaft bed with a mark in the form of the letters “E” and “X” towards the exhaust channel and install the bed.
Tighten the bed nuts crosswise and then tighten the two bolts on the side boss of the cylinder head.
Installing the timing chain tensioner
If you have a 157QMJ series engine, do the following: unscrew the plug on the tensioner body; We insert a thin flat screwdriver into it and begin to tighten the bolt until the tensioner rod goes inside the body.
Without releasing the screwdriver while simultaneously holding the tensioner body, with your free fingers, insert the tensioner into the cylinder, screw it in with bolts, and only then release the screwdriver and screw the plug into place.
If you have a 139QMB series engine, then do this: unscrew the plug from the tensioner housing and remove the spring; push the rod inside the body; install the tensioner in the cylinder; insert the spring into the housing and screw in the plug.
After installing the piston, do not forget to adjust the thermal clearances of the valves and break in the engine.
Our production
In our online store you can find and purchase new piston groups at low prices. A complete list of piston engines can be found at
Installing a piston with a larger volume than stock is perhaps the simplest, most affordable, affordable and effective way to significantly increase the maximum speed and power of a scooter. There are, of course, even more effective ways to increase maximum speed and power, but these methods, or rather the hardware, cost simply unrealistic money...
If you charge the engine of the same 139QMB to the maximum, then such tuning before the “increase” cost the client about 35,000 rubles and this does not include work.
It is clear that not everyone can afford such amounts. Yes, even if it’s affordable, what’s the point? It’s easier to buy an old branded scooter and ride it than to charge the “Chinese” and then throw it in the trash after a season. But that's what I think.
