How to wash a car's gas tank by removing rust: methods without removal and with removal from the car
The quality of gasoline that can be filled at Russian gas stations is far from ideal, which can lead to various problems in the operation of the car.
Often, fuel contains dirt particles that enter the gas tank and settle at the bottom, and then run the risk of causing rust or getting into the engine. To prevent this from happening, you need to clean your car's gas tank from time to time. There are many ways to clean a car’s gas tank from accumulated dirt, and in this article we will look at them. Completely flushing a car's gas tank is a rather labor-intensive but effective procedure. If you don’t have time to do it, but you need to clean the gas tank of accumulated contaminants, you can perform express cleaning without removal, which is much less effective. You can clean the gas tank without removing it from the car as follows:
How to flush the inside of the gas tank after removing it from the car
To properly clean the inside of the gas tank from deposits, you will need to first remove it from the car. On almost any car, this is not difficult to do, and the book on the technical operation of the car should describe in detail how this procedure is performed. There are several ways to flush the inside of a gas tank; we’ll look at the most popular ones below.
Cleaning the gas tank with soda
The cleansing powers of soda are legendary, and they're not based on nothing. Indeed, soda can remove rust, including that formed inside the gas tank.
The method of cleaning a gas tank with soda is quite expensive in terms of costs, but it is considered very effective and simple. Cleaning is performed as follows:
Don’t forget to rinse the gas tank thoroughly before adding gasoline so that there are no traces of the sweet drink left in it.
Electrolysis method of flushing a gas tank
An extremely effective way to clean a gas tank, which allows you not only to remove the rust that has formed, but also to restore the metal layer. It is based on the chemical reaction of electrolysis, which will result in the formation of hydrogen and gases, so carrying out the procedure in a closed room is extremely dangerous.
Electrolysis flushing of the gas tank is performed as follows:
When cleaning the gas tank is completed, drain the electrolysis, rinse and dry the tank, and only then fill in gasoline.
Cleaning the gas tank using phosphoric acid
A fairly simple and effective way to get rid of rust inside a gas tank. For cleaning, you will have to purchase orthophosphoric acid (if the acid is highly concentrated, it is better to dilute it) to obtain several liters of rust converter. The cleaning itself is extremely simple:
When the work is completed, clean the gas tank with water and soda, then rinse everything again with plain water.
It is important to completely remove any remaining acid from the gas tank. After washing is complete, dry the tank and you can use it.
Cleaning the gas tank with nuts
This method can be called “old-fashioned”, and it should be used only as a last resort, when the inside of the tank is completely covered with rust.
The point of this cleaning method is that various potentially sharp objects are poured inside the tank - nuts, bolts, granite stones, and so on. Once they are inside the tank, you need to shake it so that the rusty particles fly away from collisions with sharp objects. After this, empty everything from the tank. Next, dry coarse sand is poured inside and the gas tank is shaken again. The procedure is completed by flushing the gas tank with gasoline and drying it.
okeydrive.ru
Sources of pollution and combating them
A clogged gas tank is the source of many car problems:
- Difficulty starting the engine after the machine has been idle;
- uneven engine operation;
- Frequent blockages in injectors and filters.
If you continue to ignore the problem, then at one point the car may refuse to start. Various contaminants can enter the gas tank, which will affect the operation of the entire fuel system. Various methods are used to remove them. Accordingly, to find out how to flush a fuel tank, you need to determine the type of contamination.
This type of pollution is the most common and most dangerous. There are several sources of water getting into the system:
- diluted gasoline, which is poured at dubious gas stations;
- the air contained in the tank condenses.
Water is heavier than gasoline, therefore it sinks down and settles at the bottom of the tank. From there, the water enters the fuel system. This situation poses the greatest threat in winter. Under the influence of low temperatures, water in a car fuel system can freeze, creating a barrier to the fuel supply and destroying it from the inside. First of all, the fuel line and injection system are hit.
Also, water triggers corrosion processes inside the tank, which further pollutes it and shortens its service life. There are several ways to clean the gas tank from water:
- Any alcohol can be used: ethyl, methyl, isopropylene. You need 500 ml of alcohol per tank. It is important to use a pure product, without additives or impurities. Alcohol, when combined with water, forms a mixture that burns well in the engine. In the case of a diesel engine, you need to use engine oil instead of alcohol. It will also require 500 ml per 50 liters of fuel. This tank cleaning measure is a one-time procedure. It is better to carry it out before the onset of cold weather.
- Draining the fuel and drying the gas tank will be long and tedious, but effective and free. Some tanks have a drain hole at the bottom. If it is absent, the fuel rail is used. The empty tank is cleaned of existing contaminants and dried with a hair dryer. Drying must be thorough and thorough.
- Dehumidifiers are special chemical solutions that allow you to remove water from the fuel tank without much difficulty. You can find a number of such solutions in any automotive chemical store. Most are based on an alcohol solution. Some products contain strong reagents. They not only effectively remove water, but also accelerate the formation of corrosion on the walls. You need to carefully study the composition and choose only safe products.
We figured out how to rinse the tank and rid it of water, but this is not the only type of contaminant that can negatively affect the operation of the car. Other blockages need to be dealt with using other methods.
Dirt, precipitation
This type of contaminant enters the tank mostly with low-quality gasoline. It is a cloudy sediment that also enters the system and disables it. In this case, flushing the fuel tank is carried out using a soap solution or cleaning agent. Do-it-yourself flushing of the gas tank is carried out according to the following scheme:
- We dismantle the tank and drain the fuel inside. Dismantling is not required only if there is a drain hole at the bottom. But the efficiency of washing will be reduced in any case.
- A soap solution is poured into the tank through the neck. It can be replaced with a cleaning agent. Strong water pressure can also be used.
- The tank needs to be thoroughly shaken so that no dirt remains on the walls. If dismantling was not carried out, then you will have to rock the car.
- Drain the solution. This procedure should be repeated several times until the drained water is clean and transparent.
- Fill the tank with fuel, 5 liters will be enough.
- Drain the fuel and dry the tank. It is convenient to use a hair dryer. Drying must be thorough so that not a drop of liquid remains inside. It must be completely dry.
We suggest you familiarize yourself with Home> Popular> Home and Garden>»aquarium pipe cleaning brush»772 found products
This is how you can wash the gas tank without removing it from the car. It is better, of course, to spend time on dismantling and achieve an effective result. In this case, you can give the gas tank a good shake and clean all its corners and walls.
Rust
This is another problem with fuel tanks. Rust forms for various reasons:
- water and cloudy sediment;
- a large number of additives in fuel;
- use of aggressive chemicals to remove moisture.
Cleaning the fuel tank from rust must be carried out in a timely manner. Otherwise, the fuel system will constantly become clogged, and over time the tank may even develop a leak. Cleaning a gas tank from rust can be done in several ways:
- Cleaning with strong water pressure removes small deposits and removes large flakes.
- Increasing the cleaning efficiency is possible by adding shot or small nuts to the tank. The mechanical method allows only partial removal of contaminants.
- Chemical treatment appears to be more effective in controlling rust. Special converters, acetone and various acids are used as chemical reagents; orthophosphoric acid is most often chosen. Cleaning the inside of the tank from corrosion using chemical reagents is carried out according to the following scheme:
- We provide ventilation in the room and prepare thick rubber gloves; it is also advisable to have eye protection glasses and a respirator on hand;
- remove the tank, drain the existing fuel;
- pour about 2 liters of warm or even hot water inside;
- in case of severe contamination, the water is replaced with gasoline/kerosene, and nuts are added to the tank;
- drain the tank, drain the water, repeat the procedure several times;
- dry the tank with a construction or technical hair dryer;
- fill in the chemical reagent (a liter of acetone, 100 ml of orthophosphoric acid per liter of water, and the converter is used in accordance with the instructions);
- shake the gas tank well so that the reagent reaches all corners and walls;
- leave the tank for a while, shake the contents periodically;
- dilute 100 grams in 10 liters. baking soda for cleaning the tank;
- rinse the gas tank with water to remove soda residues;
- dry with a hairdryer and install in its original place;
- We fill in fresh fuel, in no case what was drained.
This way you can effectively remove rust from the gas tank. If there is advanced corrosion, holes and cracks may form during the dry cleaning process. In such cases, electrolysis would be more appropriate.
- Electrolysis involves the use of electric current. For this process you need to prepare some materials and tools:
- caustic soda;
- battery or charging device;
- metal wire;
- water.
During the cleaning process, oxygen and hydrogen will be released. This mixture is explosive, so you need to work in a ventilated room or outdoors. From some experts you can hear about the need to evaporate the gas tank. This is due to the fact that even in a cleaned and dried container, explosive vapors may remain.
A steam generator is well suited for evaporation. This tool is not available in every garage. Therefore, another method is more often used. It is based on the use of exhaust gases. Using a hose, the tank is connected to the exhaust pipe, the car starts and the evaporation process takes place for 20 minutes.
Steam generators for cars
Let's return to electrolysis. If the tank is prepared and all the necessary tools are at hand, then you can start working:
- soda is mixed with water (for 30 liters of water 250 grams of soda);
- pour the solution into the tank so that it is 80-90% full;
- We place the metal wire inside, but it is not allowed to touch the walls and bottom;
- the positive terminal from the battery is connected to the wire, the negative terminal is located on the cleaned surface of the gas tank;
- after 2-3 days, disconnect the battery, remove the wire and drain the solution;
- rinse the container and dry it.
Although this method takes several days, it allows you to carefully remove corrosion from the inner walls. It is especially relevant in the case of old or rare cars.
Cleaning with water, shot and reagents
To remove rust particles, use a high-pressure water jet. To enhance the effect, you need to throw small metal objects inside, for example, nuts. In addition, you need to purchase a special rust neutralizer. Acetone, thinner or acid will also work.
All work with chemicals should be carried out in a well-ventilated area or outdoors. It is imperative to use personal protective equipment: respirator, goggles, thick rubber gloves.
The procedure is as follows:
- You need to start by removing any remaining fuel and removing the gas tank.
- Pour 2-3 liters of hot water inside.
- Add shot or other filler.
- Shake the tank.
- Drain and repeat the procedure several times.
- Dry the container.
- Prepare the reagent. If you use a purchased regressor, you must follow the directions on the package. The acid is diluted in the amount of 100 milliliters per 1 liter of water, and acetone will need one liter.
- Shake the tank vigorously and do this several times every 2-3 hours.
- Rinse the tank with a solution of water and baking soda in a ratio of 100 g per liter.
- Treat the inner cavity of the tank with clean water.
- Remove the nuts using a magnetic screwdriver.
- Dry the tank.
- Set it in place. If corrosion stains are found on the outer walls, clean them and paint them.
- Fill with fresh fuel.
This technique is quite effective. However, it takes a lot of time to implement it, and if the tank is severely corroded by rust, you can pierce it through with pellets or burn it in weak spots with acid, so old containers should be cleaned using another method.
Which paint to choose
Many people are interested in what can be used to paint a metal tank. Which paint will withstand both temperature changes and constant contact with water? Here, the main criterion for choosing should be good thermal and moisture resistance. Anti-corrosion enamel, cetra, and epoxy resin-based dyes have these qualities. Each of these paints is suitable for a hot water tank. The main thing is to do everything according to the instructions indicated on the label.
Anti-corrosion enamel for metal
Prepare the tank and work area
Since gasoline is not the healthiest liquid for humans and its vapor is also not a fresh southern wind, be sure to prepare the place of work. You need very good ventilation or even open air. The fumes from the acids that will be worked with further are similarly harmful to humans. I advise you to also think about a respirator.
The gasoline is drained from the tank and the remainder is allowed to drain. The tank is removed. Inspect it from the inside with a thin flashlight to understand the scale of the disaster
This is important to know in which places the liquids should come into contact with the rust longer. You may have to turn the tank at a certain angle and leave it like that for a while
Remember where the corrosion is most, these are the places you need to work on.
You will need thick rubber gloves to protect your hands. Acids should not come into contact with the skin, much less the eyes. Be careful.
Vinegar
The next way to eliminate the unpleasant smell of fuel in the car interior or in the trunk. You can use grandma's old (proven) method. You must use table vinegar. To do this, take vinegar and pour it into a spray bottle. If gasoline contamination is on the floor mats of the car, then you need to take them outside and treat the surface of the stain (contamination) with a prepared vinegar solution from a spray bottle. If the source of contamination is on the elements of the car themselves, which cannot (cannot) be taken out into the street, then after treating such a surface with vinegar you will need a whole day to ensure that the car is well ventilated.
How to remove rust from wrenches
How to remove rust from tools, bolts and nuts with your own hands
- how to remove rust from a tool?
- how to clean rust from a coin?
- how to remove rust from a knife?
There's an answer!
Vinegar
Have you ever been cleaning out your garage and found a bucket of tools that might be wet and rusty?
DO NOT THROW THEM OUT!
There is a simple solution to restore their appearance for very little money, because buying new tools will cost you a decent amount.
So, have you found bags of nuts, bolts and tools corroded? If you do not know about the properties of vinegar, you will think that they are useless, nothing more. Wear gloves to avoid getting rust on your hands, because rust is very difficult to wash off. Gather all your corroded tools, nuts and bolts together. Depending on how many rusty things you find, select a container so that everything will fit. You can use a large basin.
Place your tools in a bucket and fill the bucket with vinegar until the vinegar covers the contents of the bucket. You won't believe the properties of the almighty vinegar. It will eat up the rust on tools, bolts and nuts!! It will all bubble up and you will watch as the rust starts to rise to the top!!!
If your tools are very corroded, you will need to leave them for several days, maybe even up to a week. Check them and when you see clean metal then it's time to take them out. Be sure to wear gloves when checking your tools! After taking them out, rinse them under running water and let them dry on a rag, or wipe them dry using the same rag. The vinegar cost practically pennies compared to what new tools would have cost!
Potatoes remove rust
Fresh potatoes contain oxalic acid, which will help us in this matter. If the rusty spot is small, for example on a knife blade, then sprinkle salt on the cut potato and clean the knife with it. You can simply hold the potato with salt on the rusty spot for about 15 minutes, then rinse and dry.
Vinegar and lemon juice
We mix these two components, which can be found in any kitchen in equal parts, and apply the mixture to the rust stain on metal, clothing or tiles. For metal, the mixture should be kept for two hours, for other materials, 15-20 minutes. After finishing the treatment, we also wash and dry the surface.
Baking soda
To prepare the composition, mix regular baking soda with water so that you get a not very thick paste. Apply this mixture to the rusty area of the metal surface for 15-20 minutes, then remove it with a steel wool. You may have to repeat this procedure a couple of times.
Coca-Cola or other soda
Quite a modern rust remover. American housewives first started using Coca-Cola, who noticed that it copes well with rust stains. It's all about phosphoric acid, which dissolves rust. So think again about whether you should drink water that dissolves iron oxide.
Alka-Seltzer
Another miracle of modern chemistry that helps those suffering. It will help us remove rust stains from aluminum cookware. Place the dishes in a container, fill with water and add 4-6 Alka-Seltzer tablets. After 5-10 minutes, rinse with clean water and dry.
Ketchup
Yes, and it will come in handy in this matter. Place ketchup or tomato sauce on the rust stain, wait 5-10 minutes, then wipe dry
Toilet bowl cleaner CILIT
Take an old rusty scraper:
And immerse it in CILIT toilet bowl cleaner for several hours. Is there a difference before and after?
As for professional methods,
then there are a large number of rust converters or removers on sale that operate on the same principle - the composition enters into a chemical reaction with rust, transforming it into a dense black or dark blue coating, which can then be painted. As they say, fast and reliable. I recommend using these products to remove rust on water pipes, metal rods of buildings and other solid metal objects. It makes no sense to cite specific means, since it is not worth advertising for any brand, since its products may not suit everyone. Converters and rust removers are sold in auto stores and auto departments of construction supermarkets. So that you do not have to use all these means to remove rust, first of all take care of its prevention - regularly paint metal surfaces, treat them with anti-corrosion impregnation and protect them from moisture.
Testing the B-52 rust destroyer
Rust control methods
◾Manual
Practical Stain Removal describes the use of abrasives to remove heavy rust without a fuel tank. The raw material can be anything hard enough, as well as small enough to fit in your gas cylinder . The first thing you can do is place some small screws and nuts inside the container. Place them inside and shake. At the same time, small nuts and screws remove scale deposits.
You can additionally use s Omsk pears and crushed stone for this, as well as almost anything that can move the gas tank without getting stuck. Anything will certainly do as long as it's nasty enough to get rid of the range build-up and also tiny enough that it can be easily eliminated without the intended use of the tank.
However, this method may not be the most effective if the level of rust is high.
◾Chemical
Chemical restoration is commonly used in renovations. He uses white vinegar or extra mild acid to clean the gas tank. Vinegar helps remove rust from the fuel tank as it actually embeds itself into the tank.
However, you should only use mild acids; otherwise, it may absorb as well as damage the container itself, which is something you should stay away from. You want to be safe in the container, getting rid of all the rust.
For best results, combine this method with the previous one. Combine chemicals with nuts and bolts to create a saliva-like cleaning agent.
Mechanical method for advanced cases
This method is called “grandfathered” because it is as ancient as our dreams. If corrosion has tightly gripped your gas tank, then before filling it with chemicals, you need to disturb the thick layer of rust. To do this, sand is poured into the tank. I don’t presume to recommend throwing bolts or nuts in there, simply because we don’t need damage to the “healthy” walls and scratches on them. Sand will make the work more gentle. For the sandblasting effect there is not enough pressure, but instead you will have to work with your hands - shake the tank thoroughly.
There is a recommendation to fight off rust using water pressure from a Karcher, but I will not recommend such an extravagant method. I don’t really believe that you can clearly clean everything off a Karcher, except maybe break off large pieces, and then not everywhere. The problem with cleaning a gas tank is that it is a confined space with a narrow opening, which means that not all cavities can be cleaned with equal success.
Kinds
In addition to the gasoline solvent Galosha, you can find a similar substance called Galosha in the retail chain. The difference between them is minor:
- Galoshes are made according to GOST 443-76, designated B-70;
- Galoshes are produced according to technical specifications 308.401-67108-92.
Galoshi, a later type of gasoline solvent, followed the standardization rules, but some characteristics were changed. The octane number is slightly higher.
Both brands are not suitable for refueling cars due to their aggressiveness towards rubber and plastic gaskets. Unlike traditional gasoline, the consistency does not have additives and is suitable for cleaning work surfaces. The peculiarity of nefras is its low bromine number per 100 cm³. If regular fuel contains 0.05 bromine, then gasoline solvents contain 0.02 grams.
For the current period, GOST 443-76 has been cancelled. The trade names of the gasoline product Galosh and Galosh are represented by Nefras S2-80/120, a product of the highest purification, a universal solvent in practical use.
Causes and signs of pollution
For an inexperienced motorist, the need to clean the insides of a fuel storage container is not a mandatory procedure. Only when interruptions in the operation of the fuel system occur do the search for causes begin, and contamination of this part of the car is not among the first on the list of possible defects. It is believed that dirt cannot enter the sealed tank, which is the gas tank.
However, this assumption is not true, especially for older vehicles. Due to temperature fluctuations to which the machine is exposed during operation, corrosion occurs on all metal parts. In addition, there are many reasons for fuel storage tank clogging:
- Water getting into the fuel line.
- Poor quality fuel with sediment and dirt.
- Long-term neglect of cleaning the elements of the fuel complex.
If the engine starts to run rough at low speeds, you should start cleaning the gas tank. But it’s not worth leading to unpleasant consequences. Reliable operation of the car is ensured by carrying out this procedure every two to three years, and in conditions of regular refueling at dubious stations, it is worth doing this annually.
Such care will help preserve gasoline filters and ensure uninterrupted operation of the entire fuel complex. The entry of small foreign particles into the engine threatens to cause it to fail.
Cleaning methods
Different brands of cars have different fuel tanks. The easiest cleaning method will be on those models whose gas tanks have a drain hole. That is, draining fuel and washing can be done without dismantling the tank.
However, this option is not available to most car enthusiasts, so you will have to remove the tank from the car and wash it separately.
Preparatory stage
The procedure for flushing the gas tank is best done in the fresh air or in a well-ventilated area. Working with flammable and strong-smelling substances can affect a person’s well-being.
The fuel tank must be removed from the car body. As a rule, this procedure does not take much time. The main thing is to use up the entire volume of fuel available in the tank in advance, so that you do not have to drain the gasoline. However, in any case, several liters of fuel will remain in the system - both in the tank itself and in the fuel lines. Therefore, you will need to disconnect the connectors from the fuel pump, and also remove the hoses from the tank itself. You can place fuel drainage containers under all connection points so that fuel does not go into the ground or into half the garage.
When dismantling the gas tank, some amount of fuel will inevitably spill, so it is recommended to use both containers for drainage and rags
After the gas tank is removed from the car, you need to open all its holes and drain the remaining fuel.
Various cleaning products
A variety of products are used to clean gas tanks. All of them are freely available and inexpensive. Depending on the cleaner used, the cleaning method will vary.
We use acetone
To flush a standard 43–50 liter tank, you will need to prepare 2–3 liters of acetone. The procedure is performed as follows:
- Pour 1 liter of acetone into the dismantled gas tank.
- Close all drain holes and filler cap tightly.
- Shake the container well several times.
- Drain the liquid into a bucket.
- If a large amount of rust and dirt comes out along with acetone, then it is necessary to carry out the procedure one or two more times.
The properties of acetone allow you to efficiently remove rust from any metal surface.
Vinegar is a great helper in cleaning the tank.
The main advantage of acetic acid is that it perfectly dissolves rust and old dirt in the gas tank cavity. However, there is also a minus: you will need a lot of vinegar, since you need to fill the tank with it to the brim:
- Pour vinegar into the gas tank and close the tank with a cap.
- Leave the solution overnight.
- In the morning, drain several liters of vinegar, then shake the gas tank well.
- After this, pour the entire solution into a bucket - all dirt and rust should come out.
- Next, pour a pack of baking soda into the tank. It will react with the remaining acetic acid and remove even the smallest particles of dirt.
- After this, you will need to rinse the gas tank cavity with warm water several times to remove any remaining acid and soda.
Vinegar is the most affordable way to clean a gas tank with your own hands.
Regular detergents
It is advisable to use household detergents in cases where there is a known small amount of dirt and rust in the tank. Conventional dishwashing detergents will clean the tank cavity well, but will not remove rust, so it is better to use them for primary rinsing or as an additional one after rinsing with acids:
- Fill the tank with hot water to the brim.
- Pour washing powder or dishwashing detergent into the water.
- Close the tank and shake it well.
- Leave the mixture for two hours.
- After this, drain the water and thoroughly rinse the gas tank with hot water.
- If necessary, you can repeat this procedure.
Household detergents allow you to clean the gas tank from dirt and impurities on a budget
Hydrochloric or phosphoric acid for flushing the gas tank
Acids do a good job of cleaning metal surfaces from rust and sediment.
However, you should be careful, as one drop of acid can cause severe burns. It is recommended to wear thick rubberized gloves and goggles to protect your eyes from evaporated fumes:
Fill the tank with hot water about halfway. Add 2.5–3 liters of acid. After this, add hot water to the brim and close the tank with a new lid.
It is important to close the neck with another plug, as the acid can damage the plastic cap. Wait 2 hours. After the mixtures settle to the bottom, shake the container thoroughly and pour the acid solution into a bucket. Next, be sure to rinse the tank with hot water. A powerful rust remover is acids
Powerful rust remover - acids
Methods for removing water, dirt and rust from a gas tank
During the cold season, experts periodically recommend removing moisture from the tank that could get there as condensation. Since water in fuel can damage both the fuel system itself and the engine as a whole, it is also a source of corrosion of the tank itself.
It is possible to remove water from the gas tank without dismantling work. To do this, you need to use acetone or alcohol. You need to pour 10 ml of one of the substances. per liter of fuel.
To remove rust from a gas tank, the first step is to completely drain the fuel. Under no circumstances should you allow the engine to run until it runs out of fuel! To pump it out, you can use a hose and do it the old fashioned way, or use an old VAZ electric fuel pump, a pump that runs from a drill (available on Aliexpress), or make a pump for pumping out the liquid yourself.
Pump for pumping liquids (purchased at home or driven by a drill)
Removing rust using electrolysis
The method is effective, but dangerous. Therefore, it should be used only in the most necessary cases, if rust cannot be dealt with using folk remedies and special chemicals.
To remove corrosion, proceed as follows:
- Fill a plastic container with warm water.
- Add 2 tbsp. l. soda or salt.
- Get a car battery charger.
- Attach a metal plate to one wire, and a corroded object to the other.
- Place both ends in the container and turn on the device for half an hour, setting the current to 4–6 amperes.
- Remove any remaining rust with a brush or sponge.
Preventing rust in the gas tank
After flushing his gas tank, the car owner begins to think more seriously about how to protect this element of the fuel system from rust formation and dirt getting inside. After all, in car maintenance, it is prevention that plays a big role, and not the repair itself.
We suggest you read: How to remove dried super glue from clothes at home
There are several fairly simple ways to maximize the life of your gas tank without resorting to frequent cleaning:
- Fill with known high-quality fuel, which contains a minimum of sediments and impurities.
- At gas stations, immediately fill the tank full so that there is no room left for the concentration of moist air in its cavity.
- In winter, it is recommended to use dehydrators that will displace water from fuel. Dehydrators come in a variety of forms and are simply added to gasoline through the gas tank.
- Periodically, both in summer and winter, use gasoline cleaners by pouring them into the cavity of the fuel tank. This measure has a good effect not only on rust prevention, but also on the entire condition of the car’s fuel system.
Another common way to protect a tank is to cover its surfaces with mastic. Mastic works well to protect metal from corrosion, but the paint itself is not cheap.
Coating with mastic will protect the gas tank from rust for a long time
You can replace the metal tank with a plastic one. In this case, the problem of rust can be avoided, but there will be a risk of other damage - cracks and deformations. In addition, plastic gas tanks, even if there are no defects, last much less than metal ones.
Thus, the condition of the fuel tank depends entirely on the care of the car owner. If you refuel at proven gas stations and periodically flush the tank, then in the future you will not have to buy a new product.
Preparing for cleaning
Getting rid of rust is a regular procedure. You shouldn’t wait until it causes problems, it’s better to do prevention. The tank needs to be cleaned at least once every 3 years. If you refuel at questionable gas stations, it is better to do it more often.
Before cleaning, you need to use up the remaining gasoline or drain it. Next, remove the tank, since almost all methods involve shaking it. Of course, you can rock the car from side to side, but this is ineffective. In any case, some of the fuel will remain in the lines and at the bottom of the tank. Therefore, after removing it, it is better to drain all the residues.
Don't forget about safety precautions. The room for washing should be well ventilated, because gasoline vapors have a negative effect on the body.
There are several cleaning methods, the essence of which is to flush the tank using chemicals or home remedies. All of them are inexpensive and you can find them in stores without any problems.
Preventing gas tank contamination
Cleaning the tank from water, dirt and rust with your own hands is quite simple. However, not every car enthusiast wants to do this. You can, of course, turn to professionals, but it costs money. It is much easier to prevent contamination of the tank and corrosion of its walls.
Epoxy against rust
Epoxy resins are used for anti-corrosion treatment of the inner surface of the gas tank. This coating is insoluble in water and gasoline, making it excellent for rust protection. To evenly apply the resin to all the walls of the tank, it must be poured through the neck, and then rotate the tank for a long time. When the epoxy has spread over all the walls of the tank, you can begin drying.
Smart car operation
The most reliable way to prevent contamination and corrosion of a gas tank is proper operation of the vehicle. A set of simple rules that, if followed, will save you from having to clean the gas tank:
- Monitor the quality of the fuel. Refuel only at approved gas stations.
- Monitor the amount of fuel. Try to keep the tank full. Be sure to fill it completely before parking for a long time. This will avoid the accumulation of water in the tank and its condensation on the walls.
- Try not to refuel in high humidity or foggy weather. If you still need to refuel, fill the tank full.
- With the onset of cold weather, add desiccant or alcohol to the tank in small quantities.
If a car's engine is its fiery heart, then the gas tank is its stomach, so it is very important for the health of the car to monitor its condition. Keep your tank clean and fill it with only quality gasoline, and your car will reward you with a smooth ride and long service life.
Corrosion Prevention
Not every car enthusiast wants to clean the gas tank from dirt and corrosion elements. Some people simply may not have enough time for this, so it is better to take steps to prevent these unpleasant phenomena from occurring:
- Treat the inside of the container with epoxy resin that does not dissolve in water. You just need to pour it into the tank and roll it over so that the protective coating covers all corners of the internal volume. After completion, the tank must be dried.
- You can choose an effective additive using the advice of friends or reviews on the Internet.
- Using your vehicle wisely and following simple operating rules will avoid the need to clean the fuel system. To do this, you need to refuel only at trusted gas stations, try to keep the tank as full as possible, especially before a long stop.
- During rain or fog, it is better to wait to add fuel.
- In winter, add alcohol or dehumidifier.
We suggest you familiarize yourself with How to clean a toilet inside where there is water
It’s not for nothing that the gas tank is called the stomach of the car. If it is clean and filled with high-quality fuel, then there will be no problems along the way.
It is important not to let the situation get worse and periodically clean the fuel tank. In this case, it will be possible to eliminate the formation of problems with the system and the car as a whole. Preventive measures will not require much time and the costs will be minimal.
- Epoxy does a good job of preventing the development of corrosion processes. This substance does not dissolve in fuel and water and serves as reliable protection for the internal walls. Epoxy is poured through the neck and spreads along the inner walls through rotational movements. Drying follows.
- Anti-corrosion additives are offered in large quantities by automobile stores. Not all of them are highly effective. To choose a worthy product, you need to read the reviews on the forums.
- Proper operation of the vehicle is the most effective method of preventing the formation of contamination and the development of corrosion. The rules that must be followed are simple and accessible to every driver:
- The quality of fuel should always be at its best; for refueling you need to choose proven gas stations;
- the amount of fuel should always be high, the more empty space there is, the more water will flow as a result of condensation;
- during fog and high air humidity, you should try not to refuel the car, and if you do, always have a full tank;
- During frosts, you need to add a small amount of alcohol or a dehumidifier along with the fuel.
Everything in a car is interconnected, each process depends on many factors. So the condition of the tank affects the operation of the fuel system, the ability of the car to start up smoothly and move smoothly.
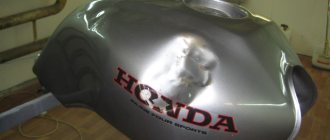
Cleaning a motorcycle tank from internal rust
Maybe it will be useful for someone... In general, what can I tell you, friends. If you wash your motorcycle tank from rust, don’t repeat my mistakes. :))))) the tank is 25 years old, and apparently it stood empty and rusted for a long time.
Obviously, all previous actions (rust converter, abrasive, solvent) gave a very mediocre result. that is, the rust remains inside the tank. and not just a little, but quite a lot. Which gave me the idea to try a chemist I knew with a soldering iron. The chemist quickly gave up and said that there is such a cool thing -
citric acid... which housewives add to all sorts of goodies. So, if you make a 3% solution of this very acid (hot solution), it will dissolve all the rust. It won’t peel off, won’t scrape off, but rather dissolve. Tank 24 liters. you need 720 grams of citric acid. but I waited and bought 620. The result was a slightly weaker acid. Considering that an 8 gram bag costs 7 rubles, then 620 grams came out fine. In chemical stores, a kilo costs 140 rubles, but for some reason they don’t sell it to private individuals.
So, I filled the tank with this hellish swill as hot as possible from the tap. Of course, first I dissolved all the powder in 2 liters of water (it will be a pain to dissolve in a tank). I left the full hot tank overnight. After 6 hours it had not yet cooled down, but it stood for about 14 hours. In the morning I successfully drained it. Typically, he poured in clear water and poured out yellow-brown water. I washed it with 10 liters of water, shook out the remaining peeling paint - and voila! There is no rust in the tank! only gray metal and remnants of paint. And before that, rust was everywhere. Glory to citric acid!
We suggest you read: Washing and bleaching white socks in a washing machine or by hand
So! The correct procedure for cleaning a motorcycle tank is:
1. Drain the gasoline 2. Rinse with water, remove all dirt that has already peeled off and is floating, rinse again with water. 3. Pour a 3% hot (!) solution of citric acid overnight (or until it cools down). The best reaction is in a hot solution. Therefore, you can wrap the tank with a blanket or quilted pad so that it does not cool down so quickly. 4. Drain the acid, rinse the tank with water, possibly with the addition of soda. 5. wash with phosphoric acid or rust converter. Converter according to instructions. The acid creates a film on the surface of the iron that prevents oxidation of the metal (rusting). 6. rinse with water, dry and that’s it. You can use it.
On the forums it is generally recommended that after all these procedures, fill the inside of the tank with epoxy. Think. but even without this, the result exceeded expectations. Thanks to chemists and citric acid!
Cleaning the gas tank from rust. main auto forum
Who used what method and with what result? The tank is not very dirty and not very rusty, but it won’t hurt to clean it.
I read and looked for several ways: 1) pour in a liter and a half of gasoline, throw in a handful of nuts and shake it until you’re blue in the face, pumping up your triceps and back; 2) Coca-Cola, aka orthophosphoric acid in diluted form, only sweet, pour one and a half cups and have a good chat with a lambada; 2a) rust converter (half an hour) washing with soda; 3) electrolysis, using a solution of baking soda calcined in the oven, which is poured into the tank to capacity. After the above steps, rinse the tank with clean gasoline and dry thoroughly.
Or suggest your options
Cleaning in place
Full maintenance of a fuel tank is a labor-intensive but rewarding task. If you don’t have time, you can wash the gas tank without removing it from the car by performing an express cleaning procedure. Of course, the effectiveness of this measure is less than a complete audit, but this method should not be ignored.
In order to carry out the work, you need to perform the following procedure:
- Drain the remaining fuel through a special tap into a clean plastic container.
- Pour two to three liters of gasoline through the neck, after closing the drain hole.
- Rock the car to wash away deposits from the sides of the inside of the gas tank.
- Drain the flushing portion of gasoline and add new fuel.
- Repeat the steps several more times.
- After cleaning, dry the inside of the tank with compressed air.
Is it possible to flush the tank with gasoline?
Washing with gasoline (diesel fuel) is a mandatory step in all cleaning procedures. The fact is that after any, even the most thorough washing, a small amount of acid, acetone or washing powder inevitably remains in the gas tank. You cannot install such a tank on a car, because all this sediment will get into the fuel system, and from it into the engine.
Before pouring gasoline, it is recommended to dry the tank with a hairdryer - warm air will quickly dry all corners of the gas tank cavity. It will take a day or more for the container to dry on its own.
Therefore, after completing all cleaning procedures, it is necessary to carry out the last one - rinse the tank with fuel:
- Reinstall the tank.
- Connect all necessary lines.
- Fill the gas tank to the brim with gasoline.
- Close the lid.
- Start the engine and allow the fuel to circulate through the system.
- Add gasoline as it leaves the highways.
Video: an alternative method of flushing gas tanks
It is very important to fill the tank full immediately, and it is not recommended to use fresh gasoline for this purpose. It is better to prepare cans of fuel in advance so that any sediment remains at the bottom.