Checking and adjusting the moped drive chain
The chain drive is one of the most loaded components in a moped.
If the chain is loosely tensioned, that is, it sags a lot, then at the moment of a load change, this excess supply of chain will first be selected, and then, when its free play ends, a sharp blow will occur, harmful to all elements of the transmission. And it’s unpleasant for the driver himself to drive such a moped that jerks whenever the gas is opened or closed, especially in a sluggishly creeping traffic jam. The second disadvantage of a sagging chain is that when the tension is weak, its unloaded shoulder tends to move in a straight line by inertia, which is why it rests imperfectly on the sprocket teeth, thereby wearing them and itself out. The life of the drive chain depends on lubrication and adjustment. Failure to maintain the drive chain promptly can result in premature wear or damage to the chain and sprockets. Chain maintenance work includes cleaning it from dirt, lubricating the links, or boiling it in molten lubricant. Cleaning the chain and lubricating its links can be done without removing the chain from the moped, using a brush, special liquids and lubricant in aerosol packaging.
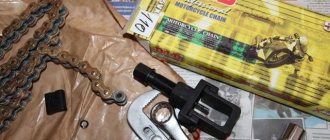
To weld the chain, it must be removed from the moped, washed in kerosene and boiled in lubricant (the lubricant consists of 95% solid oil and 5% graphite powder) at a temperature of 70-80°C. It is recommended to carry out the first welding of the chain before use.
A routine check of the drive chain tension is carried out every 500 km.
The check includes:
- Turning off the engine, place the moped on the central support stand;
- engage neutral gear;
- remove the inspection hole cap on the chain casing;
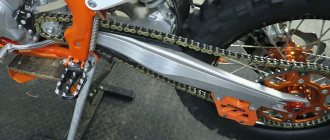
- check the chain tension (normal sagging of the drive chain should be within 5-10 mm with a force of 10 kgf;
- Turning off the engine, place the moped on the central support stand;
- engage neutral gear;
- loosen the rear wheel axle nut;
- by tightening the adjusting nuts on the left and right sides, achieve normal chain tension;
- tighten the rear wheel axle nut;
After the adjustment is completed, you need to check if everything worked out as expected. If the wheel is level, the marks on the tensioners on the right and left show the same thing, and the chain has the desired slack, then everything is done correctly. All that remains is to lubricate the chain.
Read also: Magnet for car repair
A distinctive feature of a moped from a scooter is that the former has a chain instead of a belt, so sooner or later quite typical breakdowns occur with Alpha mopeds. The chain tends to stretch over time, after which movement becomes quite problematic. You can tension the chain yourself; no special skills are required. But know that you don’t need to tighten the chain on the Alpha moped too much; the free play should be from 2 to 3 cm, otherwise you will face much bigger problems.
So, if you don’t know how to tighten the chain on an alpha moped, follow the instructions below.
First of all, remove the passenger footrest so that it does not interfere with tensioning. Then place the alpha moped on the center stand. But some experts recommend tensioning under a certain load on the moped, because on the center stand your vehicle will be supported by weight; after tensioning the chain, you will notice that it has become even more tense, like a string. This oversight leads to serious damage; many say that an overtightened chain after 1 thousand km leads to a breakdown of the entire clutch mechanism.
How to tension a chain on an Alpha moped
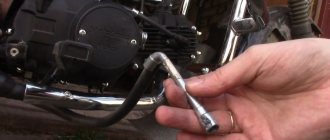
Next, you will have to unscrew the nuts of the central axle of the wheel, this will help loosen the wheel axle. To do this, a 14mm wrench is suitable, after that you will have to unscrew the nut located on the same axis, but then, in the case of the Alpha moped, a 24mm wrench will do. After this, we proceed to adjust the chain; on the same axis there is a chain tensioner with a nut, just enough tighten it, this will require a 10mm wrench.
You will have to tighten the nut until you feel that the chain is tensioned. In this case, the teeth should not fall on the edge of the chain, check this, and only then can you begin the final procedure - tightening the axle nuts back. Tighten these nuts well, but do not overtighten them. That's all, as you can see, tensioning the chain on an alpha moped is quite simple.
Photo report: How to check the timing chain of a scooter?
It’s always like this in life: one thing is great and the other is bad. Exactly the same principle applies to various types of mechanical transmissions. Chain transmission is no exception here. On the one hand, there is nothing simpler, more reliable, lighter, more compact and cheaper than a chain drive.
On the other hand, we get endless hassle with stretching the chain, wear of the sprockets, endless cleaning and lubrication, maintenance and tensioning of this very chain. But there is nothing to be done, the chain box has a lot of advantages over other types of mechanical transmissions, which is why these types of transmissions are used almost everywhere.
Read also: Is it possible to start an ATV from a pusher?
In general, now we will not talk about the chain drive as such, but about the method of diagnosing the timing chain driving the camshaft of a scooter engine .
Preparatory work
It is imperative to clean the chain, otherwise tensioning will not work. There is grease on metal surfaces, and dust accumulates on top over time. These contaminants cannot be washed off in ordinary water; you need to use auto chemicals. It is better to choose a product in the form of an aerosol that will not corrode the seals - chain O-rings
If the mechanism is heavily dirty, it is advisable to remove the cover from the drive sprocket. It is important to ensure that the retaining nut is well tightened. The cleaning itself is carried out as follows:
- First, rotate the moped wheel while spraying the cleaning composition.
- The mechanism is left for several minutes so that the product is well absorbed into all the recesses.
- Using a stiff brush, remove dirt from the sprockets and chain.
- Use a clean cloth to wipe all parts of the mechanism.
Cleaning the moped chain
Now you need to determine the degree of wear of the elements. The chain links should not jam, ideally they move easily. It is also necessary to check the presence and condition of the seals. The sprocket teeth must not be bent, pointed or damaged. Wear on the tooth surfaces may be associated with improper installation of the rear wheel.
To determine the condition of the chain, you need to check whether there are areas where the tension is too high or, conversely, weak. To do this, you need to manually turn the wheel. If such areas are present, it means that the bushings and pins have worn unevenly. In this case, the distance between the pins increases and the chain becomes longer.
Severely worn chain
Often the cause of the appearance of sections with different tensions are problems with other components of the moped. The sprockets may be installed with an incorrectly centered hole or the wrong diameter. Uneven tension may be due to severe wear on the wheel hub or failure of the sprocket hub bearings. But other damage may also be discovered, so it is important to carry out a thorough inspection.
It is easy to determine the degree of wear by the length of the chain. To do this you need to pull it back. It is important to try to pull the chain off the sprocket at the same time. Replacement is required when, when attempting to remove, most of the sprocket tooth becomes visible. If the chain rollers are bent and squeak when driving, it is better to change the part along with the sprockets.
After cleaning, you need to align the rear wheel. This is an easy task if the axis is marked. But the marks sometimes get confused, so additional checking is necessary. As the rear wheel rotates, you need to shine a flashlight and pay attention to the chain. If it does not move straight, it means the installation was not done correctly.
After installing the rear wheel, you need to remember where the marks are located. If they are not symmetrical, this indicates that the marks were applied incorrectly. In this case, you can draw new marks on the reverse side of the chain with a marker. When tightening the rear axle, it is important to push the wrench toward the front wheel.
To change or not to change?
Suppose you are overhauling your engine: changing oil seals, crankshaft, gaskets and other devices, but you doubt whether to replace the timing chain with a new one or not. If you have any doubts, change it for a new one at the first opportunity. And now I will explain why.
See for yourself: a chain has an average service life of approximately 18,000-20,000 km of a scooter (personal experience), approximately the same as the average service life of the engine itself. And for example, after driving 6,000 km, the crankshaft jammed or the engine leaked, or something else happened that requires complete disassembly of the engine. Naturally, you disassemble the engine, replace the crankshaft with a new one, and leave the chain, which by that time has exhausted a third of its service life.
And what happens? The chain, after 12,000 km, will exhaust its service life and become unusable, but the crankshaft and other parts will be in good order and whether you like it or not, you will have to halve the engine again, because of the chain alone. Is it necessary? The chain is a consumable. Never skimp on it!
Setting the timing belt on a delta moped
1. Install a new cylinder head gasket.
ATTENTION!
The cylinder head gasket is made of soft metal (copper, aluminum) and after tightening the cylinder head nuts it is deformed, thereby ensuring a tight connection. Reinstallation of the cylinder head gasket is not permitted.
2. Install the timing chain guide.
3. Install the cylinder head.
4. Set the piston to TDC according to the marks on the flywheel. This is usually the "T" mark on the flywheel. Align the mark with the tide on the engine crankcase.
ATTENTION!
The following operation is one of the most important when assembling the engine. It is important to align all the marks very accurately. An error in installing the chain even by 1-2 teeth will result in the engine not working correctly, and it will probably even lead to serious damage to the timing and cylinder-piston gas parts when trying to start the engine!
5. After making sure that the timing chain has not jumped off the drive sprocket on the crankshaft, install the camshaft into the cylinder head, at the same time putting a chain on its sprocket so that the marks on the camshaft sprocket are parallel to the plane of the edge of the cylinder head, and the cams are directed downward (inside the head).
6. Install the rocker arm support, orienting it according to the installation marks. Lubricate the cams and camshaft bearings.
On the rocker arm support are the letters “EX” - which means “EXHAUST” - release. The "EX" mark should be located above the exhaust valve.
ATTENTION!
• Check the correct axial alignment of the camshaft (make sure that the camshaft bearings are correctly positioned on the beds). Probably, on some scooter models, the holder will have a mark “IN” - “INTAKE” - inlet. Accordingly, the “IN” mark must be located above the inlet valve.
ATTENTION!
If the copper washers are severely deformed (flattened), they must be replaced, since if the washers do not fit tightly due to oil leakage, the pressure in the lubrication system will drop and the motor will quickly fail. Sealing this connection with any sealant is unacceptable.
7. Install sealing copper washers on the studs.
8. Screw on all four cylinder head nuts without tightening them.
9. We recess the working rod of the timing chain tensioner inside the housing.
10. Reinstall the timing chain tensioner and tighten its mounting bolts.
11. Insert the working bolt and the timing chain tensioner spring, tighten it. In this case, you can hear characteristic clicks - the ratcheting mechanism of the tensioner working rod will be activated, which, under the influence of a spring, will come out of the housing and tension the timing chain.
12. Sequentially, crosswise tighten the cylinder head nuts in 3-4 steps. The final tightening torque is 10-15 Nm (More accurate values can be found in the repair instructions for the specific scooter model).
13. Screw in and tighten the additional cylinder head bolts.
14. Using a socket wrench for the central bolt of the flywheel, or with your hands holding the flywheel, slowly turn the engine crankshaft clockwise 3-4 turns to make sure that the timing timing is set correctly and the piston does not collide with the valves.
15. We install the crankshaft at TDC of the compression stroke and once again check the correct installation of the camshaft according to the marks.
17. Rotate the crankshaft several turns and once again check that the valve clearances are set correctly.
18. Install the cylinder head cover and tighten its bolts.
19. Place the crankcase ventilation hose onto the fitting in the cylinder head cover.
20. Install the cylinder cooling casing.
ATTENTION!
Do not forget to remove the paper from the intake manifold if you covered it from dirt during disassembly.
21. Install the inlet pipe assembly with the carburetor.
ATTENTION!
In most cases, when installing an exhaust system, the exhaust pipe gasket will need to be replaced. It is better to replace it with a new one during assembly.
Source
Examination
Personally, I never check timing chains. I simply throw them in the trash, no matter how awesome they seem to me. A chain is a consumable item for me, just like a spark plug, oil or oil seal. But if you are important, or money is tight, you can use the old fashioned way.
Alpha tensioner repair
alpha
Tensioner repair 149 fmb.
We stretch the chain along its length, hold it with our fingers and try to position it in a horizontal position
- If the chain describes an arc that looks very much like a 90-degree angle, then feel free to throw it in the trash.
- If the chain bends slightly and describes a small arc, then such a chain is quite suitable for further use
For clarity, I took a new and heavily worn chain, put them together and checked for horizontal deflection. As you can see: the new chain (above) described a barely noticeable arc, while the worn and useless chain sagged like snot, almost at an angle of 90 degrees.
The worn chain turned out to be almost a centimeter longer compared to the new one.
Read also: Webasto repair instructions
How to replace the timing chain of a scooter engine?
It’s very simple, my friends: you remove the engine from the frame, disassemble it and replace the chain with a new one. There are no special secrets in this matter, just as there are no special ways to deceive fate without disassembling the engine. The chain can only be replaced by completely disassembling the engine.
There is, of course, one guy on YouTube who rivets an old chain , then rivets a new one, connects both chains, pulls out the old one, starts a new one, and then rivets the whole thing back, but this is porn. I don’t suffer from such crap, since the result of such repairs is not always predictable.
The timing chain is in no way designed to be riveted or riveted. During the riveting process, it can easily be pulled or twisted, and this is a sure way for the engine chain to fly off the sprocket, and then, with luck, maybe everything will work out, or maybe the valves will bend. And one more point: a beginner will not be able to rivet a chain efficiently. This work is not as simple as it might seem at first glance. Therefore, don’t suffer through this bullshit and disassemble the engine.
Setting TDC on Alpha
To start adjusting the valves on the Alpha moped, you need to set the top dead center. To do this, remove two covers on the rotor cover. Rotate the rotor until the T mark appears.
To accurately control this process, you need to remove the timing sprocket cover. To do this, on the opposite side you need to unscrew the clamping bolt, which can be unscrewed with a 10mm wrench. Remove the timing chain sprocket cover carefully so as not to damage the gasket.
The star has a mark in the form of a dot. It should be aligned with the mark on the head body.
To easily turn the engine mechanisms, I unscrewed the spark plug, reducing the compression to nothing.
Now you can begin adjusting the valves on the engine.
How to adjust and tension the chain?
There’s no way you can tighten it or adjust it, and you don’t bother Google or Yandex search with such queries. The chain in the scooter engine is tensioned automatically. And if it has already stretched to such an extent that it begins to fly off or jump over the teeth, feel free to disassemble the engine and replace it with a new one. There are no miracles.
And I will prove this to you now. The chain in the engine is tensioned using a special tensioner, which operates in a fully automatic mode. As the chain stretches, And the more the chain stretches, the more the rod will come out. But! The rod has a limited stroke: on a completely new chain it comes out about a third of its stroke and then, as it stretches, it comes out completely and then it won’t come out anymore. Therefore, the chain will no longer be tensioned! And all your attempts to correct the situation will lead to nothing.
Video on this topic
repair of alpha tensioner 149 fm.
Replacing timing rollers 139FMB (1P39FMB)
Why does the timing chain rattle in Racer Alpha? and how to remove it!
Subscribe to the channel and post how!
#41 How to determine the alpha chain stretch of a magnifying glass?
Subscribe to the channel) Link to vk-https: //vk.com/id352703079 My group vk-https: //vk.com/club116536286.
Modification of Delta with a tricky time change
How to replace the oil pump sprocket without disassembling the clutch basket. Chinese moped Delta 72cc.
replacing a Gm chain in an ALFA moped
Spare parts for scooters in Belarus Online store in Belarus https://scooterbaza.by/ Group in contact https://vk.com/scooterbaza.
Alpha 110 (Change timing chain)
They brought in a moped (Alpha 110) with a complaint about a foreign knocking noise in the engine, as it turned out that it was loose timing chain. Foam.
Replacing the camshaft tensioner and Delta timing belt
Repair of a Chinese moped. There was a strong blow to the engine.
Alpha 110 (Replacement of magnet chain)
Foam filter for Alfa moped https://goo.gl/MF6F3b Digital thermometer.


