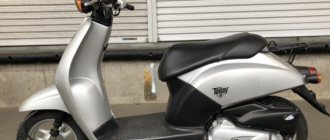
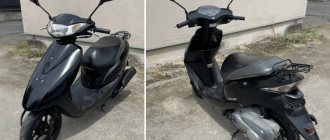
Budget tuning using the example of Honda Dio AF-18
Many people, especially when buying a fifty-dollar scooter for the first time, think that the power and speed of their mopeds will be quite enough for them. I was among them. Where is 50-60 km/h faster and why? - I thought.
I soon realized that I was wrong. I wanted higher speed. It is after this thought that owners of scooters (and not only them) think about tuning. You can find a huge number of articles about this sacred rite on the Internet. Of course, 70cc piston engines, saxophone mufflers, sports CVTs, and so on look very impressive. But not everyone can (or wants) to pay about 120-200 euros for the same tuning piston on a scooter costing 400-600 dollars, it’s somehow impractical. So I’ll try to talk about the so-called budget tuning of scooters. Of course, I won’t open America, but I will share my not so great experience in this matter. By the way, if you have not yet read the article Tuning for two dollars, I highly recommend doing so. In my (and not only) opinion, this is one of the best articles on this topic.
Before complaining about poor reception of the scooter, you need to make sure that the standard settings are correct. You can be pleasantly surprised by cleaning the exhaust pipe, air filter and adjusting the carburetor.
The first thing I did after buying the scooter was removing the limit washer between the variator cheeks and adjusting the carburetor. After that the device became faster. Perhaps these are all operations to increase speed in the first season.
Having closed it, I realized that I already wanted better speed and response to the throttle. The improvement of these indicators began with the purchase of a zero-resistance filter Malossi E5 for 35 USD. In the already mentioned article it is written about the homemade production of such an air vent, but I considered it not such an expensive acquisition from the company.
By itself, such a filter will not do much (except for the appearance and sound of the J, and also, unlike the standard one, it does not obscure my cool shock absorber, about which I will write an article soon). After installing it, the carburetor needs to be reconfigured. It begins to become lean (there is more air, the same amount of fuel) and this can lead to burnout of piston L. Here you need to play around with the jet. You can drill it out. You can’t do this on your knee; you need a special tool and an experienced turner. You can drill out the thread and install a Solex jet. They say that from Weber they fit without modifications. + Well, finally, you can order it. Price approx. 1.5-2.5 euros. That's exactly what I did. Of course, you can also install carbon petals, but I don’t see the point in this if the tuning is not that serious.
It seems like I've sorted out the intake for now, it's time to move on to the exhaust. The simplest thing is to simply clean the exhaust pipe. Here you can do things differently. Someone advises walking through the backwoods with a blowtorch; someone cut it at the seam, cleaned it and welded it back together. I did something different: I lit a small fire in the dacha and put a muffler on the fire. I let it get red hot and then cool (I don’t recommend cooling it in water). I repeated this two or three times. I did this not for prevention, but after a significant deterioration in power and speed. How much burnt shit fell out of him! After this simple operation, the scooter began to ride MUCH better! As for the appearance of the muffler: it has not become any worse, but red scale has appeared in the area where the muffler and exhaust pipe are connected, like on J sportbikes. Well, a radical option that I am now thinking about is the manufacture of a resonant muffler. I dug up the calculation formulas and recommendations on some website, to be honest, I don’t remember which one (dedicated to alterations of Soviet motorcycles).
If anything good comes out of this idea, I’ll tell you. In this case, I strive not only for technical indicators (it’s still impossible to get an absolutely correct resonator, the skills are not the same), but also for appearance and sound. I like the look and sound of the saxophone muffler much more than a standard trumpet.
So, that’s all about the exhaust for now, let’s move on to the piston. Everything is simple here, if the compression is 7-10 atm, everything is in a bunch, if lower, perhaps the rings (or the entire CPG) need to be changed. At one time I installed Chinese piston rings for 290 rubles, I declare - SUCKS! I gave them to a friend, and one of them burst within a week. The result is the replacement of the entire CPG L.
I bought SEE rings and am very pleased with them (pah-pah-pah J). I advise you to polish the cylinder head, as well as the top of the piston (hello to Kirill J). No carbon deposits, more power. It would also be good to use a polishing machine on the windows.
Well, a little about the variator. I didn’t experiment with the weights, I just installed new nominal ones. Before installing them, it would be a good idea to run a grinder along the paths of the weights and lubricate them with a thin layer of graphite grease, as Kvkamikadze advises to do in his article. Well, don’t forget to remove the already mentioned washer between the cheeks of the variator.
What happens after all this has been done? A device capable of confidently accelerating to 70-75 km/h and sometimes even more, it can pull one person or two equally well. And, perhaps, the most important thing is the costs, or rather the almost absence of them (you can make the filter yourself, dig up the jet in your dad’s (grandfather’s) garage)! If you are not preparing your scooter for serious racing, but just need acceptable maximum speed and traction, then I think it’s worth doing just that.
Author: Maxim Maxdio
Tuning for two dollars
Let me start with the fact that, after reading a mountain of articles on various websites and other media, I came to the conclusion that they all reek of advertising a mile away. Yes, it certainly looks cool - a shiny muffler from Leo, the Malosi label on board... But no matter how you look at it, you can’t make a Hayabusa out of a Joga. And here the question arises:
So why do we need a scooter? Flying for a hundred (*1) on the highway - so any eight-wheeler accelerates for a hundred, but the price is ultimately lower and the safety is much higher. You will say: “You need a license and registration,” and I will answer: “You might think that flying a hundred miles past a guy on a scooter, you can prove to him that you are a horse-drawn cart? And it doesn’t matter what to screw it on with.” I don’t take athletes into account - the specifics are different here. “Advanced youth” for whom show-off is more important than money? But after a while they also grow from 50-125 cubic meters and take a liter. What remains are ordinary people, for whom the cruising speed is 80-90 (*1), scanty consumption, the ability to not care about traffic jams and the heat - that’s all, no stress, you drive for pleasure. So it turns out that it’s not worth the candle. From this point of view, I decided to share my research in terms of low-budget boosting.
The basis was taken from Honda Dio . Cheap, reliable, with a good resource (*2). There are two options when purchasing. Buy a wheel alignment for $50 - $100, capitalize on it by investing another hundred or two, or find a running gear in good condition for $300 - $500. Which one is preferable is up to you to decide. I chose the first one. I have experience working with iron, a workshop and, most importantly, desire. If you don’t have the first two, ask your brother, friend or father to help (he, too, in his youth probably loved to unscrew the whole program), in extreme cases, you can sort out the device in your room (but you’ll have to at least study for straight A’s and promise your mom clean everything in its place regularly). Well, without the third there is nothing to start with.
This option has one more advantage: there is a persistent need to completely overhaul the device, which will add reliability to it and add confidence and pride to you. The second option is also not bad, but here it is better to take a scooter from good friends who will point out the mistakes and weak points - believe me, they are always there, and will not splurge in order to sell it quickly. Here it is also advisable to check the condition of the suspensions and frame (*3).
So, the object is there, let's start working. The first thing we will do is to ensure low intake resistance (*4). To do this, we purchase an air filter from the 41st Muscovite. We don't need paper, but polypropylene (it's so white with orange plastisol seals). Carefully peel off the plastisol and get a round pipe. Then we take the original foam filter or its template, and mark the width of the future homemade filter, leaving 10 mm of margin on each side. Now we take a sharp knife and carefully cut the pipe along the outer edges at an angle to the tangent of about 45 degrees. This is necessary so that when leveling the sector, the inner side does not turn out smaller than the outer one.
The cross-section shows that the filter consists of four layers - the first and fourth are a dense frame, the second is for coarse air purification and the third is for fine air purification. We need to remove the inner frame; to do this, use the tip of a knife, without bending (!) the workpiece, to cut it off, trying to touch the fine layer as little as possible. Now we place the workpiece under a press (or a suitable load) and wait until it takes a more or less flat shape. There is no need to hold it for a long time, because... in the case it will still be pressed against the guides.
Ideally, the workpiece can be ironed with steam through a fabric on a smooth surface, but there is a risk of melting it. Experiment with the leftovers, there is nothing complicated, you just need to get better at it, and the main thing is that the outer side, on which the frame layer still remains, is facing the sole of the iron.
Then we cut out the filter with tailor’s scissors or a knife, so it’s exactly the same as the old one (you can burn a hole and then align the outlets).
Next, let's take a look at the filter housing. On its main part, in the place where the filter is adjacent to the edge, there is a kind of groove. It must be filled with sealant (silicone) to prevent air leaks (*5). The sealant should protrude 0.5-0.2 mm above the edge. The smoother the fill, the better. Beware of sudden changes. Smooth ones are not scary. It is better to fill it at once without stopping. Next, we put everything together and screw it on. When installing a converted box on a scooter, be sure to fill the previously degreased junction of the pipe with the body with sealant. Fortunately, it is rubber and bends easily. We're done with admission. Really, nothing complicated?
Let's move on. Release. We remove the muffler. We open it along the back seam, but since there is a partition inside, it is better to make the cut by stepping back a centimeter from the seam towards the middle of the body. Having cut along the perimeter, we turn it along the longitudinal axis and remove it from the holding tube 1. Then, at an angle of 60-70 degrees, we cut off the largest possible piece from tube 1 (I then welded it to the rear wall of the muffler body, having previously drilled a hole along the inner diameter of the tube - you can do the same, but I doubt the advisability of this action a little). That's it, weld both parts together and install the muffler in place. By the way, I recommend combining all these modifications with cleaning the muffler from carbon deposits. You can heat it with a blowtorch and beat dry carbon off the walls, or you can simply scrape off the carbon with a hard metal brush and a brush.
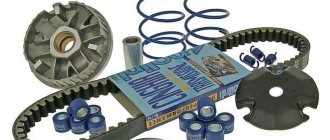
Fig. 1 Reworking the Honda Dio muffler In principle, you can stop there, but it’s better, in addition to this, to clean the combustion chamber of carbon deposits and select the weight of the rollers. An article has already been published about the camera, and the weights are made lighter by drilling a hole. It is advisable to select their weight experimentally, gradually lightening it and monitoring the change in the behavior of the scooter. But you can simply reduce their weight by half a gram and leave it at that.
And finally, I strongly recommend adding oil to gasoline in a ratio of 1:100 or 1:80.
——————————————————————————— COMMENTS from Black Bird ( [email protected] ):
“Fly over a hundred” - we are, of course, talking about the speedometer readings (which at the end of the scale are quite high). To achieve a real speed of 100 km/h on a 50 cc scooter, you will need very, very strong tuning. But getting a speed of 75-80 km/h is much easier - but very useful for confidently staying in traffic.
Honda Dio is a truly relatively affordable device, with a good service life and engine reliability. And, like almost any Honda, it really requires tuning - because the standard modification is too strangled. The proposed “tuning for two dollars” is just what the doctor ordered for her. And if you add it by replacing the ignition switch with a sports one (without a rev limiter) and don’t forget to remove the limiter bushing in the variator (found on all European Hondas and some Japanese lots) - then you simply won’t recognize the device.
Frame problems are very rare with Dio. But the suspension, especially the standard front fork, is a sore spot. In the front fork, the rubber cuffs tear due to dirt, after which dirt and sand go inside the fork, tearing off the chrome from the stays. As soon as the chrome is stripped off, the fork can no longer be saved, the stays begin to quickly wear out and oxidize, and the guide bushings also wear out. The fork begins to dangle - and this catastrophically reduces the stability of the device and increases the chances of spinning up at speed. Therefore, when buying Dio, check whether the fork stays are loose, whether there are signs of heavy wear on them, and whether they move freely along their entire length. “Wedging” when the stays move upward means that the cunning seller cut the guide bushings and wrapped electrical tape under them, trying to hide the wear of the fork. This trick won’t last long, so you shouldn’t buy a Dio with a worn out fork. After purchasing, immediately disassemble the fork, check the condition of the rubber bands, wash and thoroughly lubricate the feathers, and carefully monitor them in the future. Wipe the feathers from dirt after each trip and lightly lubricate them with old gear oil - and they will last a long time. By the way, it wouldn’t hurt to install more powerful springs - both forward and backward.
Low intake resistance gives an increase in engine power only when paired with a modification of the carburetor (increasing the main jet or, at a minimum, reconfiguring the mixture quality). On a Honda this is easily achieved, but on a Yamaha (Teikei TK14 carb) and Suzuki (Mikuni carb) it is much more difficult - their carburetors, with too little inlet resistance, refuse to supply gasoline to the main diffuser. This is not a design mistake - they thus provide protection against driving without an air filter. This can be partially counteracted by raising the fuel level in the float chamber - but you need to make sure that at idle the carb does not overflow gasoline due to vibrations.
Instead of fussing with silicone sealant, you can seal your homemade filter with a ring of foam rubber 5-8 mm thick, cut along the contour of the old filter. By the way, if you find foam rubber about 10 mm thick with open pores (air is inhaled through the mouth without noticeable resistance), you can make an improved air filter from it by giving the foam partition a W-shaped cross-section using a pair of wire inserts to increase the area of the foam partition. spirals. And don’t forget to soak the foam with oil and wash it every 1000 km! Although, of course, the proposed dry filter from Moskvich is somewhat more practical - since it lasts longer without cleaning and filters fine dust better.
But in general - a very correct and reasonable approach to tuning a scooter. This is how devices are made that you can rightfully be proud of - with your own hands and head. And even a fool can buy Italian tuning kits worth many hundreds of bucks, but the results from them are not always better than from such tuning “for two dollars,” and there is definitely very little point in bolting such kits to a scooter for $300-500. If, of course, you are interested in the result, and not show-off...
Author: Alexey Eremeev aka Barmaley ( [email protected] )
Increasing piston volume on a Honda Dio scooter
It is important to understand that any boost to the engine definitely leads to a decrease in the reliability and overall service life of the engine components. Increasing volume and maximum speed inevitably leads to premature wear of the standard main bearings and crankshaft. When installing a piston with a volume of more than 62 cc, there is a need for additional adjustment of the oil and gasoline supply.
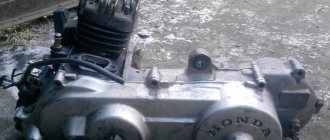
One of the most common types of urban scooter tuning is increasing engine capacity. Let's consider the possibilities of such a boost using the example of a Honda Dio scooter with an AF18E engine. The manufacturer here provides a piston volume of 49.9 cubic centimeters, and the piston diameter is 39 mm.
List of models with the same engine:
- Honda Dio AF-18
- Honda Tact AF-24
- Honda Dio AF-27
- Honda Dio AF-28
- Honda Tact AF-30
- Honda Tact AF-31
Piston also fits scooters:
- Honda Lead AF-20
- Cabina AF-33
- Broad AF-33
- Honda DJ-1RR
- Honda Dio SR AF-25
- Honda Dio Fit AF -27
- Honda Dio XR Baja
The dynamic and speed performance of these scooters are often inferior to those of similar equipment from Yamaha and Suzuki, however, the reliability of Honda engines has never been in doubt.
Most often, to increase engine capacity on these scooters, a 60cc or 65cc CPG is used. This volume allows you not to bother with major adjustments or replacing the carburetor, and the stock bearings and crankshaft are able to cope with slightly increased loads. In this case, the speed does not increase, since the engine speed remains the same, but only the dynamics increase. For many, this is enough for comfortable movement around the city. In this case, there is no need to change the cylinder head.
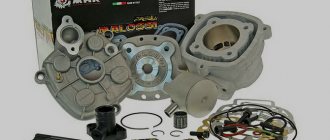
For more serious tuning enthusiasts, piston kits of 72cc or even 76cc (piston diameter 48 mm) are available. Just a few years ago, finding them was quite problematic, but now, with the increase in Chinese and Taiwanese factories of spare parts for scooters, there is no problem with this. You can buy one of these kits, for example, here: CPG 76cc Honda dio. The old cylinder head will no longer fit in this case, so usually all kits should also include a new head.
Installing a kit is no different from a standard piston replacement:
- We place the scooter on the central support.
- We remove the “toilet”.
- Disconnect the carburetor along with the intake pipe and reed valve.
- Unscrew the muffler and move it to the side.
- Unscrew the bolts securing the cylinder blower casing and remove the casing to the side.
- We unscrew the 4 bolts on the cylinder head, remove the cylinder, and replace the piston with a new one.
- We install the new kit in reverse order with the gaskets from the kit.
Everything is simple here, now about the consequences:
- Just adjusting the carburetor, as was the case with the 60cc, will no longer be enough. The stock carburetor cannot fully deliver the required amount of fuel-air mixture due to its low flow rate. Ideally, you will need to replace the original carburetor with a model with a larger diffuser (for example, 18 mm).
- Naturally, the performance of the stock oil pump will not be enough. Adjusting oil pumps on Honda scooters, in this case, does not solve the problem. You will need to additionally add oil to gasoline at the rate of 1 to 25 (1 part oil to 25 parts gasoline) in the summer and 1 to 40 in the cold season. Converted to a liter of gasoline, we get, respectively, 40 grams of oil per 1 liter of gasoline in hot weather and 25 grams of oil per 1 liter of gasoline in the cold season. Ignoring this rule will inevitably lead to oil starvation of the engine and the corresponding consequences.
- Naturally, the service life of the stock main bearings and crankshaft is reduced.
- The maximum speed does not increase because the maximum engine speed is limited. To increase speed, you will need to either lengthen the gearbox or increase engine speed using a tuning switch. The second option with stock bearings and original crankshaft is not desirable, since increasing engine speed further reduces engine life.
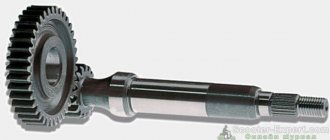
- The dynamics increase significantly. You may have to reconsider the weight of the variator rollers.
This is such a budget tuning. Whether it is needed or not, everyone decides for themselves.
Source