Bleeding the motorcycle brake system
Bleeding the brake system begins with bleeding the master cylinder.
On some motorcycles, the master cylinder (brake machine) of the front brake system does not bleed. In our case, the master cylinder has an air bleed fitting, so it needs to be bled.
On all motorcycles, the rear brake master cylinders are not pumped; they automatically bleed air into the reservoir by shortening the brake lever.
Pour brake fluid into the reservoir.
If the master cylinder has an air bleed fitting, bleeding begins from there, then the slave cylinder is pumped. Otherwise, only the worker is pumped.
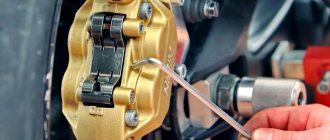
We put the hose on the fitting. Lower the free end of the hose into the container.
We make several contractions of the brake lever (squeeze sharply, release slowly), then squeeze the lever and keep it tense (press). The fitting is closed.
Open the fitting. The brake lever “falls” and fluid comes out of the hose. Check for air bubbles in the escaping liquid. Close the fitting. If there are bubbles, repeat steps 4 and 5 until the bubbles disappear. Don’t forget to monitor the liquid level in the tank; when it drops, add more.
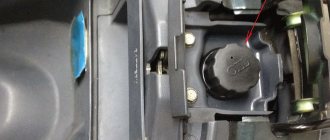
Add liquid to the reservoir to the maximum level. Not to capacity, but to the maximum level, which is indicated on the tank (see photo). We close the tank. The system is pumped.
Thus, for the rear brake system, only the slave cylinder needs to be bled. For the front - a master cylinder (if necessary) and two workers.
Method 2: Replacing the fluid with a vacuum pump
Follow steps 01 to 05 as described in Method 1, then continue as follows:
06 - Aspirate brake fluid and air
Use a vacuum pump to collect the used brake fluid as well as any air present in the reservoir.
- Refill the reservoir promptly with new fluid before it becomes empty (see Method 1, step 6, photo 2).
- So always keep an eye on the fill level!
- Continue operating the vacuum pump until only new, clear fluid with no air bubbles flows through the clear tube (see Method 1, Step 7, Photo 1).
During the final vacuum pump, tighten the bleeder screw on the brake caliper (see Method 1, Step 7, Photo 2). Depending on the system, you must bleed the brake system at the next bleed screw as described above / in the case of dual disc brakes, this step is performed at the second brake caliper of the system.
Differences and specifics of bleeding brakes with ABS
The anti-lock braking system allows you to control the vehicle's handling when braking. After pressing the pedal, the central control panel receives a response signal from sensors installed on the front and rear wheels. Thanks to the control system, the wheels slow down at the same speed as the car itself. In other words, thanks to ABS, the car cannot skid.
Regardless of the manufacturer, most devices have common characteristics:
- Electronic speed sensors on the hubs;
- Pressure controllers for main brake fluid lines;
- Electronic unit for signal processing.
Unlike most cars with simple braking systems, bleeding anti-lock brakes is difficult. For the procedure to be successful, it is necessary to familiarize yourself in detail with the theory of ABS operation. However, if the hydraulic accumulator, valves and pump are located nearby due to the design solution, the pumping technology will be very similar to the standard one.
Before starting work, in addition to standard tools, you must acquire a scanner to read information from the electronic unit. However, if the car has additional sensors, it is better to take the vehicle to a specialized salon. Any improper intervention calls into question the safety of road users.
Usually, for successful bleeding with the ABS system, it is enough to monitor the pressure in the hydraulic system. The standard value is 180 atm, but to work with the brakes it must be reduced - turn off the ignition and apply the brake 20 times. Only after this, some of the liquid will splash out and the pressure will drop significantly. After reducing the pressure, you can begin to turn off the ignition and disconnect the connectors and controllers on the GTZ tank for further manipulations.
The brake bleeding diagram, or, in other words, the brake bleeding sequence, should look like this:
- front left wheel mechanism;
- front right wheel mechanism;
- rear right wheel mechanism;
- rear left wheel mechanism.
- front right wheel mechanism;
- front left wheel mechanism;
- rear left wheel mechanism;
- rear right wheel mechanism.
Starting the pumping procedure itself, provide comfortable access to the relevant mechanisms with which you will work - remove the desired wheel, or drive the car into the inspection hole. Procedure for bleeding the brakes.
- Remove the cap from the expansion tank.
- Unscrew the brake bleeder fitting and clean it of any buildup.
- Place a clean hose onto the fitting of the corresponding brake mechanism, lowering the free end into a reservoir filled with brake fluid. Due to the fullness of the container, air does not enter the cylinder through the fitting.
- Start the engine and leave it running.
- Press the brake pedal several times (your assistant can do this) until the brake fluid flows through the hose into the reservoir. Perform these actions as long as the brake pedal allows, until it hits the floor.
- Bleed the brakes until all the air is out of the mechanism, while constantly refilling the reservoir with new brake fluid. The tank should not be completely empty, otherwise it will fill with air again. This system is used for cars with a manual transmission.
- Tighten the abs bleeder fitting. Tighten it while the pedal is reversed to prevent air from entering.
- Remove air and fluid from the clutch hydraulic drive as well.
- Add fluid to the expansion tank to the maximum mark.
- Check the action of the brake pedal; it should be depressed 1/3 of the entire pedal stroke.
In any case, before starting pumping, read all the nuances in the technical documentation for the car.
Drum Brake Adjustment
Adjusting the drum brake involves setting the free play of the rear brake lever.
The free play of the drum brake lever is determined by the distance from the beginning of the handle movement to the grip. Normal free play of the drum brake lever should be within 10 ... 20 mm.
Procedure for adjusting drum brakes on a scooter:
- Place the scooter on the center stand
- Clean the threaded part of the cable from dirt
- Adjust the free play of the drum brake lever by rotating the adjusting nut, which is located at the end of the brake cable near the wheel hub. To decrease the free play, you need to rotate the adjusting nut clockwise, and to increase the free play, you need to rotate it counterclockwise. It may be necessary to hold the cable to prevent it from turning along with the adjustment nut
- After setting, you need to make sure that the wheel rotates freely and without jamming
- Check the serviceability of the brake drive (cable) and drum brake lever
If the threaded part is not enough to adjust the free play of the control lever, then you can adjust the brake by moving the brake lever by 1-2 slots.
If after tightening the drum brakes their performance has not increased, check the condition of the brake pads and change them if necessary.
Front brake
Most scooters use a hydraulically driven front brake. Before we begin to describe it, it is necessary to emphasize that this is perhaps the most critical component on a scooter. If the motor malfunctions, for example, in the worst case, the scooter will simply stop. A faulty brake system can cause a serious accident or even death. Therefore, if there is no experience in such work, it is better to entrust the repair of the brake system to professionals at a service station. But for safe driving, it is desirable to understand its structure and operating principle, so let’s look at the hydraulic brake mechanism in detail.
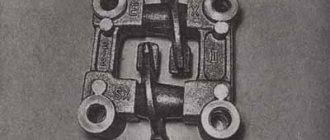
This system includes:
1. Main cylinder (attached to the steering wheel on the left side) driven by a handle;
2. Caliper (attached to the wheel fork);
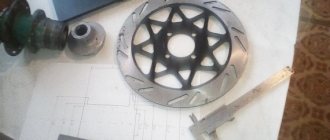
3. Brake disc and hoses.
The master cylinder is used to create braking force by using a piston to act on the brake fluid. The fluid transmits force to the caliper, in which one or more pistons are installed. These pistons move outward in response to the force exerted by the master cylinder piston on the fluid. The pistons in the caliper press against the brake pads, which in turn press against the disc to create the necessary friction, see Figure 1. The master cylinder and caliper are discussed in more detail later in this section.
Since fluid is incompressible, it is used to transmit force and movement in hydraulic systems.
There are currently four brake fluid options for motorcycles and scooters: DOT 3. DOT 4, DOT 5 and DOT 5.1. The first two are suitable for the braking system of most scooters.
Bleeding the car's brake system and removing air from it.
To bleed the brakes you need to take keys of different sizes, brake fluid and a clean plastic or glass container and hose. In addition, you will have to call your friend or someone from your household to help in the process.
After this, you need to conduct a visual inspection of all components and mechanisms of the system, as well as hoses and tubes. If any element is found to be faulty, it must be replaced or repaired. If there is no visible damage, you can proceed directly to pumping.
- Each brake disc has a fitting. We put a hose on it, and lower the other end of the hose into a container with brake fluid. Add liquid to the reservoir to the highest level.
- Next, the assistant makes 4 presses on the pedal, and then leaves it in the lowest position. Next, you need to unscrew the bleeder fitting by about 1-1.5 turns. Liquid should come out, which is squeezed out by the pressure created in the system. Along with it, air will come out in the form of bubbles. As soon as air stops escaping, you must immediately return the fitting to the closed position.
- Bleed the remaining wheels in the same way.
This bleeding method is applicable to trucks and cars with conventional hydraulic or pneumatic brakes. For a brake system with ABS, bleeding is carried out a little differently, because the operating principle is different.
Moscow Scooter Club
Time zone: UTC + 4 hours [Summer Time]
Forum Rules
BE SURE to indicate the model, unit and symptoms of the malfunction in the title of the topic.
Heading form: [SCOOTER MODEL] - unit malfunction Example: [Dio] electric starter does not work.
If the topic concerns general repair issues, the model may not be specified.
The main rule is that the title of the topic should be brief, but as fully as possible reflect its content. Topics whose title does not indicate at least the approximate essence of the question, such as “AAA. Save!”, “I have a problem, tell me,” will be DELETED .
Replacing brake fluid and bleeding brakes
The brake fluid on a scooter, like any other vehicle, should be changed at least every two years. Fortunately, on a scooter this is such a simple procedure that it can be done at least every season (although it doesn’t make sense to do it this often). Time costs – 5-10 minutes for preparation and replacement.
The main thing is to do everything carefully, then you will be able to avoid unnecessary actions.
To get started, you should stock up on the following items:
- brake fluid DOT 4
- empty container
- straw
- socket wrench 8
- crosshead screwdriver
First you need to prepare a drain for the old fluid. To do this, remove the rubber plug from the drain fitting.
We put a spanner on the fitting, then we put a tube on it, the end of which we lower into the container.
We will change the brake fluid by gravity, without pumping. An important aspect of this replacement method: do not allow air to get into the brake line, otherwise you will have to bleed it - which, of course, is not terrible, but this is an unnecessary step.
Unscrew the bolts of the brake reservoir cap, remove the plug and rubber membrane.
The brake fluid in the reservoir will be something like this:
Uncork the bottle of brake fluid.
Now use a wrench to unscrew the fitting about a quarter of a turn (or even less). There is no need to unscrew it too much, otherwise air bubbles will appear. The brake fluid should slowly pour into the container.
As the brake reservoir is emptied, add new brake fluid.
It is very important that the tank is always filled with liquid! After some time, the old liquid will drain and new liquid will go down the drain, this is always visible by color
After some time, the old liquid will drain and new liquid will go down the drain, this is always visible by the color.
The volume of three or four brake reservoirs is enough to flush everything.
Close the fitting, add fluid to the tank to the level, and you're done!
Bleeding method
However, if at some point you leaked fluid and air got into the brake line, then it will not drain by gravity. Then we will use the pumping method.
- Filling the brake reservoir.
- Using an open-end wrench, open the drain fitting half a turn.
- We squeeze the brake handle all the way and do not release it.
- While pressing the handle, close the fitting.
- Let's release the handle.
- Repeat steps 2-5 until all air bubbles come out of the tube (without forgetting to replenish the liquid in the tank).
https://youtube.com/watch?v=2UQb9WjJKtI
Review by Yashiro: bleeding the rear brake on a scooter
- Brake fluid Dot 4 volume 0.5 liters. I won’t recommend the brand, the choice is huge: from Russian Dot 4 to Motul, Liqui Moly, etc.
- Phillips and flathead screwdrivers
- Bleeding wrench for caliper fittings. If there is no special key, then you can use spanners. But I WARN YOU IMMEDIATELY: the fitting is a delicate thing, it’s good that we have it in normal size, that is, 10 or 11 (HELLO DRAGOVERS with a fitting for 7)
- Transparent hose (20-30 cm). I used a regular hose from the windshield washer system from any car
- Hexagons of different diameters for removing the rear wheel, caliper, pads and mirrors (optional item WHEN BLEEDING THE BRAKES)
- Empty 0.5 liter bottle for old brake fluid and draining the new one when bleeding
- Gloves
- Cling film for sealing plastic (if you are super neat, this item is optional)
- Knife
- A clean cloth (sleeping sheets are great, HELLO TO MOM!)
- Clamp or water wrench
- The syringe is the largest one sold in a pharmacy. When I was little, I had cases when the pharmacy refused to sell syringes; in response to all the requests and explanations that I needed to pump out the brake fluid, the pharmacists always grinned and did not sell them. Asking to sell a syringe without a needle always helped, we don’t need it anyway! I still can’t understand why they didn’t sell it, because I can’t imagine a drug addict who uses a 20 cc syringe for his dirty purposes. But we will leave this to the conscience of drug addicts and pharmacists.
- Toothpick
So let's get started:
1. Having lit a cigarette and looked at the trusty conic, we begin to work. I WANT TO WARN IMMEDIATELY: the operation, of course, is not surgical, but I do not recommend performing it on the street. Dust and sand will not help us in this situation.
2. First, take an empty plastic bottle. I used everyone's favorite Kala Cola. We unscrew the lid, make a hole in the lid with a diameter 1 millimeter smaller than our hose (let the 20-30 cm weenie feel proud, we also flatter ourselves ALL), insert the hose into the resulting hole (about 4-5 cm), screw the lid on hose onto the bottle. In the bottle, at a distance of 2-3 cm from the neck, we make a hole with a diameter of 2-3 mm to relieve pressure. For greater effect and for the purpose of further use of this miracle device, I glued the hose to the stopper with Poxypol, and the bottle can always be replaced.
3. Before starting this process, I ADVISE you to WRAP all plastic parts with cling film. Please note that when bleeding the steering wheel will move to both extreme positions, the reservoirs will tilt and brake fluid may leak onto painted parts. I can tell the alarmists from my own experience: yes, there have been cases when liquid got on plastic, but there were no consequences. However, it's worth being safe.
4. Take the hexagon in your hands and unscrew the mirror mounting bolts
5. Using a Phillips screwdriver, unscrew the screws that hold the plastic muzzle of our conic, carefully remove the plastic from the grooves
6. A great picture appears before us, a bunch of wiring, a steering wheel and the treasured tanks, with which we will have to work closely for the next 30 minutes.
7. Using a Phillips screwdriver, unscrew the 2 bolts that secure the tank lid. Have you unscrewed it, but the lid does not come off? Take a rubber mallet and slowly tap the lid around the perimeter. It came off - good. If not, then take a flat-head screwdriver, press it against the lid (INTO THE COVER and not under the COVER) and use a hammer to SLOWLY try to move it. FOR LOVERS TO PUSH EVERYTHING THAT FINDS INTO THE HOLE: I don’t recommend picking out the cover with a flat screwdriver, since there is a rubber gasket under the cover that can be easily damaged.
8. Having removed the cover, a rubber gasket appears before our eyes. Take a clean cloth, wipe the rubber band from the brake fluid and put it in a clean place.
9. We look into the tank. What do we see? The liquid is dark, there are strange particles floating in it, the verdict is to change it completely!
10. For those who are just going to pump the brakes, you can skip this text. Here's a story about replacing the rear pads.
A. In order to get to the rear caliper, we need to unscrew the rear wheel, which is secured with 5 or 6 hexagons. It is not necessary to unscrew the muffler. Let me make a correction: mine has a standard muffler, perhaps saxophones will interfere with this operation.
b. After unscrewing the rear wheel, remove it towards the muffler. Voila! The support is in front of us. Take the hexagon and unscrew the 2 bolts securing the caliper to the rear of the engine. The hexagon size is the same as the wheel bolts.
V. We clean the removed caliper from road and block dirt, remove the pads, inspect the cylinders and pistons for possible scuffs, torn cuffs, etc. IF YOU ARE DOING THIS FOR THE FIRST TIME, I don’t recommend disassembling the caliper, as there is a possibility of screwing everything up! If you have problems with the cuffs biting or the cylinders wedge, then ask a knowledgeable friend or take it to a service center.
d. When the pads wear out, the brake pistons come out of the cylinders, and when people install new pads, they cannot put the caliper on the brake disc. To prevent this from happening, we take the old block, install it in place and, using a clamp or a water wrench, slowly and evenly drive the pistons into place. IT IS IMPORTANT TO MONITOR THE FLUID LEVEL WHEN INSTALLING THE PISTONS IN PLACE. IT WILL INCREASE AND MAY LEAK OUT OF THE TANK!
d. Install new pads, put the caliper in place, and screw the rear wheel. I advise you to use a thread locker for both the caliper mounting bolts and the wheel mounting bolts. ACCORDING TO INFORMATION FROM FOREIGNERS AND SERVICE PERSONS BEHIND THE GUARDS, THERE ARE A CASE OF FAILURE OF THREADED CONNECTIONS. SO AS NOT TO RUIN YOUR HOLIDAY, TIGHTEN EVERYTHING CAREFULLY, AND BETTER USE A TORQUE WRENCH!
11. When replacing brake fluid, you can go in two ways:
A. drain all the liquid at once
b. pour in a new one displacing the old one
The methods differ only in the amount of brake fluid used, although, as it seems to me, the first method has an advantage in quality. That is, all the crap from the tank will not settle on the walls of the hose. I did it myself using method 1 and will describe it.
12. We put a spanner on the bleeder fitting, and we put our hose with a miracle bottle on it.
13. We take a syringe from the open reservoir and begin to pump out the brake fluid until all the liquid and crud from the reservoir transfers into the bottle.
14. Now you can open the bleeder fitting and drain the remaining brake fluid from the hose.
15. While the brake fluid is draining, you can use a toothpick and a cloth to clean the reservoir and inspection window.
16. As soon as everything shines like a cat’s... and the brake fluid has stopped dripping from the fitting into the bottle, take new brake fluid and begin to carefully pour it into the reservoir (FITTING IS OPEN). As soon as the brake fluid begins to pour into the bottle, we begin to watch and pour until it becomes the same color as in our new bottle.
17. When clean brake fluid starts flowing, close the fitting.
18. Now you can have a smoke break, drain the old liquid into a waste canister or special trash can. I don’t recommend pouring it on the ground or asphalt, it will be aesthetically unsightly, and TAKE CARE OF NATURE, YOUR MOTHER.
19. Now begins the most interesting and dreary task - bleeding the brake system. Add brake fluid to the reservoir just above the inspection window (FROM THIS POINT YOU NEED TO CONSTANTLY LOOK AT THE FLUID LEVEL IN THE RESERVOIR BECAUSE IF YOU MISS THE POINT, AIR WILL GET INTO THE SYSTEM AND YOU WILL HAVE TO START EVERYTHING OVER), put the wrench and hose on the brake fitting and start.
20. With forward-returning movements of the hand (WHAT DID YOU THINK???) we begin to pump pressure into the brake system, 5-10 presses on the brake handle, FIXATION IN THE PRESSED POSITION, opening the fitting and what we see: a bunch of air bubbles with minimal amounts of brake liquids!
21. We repeat this operation until the force on the brake lever appears with 1 press and air bubbles stop coming out of the brake system (EVERY 3 OPENINGS OF THE BLENDING FITTING I ADVISE ADDING BRAKE FLUID INTO THE RESERVOIR).
22. DRAINING THE LIQUID FROM THE FITTING IS CARRIED OUT ONLY WITH THE HELP OF A HOSE-TUBE, BECAUSE IF THERE IS NO HOSE, WHEN THE FITTING IS CLOSED, A SMALL PART OF THE AIR ENTERS THE SYSTEM BY RETURN AND YOU have to pump forever, pressure will appear, but not enough.
23. After the whole operation is over, you can thank your friend (If he was used in this event). Add brake fluid to the reservoir: the level should be slightly above the middle of the inspection window.
24. Place the rubber gasket on the tank, screw on the lid, and assemble the plastic in reverse order!
© Yashiro
© 2021 Alexander Smirnov, gilerarunner.ru. Spare parts and accessories for Italian motorcycles from Europe. Phone/WhatsApp or email The email address is protected from spambots. Javascript must be enabled in your browser to view the address.
Once again about the reasons
Air in the brake system may appear for the following reasons:
- the amount of brake fluid in the reservoir of the main brake cylinder has significantly decreased, which has led to the “entrapment” of air; as a rule, this reason is closely related to subsequent reasons;
- wear of the sealing cuffs, both in the main brake and working cylinders;
- loss of tightness in the connections of brake pipes and hoses; as a rule, rubber brake pipes must be replaced every 4 years;
- loss of tightness in the rubber brake pipes themselves due to their natural wear;
- loss of tightness in metal brake pipes due to their corrosion.
This is usually manifested by the presence of smudges in the locations of the structural elements of the vehicle’s braking system. In this case, the trip should be postponed and all measures should be taken to eliminate the brake fluid leak and air the brake system.
Read on topic: How to bleed brakes without an assistant.
Another reason why air appears in the brake system and, accordingly, its low efficiency is the failure to replace the brake fluid in a timely manner.
The fact is that any brake fluid is hygroscopic and accumulates a large amount of moisture over time. For example, in NEVA brake fluid, this can be seen by its dark color.
The brake fluid should be changed approximately once every two years. If this is not done, the following may happen.
During prolonged braking, especially on a mountain road, when drivers forget about engine braking, all brake elements become very hot, and accordingly, the brake fluid will also heat up.
The new brake fluid can successfully withstand all these loads, but the old fluid, with the presence of moisture, can let you down.
The boiling point of such brake fluid is much lower than the standard (about 200 degrees Celsius), and accordingly the likelihood that it will boil becomes very high. During boiling, air bubbles form in the system, and air appears again in the brake system.
Read on topic: How to change brake fluid.
Therefore, try not to forget about this method of braking, such as engine braking.
As we see, air in the brake system is the first enemy of the brakes, so it is necessary to constantly monitor the condition of the brakes, both in the garage and while the car is moving.
The presence of brakes is the first criterion for your safety and the safety of your family and friends, do not forget about it.
Interesting note - Disc and drum brakes from "Main Road".
Therefore, there should always be no air in the car’s brake system.