Aside from the tires, no other component affects your scooter's steering and handling more than the headset bearing where the fork meets the frame. Ignoring their timely maintenance, repair and replacement can lead to dire consequences.
Honestly, when was the last time you serviced your moped's steering bearings? Never? There is nothing surprising. I'd bet a significant percentage of drivers don't even know they need maintenance, let alone get serviced regularly. But keep in mind: not many other parts have the same impact on the control of a scooter as the steering column bearings.
Every turn goes directly through these bearings. Ignore them if you like, but when your old new scooter with nice steering starts to act like a piece of farm equipment, don't say we didn't warn you.
What's happening?
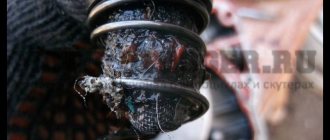
When your new motorcycle was assembled, its head bearings were coated with good, fresh grease. Solid oil or lithol lubricates bearings, acts as a spacer between support rollers and their raceways, and prevents corrosion damage.
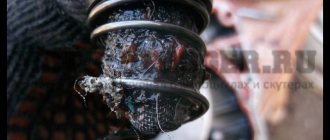
Over time, due to frequent hot water high pressure washing at a local car wash, the lubricant tends to dry out (or wash out). Once the lubricant disappears or becomes useless due to age, the support rollers stop rotating and begin to rub dry. After this, it is only a matter of time before the bearings wear out and seize.
Because this process usually takes several years or more, the average driver adapts to the situation and usually has no idea that anything is wrong until someone else tells him or significant damage has been done. To prevent premature bearing wear and its attendant problems, your vehicle manufacturer would like you to periodically remove, clean and lubricate your steering column bearings. As a rule, bearings should be inspected every two to four years, or more often if the mileage is quite high.
Now you know
Now that you know when the steering column is due for inspection, you have three options:
- You can do nothing and replace the bearings when they fail. This alternative is chosen by a large number of scooter owners.
- You can have your moped serviced at a service station, which is certainly an acceptable option.
- You can do bearing maintenance yourself.
Before you decide, let me warn you that servicing your bike's head bearings is neither a particularly quick job nor a very fun one. You will have to work hard, but the interaction between the driver and the vehicle is always good J.
I recommend scheduling the maintenance alongside your regular annual essential service, or doing it along with all the other work you've been putting off over the last few years, such as replacing a leaking fork seal or a worn front wheel.
This is mostly routine work. However, there is one aspect that can create real cramps. All mopeds manufactured since the early 1980s use tapered roller head bearings.
The lower rod bearing usually fits tightly to the steering rod. To properly lubricate the lower bearing, it must be removed from the rod. Fifty percent of the time they come off right away. But in the remaining 50 percent, difficulties may arise. Although there are methods to remove thrust bearings without using any special tools, it requires time and experience and you will most likely end up with a damaged bearing.
Finally, although I don't recommend it, some bearings can be cleaned and lubricated without removing them from the rack. In some cases this may be the most practical solution.
How long will it take
A full steering column service—removing, cleaning, checking and reinstalling the bearings—usually takes an experienced technician between two and eight hours, depending on the type of scooter, available funds and level of ambition. If this is your first time doing this, plan to spend at least a day.
I'd also suggest taking a look at the list of recommended tools before you start. There's nothing more frustrating than stopping in the middle of a job because you're missing some important tool or part.
Tools and Supplies
Here's a typical list of the unique tools and supplies you'll need to service your motorcycle or scooter's steering column bearings. The instructions may indicate some additional items you will need.
- High temperature wheel bearing grease; Anything designed to be used in a disc brake mechanism will also work.
- Service manual from your moped manufacturer.
- A work stand to support a bike without a front wheel.
- Keys and sockets are designed to fit your scooter.
- Torque wrench capable of displaying up to 500 N.
- Any special attachments or wrenches specific to your scooter (the manual should list these).
- Heavy steel or copper hammer (1 kg or better more).
- Steel pipe of appropriate sizes. Will be used to return the lower bearing to the steering stem. The pipes must be positioned directly on the inner race of the bearing.
- Plastic hammer.
- Solvent; WD-40 works great.
- Rags.
- Additionally: new lower bearing dust seal, latex gloves, factory recommended tools for bearing removal/installation. All this can be found in the same place where they sell steering rack repair kits and other spare parts for cars.
Is it possible to bend the handlebars of a motorcycle?
It is, of course, undesirable to bend the steering wheel. But not everything depends on the driver, and hardly anyone does it at will. The most common cause of such a problem is a vehicle fall. This is especially true for cross-country motorcycles or enduro-type cars.
Did you know? At motorcycle racing in Northern Ireland, in the event of an accident, doctors on motorcycles are the first to come to the aid of the victim. Their average speed is 290 km/hour.
It should be said right away that the curvature of a part can be completely different - it’s one thing when only the steering wheel is deformed. In this case, you are allowed to straighten it yourself; the chances of a successful operation are quite high. A completely different option, in which, as a result of an impact, the fork legs and yokes are bent. If you can straighten the second part in a garage, then putting the first part in order on your own is an extremely difficult task, bordering on impossible.
How to remove a scooter's steering column
Place your scooter on a work or center stand and lift the front off the ground.
Start by removing anything that doesn't look like a triple clamp. Your manual details the exact procedure. Resist the temptation to shorten the job by removing some of the knots in large chunks. Struggling with the fork while it's still attached to the front wheel and fender isn't as fun as you think.
Before loosening the top clamp lock nut, rotate the clamp from lock to lock. Without the weight of the front assembly on it, any roughness or dents in the bearings will feel much more obvious. If in doubt, now is the time to replace the bearings.
Remove the top clamp; you may have to knock it down with a plastic hammer. Remove the preload adjusting nut from the stem. If you are ready to replace the nut with a new one, you can help yourself by hitting it with a hammer to loosen it. The stem should fall when you loosen the nut, so be prepared for this. If the fork doesn't fall off, screw the nut back onto the first few stem threads (to protect them from damage), then lightly hit the stem with a plastic hammer.
Remove the top bearing and set it aside. Typically the top and bottom bearings have different inner diameters so there is no chance of getting them mixed up, but to be on the safe side you may want to mark them as removed to avoid any confusion in the future. Clean both bearings thoroughly and inspect them for dents, chips or any other damage. Dark lines by themselves do not mean anything serious. However, they may be hiding other problems.
Run the tip of your finger or nail around the bearing. If you feel anything other than a perfect surface, the bearings and races should be replaced.
The tricky part
This is the hardest part of the job.
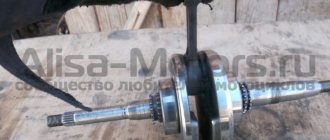
Clamp the steering rod in a vice with soft jaws and move the lower bearing away from the rod (use a piece of cardboard or wood to protect the rod). If it doesn't budge, you can try applying some heat, but be careful—splattering hot grease isn't much fun, and some bearings use easily meltable plastic cages to position the rollers.
The bearing should be allowed to air dry or wiped with a soft cloth. If you are using compressed air to dry them, blow air into the bearings parallel to the roller. Whatever you do, do not rotate the bearing without lubrication.
Place the lubricant in the palm of your left hand. Hold the clean bearing in your right hand, with the large diameter side facing the grease (if the bearing is a ball or non-tapered roller bearing, it can be sealed on either side). Pull the bearing across your palm as if you were using it to wipe grease off your palm, rotating it as each roller becomes completely lubricated.
When done correctly, you will see curls of fresh grease rolling out of the small end of the bearing. It may take a few iterations to get this right, but I've packaged thousands of bearings this way and never had a single failure.
Installing a bearing on a moped steering column
Keep the bearing at room temperature or higher, but not so high that it melts the lubricant. This will also help polish the bottom of the stem where the bearing is located. Use a piece of sandpaper and sand lightly. The goal is not to remove a lot of metal, but to clean the area and remove burrs.
Install the boot and slide the lubricated bearing onto the rod. Place the bearing drive or piece of pipe over the bearing, making sure it only touches the inner race, then slide the bearing onto the shaft. There is no need to beat the snot out of him - for this you need to give a few strong blows.
As the bearing settles, the tone of the hammer will change. This is your signal to stop. As shown in the photo, I have had some success using a piece of heavy PVC pipe and a composite hammer to reinstall the bearing. This works great as long as the bearing presses lightly on the shaft.
Bearings must be preloaded according to manufacturer specifications. In some cases, this means tightening the nut to some initial torque, disengaging, and then resetting to the recommended preload. Using moderate pressure, lower the adjusting nut until the rod begins to bind. Rotate the steering arm back and forth several times, then turn the nut half a turn.
Repeat again: turn, release the tension several times, always turning the steering stem from side to side. For final adjustment, pull the nut up firmly and then turn it back one turn. Don't worry if the rod feels a little tight at this point - it will release as you install the rest of the front end.
Install the top clamp snugly, but do not overtighten. Insert the fork tubes into the clamp, positioning them where you want them. Tighten the bottom pinch bolts only. Insert the front axle, making sure it slides smoothly into place. If not, check the fork height and alignment.
Using the manufacturer's recommended torque settings, tighten the top clamp nut first. This will ensure it is fully seated on the steering stem, followed by the upper and lower clamp bolts.
From here on out it's just a simple assembly job followed by a road test.
How to straighten the steering wheel yourself
So, if only the steering wheel itself is bent, you should try to solve the problem yourself. There is an opinion that to do this it is enough to remove the seat, tank and handle on the side on which the steering wheel is bent. Next, using a fairly long and strong lever (for example, a fork leg from another motorcycle), placed on the part from the deformed side, try to align the part.
But it should be said that with this approach, by eye, it is very difficult to achieve an acceptable result. You may be able to restore the part in such a way that visually it will be perfectly smooth. However, this does not mean that the steering wheel will actually become balanced - the slightest misalignment (0.5–1 cm) is enough for you to feel a significant imbalance in control when driving.
Due to a fall or impact of the motorcycle, the following situation may arise: the steering wheel is level, in a neutral position, and the wheel is turned to the side. This circumstance can cause the fork legs to rotate in the yokes. To correct the problem, you need to loosen the traverse bolts and set the wheel straight, strictly perpendicular to the steering wheel. If, after completing the procedure described above, you come to the conclusion that only the steering wheel is skewed, it should be straightened.
Important! There should be notches at the point of contact between the steering wheel and the racks to prevent the part from turning in the mount. If there are none, wrap the clamp area with a thin strip of sandpaper
-
this contributes to a more stable fixation of the part.
Removing the part may vary slightly on different motorcycle models, but in general it looks like this:
- Remove all remote controls and controls. Usually it is enough to loosen a few bolts on the reverse side. You don’t have to completely unscrew them, just loosen and tighten the device or mechanism. Various wires and hoses do not need to be disconnected.
- Lay a thick cloth on the tank, on which you will need to place the dismantled components and mechanisms so as not to leave marks on the paint. Then you need to unscrew the racks.
- Next you need to remove the handles. Difficulties may arise when dismantling the left one: since it simply sits on the pipe, sometimes it is secured with glue. Often this is a fairly strong connection; simply twisting and tightening is not enough. You will have to use a knife or a thin screwdriver, which must be inserted between the pipe and the handle, and thus try to break the connection.
- Remove the steering wheel and try to visually determine the bend location. Inspect the item carefully. Most likely, you will be able to detect a crumple zone.
- Secure one side in a vice, and put a lever on the other and bend the steering wheel, trying to give it its original configuration. Take your time and perform the operation in several stages.
- After each bending, check the bending of the part in this way: place a bench square on a flat surface so that the scale is vertical. Place the steering wheel with its frontal plane on the table so that the center of the edge of the part pipe is next to the square scale. Measure the distance to a millimeter first on the undeformed side, then bend the curved part until the same indicator is obtained.
- When the part becomes smooth, it needs to be installed on the motorcycle. The procedure is the reverse of what you did when dismantling it.
- Learning to ride a motorcycle
- All about automatic transmission on motorcycles
- Motorcycle handlebars: its types and names
- What are they for and how to replace motorcycle steering weights?
Video: Straightening the steering wheel after a fall
What could be the consequences?
First of all, it should be said that driving with such a steering wheel is very uncomfortable. In addition, depending on the degree of curvature of the part, it is unsafe. The point is not only in the unusual procedure for driving the vehicle - driving with a skewed control mechanism, especially on a two-wheeled vehicle, is simply dangerous. The usual feeling of the steering wheel is lost, and therefore the reaction to a possible obstacle is lost. So the problem needs to be corrected immediately after it appears. You can, of course, hear the opinion that you get used to everything, such riding is possible, it just requires certain skills. But it’s better not to get used to this, the maximum you should go to with a deformed steering wheel is to a garage or service station.
Recommended reading:
Back on the road
Before returning your motorcycle to active use, give it a thorough road test, especially if it was a winter repair and the scooter was parked in the garage while the snow melted. If something seems unusual, investigate and correct the problem before proceeding.
During the first few miles, new or freshly lubricated bearings may loosen slightly. This is completely normal, so be sure to keep an eye on them. Check the preload after the first road test and again at the 500 km mark, re-adjusting if necessary.
If everything looks good, give yourself a pat on the back J. Now you're an expert at replacing steering column bearings, maintenance on your scooter won't be as hard next time.
Is it worth buying a new steering wheel?
The decision about whether purchasing a new steering wheel is necessary can only be made on a case-by-case basis. If the damage is minor and has been repaired correctly, this is not necessary. If the curvature is severe, you tried to fix it yourself several times, but as a result did not achieve the desired result, you may have to purchase a new steering wheel. The reason for this is the formation of microcracks in the metal, which form during intense and frequent deformation that occurs in attempts to align the part without the proper skills.
Before installing the painted steering wheel, the paint layer, which should be under the gas handle, must be cleaned and polished, and then lubricated with machine oil.
If the steering wheel becomes bent, you can try to straighten it yourself, but only if the deformation is insignificant and the reason is only in the steering wheel (the fork stays are intact). If the damage is more serious, then it is better to contact a service station that deals with such things. Do not forget that a motorcycle is a rather unsafe form of transport and there cannot be any trifles here, especially in matters related to control.
Source:
