So I’m ready to write another post. For some reason, inspiration (if you can call it that) attacks me exclusively at night, but let’s not talk about it... Everyone knows what stock brakes are in the Urals, especially the front ones. I understand that with proper adjustment they should brake, but either my hands are in the wrong place, or the wheel drum was already worn out, no matter how I adjusted or adjusted the pads, it absolutely refused to brake. Instead, when you pressed the lever hard, the brake cable was pulled out (the shirt was compressed, to be more precise). Having suffered quite a bit with it, I thought that I should install the disk. I don’t know why, I don’t remember now, but I decided not to grind the hub from scratch, but to disassemble the original “drum” hub, and instead of the drum put in something like an adapter, which I would grind at a turner. “This is the beginning,” I thought and went to local stores to look for a brake disc. I came across this copy from the Middle Kingdom, I don’t remember where from, it seemed to be from Cobra, but along with it I bought the entire brake circuit assembly.
I disassembled the hub, cut off a piece of the brake drum on which the pads are attached, in order to subsequently pull the bushing out onto the axle, and began drawings.
On the left is the original hub, on the right is the adapter that is put on it and attached to the drum mounting holes.
This is the kind of crap that should have turned out according to my calculations. I took out a steel blank, took it to a turner at our factory, and picked up the finished product the next day.
I drilled all the holes in the garage using a drill. I marked the holes using my own drawing, printing it 1:1, cutting out the necessary parts and placing it on the workpiece.
(working hours)
I assembled it to see what it would all look like...
... and started painting.
I took the original rim from the same wheel from which I took the hub apart. I cleaned the paint off so much that it was a pity to even paint it)
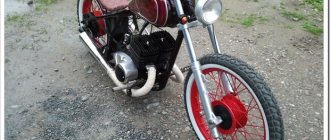
Well, the hub is ready, and it even looks pretty good.
The assembled wheel looks even more beautiful)
However, together with the tire, the disk looks somehow small...
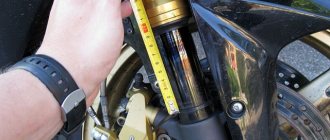
Next I started making the caliper mounting plate. On one side it is put on the wheel axle, and on the other it is attached to the reaction rod, which went to the brake drum. To do this, the thrust had to be shortened. A few photos of the working process...
And so, after several hours of fitting and fitting, the caliper was installed...
Well, then I decided to paint the mounting plate and wheel boot.
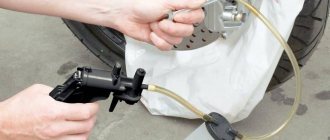
And everything seemed fine, but when I started pumping the brakes, it turned out that this caliper was leaking, an infection. The cuffs are poisoning the brakes. When I disassembled the caliper and put these cuffs on the piston, they fell freely on it and the gap was about a millimeter. We don't have repair kits in the city. Order on the Internet... I don’t know what to order, I don’t know exactly what this caliper is from, and it doesn’t seem to have a name. Therefore, I bought rings of suitable diameter from a rubber shop, installed them and everything is fine (despite the fact that the caliper cuffs have a square profile, and the rubber bands that I bought are round).
Here are a couple of photos of the fully attached caliper.
How to summarize... The brakes make me happy, now I’m no longer afraid of pedestrians who unexpectedly run out onto the road)
MY MOTORCYCLE
It is hardly possible to surprise anyone today with a disc brake on Ural motorcycles. Of course, this only applies to newer models! But if you try, you can put something on the old man. I want to tell you a little about the disc brake circuit. The info may be a little outdated, but it might be useful:
Currently, two modifications of the front wheel brake have been developed - single-disc and double-disc. The first modification is intended for a single motorcycle, and the second for a sidecar version. Although there may also be a second option on a single person.
In both cases, the design is as unified as possible - the only difference is in the design of the disks and in the methods of attaching them to the wheel. To simplify the design and to avoid complications in the technological process, the brake disc in the single-disc version is installed on the wheel instead of the drum brake pads, while the wheel does not change. A scheme is also provided with a change in the design of the wheel hub, but it is unknown (to me personally) whether it will be used or not. In the version with two discs, the wheel receives a completely updated hub. Let's take a look at the design of a double-disc brake:
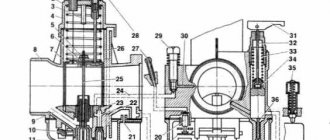
Front wheel double disc brake design; 1 - main cylinder; 2 — drive lever; 3 — connecting hoses; 4 - tee; 5 — bracket with pistons; 6 — compound brake disc; 7 — wheel hub; 8 — front fork: 9 — wheel axle; 10 - wheel.
It consists of a master cylinder located on the right handlebar, brake calipers mounted on the movable pipes of the front fork, three hoses and a connecting tee. The design is simple and reliable. Its operating principle is as follows: when the driver presses the lever, the piston of the master cylinder creates pressure, which acts on the brake calipers. The pressure in the system is proportional to the force on the lever: the intensity of braking depends on it. If the lever is released, the piston returns to its original position. The brackets have a so-called “floating” design. When the pressure in the system increases, the piston located in the caliper presses on the brake pad, which rests on the disc. However, the “floating” bracket begins to move to the side and moves the second pad, which, after removing the gap, also rests against the disc, thus beginning the braking process. The gap between the discs and pads always remains constant, regardless of the wear of the latter. Maintenance comes down to replacing worn pads and checking seals. After replacing the pads, sometimes you have to remove air from the system - “bleed” it. I think the robot with this is no different from passing air on foreign cars. And there is plenty of this information on the Internet.
Brake disc assembly for installation instead of a brake drum: 1 - disc; 2 — protective cover; 3 — support bushing; 4 - toothed disc hub; 5 - bearing; 6 - special bolt.
A few words about the design of brake discs. In the single-disc brake version, the disc is made one-piece and ventilated. With a double-disc brake, the hub design has undergone significant changes, and the discs are made of composite parts.
1. Double disc brake of the front wheel. 2. Tee for hydraulic brake drive.