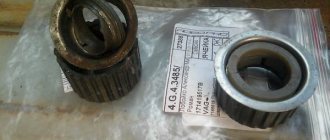
Typically, scooter crankshaft main bearings last as long as the big end bearing, if not longer. But there are situations when, after disassembling and carefully checking all engine parts, it turns out that the crankshaft is still suitable for further use, but its main bearings are not.
And there's nothing you can do about it. Either change the crankshaft to a new one, or get rid of it and change only the bearings, which, by the way, cost pennies, and a new crankshaft is very, very expensive - this is the first important point.
The second important point is that when choosing a repair or diagnostic method, you need to proceed from the available tools, and I have a welding machine and a bunch of various pullers and devices. Therefore, the option of engine repair with replacement of only the main bearings seems preferable to me. If you don’t have tools, replace the crankshaft with a new one and don’t worry (advice).
Main reasons for replacement
Each engine is equipped with a crankshaft. It moves the piston and also helps move the rear wheel. The crankshaft consists of two disks, the connection of which is ensured by a connecting rod journal. The role of the disks is similar to the tasks of flywheels: to provide uniform movement of this part in the required direction. In the center of the disks there are axle shafts with bearings. These bearings allow the crankshaft to rotate. Due to the ends of the shaft, rotational motion is transmitted directly to the scooter transmission and generator. And so, we list the main reasons for removing and replacing the crankshaft:
- Tuning. Speed lovers who want to get the most out of a scooter install tuning crankshafts.
- Removing the crankshaft is necessary to replace the scooter's crankshaft oil seals. Also, bearings rotating the shaft are often replaced;
- Engine noise, vibration, loss of dynamism.
If you have a garage and the necessary set of tools, then removing the crankshaft will not be a problem for you. First of all, you should have special pullers as tools. To remove the crankshaft, first remove the engine itself: disconnect all fasteners, hoses and wires, as well as the CPG.
Replacing scooter crankshaft bearings
The crankshaft plays a huge role in the design of the scooter, ensuring the interconnection and operation of several main components and systems at once - the cylinder-piston group, the generator, the gas distribution mechanism and the clutch. In turn, the rotation of the mechanism is ensured by the crankshaft bearings located on its axle shafts.
The internal parts of the system are closed with special seals, which provide reliable protection against the ingress of debris, dirt and dust particles. However, during operation of the scooter, the friction force negatively affects the condition of the balls and bearing race. Over time, the seals also wear out, losing their strength and tightness. All this ultimately leads to the need to replace the crankshaft bearings and oil seals with new ones, in order to avoid wear of more expensive parts of the scooter systems.
External signs of crankshaft problems and engine disassembly
The main reasons for disassembling the engine and crankshaft of a scooter are:
- oil leakage;
- engine vibration during operation;
- loss of power.
To more accurately determine the breakdown and replace worn parts, you must first disassemble the engine. Unfortunately, you can only determine whether the bearings need to be replaced after removing the crankshaft from the scooter.
It is quite possible to disassemble and replace crankshaft bearings in a garage. To do this, you need to stock up on special pullers, a workbench, a hair dryer and a classic set of tools for auto repair.
To disassemble and remove the engine and crankshaft, you must:
- place the scooter on the center stand;
- unscrew and remove the elements of the plastic body kit that blocks access to the necessary components;
- unscrew the spark plug;
- drain the oil from the system;
- disassemble and dismantle the cylinder system;
- remove the impeller;
- unscrew and remove the generator parts;
- remove the starter, carburetor and oil pump;
- Unscrew the bolts holding the engine block;
- wrap the connecting rod with a rag to avoid damage;
- use a puller to separate the block halves;
- Carefully remove the crankshaft.
After this, you can begin the procedure of inspecting the bearings, identifying their damage and wear and, if necessary, removing them and replacing them with new ones. To do this, remove residual oil, dirt and foreign impurities from the surface of the axle shafts. A clean bearing surface will easily show signs of wear, deformation or abrasion. The bearings can be removed from the shaft axle shafts using a special puller, and the oil seals are carefully knocked out using a nozzle of suitable diameter.
Replacing scooter crankshaft bearings and oil seals
To install new bearings, you need to have a vice and a heat gun, as well as instructions for assembling the motor. If you strictly follow all the rules, the result of the repair will be satisfactory; if you break it (even in small things), the scooter will have to be sent to a service center. The bearing replacement procedure consists of:
- reliable fixation of the crankshaft in a vice with the axle shaft up;
- heating the inner race of the bearing to 100 degrees;
- its quick installation on the axle shaft seat;
- driving the bearing until it stops on the axle shaft using a pipe of suitable diameter.
The bearing of the other axle shaft is replaced in the same way. When carrying out such work, you must strictly observe the rules of behavior with fire, as well as the rules of personal safety.
When removing the oil seals, it is necessary to note and record the depth of their seating in order to install new ones in the same place. In addition, the oil seals of many scooter models differ in size, which should be taken into account when purchasing a repair kit. The oil seals are installed in a clean and dry cage using a nozzle of a suitable diameter.
After this, the system should be assembled. To do this you need:
- lubricate the crankshaft axle shafts with oil to avoid damage to the seals during installation;
- heat the bearing seat in the block to 100 degrees;
- install the crankshaft, making sure that the connecting rod does not touch the block;
- very carefully treat the junction of the block halves with sealant;
- warm up the seat of the other half and connect the block;
- Compress the block halves with bolts so that distortions do not form.
Next, install the scooter systems in the reverse order.
And in conclusion, a few general rules for carrying out repair work:
- the room, table, mechanisms, rags and tools must be perfectly clean;
- drain the oil into a prepared container;
- all parts removed from the scooter must be thoroughly washed and dried;
- during assembly, all parts must be dry, and threaded connections must be treated with compressed air;
- A layer of protective lubricant should be applied to the rubbing parts.
Successful repairs to everyone!
Removing the crankshaft
The crankshaft is located between the two halves of the engine. We “split” the engine, thereby separating those same two halves. After this, it is possible to remove the crankshaft. This is done in the following sequence:
- We wrap the surface of the connecting rod with a rag to avoid damage.
- We unscrew the bolted connections that hold the halves of the blocks in place.
- It will not be difficult to separate the halves of the block if the bearings are worn out.
- If separating the halves is problematic, use a special puller.
Bearings are removed by heating them, or vice versa using a special puller. The oil seals are removed by knocking out a socket wrench of a suitable size. You need to knock it out carefully, the main thing is not to overdo it.
Removal
The oil pump drive sprockets and timing chains, which interfere with the removal of the main bearings, can be removed with a regular automotive three- or two-legged puller. I use a three-legged one because I kind of have it and it’s more convenient to work with.
If I didn't have one, I would remove all the sprockets and bearings using just one puller. And since I have a lot of pullers, I use whatever is more convenient for me.
The oil pump drive gear does not sit on the trunnion with its entire internal surface, but only with a small part in the form of a groove. It can be removed from the shaft very easily, literally with little effort.
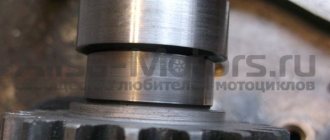
The crankshaft journal is thickened where the sprockets fit.
The timing chain drive sprocket cannot be picked up with a simple puller, which I used to pull off the oil pump drive gear. Since it is placed close to the bearing and the puller’s paws rest against the bearing with their hooks and do not allow the sprocket to catch.
To remove the timing chain drive sprocket, it is best to use a regular two-legged automotive puller with a fixing bracket.
The timing chain drive sprocket sits on the axle with its entire inner surface and can be easily removed.
The stars have been removed and nothing stands in the way of further work. The hardest part remains - removing the bearings. The main difficulty is that the bearings sit close to the crankshaft cheek and there is no way to pry them off.
There is a special puller on sale, or rather a whole set, that allows you to engage and remove almost any bearing, but it is very expensive. I wanted to buy it, but changed my mind: paying a few rubles (about 8,000) for an instrument that will be used at most several times a year is not a very rational investment option.
Therefore, I wrinkled my brain and did the following: in order to protect the working surfaces of the crankshaft from splashes, I took a piece of tin, cut a strip in it, put it on the crankshaft, put a piece of unnecessary pipe on the axle and welded a large washer to the bearing.
I pulled the washer with a puller and voila!!!
I did the same with the second bearing.
How to change bearings on a crankshaft?
For quick and correct replacement, you need a hair dryer, which is used by builders and a vice. Clamping the crankshaft with one of the axle shafts, the inner part of the bearing is heated with a hairdryer to 100 degrees. Thanks to this operation, the bearing “seats” easily. To install a bearing millimeter to millimeter, you can lightly tap it through a pipe that has a suitable diameter. Using the same method, install the bearing on the other axis.
content .. 61 62 66 ..
SCOOTER. FRONT WHEEL BEARINGS - DEFECTIVE
Wheel bearings are usually sealed to prevent maintenance and prevent dirt and water from getting inside.
• Place the scooter on the center stand so that the front wheel is hanging out. If the scooter does not get into this position on its own, you can have a helper sit on the saddle to load the rear of the machine, or simply place a heavy object on the saddle or rack. The main thing is that the scooter does not fall.
• Spin the wheel. It should rotate freely, without jamming or extraneous noise.
• We grab the wheel in the “fifteen minutes to three” position and try to swing it in a direction perpendicular to the wheel axis. If play is felt or knocking or crunching noises are heard, the bearings must be replaced. For the procedure for replacing wheel bearings, see p. 102 “Front wheel bearings - replacement”
SCOOTER. REAR WHEEL BEARINGS - DEFECTIVE
The rear wheel bearings are checked using a method similar to the front wheel. However, most often, the rear wheel of the scooter does not have its own bearings, and rotates together with the gearbox shaft, which, in turn, rotates on bearings pressed into the variator housing. If play, extraneous sounds, or jamming during rotation are noticeable, the gearbox driven shaft bearings must also be replaced.
SCOOTER. STEERING COLUMN BEARINGS - DEFECTIVE
The steering column often uses angular contact full complement (“bulk”) bearings
To check the condition of the steering column bearings, place the scooter on the center stand and hang the front wheel.
• We grab the fork stays at the bottom and slowly turn the fork left and right from lock to lock. The fork should move smoothly, without jamming, clicking or extraneous sounds. If there is even a slight change in the force when turning the fork, the bearings must be replaced.
• We try to rock the fork back and forth, holding the very ends of the feathers with our hands. The slightest play in the steering column is a reason to change the bearings or check and adjust their tightening.
• We try to rock the fork up and down, parallel to the axis of the steering column. Any play in this direction indicates insufficient tightening of the steering column bearings, or their failure.
Replacement and maintenance of steering column bearings are described in detail in the chapter “ Steering column bearings - maintenance”
»
SCOOTER. ENGINE AND TRANSMISSION BEARINGS - DEFECTIVE
Crankshaft bearings are constantly running in oil or lubricated with a gasoline-oil mixture (in two-stroke engines) and do not require maintenance
Bearings located in the engine and transmission are quite difficult to diagnose with a high degree of accuracy without resorting to disassembling the units in which they are located. Although there are some indirect signs of malfunctions here too.
The connecting rod upper end needle bearing does not have an inner or outer ring. Rollers (or needles, as they are also called) “work” along the surfaces of the piston pin and connecting rod
If the engine cranks hard at start (both with a kickstarter and an electric starter), extraneous sounds are heard from the engine (hum, constant noise that changes with changes in crankshaft speed, knocking), a noticeable drop in power - all this may indicate that some Some of the bearings have failed.
The camshaft also rotates on roller bearings
However, the same symptoms may indicate other malfunctions of the power unit - in this case, it would be wise to contact a workshop for a more detailed diagnosis of the scooter.
SCOOTER. GENERAL PRINCIPLES FOR REMOVAL AND INSTALLATION OF BEARINGS
Radial ball bearings are most often used in the design of scooters.
For these types of bearings, a single removal and installation method is used. The old bearing is usually knocked out of its seat using a hammer and drift (for more details, see Front wheel bearings - replacement
). If the bearing seat is not through, then the bearing is removed using a two-jaw or three-jaw puller.
ATTENTION!
A bearing removed from the seat by any of the above methods in most cases cannot be reinstalled, since the force when removing the bearing is applied to the inner ring, the entire bearing is subject to strong lateral overloads, for which the bearing is not designed, and as a result of which it is deformed and narrower. cannot perform its functions. Most likely, a reinstalled bearing will fail very quickly.
In garage conditions, it is most convenient to press bearings using socket heads and a hammer.
- Lubricate the outer ring of the bearing with a small amount of oil or grease.
- We install the bearing into the socket strictly perpendicular to the axis of the socket. This will avoid damage to the landing plane.
- We select a socket head of suitable diameter from the tool kit (the diameter of the head should be slightly smaller than the diameter of the outer ring of the bearing).
ATTENTION!
It is unacceptable to press a bearing into the crankcase or housing by impacting its inner ring. Likewise, the bearing cannot be pressed onto the shaft through the outer ring.
• Using light blows of a hammer, press the bearing until it stops in the seat. Make sure that the bearing fits into the seat without distortion throughout its entire path. This will save the seat diameter.
In most cases, bearings are installed in their seats with an interference fit, that is, the seat diameter of the seat is made smaller than the diameter of the outer ring of the bearing. Shafts rotating in bearings are also installed with interference, that is, the diameter of the shaft is greater than the seat diameter of the inner ring of the bearing.
If the fit is small, then the bearing can be pressed in “cold”. If the interference is large, then it is best to use the “hot” pressing method. Most often, bearings are installed in parts made of aluminum alloys (engine crankcase, variator, alloy wheels), which facilitates the pressing process, since aluminum has a coefficient of thermal expansion five times greater than steel.
The essence of “hot” pressing is to use the property of materials to expand when heated. That is, if in a cold state the seat diameter is smaller than the bearing diameter, then when heated it becomes equal, or even larger, and the bearing fits into its seat without effort or distortion, which undoubtedly has a positive effect on the durability of the bearing itself, as well as the landing planes of the parts into which it is installed.
It is best to use a technical hair dryer to heat the part. Most often, it is enough to heat the area around the bearing seat to 100-130 ° C. Of course, you can use a gas or gasoline burner, but the temperature of the open flame is too high, and if the heating is uneven or too strong, the entire heated part can “lead”, that is , the part may become irreversibly deformed.
There is also an alternative method of “hot” pressing. Instead of heating the part, you can cool the bearing itself. To do this, as already mentioned, you can use the physical cooling method - freeze the bearing in the freezer or treat it with a special cooling spray, which can be purchased at auto chemical stores. At the exit from the cylinder nozzle, the spray has a temperature of about minus 40″ C. At a part temperature of about 20 ° C, the temperature difference can reach 60 ° C, which is quite enough to significantly facilitate the pressing of the bearing.
Of course, for particularly large interferences (when the bearing fits tightly into the seat even after the part has been heated), both methods can be used simultaneously. That is, heat the part and cool the bearing.
If there is interference in the bearing-shaft pair, it is also recommended to use the hot pressing method. Only now you need to heat the bearing and cool the shaft.
ATTENTION!
All bearings that do not have a constant supply of lubricant, such as in a motor or gearbox, must be filled with grease. Depending on the assembly method, the bearing must be filled with lubricant before pressing or after, so that the lubricant does not lose its properties when exposed to strong heat.
ATTENTION!
Premature wear of rolling bearings is usually associated with water and dirt entering the bearing, acting as an abrasive material.
content .. 61 62 66 ..
