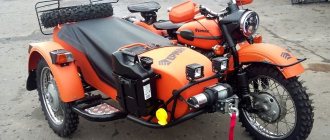
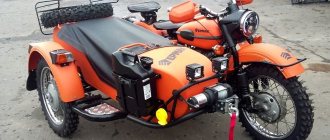
A motorcycle that appears in a dense stream of cars attracts attention. But its active use can make a process such as painting a motorcycle or polishing its individual components (for example, a muffler) a real necessity. How and why to do this, what material or tool to use, how to organize the work? This is very important, because a motorcycle as a vehicle can still be considered a status vehicle, saying a lot about the character and life position of its owner. In addition, it is much more maneuverable and less voracious than a car.
Work order
You can easily master the process of painting motorcycles yourself without throwing away fabulous sums of money. In this case, observe the following procedure.
| Types of jobs | Processes and subtleties |
| Preparation. | At this stage, you need to decide on the upcoming scope of work: choose the color of the paint, the necessary putty and primer according to the parameters. If you have to paint individual components, for example, a tank, then you will need to resort to dismantling all unnecessary elements. |
| Puttying. | This is a layer of plastic material that smoothes out visible surface defects (dents, scratches, etc.). The putty will have to be applied in several layers, and the thickness of each should not exceed 1 mm, and the total thickness should not exceed 3 mm. This is due to the fact that at a higher value, high stresses arise in the thickness of the material, which can lead to the formation of cracks. A pause of approximately 20 minutes is maintained between each layer to ensure complete drying of the putty. The finished layer is processed with abrasives to the required geometry. |
| Padding. | On the prepared and leveled surface of the part, you need to apply several layers of primer with intermediate exposure. This will ensure reliable adhesion of the paint to metal or plastic. |
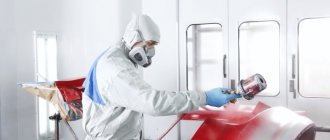
| Painting. | Uniform coverage and color can be ensured by the use of special paint guns. The distance from the exhaust hole to the surface of the part is maintained at approximately 30–50 cm to ensure maximum area coverage with the same layer thickness. You need several layers of paint: the more there are and the thinner they are, the better the final result will be. |
| Varnish coating. | This protective coating is applied in 3–5 layers. The work is carried out very carefully to avoid smudges. It will not be possible to eliminate them without removing the paint layer and repeating the previous steps. |
| Motorcycle polishing. | For this, various polishing pastes are used, which can be purchased at almost any auto store. Thanks to it, it is possible to achieve the ideal shine of a muffler or a painted part made of metal or plastic that has become dull from regular use. In addition, the polish eliminates minor irregularities and scratches on the surface. |
You will have to follow all the steps exactly, otherwise the result will be unsatisfactory and you will have to redo everything.
Graffiti paint
This option is chosen by lovers of bright colors. Graffiti balloons have a huge selection of colors. There are more tones in the color catalogs for street art than there are options for the color of nail polish for your beloved's manicure.
An indisputable plus for the team of these materials is their survivability. They were developed to be applied to completely different surfaces, from brick to wood, with a discount on weather conditions - rain, frost, etc. And if you put in your work, it will definitely please you for more than one season.
Spray cans for graffiti also have a useful option - the ability to choose caps. Cap is a spray can nozzle that regulates the paint flow. Manufacturers of graffiti spray cans have created entire sets with caps. With their help, you can control the width of the paint spray, create thin, rounded or oblique lines.
Provided that the base tone is snow-white, one and a half layers of bright color from a graffiti spray can create truly delightful shades of expression.
Materials and tools used
Even in artisanal conditions, that is, in your own garage, the work of painting a motorcycle can be completed at a fairly high level. You just need to strictly follow the motorcycle painting technology, as well as use high-quality materials and tools. The material component of the process includes such components.
- Dye. What type, texture, color is determined by the owner, based on his own preferences or objective circumstances (for example, during local repairs, you will have to match the color of the new paint to the old one).
- Primer. Another irreplaceable component that provides the required level of adhesion - adhesion of paint to the surface of the part. In addition, some of the primers may contain anti-corrosion additives. This is especially important when it comes to metal parts with pockets of corrosion.
- Putty. This is a plastic mass that is used to smooth out the geometry of painted parts (scratches, dents, holes, etc.).
- Abrasives. Coarse and fine-grained materials used for removing old coatings, as well as roughing and finishing surfaces.
- Protective materials. This is a set of film products designed to protect those parts or components of a motorcycle that should not be painted.
As for tools, special attention should be paid to the means of applying putty and primer masses and the paint itself. In the first case, sets of spatulas are used, but primer and paint will have to be applied using special spray guns (paint guns) to improve the quality of the layer.
How to clean rust from a motorcycle gas tank: several guaranteed methods
Owners of old motorcycles sometimes do not even suspect that the gas tanks of their iron horses have long been in need of cleaning - they are covered with a layer of rust from the inside. It often occurs due to violation of the operating conditions of motor vehicles. In addition, fuel often contains impurities in the form of water, so the occurrence of rust is a matter of time. The filters, of course, function, large pieces of “garbage” will not get into the carburetor, but the problem still needs to be solved, otherwise the tank may become unusable.
"Grandfather's" method
If you scroll through the forums related to motorcycles, this method of removing rust will turn out to be almost the most popular. The following actions are performed:
- the tank is removed;
- the remaining fuel is drained;
- rinse the inside with water;
- pour small nuts inside.
Then we begin to shake the tank vigorously. The impact of the nuts will cause the rust to easily come away from the walls; all you have to do is shake it out. By the way, the nuts can be replaced with small stones.
Important! After finishing the “procedure”, you can pour sand into the tank and shake it as well. This will help remove any remaining rust from the container.
Rust converter
Such “chemistry” is freely sold in any auto parts store. The best option is orthophosphoric acid. It removes rust most effectively, is inexpensive, but requires special care when using:
- you should protect yourself from inhaling chemical vapors;
- Do not allow acid to come into contact with paintwork;
- Be careful not to get the substance on your skin!
Before cleaning, you need to remove the gas tank, drain the remaining fuel and rinse it thoroughly. After this, the tank should be purged or dried with the lid open.
Next, pour half a liter of converter into the tank, close the lid and turn it over several times. This is necessary so that the caustic liquid wets every centimeter of the rusty surface. After 40-45 minutes, open the tank and drain the resulting slurry. The cleaning is not finished yet - you need to pour soda solution into the tank and shake it. Soda will wash away all the “chemicals” and also remove any remaining rust. After this, drain the solution, rinse the gas tank with running water and dry thoroughly. That’s it, then the container returns to its place, you can refuel the motorcycle and go about your business.
Important! If the tank is not very rusty, you can replace store-bought chemicals with Coca-Cola - it contains a lot of phosphoric acid. By the way, this tasty water perfectly cleans plumbing fixtures and tiles.
Electrolyte solution
To implement this method, school knowledge of physics, an electrode, and an electrolyte will be useful. If you don’t want to spend money on the necessary sodium carbonate, you can get it at home. To do this, ordinary baking soda should be heated in the oven to 180 degrees and calcined for forty minutes. As a result, we get exactly the desired carbonate. After this, you need to pour water into the tank and dissolve the resulting sodium in it (for every 15 liters of volume you will need 5 tablespoons).
An electrode is immersed in the tank. Any piece of iron or wire will play its role well, the main thing is that it is not non-ferrous metal - the amount of harmful gases released will be too large. Moreover, the electrode should not touch the walls of the tank, otherwise a short circuit may occur. Next, the most important thing is to connect the cathode (minus) to the body, and the anode (plus) to the electrode. Do not mix it up, otherwise the process will reverse and the tank will be completely covered with rust! Then we connect direct current and wait for the result.
The essence of the method is that the cathode produces hydrogen, and the anode produces oxygen. Restoration occurs due to the influence of the first - it, like sandblasting, removes rust from the walls of the tank, and also restores the metal with the “forces” of iron oxide, that is, rust itself. Please note that this “procedure” should be performed outdoors - during the electrolysis process, many harmful gases are released. If you clean the tank indoors, ventilate it thoroughly.
Important! Do not use stainless steel as an electrode. During electrolysis, hexavalent chromium will be released - a very harmful substance that can cause poisoning and give impetus to the development of cancer.
Epoxy resin
Frankly, not the best solution. The tank is filled half a quarter full with epoxy and turned many times so that the resin coats the inside of the walls. After this we leave it to “freeze”. When cured, epoxy resin forms a glass-like substance. It will prevent rust from occurring. The disadvantage of this method is that if there is a strong blow to the gas tank, the glassy substance may break, after which the owner of the motorcycle will spend many hours removing fragments from the fuel system.
Many different means have been invented to remove rust from a motorcycle gas tank. Some of them are worthy of attention, others are not even worth mentioning. The main thing in this matter is compliance with safety precautions when working with toxic substances. If everything is done correctly, the motorcycle will sparkle as if it had just “arrived” from the showroom, both outside and inside!
98moto.ru
