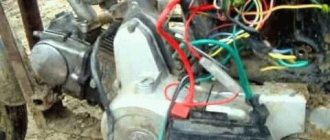
Checking a scooter's generator is a fairly important and sometimes necessary procedure for every owner of this two-wheeled vehicle. Unfortunately, it can be difficult to establish its functionality, especially if you do not have deep knowledge in the field of electrical engineering, as well as the necessary tool - a multimeter tester . If you have such a tool, then before checking the generator you will need to familiarize yourself with the concepts of alternating and direct current, voltage, electrical impulse and tester indicators.
Let's move from words to action
To check the generator on a scooter, you need to remove the plastic around the engine, and then measure the indicators - first of all - voltage . You need to remove the casing as carefully as possible, otherwise you will damage the fastening system.
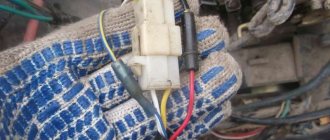
Find the place where the bundle of wires comes out of the engine and move along it to the connector - the place where the generator is connected to the scooter’s on-board network. Then you will need to measure the resistance of the circuit that powers the generator coil. Disconnect the wiring from the generator and measure the resistance of the connector wires. In theory, the resistance in the coil should be from 80 to 150 Ohms. If during measurement deviations from these values are found, you should not immediately think about a malfunction.
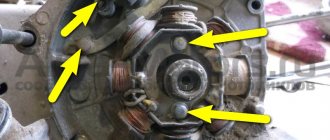
Try removing the generator from the scooter and measuring the resistance of the coil itself by connecting the tester directly to it. When taking readings from the coil, carefully inspect the condition of its terminals - damage that leads to a decrease in resistance may be the cause.
If during diagnostics you find out that the coil resistance readings are within the normal range, then the cause of the malfunction most likely lies in the wires themselves, coming from the coil or at the output points. Check the wiring and make sure there are no shorts in the wires.
If, as a result of this, no malfunctions were identified, you should also measure the variable resistance at the terminals from the ignition unit. If, after checking the generator on the scooter, you do not find any problems, the reason for the poor operation of the generator lies in the ignition unit.
How to check the generator on a scooter?
The scooter generator is one of the most important parts of the scooter; its malfunction means that it is impossible to continue moving; a spark simply will not appear.
But if you doubt whether your generator is working or the reason for the malfunction of the scooter is in another part, it is strongly advised to check the generator. Many people don’t know how to check the generator on a 4t scooter, because this relates more to electrics, which scooterists hardly understand. Also, the verification problem will be in the absence of the main tool - a multimeter tester. Experts identify several reasons for generator failure:
- short circuit formation;
- mechanical failure or wire breakage;
- significant reduction in rotor magnetization.
Before checking the generator for serviceability, we will consider the main faults. Practice shows that the generator breaks down most often on Chinese scooters, where the most common failure is the rotor losing its magnetization. The rotor often loses magnetization precisely because the scooter falls, that is, there is a direct impact. Also, if there is a nearby magnetic field, the rotor discharges.
To check the charge on the generator, you will need to use a proven method; the main task is to find out the output voltage. First of all, completely disconnect the generator from the scooter, then use the control device and start the engine. After starting, you can check the output voltage; the working generator should show at least 5V with the engine running.
The second stage is checking the output voltage of the switch; for this you will need a multimeter. The testing process begins by connecting the commutator to the generator stator, this is done using wires from both parts. Then you need to disconnect the wire related to the switch block from the ignition coil winding terminal. The next step is to connect two terminals - one goes to the engine ground, the second to the main wire on the ignition coil. This main wire is connected to the commutator.
After this, you will have to set the voltmeter to the main “direct current” mode and crank the engine with the kickstarter. By these actions we can find out the output voltage of the switch to the ignition coil. Then connect the switch wire to the coil. Under normal conditions, the output voltage of the scooter should be 200 V. For many, such a test may seem too complicated, because most of the terms are unfamiliar, and not everyone can use a multimeter, but if you really want, you can try and check the generator on a Chinese scooter.
Using a multimeter, you can find out the presence of voltage and its indicators, so you will have to start the procedure by removing some parts of the plastic located in the engine area. On the scooter you will have to find a large bundle of wires, which is located on the engines. Find the wire that should connect to the generator. The next stage is to measure the parameters of the circuit, the main task of which is to power the generator coil with electricity. Important: before this test you will have to disconnect the wiring from the generator, after which you can check the resistance. In normal operating condition, the generator should produce a resistance of 80 to 150 ohms. Deviation from the norm indicates a malfunction of the generator and the need to replace it. In some cases, the presence of incorrect resistance lies in the wiring, which is faulty. This can be determined by removing the generator and checking the coil resistance separately; if it gives optimal data, the reason is in the wires, in particular their short circuits.
Detecting the above faults is not an easy task; most scooter owners are not able to check the generator for serviceability, which is why they turn to specialists. If you have the financial means, it’s easier to buy a new generator, so you decide how to solve this problem yourself.
Checking the Pulse Generator
We measure the resistance of the Hall sensor coil at the switch connector. We set the device to 2 kOhm. We connect one probe to the green wire, and the second to the s/w. Should be 114 ohms. This means the wiring and Hall sensor are working properly.
If the circuit does not show resistance, then this indicates a break in the coil or electrical wiring from the pulse generator to the switch.
Next, we check the functionality of the entire pulse generator along with the mechanical part. Switch the device to 2 mA, leaving the probes in place.
How to check the charging relay on a scooter yourself?
A relay regulator, or voltage stabilizer, plays an important role in the operation of modern scooters, the main task of which is to stabilize the voltage. At a moped speed of 60 km per hour, the generator is capable of generating voltage up to 35 Volts, and without its stabilization, this can lead to failure of all the electronics of the moped, including the battery. The article will tell you what a voltage regulator is and how to check it on a scooter.
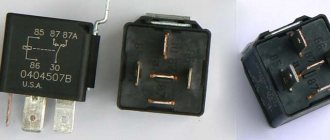
Four-pin voltage regulator relay for scooter
Travel rules
The moped is popular not only because of its budget. Another advantage is that you can ride a moped without having a license and without undergoing a technical inspection. At the same time, no one exempts the moped driver from knowing the rules of the road. A moped is considered more like a bicycle than a motorcycle. Therefore, the moped should not move in the general flow of cars, but as close as possible to the right edge of the road or along a bicycle path.
With a scooter things are a little different. A scooter is a type of motorcycle. Today, a law is being developed to revise the age limits for driving a scooter, as well as compulsory acquisition of a license.
What is a voltage regulator used for?
The relay regulator stabilizes the voltage of the scooter generator at the required level, not allowing it to increase or decrease the value above or below the norm. This prevents on-board voltage surges from going beyond the established limits (depending on the boards this is 12-14 V) and ruining the work of consumers whose service life is designed to be no more than 13 V.
That is, this part takes on the impulses that arise during the operation of the scooter (turning on the headlights, the starter button) and transfers the resulting thermal shock to itself. In this case, all the heat that could settle on the contacts is generated in it and removed through the device.
In addition to stabilizing the voltage, the relay also converts alternating current into direct current, which is necessary for charging the battery.
Moped manufacturers install charging relays with different parameters on scooters and select them individually for each. Depending on the regulator circuit, the connectors also differ. Chinese models usually have 5 terminals (male), while Japanese models have 4.
Starting current coefficient
There is another important nuance that must be taken into account - the inrush current coefficient. When most electrical appliances start up, their power consumption increases for the first few milliseconds. For example, a standard 800 W microwave oven has a starting current coefficient of 2, so in the first second its energy consumption will be 1600 W. In most cases, these coefficients are distributed as follows:
- All heating electrical appliances that no longer perform any functions (electric kettles, boilers, incandescent lamps, irons, heaters, etc.) have a coefficient of 1, that is, they do not consume more energy at the time of startup;
- TVs, computers, laptops and similar equipment have a minimum inrush current coefficient of 1.1.
- Most power tools (jigsaws, drills, screwdrivers, grinders, industrial hair dryers and similar devices) operate with a coefficient of 1.3-1.4.
- The highest coefficient (3-4) is for refrigerators, concrete mixers, vacuum cleaners, water pumps and air conditioners.
Thus, you can calculate that if, during a power outage, 3 incandescent lamps of 100 W each are on in your home, a computer is running at 400 W, a refrigerator at 600 W, and you decide to clean with a vacuum cleaner at 1800 W (starting current coefficient 2.5) then you need a diesel - a 5.8 kW generator or gas generator, while it is advisable to leave some reserve and install a 7 kW power plant. If you try to perform these operations with an electric generator whose power is 4 kW, unwanted overloads will occur and the protection system will work. Therefore, calculating the optimal performance of a home station is of great importance.
Scheme and principle of operation
The operation of the stabilizer for all models is almost the same and consists in distributing the current supplied from the generator to stabilize it and further distribute it to consumers.
The operation of the stabilizer is almost the same for all models
The main peripheral consumers of the scooter include:
- battery;
- indicators;
- light bulbs;
- sensors;
- enrichment agent;
- other nodes;
- starting enrichment.
How does the stabilizer work? The main principle of its operation is to act as a transformer, which lowers the voltage to an optimal level acceptable for the operation of electrical appliances, and also stabilizes the network and prevents unexpected power surges.
If the relay malfunctions, the scooter’s devices fail, quickly wear out or burn out.
To avoid these problems and their undesirable consequences, you should know the basics of the correct operation of the electrical circuit and voltage components of the scooter (Figure 1).
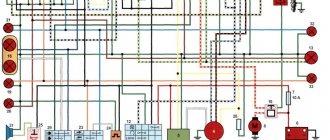
Voltage relay pinout diagram and wiring for main scooter models
Signs that a check is needed
If the battery on your scooter often runs out, and it is still quite new, this means that there is a problem with the operation of the relay regulator. As practice shows, it burns out quite often. If the device is faulty, the battery stops charging completely and loses its capacity. This means you won’t be able to start the scooter with a button; you’ll have to start it with a kickstarter.
Another characteristic sign of incorrect operation of the device may be the frequent burnout of incandescent light bulbs. They themselves are durable and have a good durability, but are quite sensitive to voltage changes. This happens because the optimal voltage in the scooter network is considered to be 12-13 V. Increasing this value even by 2 V reduces the service life of electronics and components by 2 times.
The greater the deviation from the norm, the greater the likelihood that something will burn out in the scooter. Therefore, when starting the scooter from the starter due to a power surge and a faulty relay, the bulbs usually burn out.
Signs of a malfunctioning regulator are identical for all models of Chinese scooters. They are especially typical for charging relays for scooters of Chinese models with an engine capacity of 50 cc. Therefore, before making a decision to replace something in electronics, testing systems and devices should begin with the relay regulator.
For all models of Chinese scooters, the symptoms of a malfunction of the regulator are identical.
Moped maintenance
Like any vehicle, Alpha mopeds require routine maintenance, the essence of which boils down to:
- Replacement of parts and assemblies whose service life has expired;
- Setting up and restoring the factory parameters of the main components and assemblies;
- Visual inspection of the moped to identify damage.
Chinese engines quite confidently “maintain” 20,000 km on our domestic fuels and lubricants without breakdowns or overhaul of the piston group. The main thing is to change the oil in a timely manner, especially during the break-in period.
If you do not operate the moped in harsh conditions (winter, cross-country racing, etc.), then all oil seals and rubber seals will also last a long time.
How to check PP with a multimeter on a moped?
The relay regulator on a Chinese scooter is checked using a multimeter with a voltmeter function. For this purpose, a simple DT-830 (or equivalent) is usually used. It is better to carry out diagnostics and measurement of output voltage with the device removed.
Verification algorithm:
- You need to unscrew the fairing with the central phase and find on the frame a device with 4 wires: red, green, yellow and white.
- Then start the scooter and check the voltage at idle: measure it between the green and red wires, setting the multimeter to the maximum value of 20 V.
- If the multimeter display shows a figure of 14.6-14.8 V, this is normal. For stabilizers on Chinese mopeds, this is the operating standard voltage. If at idle the multimeter shows a value of 15-16 V, this is a high voltage indicator. This indicates a malfunction of the relay regulator.
- Then you need to check the voltage supplied to the lighting lamps. An alternating voltage is supplied to the central low beam (high beam) lamp, so the multimeter should be switched to the alternating current measurement mode with a parameter of 20 V.
- Next, we measure the voltage between the green and yellow wires (green is the general electrical network of the moped). If the multimeter shows a network voltage of up to 12 V, then the electrical appliances are operating without additional load.
- If at idle this value is 16 V or higher, and with a sharp increase in engine speed it jumps to 25 V, the device does not stabilize the voltage and, therefore, does not work. With such readings, the device must be replaced with a new one.
Using a multimeter, the relay regulator is checked on a Chinese scooter.
On 4T scooters, the relay regulator is checked using a tester. Typically a mechanical tester is used for these purposes, although there are also electronic models.
In order to take a measurement, you need:
- switch the device to the “KiloOhm” mode and remove the regulator;
- then place the probes on the first pair of terminals (AB). The tester should show a value of no more than 18 kOhm;
- after that, we change the position of the probes on the terminals in the opposite direction (VA) and measure the voltage again - the arrow on the device should show 0;
- then we install the probes on the next pair of terminals (SD) and measure the readings on this pair;
- swap the probes (DS) and measure the indicator again;
- the remaining measurements have no contact and are not checked. The indicator when checking them should be zero.
In this way, regulators are tested on popular Japanese models with small engine volumes from brands such as Honda (Leard, Dio, Tact), Suzuki, Yamaha.
Replacing a faulty relay regulator on a scooter is not difficult.
How to replace a faulty relay regulator on a scooter?
If the charging current is not supplied to the battery contacts when the generator is working properly, the stabilizer needs to be changed. Replacing it yourself is not difficult.
To do this you need to do the following:
- Place the scooter on the central support.
- Find the location of the device in a specific moped model. If you can’t find it right away, you can use the instruction manual.
- Dismantle the cladding. Depending on the moped model, the stabilizer may be located on the front (under the front plastic), in the rear, or under the seat. In this case, the underseat space is removed along with the seat.
- Unscrew the device from its seat while maintaining the fasteners. As a rule, the relay is attached to the scooter frame with a bolt, or less often with a self-tapping screw.
- Disconnect the connector and secure the new regulator with the fastener. The installed device must have a pinout and connector similar to the one replaced, and be suitable in terms of parameters for this particular scooter model.
- Connect the relay-regulator on the scooter to a standard connector and assemble the remaining spare parts in the reverse order of disassembly.
Fuse box in the trunk of a car
Description of the scheme
| A | Rear window defroster relay |
| B | Trunk lid release relay |
| C | Fuel filler lock actuator relay |
| D | Seat heater relay |
| E | Trunk Lamp Timer Relay |
| 1 | (40A) Rear window defroster |
| 2 | (10A) Heated door mirrors |
| 3 | (20A) Trunk lid opening drive |
| 4 | (25A) Fuel tank filler flap opening drive |
| 5 | (20A) Seat heater |
| 6 | (15A) Trailer electrical connector |
| 7 | (30A) Power seat right |
| 8 | (25A) Electric rear windows |
| 9 | (30A) Left seat electric drive |
How to make a relay regulator with your own hands?
To make a relay regulator with your own hands, you need a diagram and a little knowledge. The model of a homemade regulator is based on the principle of disassembling the generator and outputting a separate end of the wire from ground.
As a diagram, you can take the relay-regulator connection diagram (Figure 3), and on its basis assemble a single-phase generator.
To collect the stabilizer you need:
- disassemble the generator and remove the stator from the engine;
- then you need to unsolder the ground from the generator, solder a separate additional wire for the winding to it and bring it out. This wire will be one end of the winding. The second end is the generator wire;
- After removing the wires, you need to reassemble the generator in reverse order.
With this device, the generator has 2 wires (there should be 3 in total). You can connect the stabilizer according to this scheme:
Do-it-yourself relay-regulator manufacturing diagram
At the end of the process, you need to connect the yellow wire from the old regulator to the “+” terminal in order to obtain a constant voltage on the sides of the network. Check the resulting voltage regulator on the scooter. At this point, the process of creating a homemade device can be considered complete.
The relay regulator is a very useful thing and necessary for the normal operation of the moped. However, it requires attention and constant monitoring of its work. Therefore, if the device fails or its performance is unsatisfactory, it is better to replace it with a new one, the cost of which today ranges from 300 to 500 rubles.
Air conditioning compressor from Chrysler
Around this time, I came across a refrigeration compressor and it turned out to be ideal as the basis for the engine I had planned. It was a Chrysler RV-2 automatic air conditioning compressor. The crank moved the pistons 90 degrees (V-twin design), with a 58.7mm bore and 33.4mm stroke.
In both cylinders, combined with the correct gas path, the displacement was 127.8 cc, which is more than double the volume compared to the Philips MP1002C engine. Being a refrigeration compressor, the design was made thoroughly and with sufficient margin of safety for such strong compression. In addition, this compressor contained a gerotor oil pump, which under pressure lubricated the edges of the large connecting rod bearings. Each aluminum piston had one compression ring and was connected through Alcoa aluminum connecting rods. This compressor turned out to be the most optimal for my idea.
Air conditioning compressor Chrysler RV-2
Years of development
Over the course of several years, I have designed and developed all the necessary components in order to adapt the compressor to work in a Stirling engine. I also designed a tubular support frame to support the engine. The frame is styled to resemble that used on a Philips generator set.
The heater head, displacer and inner cylinder are made of stainless steel 302 pipes of various sizes. I used a coil of copper wire as a regenerator. The cooler, located on the compression side of the engine, was made of aluminum tubes. Used a small 200 watt 12 volt belt driven generator that was originally purchased and intended to run on a garden tractor.
Here is this engine, called SV-2 MK I (Stirling V-2 Mark I):
Generator based on the Stirling engine SV-2 MK I (Stirling V-2 Mark 1)
How to check the generator on a scooter
Checking a scooter's generator is a fairly important and sometimes necessary procedure for every owner of this two-wheeled vehicle. Unfortunately, it can be difficult to establish its functionality, especially if you do not have deep knowledge in the field of electrical engineering, as well as the necessary tool - a multimeter tester . If you have such a tool, then before checking the generator you will need to familiarize yourself with the concepts of alternating and direct current, voltage, electrical impulse and tester indicators.
Let's move from words to action
To check the generator on a scooter, you need to remove the plastic around the engine, and then measure the indicators - first of all, the voltage . You need to remove the casing as carefully as possible, otherwise you will damage the fastening system.
Find the place where the bundle of wires comes out of the engine and move along it to the connector - the place where the generator is connected to the scooter’s on-board network. Then you will need to measure the resistance of the circuit that powers the generator coil. Disconnect the wiring from the generator and measure the resistance of the connector wires. In theory, the resistance in the coil should be from 80 to 150 Ohms. If during measurement deviations from these values are found, you should not immediately think about a malfunction.
Try removing the generator from the scooter and measuring the resistance of the coil itself by connecting the tester directly to it. When taking readings from the coil, carefully inspect the condition of its terminals - damage that leads to a decrease in resistance may be the cause.
If during diagnostics you find out that the coil resistance readings are within the normal range, then the cause of the malfunction most likely lies in the wires themselves, coming from the coil or at the output points. Check the wiring and make sure there are no shorts in the wires.
If, as a result of this, no malfunctions were identified, you should also measure the variable resistance at the terminals from the ignition unit. If, after checking the generator on the scooter, you do not find any problems, the reason for the poor operation of the generator lies in the ignition unit.
Checking the ignition coil
Disconnect the battery and remove the beak on the scooter. We disconnect the connector on the switch and measure the resistance on the coil with a meter. We put one probe in the connector on the black wire, and the second on the negative (green wire). There should be 4 ohms - this means that the wiring and the primary winding of the coil are working properly.
Next step.
We check the second winding of the coil. We take out the probe from the contact of the green wire and insert it into the candlestick instead of the candle. And we leave the other probe on the contact of the h/w wire. The resistance should be about 7.85 kOhm. This indicates that the second winding, the armored wire and the candlestick itself are in good working order.
And if the device shows a break (i.e. does not react at all), then remove and check the candlestick and armored wire separately. If they ring, it means a break has occurred in the ignition coil. It cannot be repaired, it is solid, you will have to replace it with a new one. It's inexpensive and you can always buy it without any problems.
Common causes of problems with scooter generators
In conclusion, it is worth noting that the failure of a scooter generator is one of the most common problems faced by owners of two-wheeled vehicles. If a malfunction occurs, you may encounter external signs such as a poor battery charge, a weak spark, or some problems with the electrical system. Typically, the reason for the incorrect operation of the generator is:
- Short circuit;
- Wire wear;
- A sharp decrease in the magnetization of the generator rotor, etc.
Before repairing the generator, you must carry out diagnostics and find out the cause of the malfunction, and only then begin repairs or take the device to a workshop.
How to check the generator on a scooter
No matter what kind of electric scooter you buy, you need to maintain it in good working order so that you can enjoy it for a long time. Maintenance and inspection of your scooter's electric generator is very important, so you need to know how to properly diagnose and maintain it. Electric scooters and motorcycles require virtually no maintenance. In this article we will talk about the main ways to check the performance of an electric generator.
Table of contents:
Most electric scooters use a hub motor or electric motor that is conveniently integrated into the hub of the front or rear wheel. This does not change the basic design of the device. Since the motor is attached to the wheel, it can move that wheel very efficiently. The generators are easy to install and easy to access for maintenance and repair. When you turn off the electric scooter to return to running mode, the hub functions just like a traditional wheel hub, which connects the tire, rim and spokes. To keep your electric scooter running, you need to regularly maintain your device.
Service Features
Unfortunately, suppliers of motorcycle equipment do not always take into account the specific features of a particular type of vehicle, assuming that low price is more important. In particular, the majority of mopeds supplied to Russia under the ALPHA brand are not designed for our climatic and road conditions.
This manifests itself in the following:
- Most mopeds are used off-road (in rural areas, for trips to nature, fishing, etc.). And factory tires, alloy rims, springs and shock absorbers are not designed for such loads;
- The quality of gasoline and oil is also far from ideal, which affects the performance parameters of the moped;
- The moped is not intended for operation at sub-zero temperatures.
In the same way as wiring for an Alpha moped, other “diseases” of Alpha mopeds can be cured with the help of replacement. In particular:
- Factory tires are replaced with more wear-resistant ones;
- Alloy wheels are replaced by traditional spoked rims;
- Shock absorbers are reinstalled from domestic motorcycles.
Scooter generator device
Hub engines have no disadvantages. First, they add extra weight to the wheel they power. And because they require additional wiring to deliver power, using wheels and changing tires is difficult. With this in mind, you will need to properly maintain your device.
Hub motor cones come in a variety of designs, and there are differences between designs. The smaller geared motor offers an increased rpm range but less power. Gear-type motors are usually large and heavy, but they provide more torque and power to an electric scooter. They are more efficient than gear motors. However, no matter what the design of the generators is, the principle of their operation is the same, which means the maintenance is the same.
Scooter generator device
Taking care of your electric scooter is key to maximizing the performance and usability of parts and components, especially engine components. If you know what kind of motor your device runs on, this article will help you know how to properly test your scooter electric generator.
Preparatory procedures
Where should you start first? Check all electrical connections on your scooter. Most of them can be found in the battery compartment. Make sure they are all tightly connected to each other. At this time, your scooter's battery pack will automatically check the main and individual battery connections. Bundles of wires should not hang freely.
Usually the battery compartment on a scooter is located at the bottom of the floor
Scooter engine initial test
Test the generator by making a direct connection to the battery. You will need to find an insulated wire to perform this procedure and cut 2 pieces approximately 20cm long.
- Raise the scooter so that the rear wheel does not touch the ground.
- Remove the battery cover and locate the 2 wires that come from the engine. Disconnect the motor wires from the controller - this is easy to do by unfastening the clamps.
- Using 2 wires, attach the first jumper wire to the red positive wire inside the motor wire clamp. Do the same with the black negative wire coming from the engine. Then take the red wire and make contact with the positive terminal of the battery and do the same with the black wire at the negative terminal.
Connected battery on a scooter
Setting up and testing the scooter
Check the power interrupt switch. This safety feature "interrupts" engine power when you apply the brakes. If your scooter does not work after adjusting the brakes, then the problem lies in this unit.
Adjustment procedures may vary depending on the scooter model. You can usually loosen the brake adjustment tension by turning the brake adjuster built into the handle toward the lever. This releases the tension on the adjustment and safety switch. Check the owner's manual or contact the motor manufacturer.
Supercharging (pressure injection in Stirling)
To obtain significant output power, it is necessary to increase the pressure in the working area of the engine. Knowing that the Philips engine operated at 12 bar (175 psi), I would like to have an engine that was structurally strong and compact to operate at these levels of internal working gas pressure. The working fluid was air, and it was chosen on the basis of practicality. I wanted my generator to be oil-lubricated, just like the Philips Stirling - this feature greatly contributes to the quiet operation and long service life that you really want in a Stirling engine.
Scooter generator inspection
Remove the generator base plate or cover and try to locate any burnt or melted wires, wire connectors, or electrical components. Also look for loose, disconnected or damaged wires or wire connectors. Pull and push on all individual wires and wire connectors to ensure they are not loose.
Sniff the engine speed control to make sure there is no burning smell. Any components that appear burnt or melted, or have a distinctive odor similar to burnt plastic, are almost always defective and should be replaced. Engines that smell burning should be replaced to prevent damage to the speed controller. Burnt or melted wires or wire connectors indicate overheating of the motor, which can cause the plastic insulation to melt the motors' electromagnetic copper wire windings.
If the insulation melts from the copper windings, a short circuit will occur, which will lead to complete breakdown of the generator. A short circuit can also burn out the speed controller by giving it too much resistance, causing it to work too hard to the point of overheating.
Electric Scooter Motor Test
Data on the health of electric motors is, in most cases, obtained using a braking test. Power consumption is calculated based on current and voltage. During the test procedure, the engine is freely accelerated and stopped to no-load speed. From the moment of inertia and acceleration, the engine torque is calculated and the power at full speed is set. Since the entire measurement time, depending on the size of the engine, is usually less than one second, the engine does not have time to warm up. During this time, it remains at room temperature.
Check the battery with the scooter running. If the scooter is running, you can perform a battery test on it by fully charging the battery and then checking how long the battery lasts. Most electric scooters will have a range of about 30-45 minutes. If the generator runs for less than 30 minutes, it is worn out and may need to be replaced. If the generator runs less than 20 minutes, it is moderately worn and should be replaced. Severely worn generators will only run for 5-10 minutes.
If you have a multimeter and the scooter is in working order, you can check the load on the battery pack by fully charging the battery. Next, lift the rear wheel, connect the multimeter to the battery, and give the scooter full throttle while engaging, but do not lock the rear brake. When you apply the rear brake, the battery will be "stressed" and you can then read its voltage to determine how much it drops. If the battery is in good condition, the voltage will only drop a few volts, however, if the battery is worn out, the voltage will drop more rapidly.
Batteries are an integral part of the operation of an electric generator. You won't get far without good batteries. Always use a charger recommended by the manufacturer. This charger should have an indicator light or sensor that will tell you when the battery is charged.
Do not leave the battery in the charger after charging it. This may damage the battery.
If you notice that your battery no longer holds the same amount of charge that it used to, this means that your battery is getting old and you will need to replace it. Pay attention to corrosion and any chemicals that may be leaking from the battery. If you notice any leaks, replace the battery immediately. If you see corrosion on the battery terminals or connectors, clean the corrosion. Remember to charge the battery after the battery has cooled down. This will help extend the battery life.
Scooter alternator voltage test
If you have a multimeter, you can check the output voltage of the generator. A good battery will have a voltage greater than its rated voltage level even if it is completely discharged and allowed to sit for a few minutes or if it is in storage.
If the battery does not recover above its rated voltage level within a few minutes after being discharged, this indicates a faulty or worn-out battery. When the battery is fully charged and its voltage is below the rated voltage level, this also indicates a faulty or worn-out battery. Good scooter batteries will return above their rated voltage level within a few minutes of starting the scooter.
Checking the speed controller
Look for any burnt or melted wires or wire connectors on the speed controller. If any wires are burned or melted, the speed controller may be faulty. Smell the speed controller for any burning smells. If the speed control smells, it is almost always faulty.
If the ESC doesn't have burnt or melted wires and doesn't smell, it may still be bad. Check all other electrical system components around the speed controller and use the elimination process to determine whether the speed controller is working or not. Speed controllers are too complex to be easily tested. Using a professional diagnostic is the best way to determine whether the ESC is working or not. If all other components of the electrical system are fine, but the scooter does not work, this indicates a faulty speed controller.
You can also watch several videos on the topic:
