In the rear axle housing of a motorcycle there is a pair of toothed gears (the so-called “main gear”), which transmit torque from the transmission to the rear wheel of the motorcycle.
The final drive ratio is 1:4.62 - eight teeth on the drive gear and 37 on the gear wheel.
The gear pair is selected at the factory, so if replacement is necessary, these parts are changed
The required clearances must be ensured by the factory precision of manufacturing the rear axle housing, but given the existing manufacturing tolerances of the parts, special gaskets are used for adjustment. Bridge repair consists of timely replacement of bearings as they wear out and adjusting the gap between the teeth of the main pair. The first sign of a rear axle malfunction is increased noise when driving.
100 - 150 cm3 of transmission oil is poured into the crankcase. Old models of Ural motorcycles have a characteristic “disease” that most owners complain about - oil leaks from the rear axle housing. Basically, this happens due to the poor quality of the seals, but careless assembly or loosening of the seal cover may also be the cause.
| To the page. |
In the rear axle housing of a motorcycle there is a pair of toothed gears (the so-called “main gear”), which transmit torque from the transmission to the rear wheel of the motorcycle. The final drive ratio is 1:4.62 - eight teeth on the drive gear and 37 on the gear wheel.
The gear pair is selected and rolled at the factory, so if replacement is necessary, these parts are changed only together.
The required clearances must be ensured by the factory precision of manufacturing the rear axle housing, but given the existing manufacturing tolerances of the parts, special gaskets are used for adjustment. Bridge repair consists of timely replacement of bearings as they wear out and adjusting the gap between the teeth of the main pair.
The first sign of a rear axle malfunction is increased noise when the motorcycle is coasting.
100 - 150 cm3 of transmission oil is poured into the crankcase. Old models of Ural motorcycles have a characteristic “disease” that most owners complain about - oil leaks from the rear axle housing.
Basically, this happens due to the poor quality of the seals, but careless assembly or loosening of the seal cover may also be the cause.
New motorcycle models are free of this disease
– however, they are assembled almost by hand, and the quality of workmanship has increased significantly since then.
Rear axle of a Ural motorcycle. We change the main pair.
Riding with an 8-wheel drive in the rear axle of a motorcycle did not bring satisfaction, especially since the rear wheel had a 16” rim.
The engine roars at maximum speed, and the speed barely reaches 90 km/h. It was decided to change the main pair in the rear axle of my Dnepr motorcycle. I had a stroller pair (8/37 with a ratio of 4.63), and at the market I bought an accelerated pair (10/35 with a ratio of 3.5). I expected the speed increase to be about 32%.
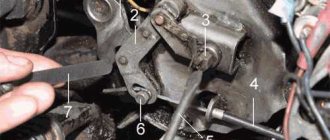
I started by draining the oil from the bridge by unscrewing the bottom plug. I took off the rear wheel, disconnected the brake rod, unscrewed the four nuts securing the bridge to the pendulum, pulled it slightly towards myself, and now I have the bridge in my hands. The brake pads were removed and put aside.
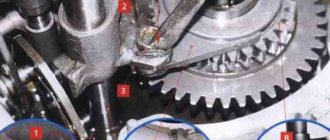
I unscrewed the protective cover (cap) of the hinge; note that it has a left-hand thread. Next, I unscrewed the nut and carefully, so as not to spoil the thread, knocked out the wedge bolt securing the hinge. Lightly tapping the body of the hinge mechanism with a hammer, he removed it from the drive gear shaft.
Unscrewed the six nuts securing the crankcase cover. Some nuts came off along with the studs. By quietly tapping the crankcase cover with a hammer, he disconnected the cover and the crankcase. When I pulled out the cover, needles from the needle bearing fell into the crankcase. I carefully counted them all (45 pieces) and collected them in one place.
To remove the large gear from the crankcase cover, I had to screw in two long bolts in place of the studs securing the crankcase to the pendulum and slowly use them to squeeze out the hub with the driven gear.
I immediately cleaned the threads in the crankcase cover with a sword. Removed the thrust bushing from the driven gear hub.
Next, I unscrewed the aluminum shank nut. It also turned out to have a left-hand thread.
Pulling the shaft, shaking it a little from side to side, he pulled it out of the crankcase. The needle bearing remains in the housing. I removed all the needles from the bearing cage, there were 28 of them.
Removed the collar seal from the crankcase cover.
I knocked out the support bearing (207) through the holes in the hub and loosened the 8 bolts securing the driven gear to the hub. The bolts were loosened and unscrewed almost by hand. Removed the driven gear.
I washed the crankcase body and cover in gasoline.
I started installing the new driven gear on the hub. It turned out that the old mounting bolts did not fit on the new gear. Different thread pitch. I had to look for eight suitable bolts.
To properly tighten the bolts securing the driven gear to the hub, I had to use a motorcycle wheel. By inserting the hub into the grooves, you can easily tighten the bolts to the desired torque.
Next, I locked the bolts and installed the support bearing in the hub.
The drive gear did not fit into the crankcase housing. The inner flange against which the double-row bearing rested was in the way. I ground off the excess metal so that there was a stop for the bearing, but nothing prevented the drive gear from rotating in the crankcase. The crankcase was washed again with gasoline and blown dry with compressed air to remove sawdust.
Having compared the thickness of the old and new drive gears along the shaft axis, I saw that the new one (10) turned out to be “fuller” than the old one (8) by 1.3 mm. I had to take it to a turner and cut off the excess metal from the side of the double-row bearing so that the bearing could fit closer to the teeth.
After grooving, I installed the inner race of the needle bearing on the drive shaft. Using a spark plug wrench, I installed the double row bearing in place.
I removed two old oil seals from the aluminum nut and installed new ones in their place, having first slightly lubricated the side surfaces with engine oil. The seals didn't want to come into place completely, so I had to carefully put them in place through a wooden spacer.
Having thickly smeared the outer race of the needle bearing in the crankcase with lithol, inserted all the needles there and aligned them with a finger in a circle.
Installed the drive shaft into the crankcase and tightened the aluminum nut. The shaft rotated easily on bearings. The gear teeth did not touch the housing. Using a gas wrench, I finally tightened the aluminum nut.
The cardan joint was installed as follows. First, I inserted the hinge onto the shaft and looked into the hole in the wedge bolt. The holes in the joint and on the shaft matched, and this was incorrect. When installed, the wedge bolt would fall completely into the hole.
Using adjusting washers, I ensured that the holes did not coincide, and the hole in the hinge body was slightly ahead of the hole on the shaft.
Next, I inserted a wedge bolt into the hole with the ground edge forward, towards the crosspiece, and hammered it there with a hammer so that the wedge would pull the hinge onto the shaft and the hinge would rest against the adjusting washers. A small part of the wedge remained sticking out outside; he could not go any further. If the wedge goes inside the hinge body, then you need to add shims. I managed to install as many as five washers. After that I tightened the wedge bolt nut. The drive gear was finished.
About the device and operation of the car
Riding with an 8-wheel drive in the rear axle of a motorcycle did not bring satisfaction, especially since the rear wheel had a 16” rim. The engine roars at maximum speed, and the speed barely reaches 90 km/h. It was decided to change the main pair in the rear axle of my Dnepr motorcycle.
I had a stroller pair (8/37 with a ratio of 4.63), and at the market I bought an accelerated pair (10/35 with a ratio of 3.5). I expected the speed increase to be about 32%.
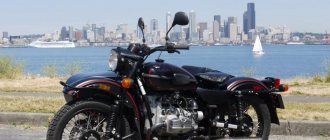
No, the tag says it's brand new! Nobody seems to say Ural twice when they talk about it, but it's named after a famous Russian mountain range close to where these bikes are built; Ural. The process has been modernized a bit since private ownership has taken over.
New management, classic production
Many of those working in Irbit spent 40 years building these machines by hand, giving them an intimate connection that is priceless to Ilya and Madina. A company that values its self-proclaimed sense of morality over profits is unusual, to say the least, but there it is, unapologetically, in living color.
I started by draining the oil from the bridge by unscrewing the bottom plug. I took off the rear wheel, disconnected the brake rod, unscrewed the four nuts securing the bridge to the pendulum, pulled it slightly towards myself, and now I have the bridge in my hands. The brake pads were removed and put aside.
What happened from there has one of two possibilities
Where did they come from originally? A boring story though, the first one is much better and who doesn't love a good story filled with intrigue and subterfuge?
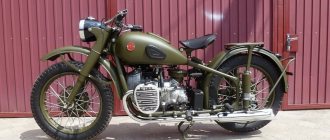
Life in the Urals after Hitler's defeat
Many Russian roads were in worse condition than the noise bombing of a European village, and these cars were in great demand all over the world.
If it could be loaded with ammo, fuel, and soldiers, it could just as easily fetch vegetables, flour, vodka, livestock, or whatever else you needed to get your "Granny" delivered to a remote community. Its simplicity of design, ease of repair and durability made it an easy choice.
I unscrewed the protective cover (cap) of the hinge; note that it has a left-hand thread. Next, I unscrewed the nut and carefully, so as not to spoil the thread, knocked out the wedge bolt securing the hinge. Lightly tapping the body of the hinge mechanism with a hammer, he removed it from the drive gear shaft.
This off-roading is a huge part of the heritage and swagger of modern Ural motorcycles. I was surprised that these were two drive vehicles. When the solid drive shaft is engaged in two-wheel mode, the rear wheel of the bicycle additionally drives the wheel on the sidecar. There's no differential, so it's a locked, positive drive system, which is rough in deep mud, snow, floods or other terrain that would stop the truck dead in its tracks or slowing it down significantly.
At first glance, this ability of the road is not obvious, but watch several videos of the Ural from the road, and it all quickly comes into focus. If there's a wide enough opening, these bikes will go there. Overall Length, in.: 8All Heights, in.: 3 Overall Width, in.: 6 Tall Height, in.: 0Round Gap, in.: 8Other Weight, lbs.: 730Torcule Volume, Cubic Ft.: 9. The Ural is right-handed the side next to the brake pedal that moves when the transmission is in neutral and the clutch lever is held to engage true reverse gear.
Unscrewed the six nuts securing the crankcase cover. Some nuts came off along with the studs. By quietly tapping the crankcase cover with a hammer, he disconnected the cover and the crankcase. When I pulled out the cover, needles from the needle bearing fell into the crankcase. I carefully counted them all (45 pieces) and collected them in one place.
When you release the clutch and give it some gas, it moves backwards just like it does in first gear forward. Very slippery and necessary when moving a 760 lb machine. You'll find a very useful tool kit in the trunk along with a tire pump and canvas for the stroller when not in use. The trunk has plenty of room to store all that gear plus two full helmets with room to rest.
It's also really cool when the Russian national anthem starts playing every time you open the trunk. Okay, maybe that part was in my head, but Ural should really think about making this a regular feature next year.
To remove the large gear from the crankcase cover, I had to screw in two long bolts in place of the studs securing the crankcase to the pendulum and slowly use them to squeeze out the hub with the driven gear.
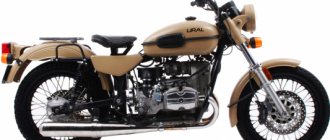
Ural offers four different motorcycles to choose from
The spare tire can be mounted anywhere on the bike by replacing it with the brake rotor.
Pricing: How many rubles will you need for this bad boy
The price seems a little heavy at first, but it is quite low compared to placing the sidecar on another motorcycle with the same Ural ability.
If you want a stroller, Ural is the best way to go
To do this correctly, you will have to change the angle of the front fork to work with the different geometry requirements of the sidecar, and build a strong subframe to connect the two together.
Close only counts in horseshoes and hand grenades
In my research, I came across an interesting alternative option for choosing a stroller.
I immediately cleaned the threads in the crankcase cover with a sword. Removed the thrust bushing from the driven gear hub.
Jens Biederstadt of Edmonton, Alberta Custom Style builds swivel or recline sidecars that can be easily attached or detached in minutes for many different makes and models of motorcycles. The pivot point allows you to ride the motorcycle normally, unlike the Ural, which cannot be tilted in corners when steering it.
However, he is working on it. Some of you reading this may be wondering how reliable a Russian car can be. This is a fair concern because in the early days all the parts were made in Irbit from the best materials they could get behind the Iron Curtain. This left a lot to be desired when it came to bearings, electrical and braking quality on the Ural.
Pulling the shaft, shaking it a little from side to side, he pulled it out of the crankcase. The needle bearing remains in the housing. I removed all the needles from the bearing cage, there were 28 of them.
Machines built in the last few years are years ahead of previous ones because new owners are serious about making these bikes a legitimate contender in the niche adventure market. If outdoor adventures aren't your forte, you can still impress your friends with the bike's ability to handle outdoor obstacles or city challenges. Electronic fuel injection Hydraulic steering wheel damper Triple disc disc brake New overall fit and finish.
This system precisely controls fuel delivery and ignition while allowing the cylinders to interact with each other for better idling and balance. The throttle bodies have been specifically designed to maximize performance while minimizing modification to existing engine components.
Removed the collar seal from the crankcase cover.
I knocked out the support bearing (207) through the holes in the hub and loosened the 8 bolts securing the driven gear to the hub. The bolts were loosened and unscrewed almost by hand. Removed the driven gear.
We've completed the package with a new air intake and an improved cam profile. The new air chamber is almost twice as large in volume. This allows for less restrictive airflow and better balance. The air intake inlet has been moved to make the system more weather resistant and easier to maintain.
Lubricate and assemble
The camshaft profile has been changed for shorter duration to increase low to mid-range torque. For a motorcycle with sidecars that weighs over 700 pounds, you need a lot of torque to overcome the moment of inertia.
I washed the crankcase body and cover in gasoline.
I started installing the new driven gear on the hub. It turned out that the old mounting bolts did not fit on the new gear. Different thread pitch. I had to look for eight suitable bolts.
What is included. The engine now features a redesigned front cover that includes a standard oil filter. The instrument panel has been redesigned to include fuel gauges and engine management indicators. Drum brakes required the rider to apply more force to the brake pedal. This configuration also required more frequent maintenance and adjustments.
The caliper also includes a mechanical parking brake function. What it does The new system provides significantly increased braking power while requiring less rider effort. Having three separate braking systems provides maximum redundancy and the ability to fine-tune the entire system.
To properly tighten the bolts securing the driven gear to the hub, I had to use a motorcycle wheel. By inserting the hub into the grooves, you can easily tighten the bolts to the desired torque.
When developing the rear disc brakes, we completely redesigned all wheel hubs. They currently use standard sealed bearings with additional protective seals. Rear hubs no longer use sanding discs. They are now equipped with replaceable hardened bolt flanges. The rear wheel hubs no longer need to be replaced due to worn drive splines.
The parking brake control lever has been redesigned and conveniently positioned to make operation easier for the rider. The introduction of disc brakes has allowed us to develop a new final drive housing that is lighter and more versatile across the range. Like the current Ural, a steering damper with mechanical friction is used. This simple design, while adjustable, does not provide consistent control across different riding situations. Thus, the motorcycle requires constant input from the rider.
The drive gear did not fit into the crankcase housing. The inner flange against which the double-row bearing rested was in the way. I ground off the excess metal so that there was a stop for the bearing, but nothing prevented the drive gear from rotating in the crankcase. The crankcase was washed again with gasoline and blown dry with compressed air to remove sawdust.
What will happen. The new system features an adjustable hydraulic damper with 18 positions. These damper characteristics have been carefully selected for use on our sidecar motorcycles and confirmed after extensive on-road and off-road testing.
What is he doing? Riding a bike equipped with the new damper requires less rider input, feeling more "planted" and connected to the road surface. As an added benefit, the hydraulic damper reduces the amount of stroller yaw. For stroller newbies, this makes the transition from two wheels to three wheels easier.
Having compared the thickness of the old and new drive gears along the shaft axis, I saw that the new one (10) turned out to be “fuller” than the old one (8) by 1.3 mm. I had to take it to a turner and cut off the excess metal from the side of the double-row bearing so that the bearing could fit closer to the teeth.
In conjunction with the development of the steering damper, we have also included newly developed upper and lower triple clamps. These bridges are now made from forged aluminum alloy, which is stronger and lighter. Additionally, the top clamp includes the handlebar mounts.
Getting ready for renovation
The fork legs are now secured with clamp bolts instead of the original factory tapered top mount. In addition to all the performance improvements, the bike has undergone a major redesign. The classic look of the Urals is preserved, but well refined. Some of the improvements include new tips and badges on the gas tank, improved preformed hoses for the fuel lines, breather and reservoirs.
After grooving, I installed the inner race of the needle bearing on the drive shaft. Using a spark plug wrench, I installed the double row bearing in place.
The new instrument panel with modern indicator lamps is more aesthetically pleasing and at the same time better follows the contour of the headlights and the upper triple clamp. Some other small details also add to the overall look. The Ambassador is shot in a very nice bronze metallic paint job with a black drivetrain and new smoked glass windshields for both rider and passenger. Included in the Ambassador package is a one-year premium membership to Revere, a highly acclaimed motorcycle ride app.
If you've ever wished you could take your spouse and your child with you, check out the accessories catalog to add a loveseat or front and rear tractor seats so all three can hit the country. Of course, there is an advantage in that they can see the caves, but splitting the lane is out of the question. “For your off-road escapades, you've got 8 inches of ground clearance covered.”
I removed two old oil seals from the aluminum nut and installed new ones in their place, having first slightly lubricated the side surfaces with engine oil. The seals didn't want to come into place completely, so I had to carefully put them in place through a wooden spacer.
Having thickly smeared the outer race of the needle bearing in the crankcase with lithol, inserted all the needles there and aligned them with a finger in a circle.
Installed the drive shaft into the crankcase and tightened the aluminum nut. The shaft rotated easily on bearings. The gear teeth did not touch the housing. Using a gas wrench, I finally tightened the aluminum nut.
The cardan joint was installed as follows. First, I inserted the hinge onto the shaft and looked into the hole in the wedge bolt. The holes in the joint and on the shaft matched, and this was incorrect. When installed, the wedge bolt would fall completely into the hole.
Using adjusting washers, I ensured that the holes did not coincide, and the hole in the hinge body was slightly ahead of the hole on the shaft.
Next, I inserted a wedge bolt into the hole with the ground edge forward, towards the crosspiece, and hammered it there with a hammer so that the wedge would pull the hinge onto the shaft and the hinge would rest against the adjusting washers. A small part of the wedge remained sticking out outside; he could not go any further. If the wedge goes inside the hinge body, then you need to add shims. I managed to install as many as five washers. After that I tightened the wedge bolt nut. The drive gear was finished.
After that I took up the driven gear. Placed the hub with the driven gear on the crankcase cover housing.
I applied lithol to the groove of the needle bearing on the hub and “glued” all 45 needles to the hub.
I put a new gasket on the crankcase and carefully inserted the cover with the driven gear into the crankcase. I tightened all the bolts and checked the rotation of the shaft. Everything spun without jamming. There was barely noticeable play when the drive shaft rotated left and right. That's how it should be. If, when installing the cover in place, the drive shaft rotates with jamming, then it is necessary to increase the thickness of the gasket or add a second gasket. If the play when rotating left and right is quite noticeable, then the gasket should be removed, replacing it with a thin layer of sealant.
I installed the axle on the motorcycle, filled in 125 grams of transmission oil and went to get new riding sensations!
Gilazov Vyacheslav.
The editors of the magazine thank Vyacheslav Gilazov for the kindly provided information and photographic material.
In a certain sense, the main gear of the Ural could be considered an eternal unit... However, no one is safe from breaking the teeth of the main gear gears. Most of these problems appear on motorcycles with sidecars, whose owners ignore the factory recommendations for load capacity. It’s the same with us: they load until the boat starts to crack. Especially models with a sidecar wheel drive, whose transmission often experiences increased loads when the sidecar wheel touches the road again after leaving it. And many owners of “Urals” and “Dneprs” have to repair broken “bridges”.
Our subsequent recommendations may also be of interest to those users who would like to replace the “sidecar” gears of the main gear with a “nine” gear for “singles” (the name comes from the number of teeth of the drive gear).
Make no mistake, this is not easy to do. Cramming the gears and bearings into the crankcase isn't even half the job. The most difficult thing is to adjust the meshing of the gears and the gap between them. This procedure requires skill, time and patience. In any case, the Irbit Motor Plant ran out of patience (well, the Kiev “Dneprostroitelny” plant has long been covered with a copper basin), and, citing (this was a long time ago) achievements in the manufacture of “bridge” parts with increased accuracy, all adjusting washers were removed from the design. This “innovation” made production easier and cheaper, but, to put it mildly, did not increase reliability; rather, on the contrary. We can't help you here. Advice.
When buying a new “pair” in a store as spare parts (if you can find any at all), pay attention to the fact that the gears are numbered with the same number (before heat treatment, the gears are rolled together in pairs and only then subjected to carburization). Avoid purchasing goods of dubious origin! Along with the “pair”, buy a new collar seal. And prepare paint, preferably “nitra” (it dries faster), and a brush - you will paint the gear, the color is to your taste.
When the preparations are completed, you can get to work:
1.
Before disassembling the “bridge”, drain the oil from it. Unscrew the screws securing the collar seal cover and remove it together with the seal.
2.
Unscrew the nuts and separate the crankcase cover along with the hub and driven gear. When you separate the cover, the hub bearing needles will begin to fall off the hub. Collect them and count them - there should be 45 pieces
3.
Take the rear wheel axle and insert it until it stops, as shown in photo 3. Apply several blows to the end of the axle with a hammer. The inertial forces of such a heavy part as a hub with a driven gear will force it to unpress from the bearing (pressed, in turn, onto the “bridge” cover) or together with the bearing from the cover.
4.
If the hub ball bearing shows signs of wear, use a universal puller to press it off the crankcase cover. Or, if it “stayed” in the hub, push through the holes in the hub. And throw it away, and instead press a new bearing into the hub.
5.
Take the wrench used to adjust the suspension spring preload and unscrew the pinion ball bearing nut (note: left-hand thread). Then remove the rubber ring-seal, the shaped washer and the pack of spacer washers (if you did not remove them earlier when removing the cardan fork from the splined part of the drive gear shank).
6.
Now remove the drive gear with the double row ball bearing from the final drive housing. During this operation, the needle bearing needles of the shank may fall out of the outer race. Don't lose them.
7.
The shank needle bearing practically does not wear out, and its inner race serves as a kind of “carrying pennant” for new drive gears. Try to remove (unpress) this clip with two powerful screws. If this doesn’t work, either grind off some of the teeth with sandpaper to grab the cage with a puller, or even cut off part of the shank with a grinder flush with the cage, and then knock out the unnecessary remnant of the winding gear from the cage.
8.
Take the driveshaft yoke (or entire shaft assembly), new drive gear, double row bearing, spacers, and wedge bolt. Place the bearing on the gear, then the rings, the cardan fork and drive the wedge bolt. In this case, the inner race of the double-row ball bearing, consisting of two rings, will be “clamped” on one side by the shoulder of the shank, and on the other by the cardan fork. This happens due to the fact that one edge of the wedge is beveled (it should “look” forward as the motorcycle moves). When you hammer it in, the fork rides on the bearing, firmly fixing it to the drive gear. The thickness of the package of spacer washers is selected so that the wedge head protrudes a few millimeters above the surface of the fork, and the drive gear rotates easily in the bearing without jamming (but also without noticeable axial play).
9.
It is not necessary to follow the following recommendations, since they are difficult to implement. However, they are the ones that make it possible to achieve the greatest durability and least noise from the “bridge.” The essence of the adjustment is to obtain optimal engagement of the gear pair by axial movement of the main gear gears relative to each other.
Adjustment begins after replacing the gears. Apply a thin coat of paint to the driven gear teeth and completely assemble the final drive. Be sure to install the final drive housing cover gasket! Its thickness directly affects the location of the driven gear relative to the drive gear (the thicker the spacer, the further away the gear). If you use sealant instead of a gasket, then consider the thickness of its layer to be approximately 0.1-0.2 mm. subtracting it from the thickness of the spacer washer. Turn the driven gear of the main gear a few turns and disassemble the “bridge”. Carefully inspect the shape and location of the contact spots on the driven gear teeth. Further, in your actions, be guided by the table with pictures.
From the diagram of the main gear it is clear that the spacer washer is “responsible” for the movements of the driven gear (namely, its thickness, so change it). A little more difficult with the drive gear. You can move the spacer washers to the other side of the bearing and change the thickness of their package. If this movement is not enough, all that remains is to either place washers under the outer race of the ball bearing, or grind off the race itself. If you decide that all this is too complicated, select the thickness of the spacer washer so that the gap in the gear mesh is minimal. This approximately corresponds to the gap recommended by manufacturers of 0.1 * 0.3 mm.
10.
And the last step is to install the collar seal. For this operation, use some old screwdriver without sharp edges - use it to tuck the edge of the oil seal onto the working surface of the hub. Make sure the spring doesn't come off! Install your beloved “bridge” on the motorcycle, fill in where and how much transmission oil is required - and enjoy the soft, silent operation of the unit you have rebuilt yourself......
Messages [1 to 20 of 47]
1↑ Topic by Gregory 08/14/2014 17:24:39
- Gregory
- Experienced
- Inactive
- Registered: 03-08-2014
- Messages: 366
- Reputation: 44
- Motorcycle: “Ural” IMZ-8.103-10
Topic: Which gearbox should I install?
I know this is somewhat offtopic, but I didn’t find the “transmission” section. The point is this. Finally, my favorite “Russian Harley-Davidson” - IMZ-8.103-10 - came into my hands. Brutal device. Now I’m going through it and turning it into a Soviet retro-tourist chopper. Loner naturally. I took off the stroller. And immediately a problem arose. A gearbox, or rather the gear ratio of its bevel pair. For me it is 4.62 at the moment (eight), i.e. standard gearbox for wheelchair users. And I want to have the highest possible speed (36 hp engine). In addition to the eighth gearbox, there are also so-called. “ninth” (3.89) and “tenth” (3.3). I heard that people drove their Urals to
160km/h. So, armed with formulas and conventions of quantities, I sat down here to make smart calculations. As a result, it turns out that at maximum power speed (5600 rpm) and in fourth gear (1.3) with a standard rear wheel 4.00-19″ (tyre outer diameter 690 mm, circumference 2.167 m), the speed is as follows: - from 4.62 (eight) - 121.7 km/h . - from 3.89 (nine) - 140.3 km/h . - from 3.3 (ten) - 170.1 km/h . Thus, it is clear that the old eighth gearbox will have to be changed. But what is the problem? On the ninth or tenth? The fact is that I operated with the rotation speed at which the engine develops maximum power (5600 rpm), but I could not find data about the maximum permissible engine speed. By analogy with the engine of a VAZ car, I can assume that it is somewhere around the mark
6000rpm Torque of the engine is dangerous, especially since there is no tachometer on the motorcycle (according to style rules, it is not required). I'm lost in thought. On the one hand, logic dictates that it is necessary to put a “ten” because... with a pair of 3.89 it’s impossible to reach 160 km/h even theoretically. With a pair of 3.3 this is possible, but the top gear is too long, which does not correlate well with the modest engine power, is questionable. Although I plan to transfer the engine to AI-92 with the replacement of pistons, after which its power will increase to
40hp Please share the experience of people who know the topic. Otherwise, changing the gearbox a hundred times will be quite expensive.
Source
