Many people dream of a cross-country motorcycle, since it gives a person unprecedented freedom of movement. Unlike most sportbikes and city models, such a motorcycle is capable of moving quite quickly even outside good roads, without threatening its owner with falling and injury. At the same time, a cross bike is much easier to control than an enduro bike and other heavy types of equipment, also adapted for off-road riding. However, many simply cannot afford a high-quality motorcycle, because cheap models of real sports SUVs with two wheels are practically not found on the Russian market. Therefore, you should learn how to make a motocross motorcycle with your own hands - this will help you save a lot of money and adapt the resulting equipment to your needs.
Selection and preparation
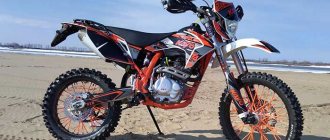
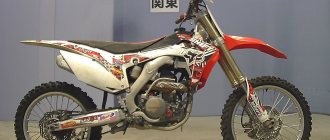
As a basis for a cross-country motorcycle, you can choose a used small-class bike - it is best to choose models with an engine capacity in the range of 125–350 cubic centimeters. The best option would be a road-going Japanese car aged 12–15 years with a well-preserved engine and an intact frame. In addition, you can even choose a Soviet motorcycle - for example, “Voskhod” or “Minsk”. It won't catch the stars from the sky at sporting events, but it will allow you to get a lot of fun from off-road adventures.
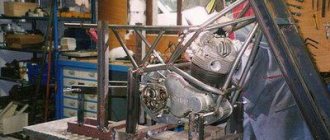
The motorcycle will have to be disassembled - you must remove all the components from it, leaving only the frame. It is better to go through the motor, transmission and drive components, diagnosing possible faults and eliminating them before starting assembly. The frame and tank of the future motocross motorcycle should be cleaned of paint, then covered with putty and a new coating applied according to your wishes. After such preparation, you can begin selecting components and gradual assembly.
Preparing to assemble the motorcycle
First, you need, of course, to decide what configuration the future “steel horse” will have, and also to resolve the issue of all the parts and tools necessary for the work. If you have some experience, some elements can be made independently, for example, on milling and lathe machines or by welding.
If during the assembly process the base is an old motorcycle, then you should not start work with the installation of small parts, universal joints, brake rods, etc. The best solution would be to start puttingty and painting the tanks and fenders. To avoid problems with the motor or parts of the gearbox bridge, they need to be placed in kerosene for a while. A homemade motorcycle will look much more expressive and impressive if its engine crankcases, covers, gearboxes and ignitions are well polished.
The engine of the old device needs to be completely rebuilt, and only then begin installing accessories, which, as a rule, include two main materials: leather and chrome.
Parts selection
First of all, you need to pay attention to the wheels of the future motocross motorcycle, since they will bear the main load. It is better to immediately abandon the use of alloy wheels, since they will not be able to properly absorb strong impacts, which will lead to their rapid deformation. The best option is to buy ready-made wheels based on spokes. A budget-friendly way to get wheels for a motocross motorcycle is to buy rims and install spokes of the required length yourself. There is no need to think long about the size of the wheels and reinvent the motorcycle, since the sport has adopted the standard - 120/70-17 in the front and 160/60-17 in the rear.
If you want to make a cross bike from Minsk, you will have to tinker with converting the rear suspension to a monoshock absorber. It is much easier to disassemble and select a fork of the appropriate size from a 125 cc Japanese motorcycle. All that remains is to choose the shock absorber itself - in this case, it is better to select the desired model based on the weight of the vehicle itself and its rider, and then make adjustments after assembly. Remember that the rear wheel travel of a motocross motorcycle should be 200–280 mm - based on this value, rear suspension components are selected.
Bicycle as a basis for a motorcycle
It's no secret that often the basis for a motorcycle is just a bicycle, which is equipped with all the necessary equipment. When thinking about how to make a motorcycle out of a bicycle, it is important to understand exactly what materials should be used, as well as to know their technical characteristics.
Quite often you can find this option when the engine of a motorcycle-bicycle is a motor from a chainsaw. In this case, it is also worth studying its power, weight and size in detail.
Tuning
Once you're done with the must-have part, you can also upgrade the motocross bike to suit your needs. First of all, this concerns the installation of modern carburetors with high performance - they will inevitably increase fuel consumption, but will allow for stable engine operation at high speeds. You can achieve good results by adjusting the standard carburetors of the resulting motocross motorcycle. However, if you encounter troubles such as loud pops in the exhaust pipe or black exhaust, it is better to return to the standard settings or even contact a specialist. If you are going to make a dirt bike from Voskhod, you will also need to replace the standard paper filter with a foam filter, increasing its throughput without sacrificing performance.
Most experts advise taking care of high-quality tail when creating a motocross motorcycle. In this case, it is designed not only to improve the appearance of your bike, but also to protect its components from impacts on the off-road. Therefore, it is better to purchase a special tuning kit made of high-strength plastic. In addition, to save money, the necessary tail parts can be found at disassembly.
Where to start assembling a motorcycle with your own hands?
Having ready-made motorcycle project diagrams at hand, as well as materials for their practical implementation, you can safely move on to the direct processing of pipes and metal sheets in the process of creating a frame.
Each part of the chassis can be chromed or painted to give it a more aesthetic appearance. This is also done to prevent corrosion of the chassis. You can also create wheel rims with your own hands. Still, why “reinvent the wheel” if many compatriots know from practice how to make a motorcycle from the Urals or Dnieper MT, using the frame, engine and electronics of the latter. By adding other unique nodes to them, you will clearly get an iron horse that is unlike any other.
Having installed an extended fork (preferably adapted for a front disc brake), homemade traverses (created using a steel sheet with a thickness of several tens of millimeters), the bike’s handlebars are mounted using brackets. The brackets are also used to mount the rear shock absorbers. They are considered a secure base for holding the seat back. Here you can fix various panniers and the trunk of the bike.
How to assemble a complete homemade motorcycle
It is better to choose/create a two-level saddle for a two-wheeled custom.
Before creating it, you need to find a thick sheet of steel (about 2 mm). The latter will bend along the contour from the future tank to the rear panel. To make the edges of the saddle more rigid, you need to bead its sides 1 cm down. The soft part of the seat can be made of ordinary thick foam rubber. Leather is best suited for all this as upholstery. When installing the seat, it is necessary to install rubber gaskets on the frame directly under it. Also make sure that in the future your homemade bike can be placed on a leg as easily as possible when parked. For these purposes, it is better to choose a side knife, which is mounted on the left side member of the frame and has the ability to easily recline in the presence of a spring.
The steering wheel should be attached not only to rear-view mirrors, levers, cables, but also to various electrical appliances, which can be purchased together with the body in many places. The devices that look most beautiful are those placed in chrome-plated boxes/cylinders.
You need to know how to make a motorcycle with your own hands as correctly as possible even before installing the throttle handle on the steering wheel. The latter should be made with small turned rubber rings.
Don’t forget about installing turn indicators on your homemade bike. Their absence on a motorcycle can lead to various dangers on the road. You can supplement the classic set of lighting devices (headlight, stop, turn signals) by installing small flashlights near the front headlight. Additional safety will be provided by installing safety arches on a homemade iron horse.
It is important to remember: when making a motorcycle with your own hands, make sure that in the future you will be able to register it with the road control authorities. Any major changes in the design of the bike must be registered with the traffic police/traffic police.
What are the results?
The resulting homemade motocross motorcycle will not be able to compete with factory models, no matter how much you might want it to. However, there is a way to make it truly perfect - for this you need to select components that perfectly match each other, as well as fine-tune them, which can take months or even years. Additionally, a motocross bike with custom components will require more frequent maintenance—you'd be surprised how many problems can arise when riding a homemade machine. Therefore, it is worth considering the option of saving up for an inexpensive used foreign-made motorcycle. Moreover, purchasing high-quality components separately will also cost a considerable amount.
Despite the fact that a pit bike is a fairly cheap vehicle, 50-60 thousand rubles. You still need to have it to purchase it. If finances are difficult for you, but you have a creative streak, desire and ability to do something with your own hands, then in this publication we will share ideas on how to make a homemade pit bike, and then show it in action.
DIY motocross motorcycle
Despite the highest technical indicators of this type of motorcycle, such as a cross-country motorcycle, it is quite possible to assemble it yourself. Of course, nothing prevents you from simply buying a ready-made model, but not always factory samples are able to satisfy all the desires of a particular motorbike enthusiast, besides, such a purchase will certainly not be cheap, and a homemade motorcycle will save a significant amount of financial resources. However, here it is necessary to strictly comply with all installation requirements, otherwise the end result may be very disappointing.
How to make a homemade pit bike
For the manufacture of a pit bike were used:
- pit bike frame;
- engine with three speeds and 5 hp;
- 86cc carburetor, running boards, seat from an Alpha moped;
- Avid Elixir 5 hydraulic brake;
- aluminum pendulum;
- shock absorber (rear) Fastace;
- Rockshox Domane freeride fork;
- wheels: front - from BMX with DTSwiss spokes, rear - assembled from a freeride rim with 2.5 mm spokes from a Soviet moped;
- pipe, mesh, plastic bottle for the air filter (later a purchased filter was installed, since the homemade one was very inconvenient to clean, although it performed its functions perfectly);
- tank – 4 l, from a motorbike;
- halogen headlight 55 W.
This is how compact and light the bike was (50 kg net weight, 55 kg with a full tank):
Technical data.
If we talk about the technical characteristics of the resulting model, they are very good. The maximum speed on a flat surface is 79 km/h, while driving feels good dynamics. I am pleased with the economical fuel consumption - only 1.8 to 2.2 liters per 100 km. Two brakes: front disc for unexpected braking and rear drum for standard braking, perform their tasks optimally.
You can evaluate a self-made pit bike in motion by watching the following video:
We hope that the article was useful to you, and, thanks to the idea presented, you now understand how to make a pit bike, and will soon be able to assemble your own unique and inimitable model.
How I assembled a motorcycle, part 1
So, in 2013, I went crazy and bought a used MT 10-36 with a sidecar.
This unit started from time to time and even less often even drove (
100 km before replacing the cylinder-piston group), I reached my destination on a rope, because after 3 km it stalled and could not start thanks to the licked finger of the kick starter (the creator of the splineless shaft be thrice damned). In general, after 5 hours of riding on a cable, I got to my home garage.
The first thing we purchased was a helmet (cheap - the first mistake), a kick finger - (the second mistake, enough for 10 factories), an ignition switch, spark plug tips, Lucky Molly 10W40 MoS2 oil, an acid battery and steering column bearings, and the stroller was also dismantled .
During my wanderings around the motor market, I became acquainted with a veteran, and I’m not afraid of this word, rickets of the MOTO movement, Khaba, who set me on the true path of alcoholism and provided me with a kick and a life-giving finger that set the engine in motion.
After installing/using these parts at the destination, I tried to get from the garage location to home (30 km - different cities), and upon entering the city, the right cylinder sent me on an erotic walk. Having reached Khaba with grief, the decision was made to replace the cylinder-piston group, at that time I myself didn’t really understand the essence of what was happening, but from memory the ring gap was about 3mm, and the pistons in the cylinders were hanging out like crazy in a tank.
The frame/chassis was also assessed and, as a result, I purchased a ready-made solution for a converted frame (extended) with a front fork and wheels from a 1982 HONDA sabre. (hydraulic front brake with an anti-wedge and two brake discs on the front wheel and a drum brake (inverted rear wheel with a cut axle from MT and pneumatic shock absorbers) from Vladislav.
Before (the tank, mirrors and half of the tidy have already been replaced, the stroller is invisible):
I drove this unit for 2 months and at a rally celebrating the 8th anniversary of our city club Night Riders (hi Sasha!) I stuck the valve on the left cylinder.
As a result, I decided to carry out a complete overhaul, which took 2 years.
The next day after the rally, the engine and everything else was disassembled down to transportable parts and manually transferred to Vlad (from his yard to his house, I drove on the right).
The next year could please me with its pedestrian condition, however, on a tip from guess who, the same Dnepr MT was purchased (which is still running) and mobility was not affected.
INJECTION, beginning (spring 2014)
Thus, I remained mobile and was able to move from dreams to planned implementation of actions for the transition from carburetor to electronic injection.
To begin with, I decided to follow the path I had taken and began searching for ready-made solutions, but apart from an article about the “Caucasian injection” and a note on the opposite, I did not find anything. Sad but true. After that, I became interested in VAZ’s solutions and came to the conclusion that the option is the most optimal in terms of quality / cost and is called “ECU January 7.2” (at first it was 7.2+ but then abandoned). Accordingly, this solution can be considered the starting point for my implementation of this problem.
1) Incredibly, I found on the online trading platform SLANDO (OLX) a lot from a person from Donetsk, the option I needed (mass air flow sensor, DPKV, diesel engine, throttle body, fuel pump with filter, plastic corrugations from the damper to the intake, brains January 7.2+ which, subsequently , were replaced with 7.2, as well as the check valve and mounting adapters for the injectors on the inlet holes of the heads and, of course, the wiring, which was subsequently redone) for an adequate price (the seller could not adapt the firmware) - which I purchased.
Where to start assembling a motorcycle with your own hands?
Having ready-made motorcycle project diagrams at hand, as well as materials for their practical implementation, you can safely move on to the direct processing of pipes and metal sheets in the process of creating a frame. Each part of the chassis can be chromed or painted to give it a more aesthetic appearance. This is also done to prevent corrosion of the chassis.
You can also create wheel rims with your own hands. Still, why “reinvent the wheel” if many compatriots know from practice how to make a motorcycle from the Urals or Dnieper MT. using the frame, engine and electronics of the latter. By adding other unique nodes to them, you will clearly get an iron horse that is unlike any other.
Having installed an extended fork (preferably adapted for a front disc brake), homemade traverses (created using a steel sheet with a thickness of several tens of millimeters), the bike’s handlebars are mounted using brackets. The brackets are also used to mount the rear shock absorbers. They are considered a secure base for holding the seat back. Here you can fix various panniers and the trunk of the bike.
How to assemble a complete homemade motorcycle
It is better to choose/create a two-level saddle for a two-wheeled custom. Before creating it, you need to find a thick sheet of steel (about 2 mm). The latter will bend along the contour from the future tank to the rear panel. To make the edges of the saddle more rigid, you need to bead its sides 1 cm down. The soft part of the seat can be made of ordinary thick foam rubber. Leather is best suited for all this as upholstery. When installing the seat, it is necessary to install rubber gaskets on the frame directly under it.
Also make sure that in the future your homemade bike can be placed on a leg as easily as possible when parked. For these purposes, it is better to choose a side knife, which is mounted on the left side member of the frame and has the ability to easily recline in the presence of a spring.
The steering wheel should be attached not only to rear-view mirrors, levers, cables, but also to various electrical appliances, which can be purchased together with the body in many places. The devices that look most beautiful are those placed in chrome-plated boxes/cylinders.
You need to know how to make a motorcycle with your own hands as correctly as possible even before installing the throttle handle on the steering wheel. The latter should be made with small turned rubber rings.
Don’t forget about installing turn indicators on your homemade bike. Their absence on a motorcycle can lead to various dangers on the road. You can supplement the classic set of lighting devices (headlight, stop, turn signals) by installing small flashlights near the front headlight. Additional safety will be provided by installing safety arches on a homemade iron horse.
It is important to remember: when making a motorcycle with your own hands, make sure that in the future you will be able to register it with the road control authorities. Any major changes in the design of the bike must be registered with the traffic police/traffic police.
How are engines for BMW motorcycles assembled?
Homemade motorcycles for cross and enduro
Moderator: Neposeda
- Go to page:
#1 Post by Mycki » Thu Oct 18, 2012 4:20 pm
I decided to create the topic “Homemade motorcycles for cross-country and enduro.” The topic was created for discussions of motocross and enduro motorcycles for those people who do not have the opportunity to buy a motorcycle, but do not give up, and sharpen their scooters for this. We post photos of our motorcycles, with detailed descriptions of what was done; We discuss all kinds of tuning options and share our impressions.
#2 Post by Mycki » Thu Oct 18, 2012 4:23 pm
Here is my first mot, the well-known MACACA, which I created with the help of my father, and a person who is registered on this forum as dimooon, for which a huge THANK YOU to them:
— frame from chz-125516 (digested to fit the Minsk engine) and pendulum; — front fork and wheel from IZH-PS; — Minsk engine, slightly boosted; — tank from ShK “Voskhod”, cut off and digested; — self-propelled seat; — the front fender is soldered from a ChZ-Tov one, the rear fender is homemade (from a plastic sewer pipe), and the side numbers are also from the pipe; — I don’t know why the shocks came from (they were higher than the shocks from Minsk and Izh); — the rear wheel is from a road IZH-PS, with a machined rear sprocket, onto which a sprocket from the ChZ-500 (52 teeth) is welded; - standard ignition from 6v Minsk (of which there were very few
) it seems like we ask anyone who is interested in anything))) and don’t forget to throw in your MOTOs.
The main directions of change in homemade motorcycles
Recently, many countries have been holding exhibitions where designers present their homemade motorcycles. At such exhibitions, the imagination of designers is amazing. A motorcycle is an excellent way to implement the most amazing design solutions. Therefore, this motorized vehicle is very popular among inventors.
There is a huge variety of models that represent homemade motorcycles. But they can be classified in three directions.
First direction
The focus here is on off-road capability. They use large inflatable cylinders. Outwardly, such a motorcycle resembles three balls, among which the motorcyclist sits. This also includes motorcycles, instead of wheels on which wheels from tractors or heavy trucks are used. A homemade minibike with very wide tires also belongs to this trend.
Direction two
This is a more aesthetic sphere. Here designers are trying to merge a motorcycle with a car. If the wheelbase of a motorcycle is extended to the size of a car, the motorcycle can look like a very impressive open car. In this case, the motorcycle is mounted on three wheels. The rear of such homemade motorcycles have a variety of sporty and aerodynamic shapes. Some owners can seat five passengers on this motorcycle.