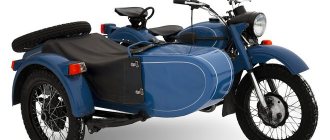
Motorcycle tuning and repair
In this section I will post my personal experience in tuning and repairing a motorcycle, as well as various motorcycle improvements that can help in a critical situation.
Everyone who loves their motorcycle tunes it in their own way, depending on what they want to achieve. For example, they install forward flow on city motorcycles to roarly accelerate cars in traffic jams, fans of stunt riding hang motorcycles with arches and sliders, move the rear brake lever to the handlebars, etc.
My motorcycle must, firstly, take me to work every day, and secondly, be able to travel far. Based on this, various improvements are being made.
How I repaired a motorcycle
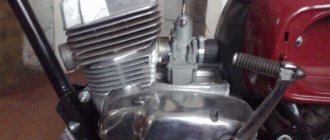
This story happened almost immediately after I joined the ranks of motorcyclists. After riding my brand new (new to me, but it was from 1998) motorcycle, I parked it in the garage for 3 days. I don't remember for what reason, but it doesn't matter. After those same 3 days, I came to the garage in the hope of spending a day off behind the wheel of my iron horse, cutting through the open spaces of the Minsk city.
The gear is on, the garage door is open. We turn the key in the lock, turn on the starter enrichment (suction in Russian), and press the power button. The motorcycle turned the starter, but did not start. Well, OK. He probably needs to stand and think. Attempt number 2 - the same garbage. it turns, but doesn't catch on. In general, after suffering like this for about 20 minutes, taking smoke breaks and checking to see if the spark plugs were flooded, I sat down the battery. OK. We put the battery on charge and go read the manual and forums.
The next day I came with the intention of leaving the garage. History repeated itself exactly, but now I checked the spark plugs every time.
When the battery started to die, I decided to try starting the motorcycle using a pushrod. He pushed for a long time, sweated, went crazy and generally became very angry. At the last push, I decided that I simply didn’t have the strength to push the motorcycle while sitting on it, so I decided to push the motorcycle and run from the side of it, and at the moment of the start, jump with my ass on the seat, in order to give pressing force to the rear wheel. As a result of my efforts, my palms were torn off and the motorcycle was lying on its right side.
Then there was a working week, during which I studied the power supply and fuel lines of the motorcycle, bought new spark plugs, checked the high-voltage wires, and in general a lot was done.
Somewhere in the middle of the week, my good friend said that he knew what the problem was. We arrived at the garage and Afanasy (name changed) walked up to the motorcycle with a proud look and stared at the fuel tap. It is worth saying (for those who are not in the know) that on many motorcycles the valve has 3 positions - ON, OFF, RESERVE. My faucet was a vacuum one, i.e. Due to the vacuum from the carburetors, it opened itself and it also had 3 positions: GASOLINE, RESERVE, PRI. This is the very thing - this is the mode of free flow of gasoline. But I have deviated from the topic. My friend assumed that I, like the last loser and noob, forgot to open the tap, but here are the dicks.
Having suffered through the rest of the week with daily battery charging, sticking spark plugs from cylinder to cylinder and other mediocre attempts to do something with the motorcycle, I was ready to take the motorcycle to the service center, but for this I needed a trailer, and a trailer, like a towbar on a car, I'm not here.
But then early Saturday morning HE, THE SAVIOR, appeared at the garage door! Another friend decided to stop by to see how I was doing. The first thing he asked was a question about the faucet, but I’m not an idiot?! Of course the tap is open. But then events began to develop at breakneck speed!
My friend No. 2, let's call him Panteleimon, with a sharp movement jumped up to the motorcycle, took out the key from the ignition and opened the tank. Fuck, not even like that, FUCK said my Savior. The tank was completely empty; there was a little gasoline splashing below the level of the reserve fuel intake, but it was clearly not enough for the start.
As it turned out a little later, my backup fuel intake pipe was leaking, but I didn’t pay attention to it, because... the leak was very small and the leaked gasoline evaporated when it hit the hot engine. The remaining gasoline poured out through it while the motorcycle was standing on the side stand. When I set it level for the start, the fuel turned out to be below the intake hose. Some may begin to be indignant, how come I didn’t smell fresh gasoline? And like this. I thought that a motorcycle should smell like gasoline and oil, it’s a motorcycle!
To say that I felt like a fool at that moment is to say nothing. I wasted 7 days trying to drive a motorcycle. The only good thing was that I didn’t take the motorcycle to service. What was even more offensive was that there was a 20 liter canister with 95 liter gasoline in the garage.
In general, any technology new to a person is fraught with a bunch of secrets, many of which result from the absence of gray matter in the head of that very person. So before you look for a problem in technology, think again where the problem may be in you and your actions.
Motorcycle repair and maintenance.
Honda cb 400 and Honda cb 600 Hornet and other road racers. I will publish articles on the repair and maintenance of these two models of Honda motorcycles in one section, since these motorcycles are structurally very similar, and repair and maintenance can be carried out by analogy. Accordingly, if you see that there is an article on adjusting Hornet carburetors, but not on the CB400SF, just adjust by analogy, almost everything is the same.
BMW F 650 GS and other all sorts of enduros.
Motorcycles are different, but enduro is enduro: spoked tube wheels, technically uncomplicated engines. I will combine articles on the repair of enduro motorcycles into one section; although they are very different in terms of purpose and maintenance, certain analogies can also be drawn.
How to repair a motorcycle?
Deacon's motorcycle can be damaged, for example, as a result of a collision with freakers, trees or rocks. On this page of our guide we will tell you how to repair your bike and restore it to 100% strength.
The current condition of the motorcycle can be checked in several ways. While driving, a tool icon appears in the right corner of the screen - it changes color from white to gray as new damage is received. Additionally, severe damage will change the icon color to yellow, orange, and red. A severely damaged motorcycle will begin to smoke.
Days Gone How to repair a motorcycle in the game? - walkthrough
Deacon's motorcycle in Days Gone is not invulnerable. It can be damaged, for example, by colliding with monsters, trees or rocks. Days Gone How to repair a motorcycle in the game? On this page of our guide we will tell you how to repair your motorcycle to restore it to 100% durability.
The Days Gone guide covers all the secrets hidden in the Bend Studio team's new production. In our guide you will find practical tips, information and tips and secrets to help you master the rules of the game.
The current condition of the motorcycle can be checked in several ways. While riding, an icon resembling tools appears in the right corner of the screen - it changes color from white to gray as new damage is dealt. Additionally, severe damage will change the icon color to yellow, orange, and red. A severely damaged motorcycle will begin to smoke.
Once you have parked your motorcycle, you can read the percentage of its current durability - this information will be displayed on the engine of the car.
Gluing plastic
Repairing the plastic of a motorcycle can be done by gluing parts together. For this we need:
- epoxy resin and hardener;
- fiberglass;
- gloves;
- Castor oil.
The gluing process: First of all, we remove the defective part, wash it thoroughly with hot water, then we clean the areas around the cracks and the ends of the chips, and finally we degrease the parts being processed. Next, we dilute the resin with the hardener; keep in mind that the material will remain in a plastic state for 2-4 hours, so it is better to prepare it in small parts. If you add a little castor oil to the mixture, it will become more flexible, which is especially important for flexible plastics. Apply the finished resin on the inside of the part with a brush in one layer. Next, we place a layer of fiberglass no more than 5 cm wide and cover it with another layer of glue. In total you should get 3-5 layers of mesh, and the final layer is glue. Remember! All work with epoxy resin should be carried out with gloves and safety glasses. Upon completion of the work, leave the part to dry for a day at room temperature. A sign of hardening of the material is the lack of adhesion and structural strength. You can apply light pressure to the seam to test its strength and make sure the material is curing. If everything is satisfactory, the repair is completed, otherwise we completely remove the layer and apply a new one. There is still an outer part left, but it should be treated with putty to prevent damage and then painted over. Gluing is needed to create a strong base, and final work is best done with materials that are more amenable to processing.
Days Gone How to repair a motorcycle in the game? - walkthrough
Deacon's motorcycle in Days Gone is not invulnerable. It can be damaged, for example, by colliding with monsters, trees or rocks. Days Gone How to repair a motorcycle in the game? On this page of our guide we will tell you how to repair your motorcycle to restore it to 100% durability.
The Days Gone guide covers all the secrets hidden in the Bend Studio team's new production. In our guide you will find practical tips, information and tips and secrets to help you master the rules of the game.
The current condition of the motorcycle can be checked in several ways. While riding, an icon resembling tools appears in the right corner of the screen - it changes color from white to gray as new damage is dealt. Additionally, severe damage will change the icon color to yellow, orange, and red. A severely damaged motorcycle will begin to smoke.
Once you have parked your motorcycle, you can read the percentage of its current durability - this information will be displayed on the engine of the car.
Complete damage to the motorcycle (reduced durability to 0%) will prevent you from continuing the ride until you have at least one piece of scrap to repair it (more on this below).
Hot air soldering
To repair the plastic of a motorcycle with heated air, you will need a hair dryer, but not just any hair dryer, but one with a temperature regulator. You can use the cheapest device, but then there is a risk of overheating the plastic, which will lead to the loss of its basic properties. Overheated material will be brittle and may break due to vibrations from driving on normal roads. You will also need a special nozzle with a thin nozzle, approximately 5-8 mm.
In addition to the hair dryer, you will need a large piece of plastic identical to the one being welded. To do this, you should pay attention to the markings of the part; most likely, you will see a product of the PP, RA or ABS brands. Polypropylene PP, for example, melts at 300 degrees and begins to burn at 350, so it should be welded at a temperature of 300 - 340 degrees. Polyamide or RA should be welded at 410 - 460 degrees, ABS at 360 - 400. Soldering process:
- For greater convenience, remove the part from the motorcycle and wash it from dirt and oils.
- We clean the edges of the parts with medium-sized sandpaper, level the edges, and try to make a hollow in areas close to the surface.
- If we weld broken parts, then we lean the pieces against the base and use a heated hairdryer to grab them in several places (from the inside). Otherwise, if you weld the parts one by one, some areas may twist and it will be impossible to achieve a flat surface without leveling with additional materials.
Advice. If the plastic initially twists a lot, then to make it easier to work with, you can fasten it with staples.
- From a piece of plastic with a suitable composition, cut out a strip 0.8 - 1.5 cm thick; this will be our solder.
- From the edge of the crack (it’s better to start from the inside), we begin to heat the seam; as soon as it starts to melt, we lean against the solder and then direct the jet partly to the seam and partly to the solder. As the plastic melts, it will fill the seam; you can help this process by lightly pressing on the plate at the moment when the material has become sufficiently liquid.
- If the fracture shape has many turns, make solder plates with a margin of up to 5 mm, and connect several sections only by complete melting. When the seam is ready, you can begin work on the front part. If you did everything correctly, the internal seam will give the piece of plastic sufficient rigidity, so the external repair will be more of a cosmetic nature. The process itself looks identical, with the exception of the solder strip, which should be made thinner. After welding of the front part is completed, the plastic should be cleaned and, if necessary, a paint coat should be applied to it or the error should be hidden with a sticker that suits the style.