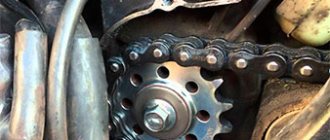
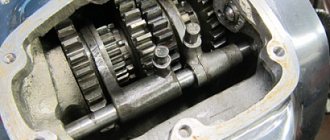
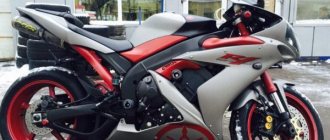
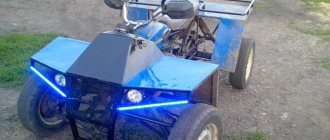
Today we'll talk about replacing the chain and sprockets on a motorcycle. Procedure replacing chain and sprockets on a motorcycle is not as complicated as it might seem, without having the skills of a mechanic, this operation can be done by anyone either in the garage or even in the parking lot under the house, the process itself is no less interesting than motorcycle ride. All photos show mechanisms, chains and sprockets for a motorcycle. Honda VFR 800 1998 release, however, on all other motorcycles, the operation of changing/replacing the chain and sprockets is absolutely identical, with a discount for the structural difference, of course.
About motorcycle chains and sprockets:
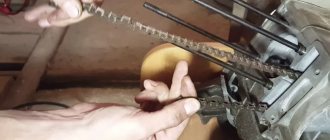
In general the chain and sprockets need to be replaced at the same time; installed new sprockets and a new chain rub against each other over time. As they wear out, the teeth of the sprockets bend, become bent, break off, and “chipped” teeth appear. By installing a new chain on old sprockets, you immediately reduce the “life” of the chain by two or even three.
(green in the center - if at least one tooth is bent, the star is replaced, hooked - bent, fairly straight - relatively straight)
Look and feel good
The cost of this repair depends greatly on the type of motorcycle you ride and the quality of the parts used. There are chains on sale for 4 thousand rubles , as well as expensive ones costing 11-12 thousand rubles .
The time it takes to complete the job can also vary greatly depending on your experience and how much of a process you want to clean your bike.
Replacing the drive chain is one of those maintenance items that can be performed even by a novice motorcyclist. A minimum number of specialized tools are required to complete the task. If the chain was not in the best condition, a new part can make your motorcycle quieter and smoother to ride.
The season is coming, so prepare your motorcycle in advance so that it doesn’t let you down!
Which chain and sprockets are best to purchase (manufacturer)?
As a buyer, I would recommend, tested personally and by real experts:
Chains for motorcycles : from DID , RK , EK , Regina , Tsubaki , Izumi , Iris . (The chains of some manufacturers are little known, either Japanese or American, but their chains are no worse than the same chains for motorcycles from DID ). The color of the chain does not affect its strength, just “show-off”, but the type of gaskets is better than X-Ring, XSO-Ring than a simple O-Ring , however, not all motorcycles are suitable for X-Ring series chains (see the manual/book for your motorcycle ).
Motorcycle sprockets : from RK , EK , DID , JT Sprocket’s (the latter manufacturer is popular because it produces high-quality chains for almost any motorcycle).
Hard work
Replacing the chain cannot be called particularly easy, although this operation does not require any special technical knowledge. The problem is that there are a huge number of nuances - the transmission mechanism can be overtightened, crushed, or simply mounted incorrectly. Therefore, when performing work, you should check all recommendations and use only high-quality tools. If you do not feel confident that you can perform all the procedures correctly, it is better to entrust the chain replacement to specialists. A motorcycle service station will help you make repairs in the shortest possible time, and will also guarantee the reliability of the transmission.
The chain must be replaced when:
- The chain is completely stretched and there is simply nowhere to tighten the chain further
- If the chain has O-shaped spacers, then you need to look at each link to determine the degree of their wear; if the chain definitely has O-shaped spacers, and they are not in half or even 10 links (for example, out of a 120-link chain), then you need to replace the chain in deadlines (however there are chains without O-rings!)
- You need to be attentive to chain corrosion; excessive rust and grinding, squeaking from the rollers should suggest changing the chain.
Motorcycle chain tension
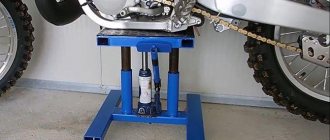
To check the chain tension, rotate the wheel and observe the condition of the chain at maximum tension. Now place the motorcycle on a stand and check how much deflection the chain has. The normal position is when there are two to three centimeters between the two parts of the chain, upper and lower.
For qualified chain tensioning, you can contact a service center. But if you want, you can do it yourself.
The main thing is to strictly follow the established rules.
- To adjust the chain, there must be a certain load on it, so during the procedure, ask someone you know to sit on a motorcycle.
- Prepare your tools for work. You will need 17x19 and 13x14 keys.
- The motorcycle is on a stand. Using a 17x19 wrench you need to unscrew the shaft on which the rear wheel spins. The wheel will loosen and can be moved with the tension bolts.
- With the second wrench, 13x14, you need to unscrew the lock nuts, which are located on both sides of the wheel.
- The chain tension on the motorcycle begins directly. To prevent the wheel from moving to the side, the adjusting bolts must be pulled evenly. When tensioning the chain, periodically check with your hand how tight it is. Just press it with a little force to do this. The chain should not be very elastic. This can lead to rapid wear.
- If the tension is correct and sufficient, first tighten the locknuts of the tension bolts. And after that you need to tighten the rear wheel shaft.
All operations have been completed. You can once again ride your motorcycle on an exciting journey without fear that it will let you down.
Consequences of untimely replacement of the chain and sprockets:
As a rule, an old motorcycle chain can simply break sooner or later; at best, this happens painlessly, both for the motorcycle and for the seller. However, there were cases when the chain got into the rotating wheel, as a result of an accident or flying off the road, and there were more severe cases - damage to the motorcyclist’s leg to one degree or another.
Sprockets without teeth do not grip the chain reliably enough, resulting in poor acceleration and the motorcycle twitching when starting and braking.
By the way, a poorly tensioned motorcycle chain can slip in the opposite direction during fairly sharp braking, and the sensations transmitted through the steering wheel and the rider’s body are not the most pleasant. Twice I saw on Russian forums a question about whether the chain plays a role in braking. My personal opinion plays a role and is not unimportant. when the speed of the star is determined, the front and rear rotate at the same speed if compared to km/h, the number of revolutions is of course different because the small one makes much more revolutions. When braking sharply and the rear wheel is blocked, the rear sprocket stops rotating, the front sprocket rotates, it is at this moment that the stretched chain is able to slip along the teeth of the rear sprocket. Of course, it is better not to block the rear wheel, but there are different situations and it is better to block it for a few seconds. wheel than getting into an accident. As I described above, just in the most critical situation, chain slipping will leave a lot of unforgettable sensations.
Installation
If you are going to change the sprockets, you can do without cutting the chain, since you still have to install the new gear by hand. However, if they are preserved, this operation can significantly reduce the complexity of the work. If you purchased a new chain from a similar manufacturer, you can simply connect it to the old one to achieve the desired result. Otherwise, you can use strong synthetic thread or wire. The resulting long chain must be pulled over the stars, gradually turning them.
To understand how to replace a chain this way, you need to wait until the old gear part is in contact with the sprockets. Be sure to generously lubricate the engaging splines with grease. Now you can remove the old chain and begin installing the new one. The drive sprocket needs to be put in its place and the mount attached. The next step will be riveting the chain, which is considered the most critical process in the entire replacement procedure.
If you're wondering how to rivet a chain using a hammer and chisel, you can read the tips below and do it manually - but the risk of breaking the gear mechanism is very high. Therefore, it is better to take a special riveter that limits the movement of the splines - this will allow you to keep the seals of the part intact. We generously lubricate the pins with a special chain lubricant, after which we put oil seals on them and lubricate them again. Now you need to thread them into the rollers, install another seal, lubricate it again and secure the lock cover on top. We install this link in the riveter so that the pins fall into a special groove - all that remains is to tighten the clamping bolt until they rest against its base.
Now you need to install a special attachment in the tool for riveting the pins. Press it against the surface of the chain - it is almost impossible to miss, since the tool has a special recess that makes aiming easier. Using a torque wrench, tighten the clamp bolt until the end of free play. Depending on the chain manufacturer, this value can be in the range of 15–20 Nm, but you should focus on a sharp increase in the required force to turn the bolt. Do not try to overtighten the bolt, as this will cause the lock to lose mobility, which will lead to accelerated wear of the transmission.
All that remains is to install the rear sprocket and attach the mount. Now you need to reinstall the wheel in reverse order, but also do not tighten the axle. Check that all parts are in place and that you have not lost any fasteners.
Tools for replacing chain and sprockets.
A standard set of open-end wrenches, always a socket “ratchet” with a set of heads, special. press and breaker (optional), hacksaw, possibly a set of hexagons.
Quiet in the motorcycle operating room...
The first procedure when changing the chain and sprockets is to loosen the fastening bolts or nuts, on the rear sprocket you need to loosen the nuts slightly, then remove the protective casing and speedometer cable on the front sprocket (on some models), engage first gear and loosen the clamping bolt with a socket wrench.
On some motorcycle , there is a bracket installed on the front sprocket; there is no bolt at all; we remove the bracket gently and carefully so that it does not jump into the bushes or a dark corner. If there is a plastic or metal casing above the chain, it needs to be removed or lowered so that it can be lifted and does not interfere with the installation of a new chain, also a lot of sand and dust often accumulates under this casing, it is better to clean it all before installing a new chain, the same The situation is also under the front sprocket housing.
Next, if you have a special tool and it is already assembled... install it opposite a rivet, any one, or opposite a previously riveted rivet and begin to rotate the special handle. mechanism until the rivet falls out from the reverse side so that it held the link together, when the handle of the chain braker , add a lever with an open-end wrench.
riveted motorcycle chain
If special. There is no tool, we take a hacksaw and cut the chain link. Next, if you only change the chain, leave the sprockets the same, using a master link and a bracket (included with the new chain) attach the new chain to the old one (if you used a hacksaw and not a chain breaker, you need to tie it with a thread :), then, pulling out the old chain along the movement of the sprockets (forward, that is), you thread a new chain in place of the old one; see below for the final fastening of the chain.
Security line – if you are not reading this article on a website about motorcycles, please contact the author by email: dark[@]pride-u-bike.com, most likely the article has been stolen! Thank you.
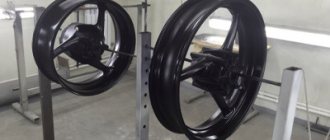
Having completely removed the chain, unscrew the bolts and/or nuts securing the sprockets, then everything is done in the reverse order. The front and rear sprockets are installed, the nuts on the rear sprocket are crimped crosswise, we do not tighten them to madness so as not to break the bolts, we thread a new chain over the new sprockets.
If suddenly the chain turns out to be longer than the required links, special. using a tool, we remove the excess links, carefully measuring before this how many links actually need to be cut (you can carefully cut off the excess!). If there is no special tool, the link that will be a connecting link in the future can be damaged when riveting, it is recommended to first practice on an old chain, I heard that you need to use a chisel and a hammer, the procedure takes a lot of time, but having a special one. the tool can be easily riveted and used to rivet the chain back, the prices for such tools are different, if there is no place in your city where you can buy such a tool, you can always purchase it in our online motorcycle store Pride Your Bike Shop by filling out an application through the “return” form connections."
Ideally, to install a new chain, the chain tensioner should be as far as possible “at the beginning” of the ruler (the green zone on the sticker for some motorcycle models or the embossed ruler on the motorcycle’s swingarm). A chain tensioner is a mechanism, usually installed in or behind the pendulum, that allows you to tension the chain according to the degree of its wear, simply by turning the nuts or bolts.
And which tool is better? To replace the chain of course