Hello.
At the very end of the season I painted my motorcycle black. Everything would be fine, but against the background of fresh paint, the motorcycle seat began to look old and faded, just in contrast. And then bam: winter has arrived) There was a lot of free time, and my hands were itching) I decided to upholster the seat with leatherette so that the motorcycle would look beautiful by the next season.
I'll say two things right away. Firstly, reupholstering a motorcycle seat is not a complicated procedure. Anyone whose hands grow from the right place is quite capable of doing this on their own. It turned out just perfect for me, and I can say this without false modesty. You can see the result of reupholstering the seat in the photo above. Secondly, this article is not a reupholstery guide, it is kind of a report on one Honda CB400 seat reupholstery. In some places I didn’t take the most rational route, but the experience gained during re-upholstery helped my brother and I later, when re-upholstering the saddle on his Sibishka.
What causes saddle wear?
First of all, the material is strongly influenced by sunlight. Leave your pet in the open air for a couple of hours, and ultraviolet rays cause the rich color to fade. The heated upholstery also expands. Therefore, when the owner sits on the seat, small folds form , due to which the material begins to crack and wear out.
Household factors also influence. Accidentally catching a rivet from jeans can damage the integrity of the fabric. After this, air enters the resulting hole and bubbles form. In addition, long-term use causes dents.
Honda CB400 motorcycle seat upholstery.
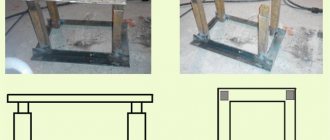
1) Disassemble the motorcycle seat. From the inside, the Honda CB400 saddle looks like this.
In order to disassemble the saddle, you need to unscrew the passenger handle and remove all the brackets. Here's what I got.
I was lucky, the shape of the saddle was still in very good condition.
Then we take the seat cover and the handle for the passenger apart, undoing the old seams with a sharp knife. As we can see, the cover of the Honda CB400 motorcycle (2000 model year) consists of two parts, the seam runs along the circumference where the front part of the seat is adjacent to the gas tank.
The handle for the passenger consists of a nylon base, a leatherette braid and two washers (brackets) for fastening the handle to the motorcycle saddle.
2) We cover the base of the motorcycle seat with a sheet of foam rubber 1 cm thick.
I made the brush from a piece of the same foam rubber, of which there is so much in the roll that the rest will still have to be thrown away.
Place a layer of glue on both surfaces and wait 3 minutes.
We glue.
That's it, let's take it to dry. After the glue has dried, remove the excess foam on the sides.
3) We sew a new cover and handle for the passenger.
We use chalk or soap to outline the old cover with a small margin. Then we cut it out.
We try it on and see where the seam will go.
We baste with a simple tie and try it on. Everything is in place
We stitch on a machine. It is better to have two seams for strength. And we move on to making a handle for the passenger. You'll have to do a little sewing here. With a margin of length, measure a piece of leatherette for the braid and cut it out.
Using white thread (this is more convenient) we outline the places where the seams will go.
Here's what I got.
I honestly admit to you that I have never been a tailor. I looked at how to pass thread in my old sewing machine “Chaika-152 M” on YouTube)) And therefore I can give the most practical advice to lamers like me. It is better to sew with a wide seam, as in the photo below, since the jambs are not noticeable. If you use a regular, “straight” seam, every deviation, even half a millimeter, is very noticeable. I screwed up one belt this way
4) We put a new cover on the motorcycle seat.
Before tensioning, both surfaces, the cover and the saddle, must be coated with glue. Then we staple the cover from the inside, pulling it tightly from the center to the edge. It is better to push the folds towards the corners. I tried it alone. It turned out to be complete garbage.
Then I decided not to suffer and leave it as it was until my brother came to the rescue. At the same time, I thought that the leatherette would stretch a little, which would allow it to be pulled tighter. I waited two days for help from my brother, and it turned out very well. During this time, the leatherette actually stretched a little, and then with four hands we were able to pull it tightly and without wrinkles.
Please note I did extra work. You can reupholster the seat of a Honda cb400 motorcycle in one piece! The staples went over the seam
Then we cut off the excess leatherette from the inside with a knife and punch the staples with a hammer so that they go into the plastic all the way. We get the result.
5) Attach the handle for the passenger.
We measure the length of the handle and attach the staples. Try to pull it harder, because, firstly, the leatherette stretches a little, and secondly, so that the second number does not have the habit of grabbing this handle! The girls we ride should passionately wrap their hands around the heroic chest of the number one, and not hold on to a leather belt! Otherwise, why do we need a motorcycle))?
The new belt turned out to be almost one and a half times wider than the original one. I didn't bother making new staples; I folded the new belt so that the fold was not visible from the outside and secured it with old staples.
Then we cut the belt to length and melt the ends with a lighter so that the base of the belt does not unravel.
Screw on the new handle.
Let's evaluate the result.
I repeat once again, the result exceeded all expectations, but the process could have been significantly simplified. Later, when reupholstering the seat of my brother's motorcycle, we took into account all the mistakes. But more on that in the next article.
All.
Required materials and tools
Before repairing a motorcycle seat, you need to collect everything you need for the job.
List of necessary resources for reupholstery:
- Seat material. Of course, it is best to take leatherette; it is great for all types of designs. However, if desired, any other type of matter that you like will do. So feel free to choose what you think will be perfect. The only thing worth emphasizing is the slipperiness of the material. To avoid falls and discomfort, you should take rough or rubberized material.
- Base (soft part of the seat). Even foam rubber will do for comfortable movement. Any soft base that restores its shape is perfect for these purposes. The layer thickness should not be large. 1-2 centimeters is enough.
- Glue. You need a durable and easy-to-set viscous adhesive. Such as “Moment” will do.
- If the seat is designed for two people and there is a handle (border), then cardboard will be needed to create a durable strap. You can also use a suitcase handle or something similar as a border. Of course, the handle has more of an aesthetic purpose than a safety feature. However, its presence is necessary due to the conditions of operation and transportation of passengers .
Tools:
- a sewing machine will be needed to give the material the shape of the seat and firmly secure the material to the base;
- hammer, for hammering in staples after tightening;
- furniture stapler and staples for it;
- pliers to remove old staples and for other small jobs.
You can not only reupholster the old seat, but also remake it for greater comfort. Having come up with seat options for a motorcycle, sketch out a small sketch to make it easier to imagine the essence of the work.
What materials should be used for upholstery of motorcycle seats?
Most often, manufacturers make motorcycle seats from leatherette. But after prolonged use under the scorching sun, they lose elasticity and crack, causing inconvenience to the biker and worsening the appearance of the motorcycle, ATV or scooter. Definitely, such a seat needs to be reupholstered with new material, which must meet a number of characteristics:
- have increased strength;
- do not cause an allergic reaction;
- provide natural ventilation, pass air through the pores without problems - this quality will be especially appreciated by lovers of long trips;
- shrink minimally at low temperatures - this will protect the seat from cracking and extend its service life.
It doesn’t matter whether you do the job of reupholstering the seat yourself or use the services of a car workshop, you need high-quality material. This is exactly what you will find in the Eco-leather online store https://grozny.ecokoja.ru/. Here you can choose canvases of any color with a variety of textures, and also find everything to change the anatomy of the saddle - dense foam rubber, special glue.
Padding
After purchasing everything you need, you can get to work. So, how to cover a motorcycle seat:
- First you need to remove and disassemble the old seat. In most cases, to remove the saddle, the passenger handle is unscrewed and the brackets are removed. The base is almost always made of plastic. Therefore, do not use much force when soldering the seat, as this may break the frame.
- After removing the chair, disassemble it into its components. If the seat frame is in excellent condition, it can be used further. Otherwise, it is worth sanding it down and soldering it in places where cracks and dents have formed. Separate the cover and passenger handle. Carefully unravel the old seams with a razor blade. Most handles are made on the basis of nylon and leather braiding and mounting bolts.
- After disassembly, cover the frame with foam rubber. If you make a layer that is too thick, you will fall through while riding, and vice versa, a layer that is too thin will provide rigidity. It is recommended to make the thickness approximately 1-2 centimeters.
- Spread the glue evenly on the foam and base. After a short wait, 2-4 minutes, connect both parts.
- Wait until the glue has completely dried, then remove the excess foam from the sides of the seat.
- Now take the old seat cover and trace it with chalk or a piece of soap on the new material. It is worth making a sketch with a reserve. Then cut out the sketch.
- Try it on using a light stitch of thread.
- Machine sew the fabric with two seams for greater strength.
- Cover the passenger handle. Cut out the material as well, with a margin. After gluing, cover the handle on both sides, this will add beauty to the product.
- When the motorcycle seat cover is finished, put it on the saddle and tighten it well so that there are no folds and the fabric is elastic. Before stretching, spread a thin layer of glue on both parts.
- Nail the cover from the inside with furniture staples. Then pull it from the center to the edge, trying to ensure that the folds go towards the corners. This work process is difficult to complete alone, so ask someone to help you.
- After tensioning, excess sections of material are cut off, and the staples are driven into the frame until the end.
- Now install the handle. Measuring in advance at what length the ends need to be bolted. It is better to tighten it as much as possible so that there is less gripping and stretching.
- After cutting the ends of the belt, burn them with a lighter to prevent the material from unraveling. After this, secure the handle from inside the seat with bolts.
This completes the process of reupholstering the seat. As you can see, you should choose the material with which the least problems will arise. It should be moderately elastic, smooth and take shape well at angles.
If you don’t want to do this yourself, you can always contact a studio, where for a small amount, 2-4 thousand rubles, your seat will be completely reupholstered with high-quality and stable material.
Symptoms.
So, this is what my motorcycle seat looked like before the reupholstery.
In principle, nothing too terrible: no holes, no dents, just an ordinary faded seat of a motorcycle that is not at all new. But this is only at first glance. Firstly, a “burdock” has formed over time under the bottom of the first number. It is not visible, since the leatherette is stretched, but in fact the seat has already been pressed in a little. Secondly, on the inside the saddle has already begun to slowly tear.
Symptoms have been identified, let's begin treatment