Description of the model
This model began to arrive in the Soviet Union in the second half of 1984.
This is a transitional model between YAVA-634 and the new design YAVA-638-0-00. New engine, electrical equipment, front fork - this is what primarily distinguishes the “638-5-00” model. Engine. Although its layout has not changed fundamentally, it has undergone a thorough modernization. The cylinders are not made of cast iron, but of an aluminum alloy with a pressed cast iron liner. Aluminum heads now have fins arranged differently. The result is more efficient cooling of the cylinders and heads, and a more uniform distribution of thermal loads. Also, for better cooling, the inclination of the cylinder axes relative to the vertical was reduced from 25 to 15°.
Favorable conditions for heat removal made it possible to increase power by increasing the compression ratio, changing valve timing, and improving purging. Thus, an increase of 12 mm in the center-to-center distance of the cylinders made room for four wider bypass channels instead of two and a second ball bearing in the middle crankshaft support. Therefore, the halves of the engine crankcase and its cover have a different shape and size. The two ball bearings of the crankshaft middle support, separated by a labyrinth seal, are now better lubricated by the oil from the combustible mixture entering the crankcase.
Other changes include a reduction in flywheel diameter from 148 to 144 mm, which improved engine response.
To take full advantage of all the advantages of the new engine, you must use only the fuel mixture specified in the factory instructions, gasoline having an octane number of 90-93, with oil in a ratio of 33:1 for the break-in period and 40:1 after break-in.
The electrical equipment has been completely updated, since the voltage of the on-board network has increased from 6 to 12 V. The heart of the new electrical equipment is an asynchronous generator, which has become 2.8 times more powerful, although it has remained virtually unchanged in size due to the transition from direct current to alternating current.
The new generator is paired with a rectifier using six silicon diodes and a vibration voltage regulator - both are located under the saddle next to the battery. Now these devices provide battery charging already at 1000 rpm of the engine, while in the previous model it began only at 1700-1800 rpm. Thus, even when driving at low speeds (in mud, rain, at night), the battery can be reliably charged.
YAVA-638-0-00 is equipped with a new rear light with a larger luminous surface and built-in side reflectors, a new battery (with a transparent case) and a sound signal. Only the lamps in the direction indicators and driver's instruments have changed. As for the headlight, it has a power of 45/40 W and provides so-called symmetrical light. This innovation helps improve active safety. Another, not so noticeable at first glance, but useful innovation. In order to comply with international standards, the size of the plugs in the electrical wiring has been changed. They now have a nominal size of 6.3 mm and are more reliable.
Technical characteristics
Engine two-stroke, two-cylinder Cylinder displacement 343 cm3 Compression ratio 10.2:1 Octane rating of gasoline 90 according to the research method Cylinder diameter 58 mm Piston stroke 65 mm Maximum power 26 hp/19 kW at 5500 rpm Highest torque 3.3 kgf * m at 5250 rpm Weight in running order 170 kg; The highest speed with the driver sitting vertically is 120 km/h. Length 2110 mm Width 750 mm Height 1070 mm Saddle height 810 mm Ground clearance 130 mm; Base 1335 mm; Tires: front 3.25-18″ Rear 3.50–18″ SUBSCRIBE TO MY PROFILE IT WILL BE MORE INTERESTING THEN YOU WANT THE SAME JAVA WRITE TO ME, HUGE SELECTION OF SPARE PARTS FOR JAVA MOTORCYCLES, ALSO QUALITY RESTORATION OF MOTORCYCLES
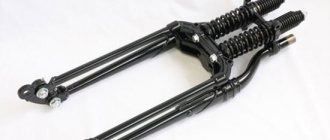
Cleaning the fork. How to change fork oil.
In order to prepare the feathers for a further change of shock-absorbing oil in Java, pour 0.2 liters of kerosene or a similar product into each of them. Then, pressing and releasing the feather tips, degrease the inside of the fork.
- – Using the same procedure as you drained the oil, drain the kerosene.
- – We continue preparing the fork. At this stage, you need to finally rinse the inner surface of the feathers by pouring 0.2 liters of gasoline into each of them. You should use pure motor gasoline, it evaporates faster. After this, move the nibs again until they are completely clean. Drain the gasoline.
- – Dry the motorcycle fork legs thoroughly. To do this, you can use an electric reflector, or simply leave your motorcycle to dry in the sun for a while.
- – Place the rod heads back into their positions in the nibs. Check that the head pin is in the slot specially designed for it; incorrect position of the pin can cause serious damage to the entire mechanism.
- – Tighten the plug bolts. Do this carefully, the threads are easy to damage.
- – Pour shock-absorbing oil for a Java motorcycle into each feather one at a time.
Preventive maintenance of the front fork of motorcycles Java-250, Java-350
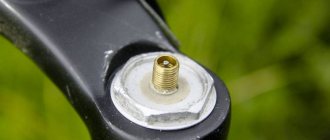
During operation, it is necessary to monitor the tightening of the bolts in the lower bridge and the upper plugs of the main pipes of the front fork and to prevent oil leakage from the hydraulic shock absorbers. To do this, you need to control the tightening of the gland nut and plug bolt. Periodically it is necessary to lubricate the springs and internal surfaces of the casings and change the oil in the feathers. Replacing shock-absorbing oil in the fork legs. The manufacturer recommends the first oil change in the hydraulic shock absorbers of the front fork
after 1000 km. Instructions regarding timing of oil changes during operation in different manuals contradict each other. Changing the oil should not be neglected, since it is not only the working fluid of the hydraulic shock absorber, but also lubricates the moving parts of the fork leg. Contaminated oil will contribute to increased wear of the fork bushings and its other parts. The practice of operating Java motorcycles shows that after running the motorcycle (3000 km), it is necessary to change the oil after 3000-5000 km (depending on operating conditions), and for tourist trips on asphalt after 10,000 km. To fill the front fork stays, you can use a mixture consisting of equal parts of SU and spindle oils of the AU brand or spindle and MS, spindle and autol in a 2:1 ratio. The optimal composition is best selected experimentally, depending on the air temperature and operating conditions of the motorcycle. At high ambient temperatures, the mixture should have a higher viscosity than at low temperatures; when driving on good asphalt roads, it should have a lower viscosity than when driving off-road. With the correct choice of mixture, the fork should react quite gently to road irregularities and at the same time not knock at the beginning and end of the lug travel. If the fork knocks, then the mixture has insufficient viscosity; if the fork does not soften the blows well, the “hard” fork) means the mixture is too viscous. When replacing shock absorber oil in the fork legs, you must adhere to the procedure below. 1. Place the motorcycle on a stand 2. Remove the electrical fuse from the socket located in the battery box. This precaution is necessary so that when manipulating the upper casing on which the ignition switch is located, a short circuit does not occur. 3. Remove the headlight optical element by unscrewing the screw located at the bottom of the headlight rim and disconnecting the lamp socket. Place the optical element so as not to break it during further work. 4. Disconnect the speedometer drive from the speedometer. The union nut can be unscrewed (moved) using pliers, then by hand. It should be remembered that the speedometer drive nut cannot be compressed too much with pliers, as it can easily be damaged. 5. Unscrew the screw connecting the halves of the headlight housing at the rear, it is located behind the ignition switch, remove and remove the washer and screw gasket, then remove the upper headlight housing. 6. Remove the front wheel. 7. Place some containers (cans, etc.) under the ends of the feathers for the drained oil. Unscrew the bolt plug. Then turn it again 1.5-2 turns. By pressing the bolt inside the pen and turning it 90-180″ in any direction, lift the rod head and remove the head pin from the socket in the movable tip of the pen. Oil will flow into the gaps formed. 8. While the oil is draining from the feathers, remove the screw plugs from the main pipes. 9. After draining the oil, set the rod heads to the working position. To do this, you need to turn them back using a plug bolt or using a special bolt. To facilitate the operation of lifting and turning the rod head and to install it in place, you can use a specially prepared bolt. This M6 threaded bolt must be at least 50mm long. Having screwed the auxiliary bolt into the head of the rod by hand until it stops, the head should be turned as if screwing the bolt and at the same time easily pull it down. When the pin hits the hole in the movable tip, the bolt will move down sharply and a metallic knock will be heard. Of course, this will also stop turning the bolt.
Having installed the rod head in place, tighten (not tightly) the plug bolts. If using an auxiliary bolt, screw the plug bolts all the way, but not too tightly. 10. Carefully pour 200 cm3 of kerosene into each feather using a funnel. By pressing on the movable tips of the fork legs, rinse the inner cavity of the fork legs. 11. Drain the kerosene from the feathers and tighten the plug bolts. In this case, you should proceed as described in paragraph 8. 12. Pour 200 cm3 of pure gasoline into each feather. It is better to use motor gasoline A-93, A-95 for this purpose (as it evaporates faster). By pressing on the movable tips of the fork, rinse the inner cavity of the feathers. 13. Proceed as described above, drain the gasoline from the feathers. 14. After washing, the inner cavity of the feathers must be thoroughly dried. To speed up the drying process, you can slightly heat (up to 40-50°C) the movable tips with an electric reflector. You can leave the motorcycle standing in the sun to dry the feathers. 15. After drying the fork, you need to finally install the rod heads into place in the movable tips. It is more convenient to do this as described above, using an additional auxiliary bolt. The pin of the rod head must fit into the hole of the movable tip. Otherwise, the hydraulic shock absorber will work with distortion, which will cause its rapid failure. 16. Having installed the rod heads into the tips, finally tighten the plug bolts. In this case, you should not use a lot of force, since the M6 thread can easily be torn off. 17. Carefully pour 140 cm3 of shock absorber oil into each fork leg. 18. Tighten the screw plugs with reflective washers. Reinstall the upper headlight housing, speedometer drive and headlight optical element. When installing the upper headlight housing, be careful not to pinch the wires between the speedometer and the upper bridge. 19. Reinstall the electrical circuit fuse. 20. Install the wheel into the fork and tighten the axle nut without tightening the bolt on the movable tip of the left stay. 21. Having removed the motorcycle from the stand and holding it by the handlebars, firmly press the fork several times; this must be done so that the lower ends of the feathers take the correct (parallel) position in relation to each other, as well as to fill all the gaps and guide bushings of the fork with oil. 22. Tighten the bolt of the left movable tip, while the motorcycle should not be on a stand and vertically, and the fork springs should be compressed as much as possible. This can be done with an assistant, who should sit on the motorcycle closer to the gas tank and, holding the handlebars, press the fork. His legs should freely reach the ground. 23. Now you can check the operation of the hydraulic shock absorbers of the fork, as described earlier. Changing shock absorber oil on motorcycles that have rods secured in movable tips using an M6 nut is done in the same way as described above, but lifting the rod head and removing its locking pin from the hole in the movable tip, as well as putting the head pin back in place is done using the rod itself, protruding outward from the feather. The nut securing it must first be unscrewed. It should be noted that when changing the oil in the fork legs of all models, the gaskets with washers located under the plug bolts (nuts) usually remain in place. They seem to stick and remain on the tips after unscrewing the plug bolts (nuts). They should not be deliberately “torn off” from the tips, since during subsequent installation after “tearing off” they will seal the joints worse. It is necessary to ensure that they are not lost when draining the oil or when washing the feathers.
Spring lubrication. The front fork springs and the internal surfaces of the casings should be lubricated with grease 1 - 13 at least once a season after removing the fork stays from the bridges.
content .. 21 22 26 ..
Engine + automatic lubrication,
Motul Selection Motul
Products
Motul recommends the following products for the Jawa 350/638 (1983 - 1992)
- MOTUL 800 2T FACTORY LINE ROAD RACING
Below you can see a selection of MOTUL 800 2T FACTORY LINE ROAD RACING oils from our catalog; for more detailed information about this or that volume, follow the links below.
- MOTUL 710 2T
Below you can see a selection of MOTUL 710 2T oils from our catalog; for more detailed information about a particular volume, follow the links below.
- MOTUL BIO 2T
Below you can see a selection of MOTUL BIO 2T oils from our catalog; for more detailed information about a particular volume, follow the links below.
- MOTUL 510 2T
Below you can see a selection of MOTUL 510 2T oils from our catalog; for more detailed information about a particular volume, follow the links below.
These products are recommended for use under the following conditions:
Mode
– Normal
Intervals
–
Motorcycles of Soviet youth
The 80s were a wonderful time, not because the USSR existed then, but because we were 16 years old then.
The first bitch, the first vodka, the first ruble earned and... the first motorcycle. Let's remember - the smell of whose exhaust gases drove us crazy, and made our friends so accommodating, but it was the opposite for our parents and traffic cops.
“Cherry”, aka Jawa 350/634
I received my chase for its characteristic color. It was produced from 1973 to 1982, so in the eighties it was considered a real hit. Not super-duper, of course, but you won’t find sidelong glances among the boys.
And the first thing we did was go and bend the plugs. The appearance changed simply catastrophically. And when asked “why,” they explained with a detached philosophical look - so that the mufflers do not cling to the asphalt when you are riding on the rear wheel.
One step lower on the coolness scale was the Jawa 350 638 of the first modifications; the chrome lining on the entire tank was considered kitsch, for which it received the nickname “mirror”.
Some lucky people who managed to get a tank with stampings for narrow slaps immediately raised their status - they changed the tank and the motorcycle immediately became five years younger and 70 rubles more expensive!
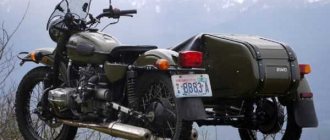
But the “Carrot” (again color), aka jawa 350 638, was considered the pinnacle of coolness. I hope there’s no need to explain its coolness - a new tank, a stunning trim under the saddle, a front fender painted in body color, and 12-volt electrics.
And here you can’t get away with just jammers. Through friends and Dad's acquaintances, we looked for garage mechanics and welded the frame. It looked stunning, but if you’re taking a friend, she just lies on your back, which is nice, of course, but tiring.
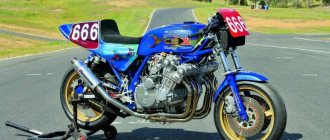
The real competition for these two-cylinder beauties was “Chizet”, aka CZ 472.6 A single-cylinder monster with an inimitable sound. The lot of individualists and ego-eccentrics with their own philosophy of worldview.
The car is rare, but the aura of uncompromisingness and extremeness outweighed the difficulties in obtaining spare parts.
Of the Soviet vehicles, only one motorcycle appeared as a real competitor - “Izh-Planet-Sport”. The 350 cc glass gave this swallow such agility that it allowed him to look down on the “old women” pilots (Jawa 350 motorcycles, early years of production).
My friend, Lekha Yakhov, the owner of such a device, was famous for the fact that at a rest stop (well, there to smoke, chill out for about 20 minutes) he calmly fingered the clutch or front fork. He loved his motorcycle very much.
Well, of course, the owners of the Ural mega-motorcycles stood apart, to which I counted myself. The attitude on the part of others was ambivalent, on the one hand - power and coolness, on the other hand it is clear that the bike was not his own, but wrested from his parents (which for the most part was true).
But this freebie was relative. We had to wait until midnight, or even later, until everyone fell asleep. It’s very quiet to take out the keys to the garage, then unscrew the stroller for 40 minutes, and in the morning, when you can even put matches in your eyes, screw the damn stroller back. Yes, it was impossible to drive quickly and for a long time - the cylinder heads were so hot that they glowed in the dark. And it’s better not to drop the motorcycle, it’s fraught! ((
But even with the stroller, the “Ural” inspired sincere respect in everyone. Andryukha Bormatov, known in narrow circles as Borman, practiced getting into a wheelchair at speed and driving a motorcycle from there. We were all very impressed.
This is all I mean... So many years have passed, all our motorcycles have long since rotted or been sent to be melted down, only their noise and smell are firmly ingrained in our memory cells. It’s so strong that it’s a sin not to make money from it. Do you want to be 16 again? Google it and for 300 thousand you can get such a beauty – NEW! Yes, yes, this is the same “Chakushka” that was not quoted at all among us, but now it’s okay!
Tags: motorcycle
Tags: How much oil to pour into the front fork Java 638
Engine thermal conditions
Often, Java-350 owners complain that the engines overheat and even “seize.” This can only happen from improper adjustment and inept driving of the motorcycle. Even when we rode loaded motorcycles for a long time at maximum speed, overheating was not observed.
How to ensure that the thermal regime of the engine is optimal? First of all, gasoline must match the compression ratio. The choice of spark plugs is also important. When running in and operating a motorcycle in urban conditions, you should use spark plugs with a heat rating of 175 (PAL-195 spark plugs often fail). Driving a Java at high speed requires, especially in the hot season, the use of high-heat spark plugs (225-240).
The ignition timing has a great influence on the thermal conditions of the engine, so it is necessary to check it every 3-4 thousand kilometers, and if new breaker hammers are installed, then after the first 200-300 km.
The ignition timing is set using a control light, connecting it parallel to the breaker contacts. The position of the piston is determined by an indicator screwed into the threaded hole for the spark plug. Setting the ignition timing must begin with the right cylinder (upper breaker). For smooth engine operation, stable low speeds and maximum power, it is important that the advance in the right and left cylinders is the same.
The composition of the combustible mixture also affects the thermal conditions of the engine. It largely depends on the carburetor adjustment. The motorcycle service manual says that the carburetor does not need it. Indeed, at the factory the carburetor is adjusted for driving at average speeds (50-60 km/h). However, on longer journeys the motorcycle tends to travel at higher speeds, in which case the mixture may need to be slightly richer. On Java-350 motorcycles with 2924M carburetors, it is recommended to replace the main jet with another one having a capacity of 115-125. . The practice of operating Java motorcycles shows that engine power decreases sharply due to large deposits of carbon deposits in the mufflers. Therefore, it is necessary to clean and burn the muffler element more often than indicated in the manual. Don't waste time and effort trying to remove it from the muffler using a wire hook. After removing the screw and short plug, insert the T-shaped part of the mounting blade into the element tube and then, wedging it, pull the element out while turning it from side to side.
And one more tip, following which you will avoid engine overheating when driving at high speed. Do not hold the throttle at a constant level, gradually reduce and increase the gas supply, in other words, learn to “feel” the engine.
Reassembling a motorcycle after changing the oil for a motorcycle fork
- – Tighten the caps. Assemble the two halves of the casing together and install it, securing it with a bolt. Assemble the headlight. Connect the speedometer drive.
- – Insert the fuse into the battery.
- – Return the front wheel to its place.
- – Take the motorcycle by the handlebars and push down firmly. This will align the chainstays with each other and distribute the fork shock oil evenly throughout all moving parts.
- – Secure the left handpiece. The motorcycle must be in a strictly vertical position and the forks must be in a fully compressed position.
Incorrect fork position
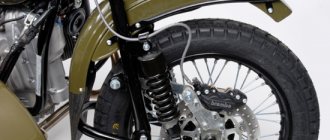
Most malfunctions that appear in mechanisms signal themselves through a variety of knocking and other unpleasant sounds. This lets us know that something is wrong with the motorcycle and it is necessary to detect and fix the breakdown before it causes other more serious damage. The reasons why tapping occurs can be classified into two categories. And the first of them is the incorrect position of the motorcycle fork legs relative to the longitudinal plane. You can find out about the occurrence of such malfunctions when driving on a road paved with cobblestones - then you will hear all the knocks associated with the incorrect location, play or deformation of the fork parts. Let us highlight the main problem areas where malfunctions and knocks most often occur:
- – Fork housing. The covers may begin to click as soon as you begin to actively use the motorcycle. Often this sound appears first of all that can occur in the front fork. Its cause is most often the friction of the casings against the elements of the mud shield. This sound can be identified and distinguished from others by the characteristic rattling of the casings, which is especially noticeable when driving on an uneven road. In order to correct this problem, you should file down the ribs of the brackets where they come into contact with the surface of the motorcycle fork housings. To prevent sawn surfaces from rusting, they must be painted.
- – Springs located under the covers. They may creak unpleasantly if soil, sand or small debris gets under the casing. Squeaks can also appear when there is insufficient oil inside the casings and on the springs. In order to eliminate this, it is necessary to clean and lubricate the moving surfaces.
- – Oil seal nut. Over time, this part may wear out, especially its guide ring may become deformed or worn out, resulting in a squeaking sound. You can distinguish it from the creaking of springs by the fact that in this case a friction sound and small tapping sounds periodically occur. To stop the squeaking, lubricate all parts.
- – Fork tip. It may start knocking if the guide bushings are not properly maintained. For small, rare knocks, it may be enough to disassemble and lubricate all the parts using shock-absorbing oil for forks; in more advanced cases, replacement will be required.
Engine repair
One of the main operations when repairing an engine is changing the piston rings. The need for this arises, as a rule, after 15-20 thousand kilometers of the motorcycle (the maximum permissible gap in the ring lock is 0.8 mm). When replacing for the first time, you can use nominal size rings.
The first grinding of the cylinders is usually required after 30 thousand km. Pistons can operate for approximately 25-30 thousand km, the crankshaft and bearings - over 30 thousand km.
When replacing, boring or grinding cylinders, you should be guided by the factory table given here, which provides four repair sizes (the next one is 0.25 mm larger than the previous one) and within each of them three groups (A, B and C).
The repair number and group index are stamped on the bottom of the pistons produced by the plant. Piston rings are divided only by repair size numbers and are not marked. The diameter of the ground cylinders, by which the group is determined, is measured at a distance of 30 mm from their upper landing plane.
The nominal size cylinders installed on the new motorcycle also come in different groups (A, B and C) - their designation is indicated on the top. Within groups, the cylinder diameter can be larger than the nominal one - up to 0.019 mm. In accordance with this, pistons of the same group (A, B or C) are installed in the cylinders.
The plant also produces a repair piston pin with a diameter of 15.1 mm. The connecting rod upper head bushing Ø15.1 +0.027 / +0.016 is deployed under it.
| Repair size no. | Group A | Group B | Group C |
| 1 | Ø58.25 +0.005 | Ø58.255 +0.007 | Ø58.262 +0.007 |
| 2 | Ø58.50 +0.005 | Ø58.505 +0.007 | Ø58.512 +0.007 |
| 3 | Ø58.75 +0.005 | Ø58.755 +0.007 | Ø58.762 +0.007 |
| 4 | Ø59.00 +0.005 | Ø59.005 +0.007 | Ø59.012 +0.007 |
If it becomes necessary to disassemble the engine crankcase into two halves along the connector (due to a breakdown of the gearbox, failure of the engine bearings), do not forget to remove the piston from the side where the puller is installed to remove the crankcase half. In this case, you should loosen or unscrew the two screws securing the partition between the crank cheeks to the crankcase. The rear screw is placed on the parting line of the crankcase under the carburetor cover, the front screw is also located on the parting line in close proximity to the upper front point of attachment of the engine to the frame.
One of the weak points in the engine is the crankshaft axle seals. A malfunction of the left oil seal is determined by increased smoke from the left muffler or by smoke passing from the ventilation hole under the carburetor cover. This is accompanied by a change in the oil level in the gearbox housing. A defect in the right oil seal manifests itself in the fact that the engine begins to operate unstably at low speeds and it is difficult to start.
When installing new oil seals, pay attention to the internal diameter: it should be no more than 24 mm. If there are no factory ones, you can use any other oil seals that are designed to work on a shaft with a diameter of 25 mm, have a width of no more than 10 mm and are made of oil- and petrol-resistant rubber (for example, IZh motorcycle oil seals). Since their outer diameter will most likely be less than 62 mm (the fitting diameter of the factory oil seal), they must be installed in the engine through an adapter ring, which is machined from duralumin.
To make engine repairs easier, we have produced a number of accessories shown in the pictures. All of them have proven themselves well.