The clutch of Izh motorcycles , as well as all other models, is designed to smoothly connect the crankshaft to the engine power transmission. Without it, it is impossible for the motorcycle to start moving smoothly. It is used in all cases where short-term disconnection of the rotating engine shaft from the power transmission is required: when starting, changing gears, braking.
Izh motorcycles have a mechanical clutch based on the use of friction between the drive and driven discs. It is multi-disc, operating in an oil bath. With this type, a small-diameter coupling can be used due to the large friction area of many discs. The clutch requires maintenance and proper adjustment. Now we will look at the procedure for disassembling and adjusting the clutch, for example we will take the Izh Planet 5 motorcycle; on most other Izh models this is done in a similar way.
Disassembly:
- Remove the carburetor guards, shift lever and kickstarter lever.
- Place the motorcycle on its right side or drain the engine crankcase.
- If the motorcycle is equipped with a separate lubrication system, disconnect the oil line from the intake manifold and the wire from the sensor contact on the left engine cover.
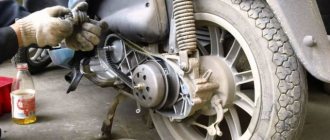
- Remove the left crankcase cover.
- Unscrew the clutch basket nuts and remove all discs.
Assembly:
- Tighten the nut securing the basket to the input shaft. To do this, engage fourth gear. Keep in mind that the threads on it are left-handed.
- Reassemble all discs in reverse order into the bin. Pay special attention to evenly tightening the nuts.
- Install the crankcase cover, having previously aligned the oil pump drive shank with the groove in its drive coupling on the primary drive gear.
Motoclass: how to adjust the clutch on Izh-Jupiter 5 on your own?
Not all motorcycle enthusiasts can afford a BMW 1200, and some simply ignore all the technological innovations of the “West,” preferring Soviet classics.
The only thing is that the owners of such motorcycles experience not only a lack of spare parts, but also a hunger for information.
This fully concerns the adjustment of the gear control mechanism, on which the efficiency of using the vehicle depends.
Functional purpose of the gearshift clutch
Before you adjust the clutch on the Izh-Jupiter 5 motorcycle, it’s a good idea to understand its purpose and principle of operation. The essence of the transmission clutch:
- Ensuring the transmission of torque from the large gear of the motor transmission to the gearbox input shaft.
- Short-term separation and smooth connection of transmission elements to each other.
Izh motorcycles were equipped with a mechanical clutch, the operation of which is based on the friction force between the driven and driving disks.
It is a multi-disc design operating in an oil bath - a classic arrangement that the Izhevsk Machine Plant used until 2008.
Working in tandem, the main chain drive and four-speed gearbox are reliable and proven by many generations of motorcyclists.
When is it necessary to repair and adjust the gear clutch on an Izh motorcycle?
Regardless of the amount of experience the motorcyclist has, the feelings regarding gearbox malfunctions are almost the same:
- At first it seems that the clutch is slipping slightly. After two or three days, confidence appears - yes, it is slipping, because as soon as you add speed, the acceleration rate lags behind the engine speed level. The breakdown is especially obvious when moving uphill.
- The clutch “leads” or the clutch is incompletely disengaged when the control lever is depressed. In such a situation, the disks of the assembly remain pressed against each other and do not stop transmitting torque to the gearbox. You can finally verify such a breakdown after lifting the rear wheel - it continues to rotate in this situation.
If you want to know how to adjust the clutch on an Izh-Jupiter 5 motorcycle, then information about the reasons causing the listed factors would be useful:
- Use thicker oil in winter.
- Weakening of pressure springs.
- Worn clutch discs.
- Wear of clutch control mechanism elements.
In most cases, if signs of slipping or incomplete disengagement of the clutch are detected, a simple adjustment of the mechanism is required. To do this, it is enough to have a “13” key and a slotted screwdriver.
Life hack: how to adjust the clutch on an Izh-Jupiter 5 motorcycle yourself?
The adjustment procedure depends on the design features of Izhevsk motorcycles. The fifth generation is equipped with a shutdown mechanism, which is combined with a gear shift device. Adjusting the clutch control should begin by centering the machine's cam relative to the roller with the lever, which are mounted on the body of the right crankcase cover.
What does a clutch consist of?
In order not to break the clutch, you need to know not only how it works superficially and what its functions are, but also what parts it consists of. The main components include the driven and driven parts, the shutdown mechanism and the pressure system.
The engine rotational torque is transmitted from the flywheel to the drive parts, which in turn transmit torque to the gearbox drive shaft. The frictional moment is provided thanks to a pressure mechanism, which, thanks to the tight coupling of the driven and driven parts, gives the long-awaited result of movement.
Disengaging the clutch is considered important. So one disk, on which springs are located peripherally, is located in a cast-iron crankcase, which in turn is located in the engine block crankcase.
The drive part includes the clutch housing and flywheel, the latter in turn is attached to the crankshaft flywheel using six special bolts. The pressure plate is located in the middle part of the casing. The torque of the pressure plate is transmitted from the flywheel through three protrusions that are located in the disk and enter the casing windows. The driven disk, hub, and drive shaft of the gearbox are the main and mandatory components of the driven part of the clutch.
On both sides of the driven disk there are friction linings made of a copper-asbestos composition (or another metal-asbestos composition), which can withstand unusually high temperatures and are known for their friction properties. The driven disk is connected to the hub with rivets or through springs. These springs are an integral part of the spring-friction damper of rotating vibrations (that is, the damper)
CLUTCH MECHANISM
Clutch mechanism
is a device in which torque is transmitted due to the work of friction forces. The clutch mechanism allows you to briefly separate the engine and gearbox, and then smoothly connect them. The elements of the mechanism are enclosed in a clutch housing, which is attached to the engine crankcase.
The clutch mechanism consists of
:
- crankcase and casing,
- drive disk (which is the engine flywheel),
- pressure plate with springs,
- driven disk with wear-resistant linings.
The driven disk is constantly pressed against the flywheel by the pressure disk under the influence of strong springs. Due to the enormous frictional forces between the flywheel, driven and pressure plates, they all rotate together when the engine is running. But only when the driver does not touch the clutch pedal, regardless of whether the car is moving or standing still.
To start the machine moving, it is necessary to press the driven disk connected to the drive wheels to the rotating flywheel, that is, engage the clutch.
And this is a difficult task, since the angular speed of rotation of the flywheel is 20 - 25 revolutions per second, and the speed of rotation of the drive wheels is zero. Clutch engaged
In the first stage
work to engage the clutch - slightly release the pedal, i.e. We allow the springs of the pressure plate to bring the driven disk to the flywheel until they lightly touch. Due to frictional forces, the disk, slipping for some time relative to the flywheel, will also begin to rotate, and the car will slowly crawl.
At the second stage
– we hold the driven disk from any movement, i.e. hold the clutch pedal in the middle position for two to three seconds so that the speed of rotation of the flywheel and disc is equal. At the same time, the machine increases its speed.
At the third stage
— the flywheel, together with the pressure and driven disks, already rotates together without slipping and at the same speed, transmitting 100% torque to the gearbox and then to the drive wheels of the car. This corresponds to the state of the clutch mechanism - engaged, the car is moving. Now all that remains is to completely release the clutch pedal and remove your foot from it.
If you release the clutch pedal sharply when starting to move, the car will “jump” forward and the engine will stall.
To release the clutch
The driver presses the pedal, and the pressure plate moves away from the flywheel and releases the driven disk, interrupting the transmission of torque from the engine to the gearbox.
Press the clutch pedal fairly quickly, but not abruptly, with a calm movement until the end of the pedal stroke. The clutch is disengaged
after mastering the operation of the clutch pedal in three stages
Adjusting the electronic ignition system on Izh Planet 5. How to set the ignition on the Planet?
If you are the owner of an IL, the ignition of Planet 5 electronic type can be adjusted in the following way:
- set the advance angle (3.5 mm to the top dead center mark, in this case the sensor will show a pulse only when the modulator leaves the gap);
- start the engine.
As a rule, this option for setting up the ignition on Izh Planet 5 works without problems. Moreover, as a reserve for installing the ignition on Izh Planet 5, you can use a contact system for starting the power unit.
So, we figured out how to set the ignition on the Planet. With proper adjustment of the engine starting system, your motorcycle will start normally, and you will be able to experience all the delights of driving such a two-wheeled vehicle.
An important detail - the cable
Owners of used motorcycles do not always take into account the essential role of the cable in the clutch control system. The cable itself is practically not subject to stretching, but the sheath loses its qualities. Its frame is a spiral under a layer of PVC.
After prolonged use, the frame becomes pliable and excessively springy, which affects the useful stroke of the lever. If the cable sheath is worn out, the clutch will not operate normally, so it is important not to miss the moment and replace the cable in a timely manner.
Adjusting the clutch on a motorcycle
The clutch is regulated by changing the force of pressing the discs against each other, which, in turn, is regulated by preloading the springs. To do this, special “fungi” are put on the springs, which can be accessed after removing the cover on the left engine cover (oil hole). It is worth saying that in this way you can not get close to all the “fungi”, but only to some of them. All “mushrooms” can be adjusted by rotating the crankshaft using the starter
It is worth noting that absolutely all springs must be equally tensioned, i.e. each “mushroom” is twisted the same number of half turns
Thus, if the clutch is slipping, there are only two steps to follow:
- Make sure there is free movement of the handle. If it is not there, the clutch will be constantly depressed.
- Open the left cover, without draining any liquids, and tighten all the “fungi” evenly. After this, you should check the operation of the clutch. If slippage continues, it is worth repeating the procedure.
During adjustment, you should be careful and pay attention to various details, for example, the oil level in the engine, the condition of the teeth on the discs, etc. If after adjusting it there is no improvement, then you can begin the process of replacing the clutch
If after adjusting it there is no improvement, then you can begin the process of replacing the clutch.
It is worth noting that the malfunction of this element of the motorcycle should not be neglected, because if at the beginning of the day the clutch begins to slip, then after just a few hours of intensive motorcycle riding, it can completely die, thereby causing harm to the vehicle as a whole. After all, small particles of burnt clutch discs get into the oil, along with which they are sent to the precision joints of the liners, connecting rods and pistons, thereby damaging the engine
Therefore, if the time has come to replace the clutch, it should be done immediately.
With constant use of the motorcycle and long mileage, the basket itself wears out along with the clutch - wear appears on the edges of its longitudinal slots. Its appearance in these places makes it very difficult for the clutch discs to move. A shallow hole can be corrected using a regular file, however, this is a completely extreme case; still, if it appears, it is better to install a new basket.
So, there are different types of motorcycle clutch, however, the most common type is the multi-plate clutch in an oil bath. This is what is most often installed on motorcycles. Therefore, we will consider replacing the clutch using the example of a multi-disc clutch.
Types of clutch
By type of friction.
The type described above has the so-called “dry” type of friction. That is, all structural elements do not have any lubrication; moreover, it is not allowed at all, since it can affect the adhesion properties of the interacting surfaces of the disks.
But there are types in which the components are in an oil bath - the so-called “wet”.
But this type is practically not used on cars, although it can be found in the design of some motorcycles.
In general, the essence of the operation of this clutch is no different from the “dry” one, with the only difference being that the crankcase in which the components are located is filled with oil.
By number of threads.
As for the number of flows, here friction type clutches are divided into single-flow and double-flow.
In the first case, rotation from the engine is transmitted to only one element. In the type described above, it is the gearbox input shaft.
But special equipment often uses a double-flow clutch.
A distinctive feature from single-flow is the transmission of rotation to two shafts. But for this, another driven disk has been added to the design.
Most often it is found on tractors (the second flow ensures the rotation of the power take-off shaft).
As for passenger vehicles, this type has found application in cars with a robotic gearbox (more about it below).
By the number of driven disks.
Regarding the number of driven discs, in addition to single-disc clutches, there are also double-disc and multi-disc clutches.
The first version of the double-disc clutch is used on the double-flow type. In it, rotation from one driven disk is transmitted to the gearbox shaft, and from the second - to the PTO.
This design made it possible to increase the functionality of the equipment (for example, on tractors, thanks to the power take-off shaft, it is possible to aggregate it with various mechanisms).
But a double-disc clutch can also be single-flow (rotation from two driven discs is transmitted to only one element - the gearbox shaft).
This design has found application in cargo vehicles (in most cases, although this type can also be found on sports cars, as well as some motorcycles), where, due to the high power of the motors, the transmission of high torques is required.
Multi-disc clutches are a package of discs - driving and driven, alternating with each other. This package is placed in a basket consisting of two drums - a leader and a slave.
Otherwise, the essence of this type of design is no different from a conventional clutch - the discs are connected to the corresponding drum springs, pressed against each other, due to which friction occurs between the discs.
When the drive is activated, one of the drums moves away, thereby interrupting the flow. This type of clutch can only be found on motorcycles.
By drive type.
Several types of drives are used to control the unit:
- Mechanical (the transfer of force from the pedal to the bearing fork is done using a system of levers or a cable);
- Hydraulic (force is transmitted through two cylinders - the main and the working, connected to each other by a pipeline filled with liquid);
- Electric (used in systems with automatic clutch control. The clutch elements are acted upon here by means of electric motors with servo drives);
- Combined (the drive combines several of the above types, for example, hydromechanical).
Additionally, special equipment often uses a variety of drive amplifiers.
Malfunctions and clutch adjustment of Izh motorcycles
There are two possible types of clutch malfunction: incomplete disengagement of the discs and slipping. If the motorcycle is slipping, it will not develop speed as the crankshaft speed increases. The reasons for this malfunction may include: wear of the discs, insufficient spring pressure due to loss of elasticity or loose adjusting nuts, incorrect adjustment of the clutch mechanism. When the clutch is not fully disengaged, the motorcycle wheel continues to rotate while the control lever is fully pressed. This may also be due to incorrect adjustment, or this malfunction may occur when thick oil is used, especially in cold weather. First of all, if you discover one of the clutch malfunctions, try to eliminate it by correct adjustment. First, you need to adjust the gap in the shutdown mechanism; this is done using the adjusting screw located on the right engine cover. To do this you will need a screwdriver and a 13 mm wrench. Using a wrench, loosen the locknut and use a screwdriver to tighten the screw until it stops, and then turn it in the opposite direction half a turn - one turn. Tighten the locknut with a wrench. Secondly, after this, adjust the free play of the lever using the cable adjusting screw on the left handlebar handle. It should be within 5-10 millimeters. The correct clutch adjustment can be checked in this way: place the motorcycle on a stand, engage first gear and try to manually turn the rear wheel with force. If the adjustment is correct, you will not be able to do this. Now you need to perform one more check: to completely disengage the clutch. To do this, in the same position (motorcycle on a stand, rear wheel not touching the ground), start the engine and engage first gear. Then fully depress the clutch control lever and apply the rear brake, the wheel should stop. Release the brake, the clutch is depressed, and the wheel should remain stationary if adjusted correctly. If it starts to rotate when the lever is pressed, you need to loosen the adjusting bolt on the right side of the engine.
To check the ease of movement of the clutch cable in the sheath, press the lever and release sharply. The lever should spring back to its original position. It may be worth lubricating the cable with a few drops of liquid oil, such as Autol.
Adjusting the IZH Jupiter clutch
On IZH-Yu and IZH-YUK motorcycles, adjusting the clutch release mechanism begins with adjusting the machine, for which the adjusting screw is screwed in all the way and released 1/4.1/2 turn, then tighten the lock nut. Correct adjustment is checked by pressing the switch pedal in any direction. Moving the front end of the shift pedal 5-5.5 mm from the neutral position should not lead to movement of the pressure plate. Then adjust by manually pressing the adjustment screw located in the left column of the clutch lever
on the steering wheel (free play 5-10 mm)
CLUTCH OF MOTORCYCLE “MINSK” MMVZ 3.111
The clutch is designed to disconnect the engine and transmission when changing gears, during a short stop with the gear engaged, and when braking.
The adjustment is made as follows:
1. Unscrew the screws of the right cover plug 39 (Fig. 3). 2. Loosen the adjusting screw locknut. 3. By screwing in or out the adjusting screw, set the free play at the end of the clutch lever on the steering wheel to 5-10 mm. It must be remembered that when screwing in the screw, the free play decreases, and when turning it out, it increases.
If the clutch “leads,” that is, when the lever is fully depressed, the motorcycle tends to move, then the adjusting screw must be screwed in. If the clutch “slips,” that is, when the lever is completely released, the motorcycle stands still, or the engine speed does not correspond to the speed of the motorcycle in a given gear, which is especially noticeable when driving on an incline, then the adjusting screw must be unscrewed.
After adjusting the clutch, the adjusting screw should be locked.
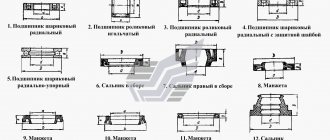
Rice. 12. Clutch: 1 — driven discs; 2 - drive disk; 3 — pressure disk; 4 - pressure spring; 5 — rod fungus; 6 — driven drum nut; 7 — lock washer; 8 — driven drum; 9 — driving drum; 10 — intermediate washer; 11 — driven gear of the motor transmission; 12 - ratchet; 13 — ratchet gear of the trigger mechanism; 14 - spring of the ratchet gear; - 15 - bushing of the driven gear; 16 — bearing retaining ring; 17 — input shaft bearing; 18 — input shaft; 19 — clutch release rod; 20 - worm spring; 21 — worm lever; 22 — right crankcase cover; 23 - ball; 24 - worm; 25 — worm thrust washer; 26 - lock nut; 27 — adjusting screw; 28 — secondary shaft nut; 29 — oil seal; 30 - lock washer.
Disassembling and assembling the clutch.
1. Using a wire hook (or knitting needle), disconnect the springs from the pressure plate and remove the disc. 2. Remove the clutch fungus and remove the discs. 3. Use a screwdriver to bend the lock washer. 4. Secure the clutch drum with a special device (Fig. 13), or, in the absence of one, with a screwdriver (which is highly undesirable), and unscrew the driven drum nut. It should be remembered that the thread is left-handed!
Rice. 13. Device for disassembling the clutch.
5. Without removing the special device from the clutch, unscrew the nut securing the gear on the crankshaft journal. 6. Remove the clutch together with the motor chain and gear. 7. Remove the driven gear bushing and thrust washer. 8. Remove the key from the crankshaft journal. Reassemble in reverse order.
Clutch care involves lubricating the cable, lever and worm, as well as timely and correct adjustment of the free play of the lever.
The most common clutch malfunctions are:
1. The clutch is not adjustable - the pressure springs may weaken, the cable may stretch out, or the pressure plate may bend. 2. The clutch does not disengage - possible jamming of the worm due to poor lubrication or sand ingress, jamming of the rod due to its bending, welding of the rod to the input shaft due to insufficient lubrication of the gearbox, misalignment of the discs, jamming of the discs on the splines or in the grooves of the drum, self-unscrewing of the driven drum nut.
content .. 11 12 17 ..
Generator
The motorcycle is equipped with a 3-phase alternator, which has an electromagnetic excitation circuit. The principle of its operation is based on some features. So, the electrical circuit of “IZH Planet-4” looks like this: the current is supplied to the rectifier, which, in turn, converts it into direct current, then supplies it to consumers. The factory instructions for the generator contain the following elements:
Voltage regulator with rectifier “BPV-14-10”;
The head light circuit consists of the rear brake light, parking light and color control light. The motorcycle is equipped with a speedometer with mileage indicators (daily and total), a tachometer, indicator lamps for turn signals and head lights, a voltmeter and an engine temperature sensor. Very often during operation it is necessary to adjust the gap between the contacts of the breaker. To do this, it is best to use a diagram and special tools to know which elements need to be dismantled.
While easily fixing mechanical failures, motorcyclists experience difficulties if the electrics fail. It’s completely in vain, the wiring diagram of the planet Izh 5 is not complicated, it’s easy to figure out.
There is no need to have special stands and equipment for repairs. A minimum knowledge of electrical engineering and a simple avometer (tester) is enough; even often you can get by with just a test lamp.
We will tell you in more detail about the main electrical wiring components and possible malfunctions. The Izh Planet wiring diagram makes it easy to find a broken wire or damaged insulation (for example, a bad contact always gets hot).
In this case, we look to see if there is a spark at the coil output and at the output at the spark plug contact. Let's take a closer look at the main wiring components of the Izh Planet.
IZH Planet clutch malfunction
Possible malfunctions that may occur during operation of the IZH motorcycle. Let's start with clutch slippage. This error indicates that the drives are slightly pressed together.
There may be several reasons:
- Incorrect setting
- The springs have lost their former elasticity
- The discs are worn out and become thinner
- Wear of drive parts
Clutch wires. This is when the lever is pushed all the way and the clutch is not completely disengaged. The discs are not evenly weakened in places that are in close contact with each other.
The main reason is the springs that compress the discs.
I mounted the clutch and installed cork discs.
I decided to experiment, if I don’t like it, I’ll return the standard ones. To adjust, I used an electronic caliper, 4mm from the nut head to the bolt.
There are now fewer metal disks. I was still thinking about the chain guide, but I didn’t bother yet and assembled it without it. I think next year. Well, the visibility of the clutch has become many times easier. Previously, more effort had to be made, but now it’s almost like foreign cars.
I like I like 2
Other entries in this logbook
Again a rarity. Ignition switch, tray in the glove compartment.
Time passes, and I still slowly continue to equip the motorcycle with original spare parts. This time they were found in the vastness of Avito. Read more
Air filter mount.
As always, I am a hunter for rare parts) While going to the market, I accidentally noticed a motor from Izh Jupiter 2, and that’s what I saw on it. Read more
I assembled the motor.
After finishing the bolt and minor modifications, the assembly of the motor began. The gaskets were cut out independently. Armor is stuffed under the cylinder. Read more
Comments
Only authorized users can leave comments
won't it slip?
- Answer
- November 16, 2021 at 05:36
__vorbik__
IZH Jupiter 5 “MRAZOTA”
My parents bought this motorcycle with wedding money in 1988. and in 1994 they put it in the garage because the family got a car. In 2007 I got it, and our relationship began. There’s no other way to call it) he and I are like cats and dogs, we love to test our nerves to the limit. 2007 Pulled it out of the barn next to the chicken coop. I washed it off the shit, started it, and drove around with minor repairs. 2009 The engine died and there were no funds for repairs. 2010 Complete disassembly, painting, engine overhaul with replacement of shafts, bearings, seals, gaskets, piston. A month later, the piston burned out (because at that time I was not yet a nanomechanic and had not heard anything about the thermal gap). As a result, I bought a piston kit with new cylinders assembled in short. 2011 April. 13 km from the house, the chain lock opened and gutted the rear casing of the star (in common parlance, a guitar) and that was the last straw. After that, the motorcycle was kicked into the barn with the words: GET OUT OF THE SOVIET MOTOR INDUSTRY! And a new YBR125 was purchased. 2015 My soul yearned for my friend, old grievances were forgotten, and my friend was transported from my grandmother to my garage. 2021 Attempts to revive this barn were ongoing. The day of dancing with a tambourine at the contact ignition was exhausting. We bought an optical ignition and it STARTED! and it didn’t just start, it FLYED. 2021 I decided to modify the engine and not touch the frame. But then, as always, I decided to go all out. Again a complete disassembly and then Ostap suffered!
Basic clutch malfunctions
One of the most common problems that occurs with the IZH Jupiter 5 motorcycle is clutch slipping. Almost all owners who use this model for quite a long time face this problem. This kind of malfunction indicates that the discs are not pressed together well enough and the IZ Jupiter 5 clutch needs to be adjusted.
The main reasons why this can happen:
- The IZ Jupiter 5 clutch was adjusted incorrectly.
- The installed springs have lost the required elasticity.
- The discs have lost their thickness due to significant wear.
- The drive elements are significantly worn.
Sometimes it feels like the clutch is dragging . A similar problem usually occurs when the lever is clamped to the maximum, but the clutch is not disengaged. In this case, the installed disks in some places touch slightly, and in others they fit tightly to each other. Adjustment of the clutch basket on IZ Jupiter 5 must be carried out in full compliance with the specified recommendations.
We examined the main issues that are directly related to clutch adjustment. These actions must be performed when you have the above malfunctions, otherwise riding the IZH Jupiter 5 motorcycle will not be comfortable and safe.
Clutch Spring Adjustment
Adjusting the springs is not difficult, that's the main thing. understand correctly. Let's start by mounting the motorcycle on the center step. Then remove the cap before draining the oil. The clutch lever is compressed to the limit and will definitely lock. Next comes speed, preferably first. Take the wheel and start spinning. We are trying to determine how much effort we are making. We look at the clutch as it rotates and determine which springs are loose. We mark them with chalk and then tighten them. We start turning the wheel again, and if you feel that the wheel is turning easier, that means everything is done correctly. The process must be repeated to achieve the best result. After that, we check the result while moving. If the load starts to clip when the load increases. All springs must be tightened using nuts. In this case, all nuts must have the same number of turns.
Clutch adjustment IZ Jupiter 5
The clutch is almost always in motion and the discs are compressed by special springs that are tuned to certain parameters. The transmission consists of two sprockets. One of which, the small one, is located directly on the crankshaft, and the larger main star is on the drum. Their connection is carried out using a motor chain. For motorcycles of the IZH Jupiter 5 model, which have one cylinder, the gear ratio is 2.17. Using a specialized mechanism, it turns off when required. This specialized shutdown mechanism is located in the motorcycle engine cover. This is important to take into account, because it is used to adjust the IZ Jupiter 5 clutch.
Purpose of the clutch IZ Planet and IZ Jupiter
Clutch - the name speaks volumes about the job it does. In our case, the crankshaft engages the gearbox of the IZH Planet and IZH Jupiter engines. The connection should occur smoothly without jerking, this is necessary to start moving and smoothly change gears. In case of heavy loads, it protects engine parts from damage. The clutch is located in the left half of the crankcase, under the left engine cover.
To get to the clutch, you need to drain the oil and remove the cover with the gasket, first remove the levers and unscrew the mounting bolts.
The basket is constantly in working condition, the discs are tightly compressed by springs.
The motor transmission consists of two sprockets. The small drive is located on the crankshaft. A large star driven on a drum. The connection is made by a motor chain.
The engine gear ratio is 2.17 for all single-cylinder IZh models. For IZ Jupiter, the gear ratio is 2.57.
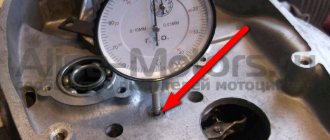
When assembling the motor transmission, the planar arrangement of the stars is controlled. No more than 0.4 millimeters are allowed.
Switching off occurs using a special device. The shutdown mechanism is installed in the right engine cover. This mechanism is used to make adjustments.
Purpose of the IZH Planet coupling
Clutch . the name of this node indicates the work it does. In our case, the crankshaft meshes with the gearbox of the IZH planet engine. The clutch should move smoothly, without jerking, which is necessary to start the motorcycle and smoothly change speed. In case of heavy loads, it protects engine parts from damage.
The clutch is located in the left half of the crankcase, under the left engine cover. To get to it, you need to drain the oil and remove the cover before removing the arms and unscrewing the mounting bolts. The clutch is always in working condition, the discs are tightly compressed by springs. The engine transmission consists of two sprockets. The small wire is located on the crankshaft. The big star led the drum. The connection is made by the motor circuit. The engine's gear ratio is 2.17 for all single-cylinder IZ models. Switching off occurs using a special device. The shutdown mechanism is installed in the right engine cover. The adjustment is made using this mechanism.
Clutch setting
Adjusting the springs usually does not take much time and is not considered a complicated procedure. To carry out these actions, the motorcycle is placed on the stand, the oil is drained, and then the installed cover can be removed. After this, the special lever will need to be squeezed to the maximum and securely fixed. Then it is recommended to turn on the first or second speed, take the wheel and start rotating. Based on the load, we determine which springs are more tense and which are looser.
Then, when we have figured out which springs need to be tightened, we rotate the wheel to check the result
It is necessary to pay special attention to such a fairly important point that when the load increases, the clutch will not slip. After all of the above steps are completed, the IZ Jupiter 5 clutch basket is assembled
Adjusting the IZ Jupiter 5 clutch is important for stable and safe riding on this popular motor vehicle. Therefore, when you feel that it is necessary to carry out these actions, then you should not delay this
Clutch adjustment IZ Jupiter 5
The main reasons why the clutch on an IZH Jupiter motorcycle “leads” or “slips” 5. Troubleshooting and subsequent adjustment and adjustment of the clutch.
In this article we will consider in detail the issues that relate to the correct adjustment of the clutch of the IZH Jupiter 5 motorcycle. The name of this motorcycle unit itself speaks about the main functions it performs, or rather, the crankshaft engages directly with the engine gearbox. Optimally, the clutch should be as smooth as possible without jumps. This is necessary for the movement of the motor vehicle and subsequent switching while driving. The clutch is located on the left side of the crankcase under the installed engine cover. In order to get to the clutch as quickly as possible, you will need to first drain the oil and unscrew the cover. In this case, you will need to unscrew all the necessary mounting bolts and then carefully remove all the levers.
Tips for increasing the life of the Izh motorcycle clutch
The clutch is not intended for long-term operation in the disengaged position, as in this case increased wear of the mechanisms occurs. The control lever must not be released abruptly or very slowly. When turned on abruptly, the power transmission receives maximum load; when turned off slowly, the parts wear out even more than when turned off completely, due to slipping of the disks. If you have a habit of keeping your fingers on the lever, make sure that there is not even the slightest pressure on it. Even with a slight pressure that does not cause the discs to slip, the clutch mechanisms experience significant load. Do not use the clutch to disconnect the engine from the gear when stopping or coasting for a long time. In all these cases, use the gearbox, putting it in neutral. Also, never try to make the engine work easier on climbs and in other difficult situations, causing the discs to slip and, as a result, increase engine speed. In such cases, it is better to switch to a lower gear in advance.
Motorcycle care
Motorcycle braking system
Storing a motorcycle in winter
Common clutch malfunctions and their symptoms
- Incomplete engagement of the clutch (with “slipping”) is a consequence of oiling or wear of the friction linings of the driven disk, broken springs, and incorrect amplitude of the pedal stroke (its small free play). To eliminate this malfunction, it is necessary to replace the driven disk, eliminate scuffs on the disks, and inspect the drive for malfunctions. When “slippage” occurs, when the clutch pedal is fully released, the disks slip one against the other. Due to prolonged slipping, the discs begin to heat up significantly, the steel driven disc may become warped, and the cast-iron flywheel and pressure plates (or pressure plates) may become cracked. Friction linings wear out and burn at an accelerated rate, and this burnt smell reaches the cabin. If not repaired, the process gradually progresses, first at high, then at low speeds. To the point where it becomes impossible to even move away in first gear.
- Incomplete disengagement of the clutch (when the clutch “drives”) is a consequence of large free play of the clutch, broken springs, a warped driven disk or an incorrectly installed pressure disk. This is also possible when the release levers are deformed; or the release bearing jams and does not move with the pressure clutch. It is possible that the clutch driven disc does not move along the splines (the lubricant has thickened or become dirty). To eliminate this malfunction, it is necessary to remove air from the hydraulic drive, adjust the free travel of the pedal, and replace inoperative disks and springs. Incomplete shutdown is manifested by the crunching sounds of gears when changing gears and, accordingly, leads to accelerated wear of gearbox parts.
- Jerks when engaging the clutch. When the car, despite the smooth release of the clutch pedal, starts jerking, this indicates the destruction of the friction linings, warping of the driven disk, or the breakdown of the damper springs, or wear of the friction washers. It is also possible that the driven disk may jam when moving along the splines of the gearbox input shaft, as well as jamming of the push clutch or destruction of the release bearing.
- Malfunctions of the hydraulic drive system. If air gets into the hydraulic clutch release drive, the pedal may “sink”, and as a result, the clutch may not be completely released. In this case, it is necessary to remove air bubbles with some of the fluid (bleed the clutch) and add fresh fluid. When in cable-driven mechanisms the clutch does not disengage at all, the cable may have broken. When the clutch pedal does not return to its original position, the return spring has become disconnected. If, when the clutch is disengaged, there is a strong noise generated by the release bearing, this indicates its wear.
If the clutch drive is mechanical (lever or cable), then as the friction linings wear out, the clutch pedal will gradually rise, but with a hydraulic drive, the pedal does not change its position, and the fluid level in the reservoir decreases.
So, the clutch mechanism plays a huge role in the functioning of any car or tractor. The technical condition of the entire vehicle largely depends on its serviceability and performance.
Therefore, to ensure long and reliable operation of all elements of the clutch mechanism, it is important to use it smoothly, and without the need to practice excessively long presses on the pedal. Under such gentle operating conditions, the clutch will last a long time
Switch P-200
Light switch with horn button (located on the left side of the steering wheel). To switch the low and high beam circuit, a P-200 type switch is used with a built-in push-button horn switch for three operating positions: neutral - the headlight lamp is off; far right – low beam is on; far left – high beam is on.
The horn button has a movable contact connected to ground and a fixed contact connected to one of the wires coming from the horn terminal. When you press the button, the contacts close and the signal circuit is completed.
Caring for a sunrise motorcycle generator - how to remove, what to check and install correctly
Generator maintenance mainly comes down to tightening the threaded fasteners of the generator stator and rotor, as well as the wire terminals.
In order to remove the generator, you must:
- disconnect the wires of the ignition circuit, sensor, brake light and direction indicators from the generator terminals;
- unscrew the three screws securing the stator to the crankcase and remove the stator;
- Unscrew the bolt securing the generator rotor and, with light, careful blows of a wooden hammer on opposite sides of the rotor, remove it from the trunnion and remove the key.
Checking the removed parts
After removing the generator stator and rotor, wash the parts with clean gasoline and carefully inspect them. Disassemble the wire fastening terminals on the stator. Wipe dry all insulating parts of the terminals.
Generator installation
Installation is carried out in the reverse order, in this case it is necessary:
- check the runout of the generator rotor, which should be no more than 0.1 mm with the bolt secured;
- tighten the generator stator without distortions, ensuring a tight fit to all three supports;
- install the ignition correctly;
- The generator wires must be securely fastened and well insulated from each other.
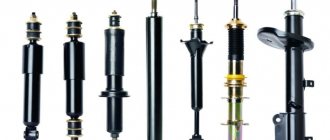
Planet Suspension [#2] Rear shock absorbers. Disassembly, troubleshooting, assembly.
Hi all!
After quite a long break, I found time to write a short article, guys, I don’t have time to write and post everything at once, work on the motorcycle began to boil, like the mouth of a volcano, so, excuse me :) Everything will be fine, gentlemen, but not right away.
The topic of today's article will be the rear suspension of the Planet 5 , I will tell you in words how to disassemble and reassemble the Planet shock absorbers without any problems, etc., etc., let's go.
To begin with, I’ll say right away that there are no photos of disassembling the shock absorbers, they should have been there, but the phone died from the cold, and that’s all... I was too lazy to run for a charger, but believe me, everything is easy there. Let's begin.
Disassembly
I was engaged in troubleshooting in its full form, that is, I changed everything, even the silent blocks, the spring, the plastic cup, and the reservoir cup itself remained from the original one, but you need to start with the very disassembly of the shock absorber, then you will understand why.
We take our shock absorber, and insert a powerful screwdriver into the upper ear, there are two plastic cups on the shock absorber, they hold the spring, we put something suitable under the screwdriver, and press it, with another screwdriver, we pick out the other shock absorber cup. In the same way, but without one cup, pressing on the spring itself from above, remove the second cup. All. The spring has been removed. remove the plastic protective cup and the thin, thin washer underneath it. We take the key, I think it’s 19, and unscrew the rod, then drain the oil from the shock absorber, if you have it, congratulations. Now we listen carefully, take a needle, and carefully pick out the upper rubber ring, it will prevent us from pulling out the entire rod, we pick it out, remove it and pull the rod by the ear with all our might. The rod was pulled out. Behind it we take out the glass of the rod, from the glass of the shock absorber itself, like there are a lot of glasses, right? :) Actually, no) If you do disassembly, you will understand everything yourself) Now my advice. I advise you to change the rod assembly, it’s more reliable, the seals that are sold in stores are all Chinese bullshit, which leaks from the first kilometers, so do better as I told you, especially since the rods are sold factory, you just need to know where to get them, there will be a separate article about this, write in a personal message, I’ll tell you. That’s all, one thing, under the spring there will also be the same thin washer, don’t lose it.
Next we move on to silent blocks.
We take our shock absorber, or rather its glass and a new rod, a head for 17 (or 19 I don’t remember exactly, the main thing is that its diameter is exactly the same as the silent block, maybe a little smaller), as well as a head for 21 (or 22 or 23, again I don’t remember exactly, the main thing is that the entire silent block fits in the head in its entire size), then we take the yews and insert our sandwich into them, place the head at 17 on the left, then the ear of the shock absorber cup and on the right the head at 21 and start press, thereby squeezing the silent block into the head at 21, with the head at 17. We do the same with the other ear if necessary.
assembly
Let's start assembling. We take all our parts and wash them first. Basically, if it’s winter outside, wash it under the tap, nothing will happen if you dry everything thoroughly and wipe it off. Now we take the glass of the rod and insert it into the glass of the shock itself.
Next, take 0.075 ml of oil, in my case it is Motul FORK OIL 10W (If you can buy a more viscous oil, for example 15W, take it, it will be better, because it is quite liquid) and pour it INTO THE GLASS OF THE STOCK.
Next, insert the rod itself and tighten it.
All. The hydraulic part is assembled. Now let's replace the silent block. In exactly the same way as we disassembled, only now after the head at 17 there is a new silent block, then the ear where it will be inserted, and then the head at 21. Before pressing in, I recommend lubricating the outer surface of the silent block with oil.
Well, then everything is in the reverse order, everything is simple, we put a small washer on the shock absorber glass, then a spring, a plastic protective cup in it, we put a washer under the glass, the same thin one, and again, pressing with a screwdriver on the spring through the upper ear of the shock absorber, we try insert plates. All. Shock absorber assembled)
I understand that the article turned out to be rather watery, and it’s all my fault, which didn’t allow me to go get some exercises :( Don’t scold me too much, I’ll try not to do that again :)
Good luck to all! Bye!
PS: Photo of the new and old rod (new on the left), as you can see there is not much difference in the rubber seals, and also on the new rod there is a rebound spring, which mine did not have, it is a necessary thing, there will be fewer breakdowns with it, and the work should be better.
Tags
- Planet 5
- Planet
- Izh Planet 5
- Izh luxury
- luxury
- Izh Planet 5 Lux
- Orion
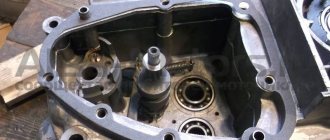
Checking the clutch drum
The first step is to check the foot start ratchet mechanism. This is where the main load falls. Turn the clutch basket over with the ratchet facing you, remove the retaining ring and disassemble the ratchet.
We inspect the teeth of the ratchet: they should be sharp without chips or other damage. If the teeth are wrinkled or broken, the winding foot will slip 100%. Many suffer from this problem due to thick oil or a weak spring - in fact, the reason for the foot slipping lies in the ratchet.
If the teeth on the basket are not worn out, it is advisable to rivet the ratchet: buy a new one in the store or remove it from another basket and rivet it. I riveted several baskets and they went without any problems until the “victory”...
An example of ideal ratchet teeth.
Often and thickly, the rivets on the ratchet weaken and if you don’t notice this in time, they are cut off. To prevent this trouble from happening to you, move the ratchet with your fingers. If it wobbles, drill out the old rivets and rivet them again. Pulling old rivets usually does nothing.
If you are making a clutch “for yourself” and for a long time, be sure to check the condition of the teeth for the motor chain.
If the teeth have already begun to turn back, then such a basket should be immediately thrown into the trash. It will no longer be of any use: the operating noise will increase, it will 100% eat up the motor chain, and there’s never an hour when one “fine” day it will lick your teeth and you will then be forced to push your jalopy for a long time and tediously...
An example of worn teeth.
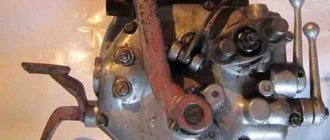
It is not uncommon for the basket body to burst. Unfortunately, the body is made of cast iron and welding it will be problematic. If you find cracks on the body, try to find a welder who welds non-ferrous metals, the so-called “argon welder”; they usually take on welding cast iron.
An example of cracks in the basket body. By and large, this basket can still be saved: chamfer the cracks, weld and turn the seams on a lathe. But the teeth under the motor chain were worn out and I threw it away.
Checking clutch discs
The main clutch problems occur due to the fault of the discs. If the discs are crooked or worn out, then no amount of even a super couture adjustment will correct the poor performance of the clutch.
Wear is determined visually and only on plastic discs: we inspect the disc and if we find a crack or a broken hook on it, with which it enters the outer drum, or we see that the round protrusions on the working surface have long been worn out, we throw such a disc in the trash.
The curvature of the disks is determined as follows: place all the disks on the glass one by one and try to swing them
- If the disk wobbles, it means it is 100% crooked and should be in the trash.
- If the disk lies flat, leave it.