Author: Evgeny Zhivoglyadov. Date of publication: September 13, 2021. Category: Motor vehicles.
Motorcycle bags are made from various materials: metal, plastic, leather or plywood. The choice depends on personal preferences and skills. If you decide to make motorcycle panniers with your own hands, you can be sure of their exclusivity. And if you approach their decoration with due diligence and imagination, then they will become not only convenient luggage racks for transporting various items, but also a unique decoration of the bike.
Types of motorcycle cases
According to their shape and type, trunks are divided into several varieties.
Side cases
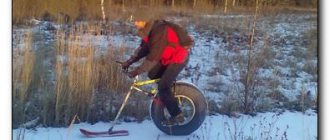
They are modeled after the duffel bags used by cowboys. Such bags were thrown over the horse's croup. Used them for long journeys. Side panniers for motorcycles are secured with a belt that goes over the seat of the motorcycle. They are located near the rear wheel on both sides. Large and voluminous panniers are installed on choppers, because these are the type of motorcycles that are used for long trips. Their form is constantly changing and modernizing. New models of trunks may have different carrying capacity and volume, different appearance, but their purpose is the same - to transport and store luggage, which contains things that may be useful on the road.
Rear case for motorcycle
Such trunks are made in a wide variety of types. Rectangular, in the form of loaves of small and impressive sizes. Cases are produced in the form of crosses and bags. Cases in the form of bags have, like backpacks, a large number of different pockets.
The rear case is placed behind the motorcyclist's back. If a two-wheeled vehicle has space for a passenger, then the trunk is attached to its back. If not, then use the rear fender or trunk for mounting. With the help of a rear case you can increase the volume of things that you take on the road.
Coffer loaf
This case has the shape of an elongated cylinder. It is convenient to attach it to the fork of your motorcycle. You can also do this near the engine. It's convenient to put drinks or keys there.
Side cases for motorcycles
On the Izh motorcycle, metal side glove compartments are already built in at the factory. They are located between the shock absorber and the gas tank. Such cases perform a dual role. Firstly, you can put all the necessary tools there. After all, anything can happen on the road, and you will definitely need them. Secondly, they cover the battery. All vulnerable components of the motorcycle are reliably hidden in such side bags.
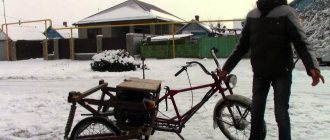
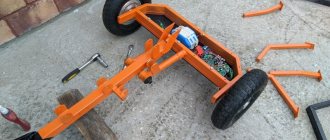
As promised, I collected photographs of different stages of manufacturing useful pieces of hardware for the Kawasaki BJ250 Estrella motorcycle. Previously, I posted my own conversion of work shoes into motorcycle boots, but now a story about iron. I didn’t always have a camera at hand during production, so some of the pictures were taken on a lousy phone. So, a few photos of the process and a brief description. Trunk To begin with, I created a simplified sketch in CorelDraw of the motorcycle itself with a trunk. View from above. Thus, it became clear what I actually wanted. All that remains is to find the materials. I went to the metal market and chose a square pipe with a wall width of 30mm. For aesthetics, it could have been narrower, but none was found. However, looking ahead, I will say that the trunk turned out to be somewhat bulky, but very durable. But if aesthetics are more important to you, it is better to choose a profile with a width of 25mm - the loss of strength will be insignificant, I think. Well, he started shredding. An angle grinder (aka “grinder”, aka “impeller”) will help. I made the roundings as follows: I made several cuts, while trying not to damage one of the four edges of the profile. I calculated the number of cuts at random, based on the bend angle I needed and the width of the cut itself. That’s why I screwed up a little and sawed through some excess on one side. Well, never mind, welding will fix everything. After that, with a gas burner (an ordinary Chinese one, which is put on a canister for a portable stove), he heated the remaining unsawed side red-hot and with a slight movement bent the metal, which had become pliable. It turned out something like this: The next bend was more difficult. Because it was necessary to accurately set the bevel angle. I won’t say that I was satisfied with the result, but overall it turned out to be what I needed. True, next time I would change this angle by a few degrees. Well, then - welding the cracks resulting from sawing and welding the crossbars. Easy to read, but in reality there were difficulties. No matter how delicate the device the inverter was, no matter how thin (2 mm) electrodes were used, metal burns could not be avoided. And no wonder, because by that time I was just taking a welding course (exactly a month spent studying theory) and before that I had only held this hellish device in my hands a couple of times! But the head is needed for this purpose, because under the welding mask there are also a couple more connected neurons, and therefore I came up with this solution: I cut out pads from sheet metal and covered my own jambs with them. In the picture below I showed this schematically. Figures 1 and 2 just show these overlays. Figure 3 shows the edge of the trunk with fastening. There I cut down a piece of the profile, but the thickness of the remaining wall (about 1.5 mm) did not suit me and I welded another piece of metal plate (shown in a lighter color) 4-5 mm thick. Then I drilled a technological hole in this mess. He did the same on the other side. Then I bought 4 8mm bolts and welded them on the bottom so that a luggage net or rope could be attached to them. The idea itself was spotted on my own Chinese motorcycle, and in general, probably, all factory trunks have such fasteners. It seemed like that was all, but then he heated it many more times, bent it, sharpened it; I polished the crooked welding seams... After which I painted it, bypassing the process of putty, which I didn’t even think about at the time - it was due to a complete lack of experience. It turned out far from ideal, but the trunk fulfills its role and has almost no effect on the speed. On the motorcycle, the product looks something like this: As you can see, I placed the rear turn signals on stems so that they are located partially under the trunk, and not on the sides of it. This was done so that these same turn signals would not break off, which previously happened more than once even when simply rolling the motorcycle out of the garage.
So, time passes (it’s almost 2 years since the date of purchase), the old Kava is finishing the stage of metamorphosis and is becoming less and less like the motorcycle that I met at the motor market.
PS. I was going to talk about arcs in the same post, but I realized that there were too many letters, and therefore I’d better prepare a separate post. If, of course, it will be interesting to someone. ZYY. A post about arcs has appeared.
Homemade leather trunks
Leather has been and remains the most favorite material for various biker accessories. You can sew trunks from this material yourself.
Required tools and materials:
- tape measure, metal ruler, marker, narrow construction knife, needle with a thick eye, groove cutter;
- a piece of leather (saddle leather, 3÷4 mm thick), thick synthetic threads, accessories (buckles, fasteners, rivets, etc.).
How to make leather trunks:
- From thick cardboard we cut out patterns for all parts of the future case (sides, bottom, closing flap, etc.), taking into account seam allowance (0.7÷0.9 mm).
- We lay out the finished patterns on the back of the leather and trace them with a marker.
- We cut out the blanks using a construction knife.
- Using a groove cutter and a wooden mallet, we make holes in the places where the individual parts are fastened.
- We sew all the parts together using a thick needle and nylon threads.
- We strengthen the corners with special rivets (holniten).
- We attach all the necessary accessories (buckles, frame holders and decorative elements). The result: we have made strong and durable trunks.
PVC motorcycle trunks
PVC plastic is an excellent material for homemade products; it is easily bent when heated with a hair dryer, cut with a regular knife, glued using special adhesives, and is very lightweight.
PVC makes lightweight travel racks for motorcycles of all shapes and sizes.
Just don’t forget that the lid should be wider than the hole and you will succeed! Eco-leather, leatherette, fabric and genuine leather adhere well to PVC, so here you are not limited in your imagination by anything!
You can decorate homemade motorcycle travel bags with rivets, locks, straps - whatever you want. This is how the manufacturing technology of PVC trunks is described.
For manufacturing, PVC with a thickness of 3 mm is ordered, this is optimal for ease of bending. First, the sidewalls are made from chipboard, connected to each other by planks as firmly as possible. Using a stapler, we stuff a PVC sheet protruding a couple of cm on each side onto the flat part of the frame. An allowance is needed in case the bend does not go smoothly and this will give some room for maneuver. Giving the sheet shape: constantly heating the PVC with a hairdryer, quickly bend the sheet and secure it with a stapler. After cooling, remove the staples and remove them from the frame. We glue the sides. We use the stapler again as we gluing. As a result, we get a finished PVC frame, on which we lay a second layer of plastic - again heating the sheet, glue and staples. After the glue has polymerized, the staples are pulled out. Mark the future cover and carefully cut it out. Please note that the lid has 4 layers - 2 that go inside the cut hole and the lid itself. The covering is done to your taste. You can glue it on immediately and hide the edges by fixing it with a stapler (the staples are also removed after gluing), this is how they cover furniture, or you can sew a cover and fix it with glue at the moment of putting it on.
Belts and other accessories stop at will. As you can see, making a motorcycle case with your own hands is very simple! The main thing is not to be afraid to start!
Motorcycle panniers made of plywood
The advantages of such a material as moisture-resistant plywood (in the manufacture of trunks) include:
- ease of processing using an electric jigsaw or circular saw;
- availability and low price;
- ease of connecting individual parts to each other using glue, self-tapping screws, wooden blocks and metal corners.
The disadvantage of this material is the impossibility of manufacturing motorcycle side racks with complex curved geometric shapes from plywood. Such a box is attached in the same way as metal or plastic products.
Materials
An equally important part is the choice of the future base, that is, the material. Here you need to build on the type of product. It’s worth listing again: there are leather, plastic and textile cases. Each material has its own characteristics. But let's take things in order.
The skin must be at least three millimeters thick. Solid, without visible mechanical defects such as scratches, abrasions and creases. Good quality requires a good foundation, which is why it is so important to find a quality material that meets all requirements.
You can buy a plastic motorcycle case on the market, but you can’t make it yourself. The textile glove compartment will be sewn from solid burlap. A solid frame is required. Again, the fabric must be strong, able to hold up even in the most difficult conditions.
Variety of motorcycle glove compartments
A motorcycle trunk can have any shape. All existing types of such devices simply cannot be counted. And there is a simple explanation for this. Each motorcyclist makes an individual case for himself. But still, certain groups can be distinguished.
Leather saddlebags for motorcycles are especially popular. Why? There are many reasons for this. Firstly, leather is the material of any biker; it looks stylish. Such a product is strong and wear-resistant, which is what the end result needs. At worst, leather motorcycle panniers are always in fashion. They are also easy to find and purchase.
Cases made from plastic canisters
The process of making panniers from plastic canisters is in many ways similar to making side racks from metal containers. The only difference is that plastic cases have insufficient rigidity, so to manufacture them you will have to install additional metal elements (strips and sheets) that strengthen the structure. The main disadvantages of this method include the large labor costs and the amount of time it takes to make plastic luggage racks for a motorcycle (compared to metal counterparts). And although plastic cans are much cheaper than metal cans, additional costs for metal and hardware can reduce the cost savings to nothing.
Luggage rack for attaching panniers
This design is used when it is necessary to transport small loads. It can be made from several metal tubes or rods. If you want a more designer solution, you can make it from a sheet of metal, which will complement the style of the bike quite well. At the same time, if the production is carried out from twigs or pipes, then the creation of additional parts will be required, since it is necessary to create a completely flat plane on which the trunks will be hung. In order not to provide those additional components, it is best to completely manufacture the part from a solid sheet. Or you can make the top part solid, and fasten it using rods or tubes.
This design is intended strictly for attaching the case at the top. At the same time, it is not advisable to use metal less than 3-4 millimeters thick for manufacturing; this will ensure sufficient rigidity of the trunk itself, and will also improve the overall appearance. For a greater design solution, you can engrave the sides or cut out “windows”. You can do this yourself using a drill or grinder.
If you want something more original, you can contact specialized workshops that have equipment for laser cutting and engraving. So let's look at the full manufacturing process:
First you need to cut out the layout from cardboard. We attach the sheet to the trunk and mark the boundaries of the trunk lid along the contour of its bottom. In some cases, the trunk already has its own mounting area; in this situation, it is necessary to make the top of the trunk strictly under the platform of the bag itself. Also, when measuring, we provide protrusions along the width, since the entire structure will need to be secured; for this, the edges will need to be bent.
Next, after measuring, making a mock-up of the site, and directly preparing it, it is necessary to prepare the fastenings. It is advisable to provide elements for fastening to the frame. At the same time, there are no clear instructions for them; here it is necessary to be guided strictly by the shape of the motorcycle frame itself. But you should pay attention that the best variation would be the mounting tubes provided at the edges of the platform that go to the frame.
Cases for motorcycle travel made of aluminum canister
The manufacturing technology of an aluminum canister is not too different from that described above.
As you can see, everything is quite simple here - we cut off the top part, installed hinges and fasteners, glued an elastic band along the top of the open case for sealing and the motorcycle case from an aluminum canister is ready! You can get confused and make the top cover separately, the simplest thing is to glue it out of fiberglass with epoxy; for this, a block is made from an easily processed material, for example, polystyrene foam and covered with fiberglass.
The foam from the roof is etched with acetone and the covers can be placed on homemade motorcycle trunks.
We paint the frames of the motorcycle in the same color and you can, having installed luggage cases on the back of the motorcycle, go to the exhibition of the motorcycle fraternity.
Since the lids are made with a margin of width, they are placed on the remains of the canisters, blocking the rain from accessing the rider’s belongings.
Hard cases or bags - what to choose?
In this video, a comparative analysis will be carried out - what is better to use - trunks or bags?
When preparing for a trip to Europe for the May holidays 2013, the question of transporting things arose. After reading many topics on forums about choosing panniers (for example https://transalp-club.ru/forum/13-401-1 https://www.moto-travels.ru/forum/52-732-1) the choice fell on soft cases. To attach the side cases to the motorcycle, it was also necessary to make luggage frames. They are needed so that the panniers do not dangle from side to side, do not fall under the rear wheel and do not touch the exhaust system. On the Internet you can easily find ready-made solutions for mass production, or order something special for your specific needs, but this is too simple an option, “we’ll go the other way.” It was decided to make the frames ourselves.
To make frames, you should first decide on motorcycle panniers: hard or soft, what brand and shape.
Having studied the assortment available in stores and on the Internet and the price/quality/hassle ratio for ordering and delivery, the following set of cases was chosen:
side cases - volume 12 liters (increases to 20 liters);
central trunk - volume 40 liters;
Each case also includes a shoulder strap for easy transportation outside the motorcycle, and a rain cape;
Manufacturer: Ukrainian company Commandor. It looks quite well made and thoughtfully done. To attach all this to the motorcycle, a special platform is provided, which is tied to the motorcycle with slings and all the panniers are attached to it. The only concern was the fastex with which the cases are attached to the platform; will they withstand all the loads and vibrations during movement? But the fears turned out to be false; all the fastex worked perfectly and withstood the entire trip without any problems.
Then things came close to the manufacture of luggage frames.
Several topics were read on various thematic forums (for example, https://transalp-club.ru/forum/44-2135-1, https://www.moto-travels.ru/forum/52-1999-1), all The options I saw were assembled from pipes with a diameter of 16-22mm or a square profile of a similar cross-section. The structures certainly look solid and well made, but they are difficult to manufacture and quite heavy. Manufacturing requires at least a pipe bender. After considering several options for materials for production, we settled on a regular steel rod with a diameter of 9mm.
Linen boxes
If you have large cardboard boxes at home, then they can be turned into cute containers for storing clothes and linen. It’s very easy to decorate them with your own hands, and then they will please the eye anywhere. The decorating principle is similar to that described for smaller boxes. However, when choosing a blank box, you need to take into account that quite a lot of things will be stored here, so it is better to take a stronger base or strengthen it with an additional layer of cardboard or using slats.
In addition to decoration, you can attach handles to the box to make it easier to move. To do this, you first need to determine the place where the handle will be located and attach a plastic or plywood panel to the inside of the box.
After this, you need to cut out a handle of the desired size from thick fabric and attach it with decorative buttons through a cardboard wall with a panel.
If you plan to make a lot of storage boxes, you can attach special holders for inscriptions to them. Such blanks are sold in stores. They are attached directly to the wall of the box. In this case, it is not necessary to reinforce with plastic or plywood. The holder can be pre-painted with acrylic paint to match the paper or fabric.
And one more little tip. You can attach cork legs to the bottom of the box. Special gaskets are sold in stores. However, these expenses can be avoided if you do not throw away bottle caps. They will need to be first cut in half lengthwise and glued to the bottom of the box. Now when moving it will not scratch the floor.
The decorated box can be placed separately or used as a linen box. To do this, you need to make it a certain size so that it fits completely into a rack or on an open shelf. In the same way, a handle should be attached to it to make it easier to pull out. If necessary, you can also attach a holder for a tag with an inscription.
Cargo rack
The next type is a separate trunk for transporting goods. This design appeared in Soviet times. At that time, it was made mostly of steel rods. Let's take a look at its features and variations of making such a trunk with your own hands.
Of course, let’s move a little away from the old days, and using the example of manufacturing, we’ll look at a trunk for more modern motorcycles, since they currently dominate the world of motorcycles. Such an example would be the manufacture of a structure only from metal tubes.
First of all, you need a pipe bender. If it is not available, steel rods must be used to obtain the desired beautiful bend. The full bending procedure is carried out using a torch. The metal element heats up and slowly, carefully bends.
Just think that buying a trunk for a motorcycle of this type will cost about 150-200 dollars. But let's move on to the process itself:
Initially, we prepare the site. To do this, you need to cut out the rods, then fold the pieces into the required shape.
Next, the side parts of the trunk are prepared and welded to the overall structure in the same way. Metal jumpers are used for fastening. Moreover, their size depends only on the model of the motorcycle, or more precisely on the features of the frame.
On the frame itself, in the places of intended fastening, the paint is cleaned off. Subsequently, measurements are taken and the trunk is welded onto the jumpers directly to the frame. Depending on the lugs welded to the frame, the location of the “response” lugs is measured and noted.
Basically, all manufacturing is carried out individually, depending on the characteristics of the motorcycle itself, so it is necessary to consider in more detail using the example of any of the models.
Also, it should be noted that when planning the transportation of particularly heavy loads, it is necessary to provide additional support frames, bringing them to the frame, preferably closer to the central part, in which case the weight of the engine will compensate for the weight of the load. It can be made from metal rods. We drill holes in the ends, then fasten them with bolts to the base of the frame; for reliability, you can also additionally secure them with welding.
After installation, the last steps will be cleaning, degreasing and actually painting or varnishing, depending on personal preference.
Thus, two variations of creating a trunk for a motorcycle with your own hands were disassembled, which in turn will help novice motorcycle enthusiasts as much as possible. And perhaps it will be a good cheat sheet for experienced drivers who previously could only buy a trunk for a motorcycle, but did not know how to make it themselves.
Boxes for small items
In the drawers of a closet or chest of drawers, not only bed linen or towels are often stored, which can simply be neatly folded and placed compactly, but also small items such as underwear, socks, stockings. It is very easy to organize their storage by using empty shoe boxes for this purpose. The process is very simple and will only take a couple of minutes.
You need to take several boxes and fasten them together. You should first try on how best to position them. If necessary (if the box is shallow), they need to be cut so that they have the desired height.
There are several ways to fasten boxes together. The easiest way is to use a stationery stapler. Another option is to glue them or sew them together.
If the box is intended to be used outside, then it can be decorated. Here everything will depend on imagination and on available materials. For example, cover it with wrapping paper or cloth. You can take an ordinary sheet of colored paper, stick it on the box, and then decorate it with decorative elements: bows, stickers, rhinestones, in general, whatever you can find that matches the interior.
Alternative option
No leather - no case? This argument doesn't work here. After all, you can try and do something of your own, not necessarily even in the classical form. It’s difficult to make a plastic case yourself, but a textile case is just right. The great thing is that the fabric is easy and convenient to work with. No tension. Again, it’s worth starting with a pattern. The details must match. Connecting them together is not difficult. The sewing machine will do the job in a few minutes. Textile panniers need a frame. It will be replaced by small diameter aluminum tubes.
Every biker needs a motorcycle trunk. A homemade trunk will become an decoration for the “iron horse”.
Metal trunks from fishing boxes
The panniers are very easy to make from two fishing boxes. The plumbing work is minimal as the hinges and latch are already installed on the drawer lid. It is only necessary to make suitable fastenings and decorate them (for example, cover them with thin foam rubber and then cover them with leatherette). Thus, a winter aluminum box with dimensions 31 x 20 x 30 cm (volume 18 liters, weight 1.4 kg) costs only 980÷1100 rubles. There is no doubt about the strength of this design due to the fact that the box is designed for an adult in full winter gear to sit on it.
Equipment
The list below shows a set of accessories for a typical case with a lid on restrictive hinges. If the functionality of your case is different, we will select all the necessary accessories for you.
- Plywood cut to your size + plywood scraps for training
- Cut aluminum profile with a small margin in length
- Spring-loaded mortise handle 4 pcs
- Butterfly mortise lock 2 pcs
- Overhead hinge with opening limiter 2 pcs
- Corner bracket 8 pcs
- Ball corners 8 pcs
Required set of tools
When ordering a kit for assembling a case, you understand that you need some hand tools, as well as a little experience working with them. Here is the minimum list of necessary tools, without which we find it problematic to assemble a case at home.
- Riveter
- Rivets of the required size, washers, bolts, screws (depending on the design of the case and internal filling)
- Jigsaw
- Screwdriver
- Marking ruler
- Metal drill 5 mm
- Mallet or hammer
- Tension straps or belt clamp
- Saw and miter box for sawing off aluminum at 45% (or an electric miter saw).