Hi all. Every owner of gasoline equipment has encountered (or will encounter in the future) a problem - cylinder wear. Here they do everything they can - either buy a new cylinder and piston, or buy a new piston and go to a turner. Grandmas pay him, but he is bored... Many turners love blue (alcohol) and the straightforwardness of some leaves much to be desired... I suggest boring the cylinder yourself! It's pretty simple.
General provisions and safety precautions:
The author is not responsible for injuries, accidents during repetition, for “jambs” and defects obtained when trying to repeat the contents of this article.
- If you are under 16 years old, work should be carried out with adults (preferably a male assistant).
- Remember, you are working with rotating parts, do not wear gloves! Work with bare hands. There should be no sleeves on work clothes. Even if there is, roll up your sleeves to at least the elbow.
- What is in the photographs is the author’s work process.
- ANY cylinder can be sharpened using THIS method. The first one that came to hand was taken.
- For the sake of writing this article, a cylinder from the D-6 engine was taken.
- For boring you will need a drill with a power of at least 350 watts. In this article I used a 1050 watt drill.
- The lower the speed, the better. I have 550 rpm.
Please remember that you are working with electrical appliances. Do not allow exposed wires or other defects in the cable network. It is advisable to carry out work outdoors. If the workshop allows it, then you can do it there.
I hope everyone has checked the wires, the condition of the sockets, their workplace, and are ready to continue.
The principle of boring: a guide must pass along the entire length of the cylinder - also known as a “mill” (shaft, cylindrical body). It should be a perfect cylindrical shape. BUT it must be smaller than the current piston that was on the engine. “Rolling” sandpaper onto this shaft will give us a certain “grip” of grinding the metal. That is, the longer the blade, the more the cylinder “eats” from us. Exactly what is needed! To attach the paper to the shaft, we need to make a groove. And fix our sanding cloth in it.
Making a “cutter”
In this operation we will need: a birch log, calipers, a marker, a chisel, a saw, a cylinder (the one we are going to sharpen), a piston (new and old), a rasp (you can use a file), a drill, a long bolt with a nut or a hairpin with two nuts , sandpaper sheets “10”, “6”, “5” and “0” (on a fabric basis - not suitable on paper). There are a few caveats - the stud or bolt must be at least 8mm in diameter. The best solution would be 12mm. Sandpaper is selected independently, depending on the type of boring. It is advisable to go through the “rough process” and bring it “to clean water”, and not to drive the rough one until you are blue in the face. Then fix the finishing one, and buy and select a new piston...
Let's start - measure the sleeve with a caliper:
Let's take an allowance of 10mm and measure it on the already trimmed log:
Let's cut off the result:
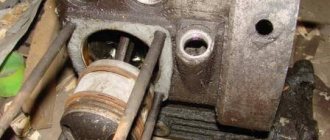
Let's outline approximately where we have “more meat”, and set some simple markings there and drill:
Immediately take a larger chisel and chop off the excess “meat”. Shape it into a cylinder.
But the shape of a cylinder will not work, it will turn out something like an oval:
The next step is to tighten the resulting cylinder onto the stud/bolt. Tighten until your teeth creak. When inserted into the drill, tighten until your teeth creak - it will unwind with a bang. If you tighten it harder, it won’t run away. Now secure the drill, make a stop for the chisel, and unwind the cylinder by pressing the gas on the drill. Take technology breaks more often. During breaks, tighten all nuts. If it gets loose, the results could be disastrous...
By substituting a chisel (smoothly substituting a chisel!) we ensure that we first get an oval:
Then the shape will remind us of a cylindrical object:
Later you will get a natural, perfect cylinder. I think there is no need to explain that the fine-tuning was no longer carried out with a chisel, but with a rasp, and later even with a file.
You should end up with a long wooden piston for the cylinder. Only well weakened. Somewhere by 0.3-0.6 mm.
Something like that:
This is an example of relaxation.
Next, we will make a technological cut in a wooden blank:
And you need to make a “latch” for it, that is, a latch. So that the sandpaper does not run away from us somewhere far away. Here I honestly admit that I stepped in the wrong place.
I made it wooden:
And it looked like this:
But when I started refilling, I realized that it didn’t hold well. The answer did not take long to arrive - a 3mm welding electrode worked perfectly as a clamp.
Make a fastener for the drill - it tends to run away from you!
Now let's see how we will have a working area:
And the “relaxation zone”:
Well, we have made our workplace. We can start taking measurements.
OUR SERVICES FOR BORING AND CYLINDER BLOCKS
CHECKING THE BLOCK FOR LEAKS - Squeezing antifreeze out of the cooling system - this means there is a crack in the BC or cylinder head. Therefore, it is necessary to check first the cylinder head, and then the block itself. Read more…
BORING THE BLOCK - The need to bore the block is determined by the wear in the cylinders: deep scuffing, ellipse, taper. The result is loss of compression. Read more…
CYLINDER BLOCK LINING - Some engines require repairs by replacing or installing liners. The cylinder block liner is produced by cooling the liner in liquid nitrogen and heating the engine body itself. We always hone the cylinder before pressing the liners . This is necessary for better heat transfer of the liner and block, and is a prerequisite for proper cylinder liner placement. Read more…
HONING OF BLOCK CYLINDERS - leaves certain “scratches” on the cylinder walls with a characteristic angle of inclination of the pattern. Thanks to this complex operation, an oil film is formed on the cylinder walls, which reduces the wear of the piston rings significantly. We STRICTLY adhere to the technology and recommendations developed by the world famous company KOLBENSCHMIDT. Honing is carried out in 3 stages: first roughing, then finishing, and then flat-top. Read more…
GRINDING THE CYLINDER BLOCK - As a result of engine operation and overheating, the plane adjacent to the BC head may be deformed. This can cause gases to enter the oil jacket or cooling, as well as antifreeze into the oil and vice versa. Read more…
THE AVERAGE REPAIR TIME FOR A CYLINDER BLOCK IS: boring - 1-2 days, liner - 2-3 days, V-block liner - 3-5 days.
The fact is that for accurate measurements, the block (preferably with a piston) must take room temperature from +16C to +22C - only this takes about 4-8 hours. PRECISION IS THE KEY TO CORRECT OPERATION OF THE CYLINDER BLOCK AND PISTONS!
Measurements
We buy a new piston, one repair size larger (usually 1 unit) and see how and where it fits (if it doesn’t fit, then it’s still ahead).
We push in different directions to understand where and what is in the way. If the cylinder worked in risky modes, it means it has a huge output. Mine worked with too early ignition, a slightly lean mixture, which gave quite high revolutions.
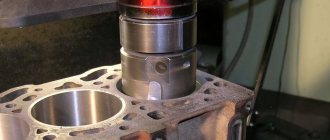
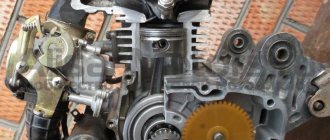
The cylinder mirror is excellent, but here's the breakdown:
What you see on the cylinder liner is dirt. That is, a lubricant that once was. After removing it, I preserved it for some reason. I don’t know why...
Having measured the piston (even if it goes inside, it jams right in the middle), I realized that it needs to sharpen just a little. If the piston doesn’t fit at all, then yes, let’s see how much grinding needs to be done. Usually in such situations they sharpen 0.1-0.15 mm. I sharpened 0.01-0.07. It is advisable to choose a piston in the store so that it barely enters. Then boring will turn out better because you can pick up the piston even larger and bore it again. In the pictures there is simply a worn-out cylinder that seems to have served its useful life during this repair.
You've been waiting for this for so long, let's start the process.
OUR ADVANTAGES
| MODERN EQUIPMENT | |
| All work is performed on specialized German equipment Huller Hille , which does not allow errors | |
| FAVORABLE PRICES | |
| We offer affordable prices for all car and service station owners, which is why our services are in demand. | |
| HUGE EXPERIENCE | |
| During the work of our company, the craftsmen have repaired more than a thousand cylinder blocks. | |
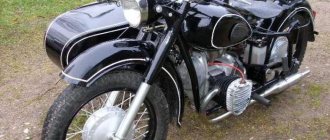
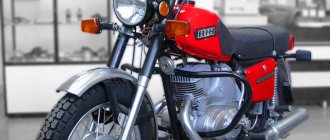
Crossing Minsk with your own hands
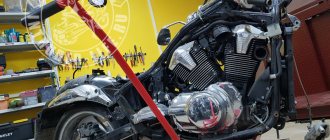
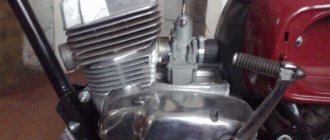
Many people want to become motorcyclists, but not all beginners have enough money to purchase a ready-made sports motorcycle. There is only one way out in this situation - to prepare a standard car yourself. The Minsk engine is considered one of the simplest in design and can easily be slightly boosted. It should be taken into account that in this case the engine resource decreases in proportion to the increase in power.
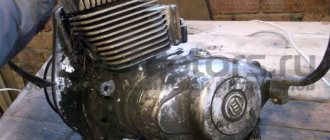
How to force Minsk
The engine of the Minsk is accessible for independent boosting. At the same time, it not only increases power to 15 hp, but also becomes more economical, and if the work is done carefully, it is also more durable.
Instructions
1. Determine the condition of the motor. The perfect option would be the latest and tested one. If the initial engine is dilapidated, purchase new crankshaft, piston with rings, bearings, cuffs and get ready for careful work. First of all, completely disassemble the power apparatus into its components.
2. Make sure that the windows in the liner match the channels in the cylinder jacket by removing metal. At the same time, make sure that the thickness of the walls of the crankcase jacket and neck remains at least 3 mm. To process the canals, use a drill with a set of cutters and scrapers. Achieve symmetry and high cleanliness of the surface of the purge channels. If after treatment the surface of the canals becomes smooth in appearance and to the touch, there is no need to polish it. Be sure to keep the height of the upper bypass windows and the vertical blowing angle constant. Make the front edge of the bypass window sharp, and saw off the upper and lower edges of the upper bleeder window along a radius equal to the thickness of the sleeve.