The design of a scooter carburetor is quite simple; Once you understand it, you will be able to understand how to properly configure the carburetor so that the vehicle does not let you down in bad weather, how you can tune it and improve the performance of the engine. You will be able to control the quality of the mixture and many other processes that affect the operation and operation of the device.
The principle of operation of a scooter carburetor
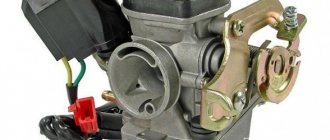
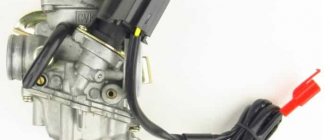
The carburetor design of a 4t scooter is not very complicated. The basic principle of its operation is as follows: a certain amount of fuel and oxygen enters the float chamber of the device, where they are mixed in the required proportions and supplied to the combustion chamber of the engine.
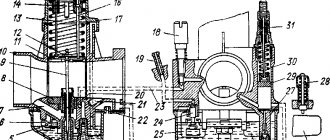
The design of a 4-stroke scooter carburetor may vary slightly depending on the model, but in general it is the same for all types of carburetors. The float version of products is most often used. It is distinguished by the presence of a float chamber in which fuel is mixed with air, after which the finished mixture is fed into the cylinder. In order for air to enter the fuel in the required proportion, the carburetor includes the following elements:
- Jets.
- A needle that meters the supply of oxygen.
- Spool.
- Throttle valve.
Sometimes the design of a 4t carburetor on a 50cc scooter includes an element such as an accelerator pump. It works in tandem with a starting mixture enricher. These devices help the scooter engine to work correctly and start in damp and wet weather. The correct operation of the motor depends on the coherence of the devices, so it is important to pay attention to their settings.
Scooter starter booster
Most often, scooters are equipped with an electric starting enrichment; on older models you can find a manual one. The task of this device is to create the right mixture in order to start the engine after a long period of inactivity.
The carburetor has an additional channel for connecting the enricher. If the device is automatic, the channel opens itself when you try to start the scooter and closes as the engine warms up. If the enrichment is manual, you need to close its valve yourself. The operating principle of the device is as follows:
- Inside the housing there is an element heated by electricity, which pushes out a needle that blocks the fuel channel.
- After the engine is stopped, the needle will be retracted.
Float chamber device
Mixing of fuel with air in the carburetor occurs with the participation of the float chamber; Thus, the finished fuel, saturated with the required amount of oxygen, enters the combustion chamber, where it explodes and sets the scooter in motion.
From the gas tank, fuel enters the carburetor through special pipes. But mixing cannot occur in them, so first the fuel ends up in the float chamber, and only then it is enriched with oxygen and further moved. To ensure that gasoline does not flow continuously, but in the right quantity, the carburetor is equipped with a special system with a float and valve. When the chamber is full, the float rises and the valve blocks fuel from entering the carburetor; when the float is lowered, the flow of fuel resumes.
Fuel dosing system design
The mixture is supplied to the cylinder in finished form, so it is necessary to control its quality. For this purpose, the carburetor has a special needle with grooves and a locking ring. The position of the needle depends on the position of the ring: the higher it is, the richer the mixture, and vice versa. Modern carburetor models allow you to tune them without disassembling them.
For proper operation of the device, the diameter of the main jet is important. It is selected based on motor power and diffuser size. When tuning, the nozzle hole can be enlarged.
Idling - principle of operation
If you need to start the scooter after a long period of inactivity or when it is cold, adjust the carburetor idle jet. This is necessary in order to enrich the mixture with oxygen at startup. As a result of correct adjustment, the engine will idle smoothly and stop stalling.
The system has a special valve that, at the right time, blocks the possibility of mixing fuel and air. In order for the engine to stop stalling, we make adjustments with the quality screw, adjusting the idle speed to the desired value. The adjustment screw is located on the side and is accessible while the engine is running. There is no need to disassemble anything, just carefully turn it with a screwdriver to the left or right. As a result, the speed will rise or fall.
If the quality of the mixture is insufficient, we achieve maximum idle speed. When the engine warms up, it will be enough to reduce the speed again to normal.
How to adjust the carburetor on an alpha moped
Beginning motorcycle enthusiasts often encounter the problem of incorrect carburetor calibration. This happens after replacing a unit or after long-term use. The usual setup can be done with your own hands in literally 10 - 15 minutes. While upgrading an incorrectly selected unit and increasing its performance (this often happens when buying a new carburetor happens at random), the matter is not simple and requires certain knowledge and skill.
And so, setting up a correctly selected or original carburetor occurs in several steps:
- The air filter is cleaned from dust and, if necessary, the spark plug is replaced, and you also need to check the integrity of all tubes and the reliability of their fastenings.
- The engine warms up to operating temperature and the quality of the combustible mixture is adjusted. In this case, screw the mixture quality screw to the maximum and unscrew it back about 1 turn. Next, you need to turn the idle speed screw until the engine begins to stably maintain speed at a normal level.
- Next you need to force the mixture to lean. To do this, the quality adjustment screw is unscrewed until the engine begins to operate intermittently. It is then screwed back in again until the motor runs normally and the motor is tuned.
- Checking the setting is done by sharply rotating the throttle. If the motor runs without interruption, then everything is done well. If, when you sharply press the gas, the engine begins to choke or stall, you will need to enrich the mixture a little more by rotating the corresponding screw.
Adjusting the quality of the fuel mixture
Why adjust the carburetor?
Carburetor adjustment may be required in the following cases:
- The spark plugs are serviceable, but do not work very well; their color has changed to black or yellowish.
- The engine does not provide the required power
- Scooter won't start
- Fuel consumption has increased excessively.
All these problems in most cases are caused by an insufficiently enriched or, conversely, overly enriched mixture with oxygen, and they can be corrected by correctly adjusting the carburetor.
The settings, regardless of whether you have a 2t or 4t scooter, have three phases and are made as follows:
- Idle speed adjustment
- Setting the fuel level
- Adjusting the quality of the mixture.
On some carburetor models there is no screw that adjusts the fuel quality, so you have to disassemble the carburetor to change the position of the needle.
The idle speed adjustment is carried out after the engine has warmed up: this takes no more than 15 minutes. For this purpose, the design provides an idle screw. It allows you to make the engine stable by selecting the desired idle speed. When the screw is tightened, the speed will increase, and when it is rotated counterclockwise, it will decrease.
It is important to adjust the quality of the mixture. If it is too lean, the scooter will ride with difficulty, and the engine will noticeably lack power. If the mixture is too rich, the spark plugs will turn black and quickly fail. Fuel quality adjustment is usually carried out using a screw located on the carburetor body. To enrich it you need to turn it clockwise, to lean it counterclockwise. If there is no screw, the carburetor is opened, the locking ring on the needle moves up for a richer mixture, down for a leaner one.
Adjustments are made as follows:
- Start the engine and warm it up for 10 minutes, after which you need to turn it off
- The screw must be tightened clockwise until it stops, but without force.
- After this, it is unscrewed counterclockwise 1.5 turns
- The engine needs to be started and the screw turned an additional 1/3 turn in the same direction. Wait 2 minutes
- As the speed increases, you need to unscrew the screw an additional 1/4 turn and observe the reaction for about 2 minutes. If the speed does not drop, repeat the steps
- If the speed begins to decrease, the screw must be turned clockwise 1/4 turn.
Ideally, the engine will operate exactly at 1.5-2 propeller revolutions, but its position depends on the quality of the fuel. In the case of a needle, the quality of the mixture will vary depending on the position of the needle locking ring. The disadvantage of such a carburetor is the small number of needle positions and the need to disassemble it each time to make adjustments.
Alfa moped carburetor overhaul
Before starting any work with the carburetor, you should know that any speck that gets into or is not washed out of the bowels of the unit can cause it to malfunction. Therefore, the workplace must be thoroughly cleaned. An important point is that all dismantling work is carried out only with the engine cooled down.
There should be no problems when dismantling the carburetor. You need to disconnect all the pipes from the unit (before disconnecting the fuel pipe, you need to turn off the fuel supply valve) and the throttle cable. Next, the assembly should be thoroughly washed from the outside using a brush and gasoline. As a “cleaning” agent, you can use gasoline, diesel fuel, kerosene, VD 40 or aviation alcohol of your choice.
Once all dirt has been removed from the carburetor body, you can begin disassembling it. It should immediately be clarified the purpose of the three (usually brass) flat-head screws located on the carburetor body (all three are on the left side).
- Located in the area of the air supply pipe and serves to adjust the quality of the mixture when the engine is idling
- Located near the throttle valve and is responsible for adjusting the idle speed
- Serves to dump sludge from the float chamber and is located at the very bottom of it
For people who do not have experience disassembling carburetors, it is recommended that they lay out the parts in a line in the order in which they were removed. This will greatly facilitate the process of assembling the unit and eliminate the appearance of “extra parts”.
When disassembling, the following is removed from the carburetor:
- float together with axle;
- locking needle;
- fuel jet (integrated with the idle emulsion tube);
- main fuel jet;
- emulsion tube of the main dosing system;
- float chamber cover gasket.
When disassembling the unit is completed, all internal parts should also be thoroughly washed. After this, the integrity of the parts is inspected, and if a defect is detected, the part is replaced. If the carburetor parts do not have defects and are not clogged with debris, then carburetor tattoos are not suitable for this engine.
What is the carburetor of a Chinese scooter and its capabilities, disadvantages, tuning
The carburetor circuit of a Chinese scooter is, in principle, standard and suitable for both 2t and 4t engines. The design of the carburetor allows certain actions to be taken to improve its performance, however, if the engine is two-stroke, the efforts will not make sense.
The simplest approach is to replace the carburetor with a more advanced one, for example, with an accelerator motor, if you have a fairly old version without it. Most often, simple tuning is limited to replacing the main fuel jet, this is especially true for engines with low power. Replacing the nozzle helps to increase the fuel channel and, due to this, add a little power to the engine.
Quite often, more serious tuning involves the use of a 150 cc scooter carburetor. Interesting models with a diffuser diameter of 17.5 mm. It is great for 70cc piston. Less often you come across a large diameter of 19-24 mm, it is just ideal for a bored 150 cc piston engine. However, the diameter must be selected correctly, otherwise the motor will begin to choke.
Tips and tricks
Setting up the carburetor on a 4t 50cc scooter is an important and responsible procedure for servicing motorcycle equipment.
When performing adjustment operations, it is important to follow a number of rules:
- perform adjustments only after the engine reaches operating temperature;
- rotate the adjusting elements smoothly, observing the operation of the engine;
- Make sure there is no debris inside the fuel chamber and the jets are clean.
Before starting work on setting up the carburetor, you must study the operating instructions and clearly determine the location of the quality and idle screws. If you have a 150cc scooter, the carburetor adjustment is done in a similar way. After all, the process of regulating the fuel system is the same for engines of different powers.
Sometimes it happens that the carburetor starts to malfunction on a faithful iron horse and it becomes necessary to clean it and adjust it correctly. Symptoms of this problem most often include: difficulty starting the engine after long periods of standstill (1 day or more), power failures when switching from idle to load, and unstable engine operation at high speeds. And, as a rule, there is not always time or opportunity to roll the moped to a workshop where it could be repaired. Therefore, you have to take on this painstaking work yourself.
Design and connection of a Yamaha scooter carburetor
The Yamaha Jog scooter is one of the most popular on the Russian market: this is explained by the simplicity and reliability of the model, and its affordable price. The carburetor design of this scooter is standard, so you can figure it out using the description given above. However, when installing it, inexperienced owners may encounter some difficulties, which we will help you sort out.
The device is worth considering in more detail. This will help you understand not only how to adjust the carburetor and use it correctly, but also how to connect it correctly.
- A starter enricher is attached to the carburetor body: it is small in size and housed in a plastic case. It has two bolts with rubber seals. The enricher is powered via a 12 V battery. This device is used to start the engine when cold, as it allows you to automatically enrich the mixture with oxygen.
- The fitting is connected to the fuel supply hose coming from the gas tank tap.
- If the enrichment unit needs to be removed, you will need to not only unscrew the bolts, but also disconnect the electric valve, to which there are only two wires.
- The mixing chamber has a special cover to which a bolt is attached. If you unscrew it, you can get to the throttle valve. This allows you to check whether the throttle cable is connected, and also to get to the needle that regulates the level of fuel and air supply. If the carburetor needs cleaning, you will definitely need to remove the throttle.
- The enrichment connector has two wire outputs, the yellow one is connected to the generator, the green one goes to ground. In principle, if you reverse the polarity, nothing will happen and the device will still work.
- For the enricher to operate, voltage must come from the battery. When the element inside the device heats up, the needle will extend.
- A special fitting is connected to the air filter, and there is a rubber elbow between them.
- There are several screws on the carburetor body with which you can adjust the idle speed and mixture quality.
- The float chamber is screwed from below and has 4 mounting bolts.
- There is an additional fitting for oil supply: it is the smallest.
- The second fitting is needed for communication with the atmosphere; you do not need to put anything on it.
- The third one is connected to a gas hose. It goes to the gas tank vacuum valve.
Removal and cleaning
Before adjusting the carburetor on the Honda Dio scooter, taken as a simple example, it is necessary to remove and clean this system. To do this, all plastic elements that impede this process (the seat and the plastic underneath it) are dismantled.
If the engine is 2t, then the fuel and oil hoses will be disconnected (there are no oil outlets on 4t engines). The enrichment contacts are dismantled. Then simply unscrew the carburetor mounting bolts and pull it out. Its external elements are cleaned of dirt.
Next, you need to partially disassemble the fuel supply system. The bolts securing the float chamber cover are unscrewed (it is thoroughly washed), and the float is removed. Next, the carburetor is flushed. The system is assembled in the reverse order and installed in place.
Carburetor design (video)
For clarity, we suggest watching a video instruction about the design of carburetors and the principle of their operation:
Knowing the structure of the carburetor and understanding what needs to be connected where, you can easily disassemble, reassemble, clean and adjust it yourself, regardless of what brand and model of scooter you have, with some skill. All these procedures will not take much time and will help you save money on car services. The ability to carry them out will help you out when the engine does not want to start.
Carburetor value
Today, there are several ways to supply fuel to the engine. They differ in their principle of operation, but all devices are united by a common parameter - preparing the exact amount of working mixture.
The carburetor is a simple but effective device for optimal dosing of fuel assemblies into the cylinders. The idea of its operation is simple - mix the required amount of fuel and air, and then feed the finished proportion into the engine.
The advantages of using a carburetor set it apart from other methods of preparing the mixture. The engine itself controls how much fuel it needs to receive.
Results
Despite all the difficulties and apparent complexity of the device, adjusting the carburetor on a scooter is possible both at home and in the field. It is recommended to carry it out at least once a season, especially during frosts - this will avoid flooding the candle. If your old engine starts to feel bad, adjusting the carburetor can extend its life. Although the moped will lose a little power. And yet, with the help of proper carburetor settings, you can make life much easier for yourself and your iron horse.
Signs of necessary adjustment
The only parameter that the driver controls while driving is the throttle position. It affects the volume of mixture supplied to the scooter.
There are a number of signs by which you can determine the condition of the carburetor. These include:
- drop in engine power;
- failures when accelerating the scooter;
- hard start;
- increased fuel consumption;
- abnormal reaction to the accelerator handle;
- sudden engine stop.
Signs do not have a noticeable periodicity; they can occur at any time.
Technical characteristics and operating features of the Honda Dio scooter
As you can see, this scooter model is ideal for the Russian consumer. Because it has decent quality and a reasonable price. Well, everyone has drawbacks, even the most expensive models.
The second generation scooters - Honda Super Dio (AF-27) - began to be produced in 1990. They differed little from the previous model, except in design. Even the AF18E engine remained almost unchanged.
Three main variants of the Super Dio were produced: the basic AF-27 model with drum brakes and an AF18E engine, the AF-28 SR model with a front disc brake and an uprated AF18E engine, and the AF-28 ZX model - all the same, plus instead of a trunk she had a spoiler with a brake light.
Honda scooters of the Super Dio series continued to be produced until 1999. At a certain period, this design was produced under the name Dio Fit, with a new design of plastic body kit and headlights.
Specifications
Engine:
Engine type – AF18E, displacement 49 cc. see Number of cylinders – 1. Number of strokes – 2. Cooling system – forced air cooling. Maximum engine power – 6.8 hp. (7.0 hp for AF-28) at 7000 rpm. Torque – 0.73 kg*m / 6000 rpm. Compression ratio – 7.3. Transmission – variator. Ignition - electric starter. The tire size of the front and rear wheels is 3.00-10. Oil tank volume – 1.2 l. Gas tank volume – 5.0 l. Maximum speed – 60 km/h (electronically limited on AF-28). Chassis:
The front wheel suspension type is telescopic.
The rear wheel suspension type is pendulum. Front wheel brake type – drum (AF-27), disc (AF-28 SR/ZX). The rear wheel brake type is drum. Size and weight:
Base – 1145 mm.
Length – 1640 mm. Seat height – 700 mm. Ground clearance – 100 mm. Total weight – 66 kg.
Medium and high speed tuning
The quality screw prepares the mixture ratio at idle. Failures in operation at high modes are eliminated in other ways.
After opening the throttle valve, the fuel nozzle comes into operation. Its task is to supply gasoline to the diffuser while the scooter accelerates.
An incorrectly selected nozzle leads to deviations in the composition of the fuel mixture. During power build-up, the scooter may “suffocate”, until the engine stops completely.
The correct algorithm for tuning the carburetor at high speeds:
- cleaning internal channels from debris;
- checking the fuel level in the float chamber;
- adjusting the shut-off valve (needle) stroke;
- checking the jet's nominal value.
A sign of proper operation of 2t and 4t engines is a sharp increase in speed when the gas is opened. Any deviations from the stability of engine acceleration indicate a violation of the settings.
Signs of deviation in mixture preparation
An important indicator of the quality of fuel combustion in the cylinders is the color of the spark plug. An experienced mechanic only needs to look at its condition to understand what adjustments need to be made.
There are two characteristic colors:
- A white (grey) spark plug means the mixture is lean, the moped overheats and does not produce optimal power.
- Black with soot – excess fuel, excessive consumption.
The behavior of a scooter with an incorrect fuel mixture is specific:
- abnormal reaction to the throttle;
- pops in the muffler;
- smoke content of exhaust gases;
- noticeable decrease in power characteristics;
- sudden engine stop.
A normal moped spark plug is brownish in color. There should be no carbon deposits on it, its electrodes should be clean, without traces of melting.
Signs of deviation in mixture preparation
When studying the technology of how to adjust the carburetor on a 2t, 4t scooter, the driver must know what factors indicate deviations in the process of preparing the fuel mixture. If it is lean, a popping noise will be heard from the system when the vehicle reaches high speed. In this case, the carburetor spark plug will be white. Electrodes may in some cases melt due to operating at too high temperatures. Also, the scooter will react poorly to turning the throttle when reaching the upper limit.
If the mixture is rich, a large excess of fuel will be detected. There will be black carbon deposits on the spark plugs. Black smoke and popping noises will come out of the muffler.
But if configured correctly, such phenomena will not appear. The engine will operate evenly at all speeds. There is no excessive consumption of gasoline. At any speed, the throttle will be informative, and when examining the spark plug, soot and soot will not be detected. Its color is slightly brownish (not white).
Adjusting the fuel level
The final stage of setup is to check the gasoline level in the chamber. The procedure is simple, but the subsequent operation of the engine depends on its correctness.
The fuel collects in the float chamber. Its volume is checked using a transparent tube. The required parameter can be found in the documentation for the scooter.
The top part of the carburetor is removed. The gasoline level should be just below the low level of the cap. If the readings differ, it is necessary to adjust the stroke of the locking needle by bending the antennae. Having set the desired range, the unit is assembled, the scooter is started and allowed to run for several minutes. After this, the level is checked again.
If the value is saved, the adjustment can be considered completed. The correct setting is checked by sea trials.
Overheat.
Plug Type: Extremely white insulator with small black flecks and premature electrode erosion.
Consequences: loss of scooter power at high speed or under load.
Probable causes: the spark plug is not screwed in enough; The scooter's engine cooling system is not working properly; ignition of the scooter too early; The thermal range is incorrectly selected - the candle is too “hot”.
Remedy: check the torque of the scooter's spark plug; operation of the scooter engine cooling system; adjust the ignition timing; select the correct spark plug heat rating.
Type of spark plug: melted and burned central and grounding electrodes (or one of the electrodes) of the scooter spark plug; bubbling insulator with metal deposits on it.
Consequences: significant loss of scooter engine power; ignition interruptions. Continued use of such spark plugs may cause serious damage to the scooter engine.
Probable causes: thermal overload; significant overheating of spark plug parts due to glow ignition - combustion begins before a proper ignition spark appears; use of low-quality fuel; burning out of the remaining air-fuel mixture in the combustion chamber due to an incorrectly adjusted fuel system of the scooter or the ignition timing of the scooter; The thermal range is incorrectly selected - the spark plug is too “hot”.
Remedy: check the scooter engine, ignition system and fuel system, as well as the quality of the working mixture and the ignition timing of the scooter. Install new spark plugs with the correct heat rating.
