In order to brighten up long trips on a moped around the city or on the highway, you can install a compact audio system on it. If you are tight on finances, then you can make music for your scooter with your own hands.
Preparatory work
Before you make music for your moped, take care of purchasing a number of necessary components, namely:
- speakers (10–15 watt);
- small amplifier;
- two-wire wires with which power is connected;
- switch off;
- additional power supply for 27–60 ampere-hour;
- MP3 player, cell phone or any other device that would serve as a sound source.
Procedure
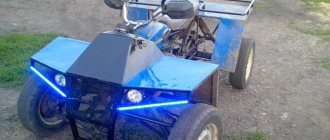
1. First, you should come up with and assemble panniers for your scooter, which will be located at the back or sides of the vehicle (they can be made from plywood or fiberboard). Inside the case you will need to make a system for securing all the wires, speakers and other components. It is better to integrate the speakers into the body so that the sound comes out towards the driver. It is better to install the part of the panel with the speakers last, after the remaining components have been installed, connected and tested.
2. The electronics of your equipment must be equipped with an additional battery , from which the wires will go to the amplifier.
3. To ensure stereo sound, it is better to mount at least two speakers, one of which will be located in the case, and the other in the steering wheel area. The wires from the speakers need to be brought out to the amplifier and connected so that their polarity is maintained, they do not cling to anything and are well insulated.
4. The cable that is responsible for connecting the phone or player can be taken from unnecessary headphones with the appropriate connector. Try to install it in such a way that you can connect a music source even while driving.
5. The amplifier's power can be connected either to the ignition switch or directly to the battery.
6. An alarm device that will show you the status of the scooter's music system can be made using an LED. It needs to be connected to a toggle switch so that it is always on when the audio system is working. The LED must be installed in a visible place on the case.
7. At the final stage, you need to ensure good insulation of all wire connections, turn on the music system, making sure that it is working. The case, fully filled with electronics, is installed in a pre-designated place and securely attached to the scooter. To add aesthetics, the case can be painted to match the moped, draped with waterproof fabric or leatherette to match the color of the seat upholstery.
Acoustics for mopeds from China
The desire to install good music in a moped does not come just like that. As a rule, the scooter owner cherishes this in his dreams for some time, and only then decides to carry out restyling. By the way, the instructions below are also suitable for installing acoustics on motorcycles and other types of similar equipment.
As a rule, ideas on this issue began to appear from the moment Chinese electronics entered the markets, in particular for mopeds and motorcycles. Music on mopeds, for example, didn’t sound so bad, quite satisfying for the boys joyfully zipping through the city streets.
Acoustic system for moped
Music for a motorcycle at any speed
There was a time when a motorcyclist could only talk to one person while riding, himself.
He could also listen to music through headphones, which were stuck in his ears and always fell out. To switch to another tune, you had to reach into your pocket and take your attention from the road. But more recently the situation has changed radically. They began to produce special motorcycle headsets for motorcyclists. They work in conjunction with a cell phone via Bluetooth. If, when they first appeared, they had exorbitant prices, and not everyone could afford to buy them, then recently such headsets have become significantly cheaper and have become available to many.
Music for a motorcycle will be a pleasant addition that will increase the pleasure that a motorcyclist receives while riding his iron friend. But when choosing a suitable amplifier for motorcycles, you may encounter some difficulties. Such an amplifier must meet certain requirements. It must have undeniably high-quality sound. It should not be overwhelmed by noise from the motorcycle or the environment. It should be compact, attractive, and functional.
Almost all manufacturers take these wishes into account and adhere to them when producing such amplifiers. It can be placed in a trunk or trunk. Some motorcyclists specially make a podium for it. Automotive technology is not suitable for a motorcycle. The amplifier must be protected from humidity, dust and temperature changes.
Modern amplifiers can work with any audio media. This could be an mp3 player or a mobile phone. The player can be mounted on the handlebars of a motorcycle. The amplifiers are small in size and can be powered from the mains.
Throughout our lives, we surround ourselves with our favorite music, and a motorcycle cannot be an exception. Pleasant music will relieve stress, lift your spirits and pleasantly complement the atmosphere of the trip.
Podiums in place of turn signals
Finding acoustics for a specific moped or motorcycle is much more difficult. As a rule, moped speakers are installed on the handlebars, and some models have short clip-ons. You will have to make products for acoustics yourself.
Note. The location for installing the speaker is easy to determine immediately. This is the reverse side of the turn signals. There is a flat area here, which is just asking for it. By the way, these turn signals perfectly divert water flows away from your hands.
Materials
So, to cope with this operation, you will have to stock up on the following:
Note. It is recommended to take 10 cm Pioneer speakers. These speakers are said to be practically waterproof, equipped with a beautiful mesh and produce maximum output in the low range. As for the weight of the magnet, it is 130 g.
Note. The fact is that if you narrow the body to the base of the turn signal, a healthy magnet protruding 4.5 cm at the bottom will not allow the acoustics to play as they should. The music will “fly away” somewhere to the side, and you won’t be able to turn the speakers in the direction of the driver’s face - they will rest. If you make the body a couple of centimeters higher relative to the bottom, when turning, the steering wheel will cling to the columns with the clutch and brake levers.
Acoustic kit and its production
Note: Stockings, as you know, are made of nylon. The latter - the material is durable and stretches well from side to side, without leaving folds or anything like that. The contours of the stockings will be smooth and pleasing to the eye.
Advice. It is advisable not to dilute a lot of resin at once, but to do it gradually. First a little, then again. The resin hardens within 15 minutes, this must be remembered.
So we got real speakers for a motorcycle or moped.
Installation
All that remains is to install these podiums:
DIY acoustic kits for motorcycles
Advice. The wires from the speakers can be routed through the turn signal vent.
A video review will help you learn more about the manufacturing process. Photos are no exception in this regard - materials are of good quality. The given instructions are not the only one of their kind; there are others. The price of a ready-made acoustic kit for a moped is not high.
Source
Amplifier
The focus should be on low power consumption with the highest possible power, very contradictory requirements. You will have to abandon the use of ready-made car amplifiers; low-power models (20...25 W per channel) are not available today, and a higher-power amplifier will be a killer of a battery or generator.
Class D switching amplifiers are also unlikely to help; their advantages manifest themselves at powers of hundreds of watts, and with low output power they are no more effective than analog ones. And at the same time significantly more expensive. Amplifiers on microcircuits most fully satisfy the stated conditions.
The absence of a voltage converter increases the overall efficiency of the amplifier and reduces its cost, and additional power can be obtained by switching to speakers with a resistance of 2 Ohms. Today there are many such car speakers, in particular, from JBL and Infinity.
With a supply voltage of 12 V, obtaining undistorted power of 20...25 W per channel from the microcircuit is not a problem. The peak will reach 40...50 W, even more than needed. Modern UMZCH microcircuits designed for car radio equipment do not require external OOS circuits and correction, use a minimum number of attachments and are equipped with built-in protection against load short circuits, overheating and other vicissitudes of fate.
There's only one problem. Today, there are no industrially manufactured automotive amplifiers on microcircuits; their production was discontinued more than ten years ago. Therefore, you will have to make the amplifier yourself or use commercially available ready-made units and kits for self-assembly.
However, in this case, it is necessary to interface blocks developed by different designers with each other, to coordinate impedances and signal levels, which is also not easy for non-specialists. It is always better to design a product comprehensively, rather than build a “Trishkin caftan”.
As one of the options, an amplifier based on the common TDA8560Q chip (Philips) is offered. It includes two bridge amplifiers, whose maximum output current reaches 7.5 A, so the amplifier easily carries a complex load, including passive crossover filters of multi-band speakers, and can operate with a 2 Ohm load.
Main characteristics
Sensitivity, mV 500 Load resistance, Ohm. . . . .2…4 Rated output power, W, at a load of 2 (4) Ohm 2×20 (15) Maximum output power, W, at a load of 2 (4) Ohm 2×40 (30) Harmonic distortion, %, at output power 1 W. . . .0.1 Rated and maximum output power are indicated for supply voltage Up=12 V with a harmonic coefficient of 0.5 and 10%, respectively. The operating range of the supply voltage is 10…16 V. The quiescent current is no more than 0.15 A (in the “standby” state 0.1 mA), and the maximum current consumption reaches 10 A.
The amplifier circuit is shown in Fig. 1.
The design of the amplifier is simplified as much as possible. The signal from the input jack XS1 (“jack” or “mini-jack”) goes to the passive tone control (A1). The required control range is provided by the microcircuit's gain reserve (40 dB). This solution is not only simpler and cheaper than using specialized chips, but also provides higher sound quality.
The volume and tone control unit is based on the circuit used in Gründig receivers and radios in the late 70s. Minor changes are due to the desire to reduce the number of parts and change the control range. As practice shows, deep tone control is not required in a modern audio path, and the balance control is a complete throwback. Therefore, asymmetrical tone control is adopted: “decline” is less than “rise”.
Double variable resistors R3, R4, R6 regulate the bass tone, treble tone and volume, respectively. From the output of the control unit, the signal goes to the power amplifier (node A2), made on the TDA8560Q chip in a typical configuration. To obtain maximum undistorted output power, the capacitance of the filter capacitor in the power circuit of the microcircuit is of great importance.
In most car radios, this capacity usually does not exceed 2200 μF, so the sound quality leaves much to be desired. This is especially noticeable when playing modern recordings with an extended low-frequency range. To eliminate this drawback, in the proposed design the filter capacitance is composed of two capacitors with a capacity of 4700 μF, located in close proximity to the microcircuit.
The microcircuit is constantly connected to the power source; to turn it on, a high logic level (above 7 V) must be applied to pin 11. In the off state, the outputs are transferred to a high-impedance state, and the current consumption does not exceed 100 μA. The state of the microcircuit is controlled by the power switch SA1, through which the supply voltage is supplied to the status indication control stage.
Diode VD2 together with fuse link FU1 protects the microcircuit from supplying supply voltage in reverse polarity. The chip contains a dynamic distortion detector DDD (Dynamic Distortion Detector) and a short circuit and overheating protection device that limits the output stage current to 40 mA.
Information from these systems is output to diagnostic pin 12. In normal condition, this output is logic high. Any emergency situation is accompanied by the appearance of a low-level signal at pin 12 - constant during short circuit and overheating, pulsed during overload. This signal closes the normally open transistor VT1, as a result the HL1 LED goes out and HL2 starts to light, signaling a problem. Zener diode VD1 eliminates the glow of HL2 in normal operation.
Details and design
Oxide capacitors C5-C7 (node A2) - K50-16 or similar imported ones with a rated voltage of at least 25 V. Capacitors C1, C2 (A1, A2), C3, C4 (A1) K73-17, BM, MBM, PM, CSR. Blocking capacitors C3, C4 (A2) ceramic of any type. All fixed resistors are MLT. Double variable resistors must have an inverse logarithmic (exponential) dependence of the resistance on the angle of rotation (index B).
The type of other parts is not critical. The KT315G transistor can be replaced with any npn structure with a base current transfer coefficient of at least 50 and a permissible collector current of at least 20 mA. It is advisable to choose the HL2 LED in red, and HL1 in any other color, but with a similar operating current value. You can also use a two-color LED.
The operating current (and the brightness of the glow) is set by resistor R3 (node A2), for a resistance of 1 kOhm it is approximately equal to 7...10 mA. Zener diode VD1 is necessary when using LEDs with a sharply different forward voltage drop (for example, LED HL2 is red, HL1 is blue). At close values of the voltage drop, the zener diode can be completely replaced by one two silicon diodes connected in the conducting direction.
In any case, the sum of the stabilization voltage VD1 and the forward voltage drop across HL2 must be at least 0.6 V greater than the forward voltage drop across HL1. The type of protective diode VD2 does not matter, only the maximum current is important (at least 10 A per pulse). Its task is to “stand” for 1…2 s until the fuse-link burns out. If the possibility of incorrect power connection is excluded, the diode does not need to be installed.
Due to its simplicity, the amplifier can be assembled on a breadboard or mounted on a board made of insulating material, using pins of parts and a mounting wire for connection. When using a printed circuit board, the power conductors should be tinned, or better yet, a copper conductor with a diameter of 0.8...1 mm should be soldered over the track.
Capacitors C3, C4 (node A2) must be placed as close as possible to the microcircuit. For installation of power and AC circuits, it is necessary to use a wire with a cross-section of at least 0.75 mm2. The heat sink can be made from a duralumin corner with a cross-section of 30×50 mm and a length of 100...150 mm, or a ready-made aluminum housing can be used. The chip substrate is connected to a common wire, so insulating pads are not required.
Considering the huge variety of types of variable resistors and connectors, in any case, it is more convenient to assemble a tone control unit using wall-mounted installation, since all parts can be placed on the terminals of variable resistors.
The layout and external design are determined by the task at hand and the capabilities of the radio amateur. The assembled amplifier does not require adjustment. When turning it on, it is enough to make sure that there is a voltage equal to half the supply voltage at pins 4, 6, 7, 9 of the UMZCH microcircuit. Permissible deviation ±10%.
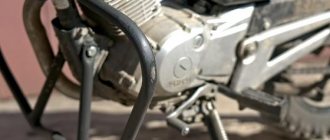
DIY motorcycle acoustics
The location was determined by itself - the underside of the direction indicators. A flat plastic platform, just asking for it. For a long time I couldn’t understand why the Germans turned these protruding “burdocks” with turns... until, in heavy rain, I saw with my own eyes how they diverted streams of water from the hands and elbows far to the side.
So, let's get down to business. I needed: - speakers 10 cm in diameter; — 2 pieces of waterproof floor laminate; - a handful of wood screws; - jigsaw; - children's plasticine; — two pairs of thick nylon stockings (40 den); — bumper repair kit (resin, fiberglass); — a can of fiberglass putty (the smallest); — brushes (5 pcs); - finishing putty; - primer - putty; — sandpaper (dry, from No. 160 to No. 400); - paint, varnish; — vibroplast (30x30 cm piece); — mineral wool (20 grams); — 3 — 5 days off; - hands (2 pcs.). The main advice for beginners is to START. This is the hardest thing. ))) 1) I take a clay saucer from the kitchen and apply it to the turn signal.
Eat. For a penny. Right with the saucer in my pocket I stomp to the Autozvuk store. I put the saucer on the counter, “I want a speaker like this.” There are 4 options with a diameter of 10 cm, I choose the Pioneer due to the stated water resistance, beautiful mesh and maximum impact in the low range. Magnet 130 grams. There is hope that there will be a little “meat”. I'm stomping home.
Second way
The second way to install a radio on a scooter with your own hands.
For installation you need:
- Radio with USB or aux input;
- Wires, cores 1 mm +/- 0.02 mm in diameter;
- Columns;
- Toggle switch with two positions;
- Material for platform and podium.
If the radio is installed under the saddle, you must first remove the plastic located on the sides of the scooter. Then a special podium for the radio is made, into which it can be made of plywood, covered and a cigarette lighter and lighting can be built into it. After fixing the radio, you need to run wires from it to the battery, and then install a plywood platform for speakers in the front glove compartment, cutting holes for the speakers and covering them with the same material as the podium. And then stretch the wires from the radio to the speakers, observing the polarity.
For convenience, you can purchase a long aux wire and run it near the speakers.
The battery lasts on average for an hour and a half of operation of the radio.
Motoacoustics: how and which one to choose
Moto-acoustics are exactly what have recently been bought with a bang in all specialized stores. 2-wheeled vehicles have ruled the city for several years now, completely crushing the competition from cars. And it’s not surprising, because it’s the bike that makes it possible to move around a large metropolis without problems, where traffic is limited by traffic jams. Let's find out from the article what kind of acoustics a motorcycle should have.
High-quality acoustics for a motorcycle
Functions and options of motorcycle radios
Players installed on motorcycles have the following capabilities:
- Playing music information from removable media (hard drives, flash cards).
- Equipped with a USB connector.
- Connection via AUX.
- Receiving radio station.
- Antenna.
- Adjust the volume and sound level for individual speakers.
- Program memory function, etc.
Of course, it is impossible to compare car and motorcycle players in terms of functionality. But in general, they significantly increase the level of comfort on long trips.
Acoustics for 2-wheeled vehicles
When preparing his motorcycle for long trips, a biker who likes to listen to good music must take care of installing high-quality acoustics. It will be great to listen to your favorite rock on the road!
Powerful acoustics for a motorcycle
As a rule, numerous models of motorcycle acoustics presented by various manufacturers are a set. It consists of a pair of loudspeakers protected by special housings. To securely fix the acoustics to the motorcycle, powerful straps with Velcro, as well as other mounting devices, are provided.
Active acoustics for a 2-wheeled vehicle provides a unique opportunity - not to connect an external amplifier, because the built-in power of about 450 V will sound oh so loud!
In your search for good acoustics for a motorcycle, you begin to understand that in our country this issue cannot be solved so easily. No, there is always a lot of Chinese slag in stock, but you can’t recommend such speakers to anyone. It’s not that they played poorly, it’s just that their reliability is still lame, no matter how they try to make us believe in happiness.
Good speakers and amplifiers are designed for installation in the case. In the case of a motorcycle, you have to think about how to install speakers on the handlebars, which would initially be sewn into a special waterproof casing.
Trying to contact services can also be a waste of time. The fact is that here you can hardly find an intelligent “acoustomaniac” working in motorcycle workshops. Yes, they will be able to install acoustics on a motorcycle, and how, but just install it, and then do it yourself, sorry comrade.
Acoustics for motorcycle Pyle
Note. And if you manage to find a more or less intelligent specialist, the price will be approximately $100. And hardly anyone wants to get handicraft work for that kind of money.
Music for motorcycle riding
Among professional bikers, the attitude towards listening to music while riding a motorcycle is ambiguous. Some people encourage such a pastime, while others categorically do not accept such an activity. Therefore, it is worth dealing with this point.
Music during a trip can even be useful. The acoustic background is constantly changing and helps maintain concentration. And it often becomes dull during a monotonous trip. Many people think that music distracts from the road. Then why are there no contraindications for using radios in cars?
But the rider's approach to listening certainly matters. When driving on the road, the most important thing is the road. And any motorcyclist should understand this. Most often, music is listened to either from a cell phone or from a player. This means that even before the trip, you need to take care of how convenient and painless it is for driving a motorcycle to switch music and quickly turn off the sound. Prolonged distraction by these procedures can create an emergency situation on the road. And this is really dangerous, and not only for the motorcyclist himself.
Another factor that opponents present is listening to music while driving. That because of the music, the motorcycle driver will not hear the traffic situation. But when riding a powerful bike, apart from the roar of the engine and the noise of the wind, the motorcyclist hears nothing else. Therefore, listening to music will not affect the perception of road sounds.
There is some practical advice for those motorcyclists who want to listen to music while traveling. There is absolutely no point in resorting to half measures; we are talking about using one earphone. In this case, the danger can become very real. Why? Each ear hears different sounds, and this changes the driver's coordination. Having heard a noise, a motorcyclist may not immediately understand its direction, and his inappropriate actions may lead to unpleasant surprises.
So you are convinced that there is no harm from using music while riding a motorcycle, and each motorcyclist will make the choice himself.
Moto acoustics Pyle PLMCA30
A meeting with experienced bikers may be more fruitful. On their motorcycles you can see real motorcycle dynamics, although most of them were imported from overseas.
On a note. Such models include European acoustics Pyle or something like that.
Imported acoustics for motorcycles
Now it's time for the heavy "artillery"!
This is for real “TRU” - bikers and connoisseurs of high-quality and loud music. And as a rule, “heavy” music)). For those who want his music not only to be listened to by everyone in the area.
These are really massive healthy cool Bluetooth speakers. They really cut heavy metal. When listening to these speakers at full volume, I can no longer hear my own voice. And no overloads or wheezing at the maximum level. These speakers will fit perfectly into the design of any chopper. Intruders, Bolivars, Hondas, Harleys, Kawasaki Vulcans are often installed on Suzukis... with volumes of 1500 cc. And they are really worth attention if you are the owner of heavy and serious equipment. Listen to good and correct music and enjoy to the fullest. The size and power of these speakers will not leave any music lover indifferent!
Avis model AVS445MP
Avis acoustic systems for motorcycles
Recently a new product was released - an audio system for Avis motorcycles, model AVS445MP. Made in a premium design, it is available in 2 colors: black body and chrome.
Acoustic system for motorcycles for the elite
Let us now take a closer look at the technical characteristics of the model:
Properly installed speakers
Another motorcycle acoustics from Avis are waterproof speakers that are ideal for a biker who regularly spends time on the road. The fact is that such loudspeakers are absolutely not afraid of moisture. The protective case is chrome plated, which also has a positive effect on the metal, which is no longer afraid of corrosion.
The speaker size is 100 mm or 4 inches. They are larger than the 445MP model, but can produce more volume.
Moto acoustics 883 HLC
The 883 HLC speaker system, which is what this model is called, is coaxial. The tweeter comes separately, it is 1-inch.
The manufacturer of these speakers promises that the speakers are reliably protected from splashes and drops, and they are incredibly resistant to vibrations.
Amplifier for motorcycle acoustics
The sound power that the speaker can produce is 80 W. In addition, due to the use of damping material, an excellent “soft” sound is provided inside the cabinet.
Other features of the model:
Features of radio tape recorders for motorcycles
As can be understood just from the name of the vehicle, a radio for a motorcycle and scooter simply must differ in its qualities from a device with the same purpose (playing music records and radio broadcasts) - from a player installed on a jet ski or snowmobile.
In order not to go into unnecessary technical parameters that vary depending on the type of motor vehicle, we will list only their mandatory characteristics. So, the main distinguishing features of motorcycle radios (by default, all types):
- Moisture-proof casing of both the sound-reproducing device itself (radio tape recorder) and the devices included in its system: speakers, subwoofer, etc.
- Increased resistance to external mechanical influences - impact resistance.
- Resistance to vibration loads and changes in temperature environment.
Depending on the type of equipment, the named technical protective characteristics may also change. In addition to the above, radios installed on ATVs, etc., have enlarged control panel buttons, which makes it easier for the owner to turn on (turn off, switch) the player in the dark without removing protective gloves.
Today, on the free market you can find a radio tape recorder designed for both a specific type of motor vehicle and universal devices. If desired, a motorcycle enthusiast can assemble an audio system from individual devices, depending on individual requests.
Motoacoustics from Boss
And of course, where would we be without the world-famous company that produces some of the best motorcycle acoustic models in the world – Boss. Let's look at the most popular options from this manufacturer.
Boss moto speakers
The Audio Marine MR60W model, although intended for installation in boats and other types of hydraulic transport, is often used by bikers.
Among the many features of these speakers, the following can be highlighted:
Specially designed for the needs of the motorcyclist, the Boss Audio MC300 speakers are protected by an additional chrome grille. There is an all-weather control panel that is incredibly convenient to control the volume.
Integration with various gadgets occurs through a 3.5 mm audio input AUX jack. The acoustic housing is shockproof and waterproof.
Standard equipment and additional equipment for radio tape recorders
The factory kit for a motorcycle radio includes:
- player with radio;
- two sound-reproducing columns (speakers);
- fastening elements for both devices;
- protective covers and fuses;
- electrical wiring kit.
The radio can also be equipped with:
- alarm protection system with attached control panel;
- subwoofer;
- additional speakers;
- satellite navigation.
For safe installation of the radio on the scooter
For the safest installation of the radio, it is necessary to remove the frame from its body, and only after that install it in a prepared place, and then carefully attach the frame by bending its petals. After this, you can connect the radio to power.
Experts advise making a separate wiring line to power the radio, which goes directly from the battery. The diameter of the power wires must be greater than or equal to the diameter of the wires.
No matter how simple the installation of a radio may seem, you need to be attentive and careful - and if you are unsure, turn to professionals.