Clutch cable lubrication
Do you grab the clutch handle and can't pull it towards the steering wheel? Are you annoyed by the evil squeaking of the clutch cable? If this is the case, then lubrication of the armor cannot be avoided.
Old-time enthusiasts (but not only them) do not have an easy life: parts tend to rust. And when they rust, the cables inside them squeak, squeal, or work hard. Half the trouble is when it comes to the clutch cable, because in this case the strong springs can easily retract the handle. It's worse when the gas is stuck. Then there is only one thing left: lubrication.
The working principle of a mechanical speedometer
With a mechanical speedometer, rotation from the gearbox through the drive is transmitted by a cable covered in a protective “jacket”.
A magnetic induction unit with a pointer indicator is used as a speed meter, and a worm drive with a drum counter (odometer) is used to display the distance traveled.
The position of the arrow on the scale depends on the rotation speed of the magnet driven by the output shaft (it is located on the gearbox). As the magnet rotates, it carries along an aluminum drum, on the axis of which a speed indicator arrow with a spiral spring is attached. The faster the magnet spins, the more the needle deviates.
Main malfunctions of the speedometer cable
The speedometer drive cable is highly reliable. However, problems with this mechanism cannot be completely ruled out.
So, during operation, the arrow on the instrument panel may begin to twitch or even stop responding to changes in speed. The reason may be a simple loosening of the nut that secures the flexible shaft to the drive. In this situation, winding the speedometer, or rather, tightening the nut, will help. In half of the cases the problem goes away on its own.
If this does not help, then you need to inspect the speedometer cable. It may be twisted, bent, or worn due to loss of lubrication.
Often, when you press the clutch pedal, an uncharacteristic squeak occurs, which also indicates an insufficiently lubricated cable.
Old style
old way to lubricate the clutch cable
One of the oldest methods for lubricating cables was a patent using a funnel. The cable is inserted from the bottom of the funnel, and the connection is sealed, for example, with a soft tube or electrical tape. You pour a little oil into the funnel (2-3 cm3) and leave this complex structure hanging on the funnel overnight. The oil will slowly drain between the cable and the armor. This method is best used for older type armor - without a plastic insert between the cable and the armor frame. Don't forget to put something under the other end of the armor so you don't have to start cleaning the floor the next day.
Post Views: 4,625
How to lubricate the cable?
Before lubricating, the speedometer cable must be washed. To do this, you can use any solvent that does not destroy the plastic braid: kerosene, white spirit, gasoline or WD40. They collect remaining thickened oil and rust. After washing, you should blow the cable with compressed air to remove dirt particles and detergents from the jacket.
The cable can be lubricated with any high-viscosity oil - for example, transmission oil. There is no point in using too liquid - it will quickly leak out, and the surfaces will soon be dry. The lubricant should have good penetrating ability, not be too sticky, and should not harden or become hard.
Solid oil and similar thick lubricants, including aerosol ones (for example, chain sprays) are not suitable for servicing cables.
Modern cables have a more complex design; they are filled with plastic with Teflon additives, covered with a polymer material and inserted into a “jacket”. It is better to treat such devices with liquid silicone.
Let's figure out how to remove and lubricate the speedometer cable.
Preparing a motorcycle for riding - or: What needs to be done after purchase
And so, the motorcycle has been purchased, but it needs to be prepared :)
First of all, I changed the oil:
The seller gave me Motul 5100 10W40 for the motorcycle, and he filled it up. The factory filled it with preservative oil, roofing felts of some kind of the wildest quality, but my father said that it felt like salidol diluted with kerosene xD
FAQ: It’s simple, the engine has warmed up a little, unscrewed the engine protection, unscrewed the drain bolt, let the oil drain under different inclinations of the motorcycle, press on the fork, on the rear, swing it from right to left. I poured 1 liter according to the marks in the inspection window (the dipstick is Chinese, there is no trust in it, and the manual says to navigate by the inspection window). It is better to immediately buy and place an aluminum washer under the drain bolt.
Adjusted chain tension
It was stretched like a string, you can ruin the bearings in one go, and plus the whole bike feels very rigid (in terms of suspension).
FAQ: Again, everything is simple: we loosen the wheel mounting bolt on the left side, using the nuts of the chain tensioner, I adjust it so that under my weight the movement up or down is 2.5 cm (on sports and road bikes, the chain almost does not change its tension under the weight of the rider, in Enduro suspensions are such that when you sit down, the chain immediately tightens, and if you set it up under no load, sitting on it, you will get a overtightened chain). After the adjustments, I rolled the bike back and forth until everything was seated, and checked the tension again. Then, using a caliper, I aligned the wheel in the center of the pendulum (I measured from the pendulum to the rim so that the distances on both sides were the same). I tighten the bolt back. After tightening the bolt, the chain is also slightly tightened.
The front brake hose ran directly above the center of the dashboard:
FAQ: I loosened the hose mounting bolt quite a bit - turn it so that the hose does not interfere with the tidy. We press it back. Now it runs along the crossbar of my steering wheel.
Lubricated the clutch and throttle cables
(although something like lubricant was visible under the clutch handle - it’s fake, the cables are COMPLETELY DRY, unlubricated - people broke quite quickly) What I lubricated with: graphite mixed with the transmission
Clutch cable lubrication
FAQ: We completely remove the cable, unscrew the cable adjusting nut at the engine, move the rubber band aside, remove the cable (I fixed the lever with a stick to remove the cable).
We release the cable from the adjusting drum at the clutch handle.
We take out the cable, remembering how it is routed through the frame and traverse.
The inlet hole of the cable on the engine side is quite large - it’s easy to fill in the lubricant (I used a syringe).
We fill in the lubricant so that it begins to flow out from the other side, rotating, bending it and moving the cable in the jacket back and forth for complete lubrication.
Reassembling in reverse order.
- I lubricated the inside of the clutch handle with silicone grease , and also sprayed the rubber on the cable near the engine inside with silicone grease (the cable began to fly into it like clockwork :) without friction)
Throttle cable lubrication
FAQ: It’s more complicated here, because the cable goes into the carburetor, and you can’t easily get into it. To remove the cable, you need to: Remove the seat, remove the plastic, remove the tank.
The main thing is to remember what was unscrewed where, the sequence, it’s better to take a photo of how it was.
I didn’t remove the tank completely, I’m too lazy to bother with shutting off the fuel, I moved it to the side and held it suspended, don’t forget to disconnect the connector before doing this so as not to accidentally tear it out.
Unscrew the carburetor cover and use pliers to disconnect the cable.
We disassemble the gas handle and remove the cable. We lubricate the cable, just like with the clutch, BUT, but not from the carburetor side, because there along the cable, oil can drain into the carburetor and get inside, in general, be careful there. Reassemble in reverse order.
At the same time, I remembered
the position of the needle from the factory: 2 mark from the bottom out of 5.
- also lubricated the gas handle inside (under the white plastic and where the cable is) with silicone grease , now it turns easily and pleasantly

- By the way, under the plastic, the tank still has an ebb/groove so that gasoline flows forward rather than under the seat.
There are also holes for air in the tank cap, but they are made in such a way that if you tilt too much, gasoline will just flow out of there in a stream... you can catch fire and explode xD joke ahahaha
- There was a rubber noise (squealing, clanging), and yes, it was rubber noise - because it was the rubber bands in the wheel axles making noise.
I removed it and simply sprayed it with silicone grease , being careful not to get it on the rotors/calipers.
- Replaced the clamps on the fuel system, on the normal ones, there were these little ones made of wire that don’t compress at all...
Lubricated the chain
MOTUL C3 Chain Lube Off Road chain lubricant. It is lubricated only between the plates at the link joints (not outside the chain, not along the cylinders).
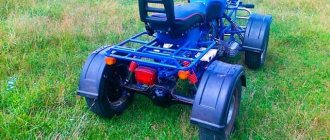
And finally, a photo of the X250 naked :)
Next is adjusting the light, but that will be a separate post later.
And now for a ride :)
Tags
- X250
- Preparation
- Service
- Cable lubrication
- Chain
- Clutch cable
- Lubrication
- Settings
Step-by-step instructions for removing and lubricating the cable
Step 1: Removing the cable
Disconnect the vehicle's electrical system by removing the negative terminal from the battery.
To get to the cable, remove the dashboard. To do this, unscrew the 4 mounting screws. One of them is located above the leftmost air duct. Remove the instrument panel itself, which is secured with two screws on the sides, as well as the chip with wires located at the back.
Locate the cable connection location on the back of the speedometer. Remove the clamping nut that connects the cable to the mechanism.
Open the hood and pull out the protective panel under the windshield, disconnect the plug of the electronic control unit, because it will interfere with operation. Next, slowly pull the cable out.
Remove the cable from the gearbox (it is secured with one bolt). When doing this, be careful not to lose the gear.
Step 2: Lubrication
Lay the speedometer cable on a clean (!) surface, for example, a large piece of cardboard or plastic. Make sure there is no dust, sand or debris on it - even the smallest particles that get into the speedometer housing can cause abrasion and destruction of the cable.
If the lubricant is thin enough, you can run it directly into the housing using a syringe without removing the cable itself.
The second option is to pull the cable out of the housing and evenly distribute a small amount of lubricant over its entire surface, slightly short of the ends. Flip the cable over and make sure the underside is coated as well. In this case, the layer should not be too thick, since during installation the lubricant will be squeezed out of the housing and contaminate everything around it.
Align the cable and correct any kinks by applying pressure.
Thread the cable through the housing several times to ensure that the lubricant is evenly distributed along the inside. There should be no resistance when pulling. After this, wipe off excess grease from both ends.