Among inexperienced owners, the question often arises about how to properly disassemble and then bead a tire on a scooter. The work is simple, but it has a number of nuances.
If you do not follow a number of recommendations, a perfectly suitable tire can easily be damaged. Even if the current tires are in poor condition and there is no point in putting them back, it is still important to do it correctly without damaging the disc.
Replacing scooter tires
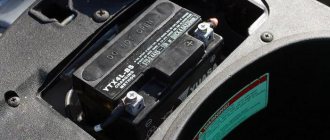
When I bought my scooter, I had regular slicks (tires for asphalt, with small grooves). The rear wheel was already a little worn, although the front one was still quite good (sorry for the dirty look in the photo):
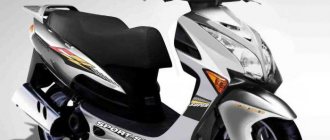
These are Thai Vee Rubber tires, at that time they were already 5 years old (in my opinion, not so young). There are no punctures or damage. In principle, it was still possible to ride and ride, but I got into a rage and decided to replace it - like many other things on the scooter. I didn’t see the point in buying expensive Dunlop, so I chose Taiwanese Kenda tires, which have a good reputation among scooter riders. At least it is wear-resistant and lasts for much more than one season.
Since I ride both on asphalt and on the ground, I decided to buy tires with more teeth: with a clearer checkerboard pattern, so that I can slide less on the ground and on the grass. And I chose the Kenda 10″ K418 model, which cost me only 1,770 rubles for two tires.
To save money on tire fitting (and also gain additional experience), I decided to re-flat the tires myself. Why I bought a mounting tool, took an extra large screwdriver and got to work. I was well versed in theory, but this was my first time practicing.
Removing a tire from some unfortunate scooter wheel turned out to be no easy task. I spent probably half an hour working on the first wheel. It happened at noon under the scorching July sun, and I was sweating, cursing my greed. But there was nowhere to retreat. I removed the tires from both wheels and put new ones on the rims (it took me probably an hour and a half). At the same time I changed the nipples.
But then desperate attempts began to fit the tire onto the sides of the rim. Since I don’t have a powerful compressor, this can only be done using one old-fashioned method: pour gasoline inside the tire, let it bubble, and then light it with a match. In theory, the gasoline inside should explode, and the explosion would cause the tire to sit on the rim.
I tried to do this 15 times, manipulating the quantity and quality of gasoline, setting it on fire from different sides and jumping on the wheel - but every time I was met with fatal failure: the gasoline burned, but did not sparkle. So, reluctantly, I went to the tire shop. Where kind people curbed both wheels for me completely free of charge :).
As for the impressions of the new tires, of course they are positive. Although I didn’t notice much of a difference in performance on dirt roads, on asphalt the scooter began to brake better, meaning these tires grip the asphalt better. I can confirm good wear resistance - I haven’t even worn out those thin protruding rubber peepholes yet.
However, I also drove quite confidently on clay - dry and wet - all summer, so I think I bought the tires for a reason.
How to disassemble a scooter wheel
We take the wheel, unscrew the valve and bleed the air. In order not to scratch the wheel rim and to protect yourself from foreign objects getting into the tire or under the tire bead (during reassembly), we place some rag on the ground. We place the wheel on a rag and stand with our feet on the tire, stomping a little until the tire completely comes off the outer rim of the disk. For those who don’t know how to remove a wheel on a scooter, I’m putting a link to the article: How to remove a scooter wheel
If you have disc brakes, remove the brake disc from the wheel before mounting the tire! Otherwise you will bend it - 100%!
This is how we stand on the tire and trample until it completely comes off the wheel rim. To facilitate this process, the tire can be watered.
To mount the tire, be sure to use special mounting “shovels”; I use Soviet-made “mounters” from a kit from some motorcycle. Mounting the tire using screwdrivers, wrenches, etc. It won't lead to anything good! Believe me, I’ve seen a lot...
With one hand we press the tire as much as possible into the rim, with the other hand we insert the mounting bracket under the bead of the tire and turn it outward.
When installing a tire, be careful that its bead does not jump into its seat; during installation, the tire bead must be constantly pressed inside the rim.
Holding the mounting with one hand, with the other hand we insert the second mounting under the side in the same way and turn it outward.
You should not move the mounting mount over a long distance at once; try to move the mounting mount a little at a time when installing the tire. This way you will protect yourself from damage to the cord.
One side was pulled out, the second side was mounted in exactly the same way. I think there is no point in describing the same actions in detail.
Before reassembling the tire onto the rim, carefully ensure that no foreign objects get under the tire bead, also do not forget to install the tire strictly in accordance with the direction of its rotation; usually there is an arrow on the side of the tire that indicates in which direction the tire should rotate.
1. Make sure you have:
- motorcycle
 or at least a motorcycle wheel assembly
 - wheel removal tool
- tool for re-beading - at least 1, but preferably 2 mounting blades (also known as “mounters” or “pry bars”)
- tire (if you are only changing tires) and/or tube (if you are changing/repairing the tube)
- pump for inflating the chamber
- repair kit for the camera (if you are going to seal the camera)
2. If this is not a sudden puncture in winter in the middle of the Yaroslavl steppe on Medved-Shatun, then it is recommended to change your shoes in a warm room. If, nevertheless, you are outside on a cold day and there is no room nearby, then it is recommended to warm up the tires after driving a certain distance. Why? A warm tire is much more pliable and will make your job easier.
3. Before all manipulations, it is best to place the motorcycle on the center stand on level ground. For what? Because the wheel is easier to remove if it is suspended.
If there is no central stand, then use the means at hand to replace it, or at least lean the motorcycle against something.
In a very extreme case, the motorcycle can be carefully laid on its side (so that the axle can be pulled out upward). Try not to dirty the axle and chain and do not forget to close the gas tap.
True, this may not always work with a loaded motorcycle. As an option, someone is on board, and someone is holding a motorcycle - who likes what... and this has happened
4. The process of removing the wheel should not be difficult. But just in case, instructions from Chris Scott:
Loosen the wheel nuts (if equipped, mark the position of the chain eccentric) and push it forward. Disconnect the chain and remove the axle mounting studs, if equipped. Remove the wheel; the brake should fall out. Reassemble all loose parts.
We do not lose or dirty the axle and bushings.
5. Place the wheel in an asterisk pattern on a flat surface. In this case, it would be very good to put something under it (a plastic bag, newspaper, rag, etc.) so that dirt does not get into the hub.
6. We unscrew the nipple and bleed the air from the chamber. The nipple is unscrewed with the back of the cap.
7. Unscrew the nut securing the spool nipple.
8. If there is a “shoe” (tow bar), then we do not unscrew it completely, leaving the nut on the last few turns of the thread.
9. Now it is necessary to “break the cord”, i.e. tear the tire bead off the rim without jamming the brake disc or bending the sprocket.
In order to tear the tire bead off the rim, help yourself with your foot in the motorcycle boot (heel). If necessary, you can jump on the tire (but remember the brake disc and sprocket!)
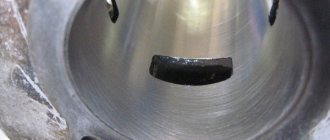
10. The tire beads should ideally meet. In the photo below they are not compressed enough.
11. Ideally it should be like this. Once you achieve this position, you can maintain it by stepping on the tire with your knees and pushing it with your weight, which will allow you to work comfortably and effortlessly on the wheel.
12. Next, working with a flat installation tool, we bring the flange to the outer side of the rim, working sequentially in a circle and starting from the nipple, so as not to damage the rubber around it with the edge of the tire (and it will not sink properly at the nipple). If the edge of the tire cannot be pulled over the bead, it means that the opposite edges have not fully entered the recess.
You can work with two rigs, alternately intercepting the tire. Either alone, but help yourself with your knee, which transfers your body weight and helps pull the tire flange away from the inside of the rim.
13. Use the curved end of the mounting tool to hook the tire bead from below. Inserting a second pry bar is easier if you release the first one a little; also hook the bead from below with the second pry bar, then pull out the tire bead one by one with the pry bar.
Now, if the length of the mount allows, we place its rear part under the brake disc. If the mount is short, you will have to hold it with your knee.
14. Once one side of the tire is completely removed from the rim, you can remove the tube. It is worth noting which side it was installed inside the tire. We push the “nipple” of the camera inside and pull out the camera.
15. If the tube is supposed to be glued, then place it on top of the tire, since it was located inside, so that, by examining the damage to the tire, you can understand where the tube is damaged.
16. If external inspection does not help, bring the “nipple” into working condition (screw in the nipple) and, to detect a puncture, inflate the chamber. If you cannot hear the whistle of escaping air, pass the camera near your eyes or over wet lips - small punctures can be found by the cold stream of air escaping. Or, if possible, submerge the camera in a bowl of water or a puddle...the puncture will be visible by the bubbles.
17. Note or mark the puncture site, release the air and place the camera on a hard surface to sand the area around the puncture with sandpaper or a rasp. The treated area should be rough and have a matte color.
18. Using a rag soaked in gasoline, degrease the puncture site from dirt and clean it of rubber dust; apply a thin layer of rubber glue to a wide area around the puncture. Wait for this layer to dry (5-10 minutes, check by touch along the edge).
19. Select the appropriate size patch. Most patches are glued on the side that has the foil on it. Using the handle of a knife or roller, press it firmly against the camera (you can press it with a motorized bot) so that the surfaces stick together, and squeeze out any air bubbles. If you have any difficulties, read the instructions for the patches :))
20. Sprinkle a little talc on the places where the glue got in (ash will also work); if the chamber was wet, put talc inside the chamber as well. This will reduce the likelihood of it getting pinched and deformed.
21. Next we throw the second bead of the tire over the edge of the rim.
22. Next, most often it is enough to “tear” the tire and rim with your hands
23. Also inspect the inside of the tire to make sure there is nothing there that could damage the new tube, and also make sure that the rubber band on the rim is not damaged.
If the tube has rubbed against a tire defect, during installation we place a piece of the unnecessary tube there. It's enough to get home, but it's better to throw away such a tire. Sometimes the culprit of a puncture is the protruding ends of the spokes or burrs on their nipples. This usually happens when the special rubber gasket breaks or becomes dislodged, exposing the spokes.
24. We put on a new tire (or an old one after repair) in the same way, first throwing one edge of the tire over the edge of the rim (do not forget about the direction of movement of the tire, if the rubber requires it):
25. We screw in the nipple and slightly inflate the chamber - it will be easier to insert it; but if you pump too hard, the camera may get pinched inside.
26. Stand the wheel upright (this will make it easier to insert the tube), insert the “nipple” for inflation into the hole in the rim and push the tube into the tire. This is difficult on tight tires - lift the other side of the tire with a pry bar to make room for your fingers, then adjust the nipple.
27. When the camera is inserted inside, screw the outer nut onto it without tightening it. The “nipple” should be perpendicular to the rim. Its position can be corrected by pulling it from side to side.
28. To make it easier to put the cord on the rim, the cord is lubricated - ideally with a soap solution. On the road, chain lube, WD-40 and even oil will do.
29. Begin to slide the tire flange onto the inside of the wheel rim. Here again, your knees and the flat end of the pry bar will help you. It is easier to bead towards the nipple.
30. The further you fill the tire, the more pressure you will have to put your knees on it.
31. At this stage you need to be especially careful so that you don’t get the tube bitten between the rim and the tire and damage it with installation. To do this, only grip the edge of the tire and never raise the mount more than 90°.
32. And so, in fact, until you reach the end, after which you carefully pick up the remaining piece of the bead and carefully, so as not to damage the rim, tuck the tire onto the rim.
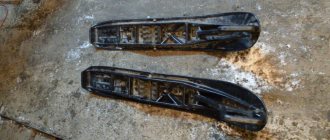
33. If you have a tow bar installed, make sure it is positioned like this:
Not like this:
34. Before inflating the tube, check that it is positioned evenly around the entire perimeter of the rim. The edges of the camera should not stick out.
35. Remember that the rubber around the nipple is thicker and the situation shown in the photo below may occur. Since the rubber is thicker in the nipple area, the tube in this place can get under the edges of the tire. If the valve stem does not go inside the wheel, then this is what happened. After making sure that the tube lies freely inside the tire, inflate the wheel.
36. Check the position of the “nipple” again: if it is displaced, reinstall it by moving the tube and tire in the rim. Inflate the chamber and make sure that the bead “sits” on the rim (usually this is clear by the characteristic pop). If not, pump the chamber up and down while adding soap. You can pump up to 2-2.5 atmospheres (the excess can then be simply released).
You can also hit a half-inflated tire on the ground several times.
37. In general, it’s okay if the board doesn’t “sit” on the rim. When driving, it will take its position.
38. Check if the pressure is decreasing. If it decreases, then there is a high probability that you have damaged the camera - then you will have to repeat everything from the beginning. If everything is in order, tighten the rim lock (if there is one) and install the “nipple” cap.
39. We reassemble everything in the reverse order, controlling the location of the wheel and the chain tension. And don’t forget to remove the entire tool 
40. And you can go!
Note. There is an opinion that: When mounting a tire, do not place a nut on the inner tube valve, pressing it to the wheel rim. If air suddenly escapes from the tire during a puncture, the tire often rotates onto the rim and drags the tube along with it. The nut prevents this, and as a result the valve will remain in the rim, and the chamber with a huge hole will no longer be suitable for repair.
Addition. 10 things you need to know about cameras.
- The tubes are made from a mixture of natural and synthetic rubbers. Natural rubber is more flexible and better able to resist punctures; synthetic rubber, however, is cheaper. Expensive tubes used by racing teams generally contain more natural rubber, allowing them to better follow the profile of the tire. There are also hard foam inserts called mousses that simulate the air pressure of a regular camera.
- For motorcycle manufacturers, a camera is a great way to save on cost and weight. Most motorcycles leave the factory with cheap and thin tubes. Since the mass of the chamber is both rotating mass and unsprung weight, this is a great place to reduce mass. However, almost all professional racers use thick heavy-duty tubes or mousses to prevent punctures.
- To ensure that the camera performs well and you do not make holes in it with mounts, it is important to install the correct size camera. If you install a 110 tube into a 100 tire, the excess rubber will get under the tire bar when mounting the tire, and you will make holes in it. If you install a smaller chamber, it will have to be pumped to compensate for the difference in size, but this will weaken its ability to resist damage. It is possible to install a smaller camera to save weight, however, this is not recommended by manufacturers.
- Tubes play a big role in tire performance. The tube must be the correct shape and size to fit snugly on the tire. If there are places in the tire where the tube is not pressed against it, then the grip on the ground will be worse.
- Inflating the chamber to the required pressure not only ensures the strength of the tire sidewalls, but also prevents punctures. You can focus on the standard recommended pressure of 0.8-0.95 atm. Also keep in mind that while driving, the pressure may increase by 0.3 atm due to heating.
- There are tubes of different thicknesses on sale, with varying degrees of puncture protection. Thin cameras have a thickness of 1.5-1.75 mm, heavy-duty 2-3 mm, and super heavy-duty 3.5-5 mm. The weight of a thin 110-90-19 camera is approximately 1230 g, and a 3.5 mm super heavy-duty camera of the same size is 1720 g. For comparison, the weight of a mousse camera is 1950 g.
- To extend the life of your tube, use cornstarch or baby powder to reduce friction between the tube and the tire casing. Inflate the tube a little when mounting the tire - and you will reduce the likelihood of damage to the tube with tire irons.
- The nipple is the weak point of the camera. It can be easily damaged and will leak air. The nipple is vulcanized into the chamber and when it rotates on the rim, the nipple can be pulled out, so check that the rim lock is installed and tightened correctly. Never tighten the nut on the nipple to the rim all the way. If you leave the nut loose and the chamber is turned slightly, the nipple will not pull out. In addition, you can see by the tilt of the nipple that the camera has moved and return the camera to its original position.
- Tubes are designed to resist the impact of the tire, but not external objects. If water or soil particles get between the tire and the tube, they begin to rub it. Try to ensure that they do not fall through gaps near the nipple or rim lock. A good solution is the rubber seals that Honda installs on its motorcycles. You can also wrap the rim with electrical tape as a replacement for the original rubber tape on the rim, this will make it difficult for water to penetrate through the spoke nipples.
- Even if the bladder is airtight, it may already be worn out. Dunlop recommend replacing the tube every 6 months. To determine whether it is time to change the camera, inspect it for cracks (like scales), changes in color (the old camera is darker), and faded inscriptions on the camera. Refurbished cameras work just as well as new ones, but the patch is the weak point of the camera and, ideally, should only be used as a last resort.
*** The article uses photographs and information from the following resources:
- https://www.dirtrider.com/,
- https://www.motogon.ru/,
- ,
- https://www.zr.ru/,
- https://www.djebel-club.ru/
How to disassemble a wheel on a scooter (photo and video)
Among inexperienced owners, the question often arises about how to properly disassemble and then bead a tire on a scooter. The work is simple, but it has a number of nuances. If you do not follow a number of recommendations, a perfectly suitable tire can easily be damaged. Even if the current tires are in poor condition and there is no point in putting them back, it is still important to do it correctly without damaging the disc.
How to remove a wheel without removing the muffler
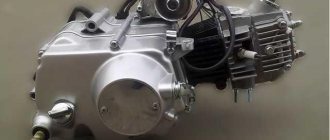
If a scooter has a punctured wheel, it can be replaced without removing the muffler. It is usually secured to the engine with 4 bolts. The exhaust system of some Chinese-made moped models consists of several parts that are connected by fasteners. They can be removed one piece at a time, making tire replacement easier. This recommendation can be used if there is no time or opportunity to carry out the full procedure according to the rules. In the case where the muffler is made in the form of a solid block, the only option is to bend it to the side. This can be done in case of emergency replacement of a broken wheel.
You may be interested in this About SUV tires
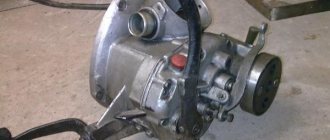
If the muffler consists of several compartments, those parts that interfere should be removed. These can be side mounts, knee and plastic. There are variations in designs when it is enough to move the weakened pipe to the cylinder through the gasket. Next, unscrew the fastenings on the sides and remove them so that nothing unnecessary gets in the way.
Important!
Before installing all parts back, check the condition of the gasket. If it has shrunk and cracked, it needs replacement.
Sequence and features of work execution
It is easier to repair the wheel yourself when another tube is available. To deflate a tubeless tire without leaving gaps is quite difficult - it requires a sharp increase in pressure, which only a high-performance compressor can generate. But if you still have to change the tires, you can use the “folk method”. After unscrewing the nipple, pour some gasoline inside. Shake the wheel and ignite the steam coming out through the hole. There will be a small explosion causing the sidewalls to settle on the rim. Regarding safety, this procedure is not capable of breaking the tire, since it has a good margin of safety. But this should be done not in the garage, moving away from the cans of gasoline at a great distance, so as not to provoke a fire. It is not recommended to perform such manipulations with a new copy, since unburnt gasoline will remain inside. Wear from it will accelerate several times.
When to change a tire on a scooter
- The tread height is less than the stated minimum standards for motorcycles and mopeds (usually 0.8 mm according to traffic regulations, but may vary depending on the country). Tread depth is measured using a caliper or depth gauge in the area most susceptible to wear.
- The tire has mechanical damage that compromises its integrity.
- The tire has cracks that appeared from “old age”.
- The tubeless tube has numerous punctures and allows “laces” to repair punctures.
- Various swellings and bumps that appeared during operation due to the supply of excessive pressure (remember that tires can be inflated at a nominal pressure of no more than 2 Atm.). Bumps can also appear as a result of a blow.
- Other damage.
All this obliges you to promptly take care of purchasing new tires, dismantling the old one and correctly installing the new tire. Let's look at how to do this correctly.
Wheel assembly
Before installation, determine the direction of rotation of the tire - there is a special arrow on the left or right side. If it is missing, installation can be done in any direction. Place as much of the tire on the rim as you can. Only then take hold of the screwdrivers or mounting brackets. Manufacturers recommend pumping the rear tire up to 2.5 kg/cm2. If you have a tubeless tube, the pressure increases to 3.5. Excessive pressure is only required at the initial stage so that the sidewalls are firmly seated in the rim. Then reduce the pressure to the manufacturer's recommended pressure.
How to disassemble a scooter wheel?
If you wish, you can disassemble the wheel yourself. But just keep in mind that it’s easy to disassemble and flange the wheel, but making sure the tire sits on the rim is very difficult. To fit a tubeless tire onto the rim, you need to put a lot of air into it, otherwise it won’t fit.
Some scooter riders, in order not to waste their time searching for a powerful compressor, install a tube in the tire and pump the wheels with a regular pump. Others take the wheel to a friend who has a compressor or to a tire shop. Tusks - they plant a tire using an explosion: they pour gasoline into the tire, bring a match to the valve, an explosion occurs and the tire hits the rim.
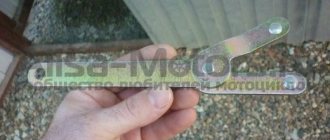
The hardest part is getting the tire off the rim. During operation, the tire sticks tightly to the rim and there is no way to press it off the rim except with a machine. Most of us don’t have a machine, much less a machine for a scooter wheel. Therefore, we will try to beat off the tire in the old collective farm way: using a corner.
We remove the brake disc from the wheel (if there is one, so as not to bend it), bleed the air from the wheel, take a piece of a suitable corner 4-5 cm long, place the corner under the rim and beat off the tire with a hammer
You should not hit the tire in one place, otherwise you will punch a hole in it or damage the rim. Hit a couple of times with a hammer - move the corner a little to the side, hit again and so gradually go in a circle until the tire falls off
After the tire falls off the rim, turn the wheel over and beat off the other side
Let's take the "montages". “Fasteners” should only be used from the factory, and under no circumstances should the tires be beaded with screwdrivers or wrenches - you will 100% break the tire!
under the tire, turn it out a little, make sure that the tire does not hit the side, but is in the depths of the disk, and turn the tire outward
Holding the “installation” with your hand, with your other free hand we insert the second installation under the tire and turn it out again
We take out the second assembly, wind it a little further and turn it out again
After the tire comes out halfway, you can turn it out by hand.
The second side turns out even easier than the first
How to properly remove a wheel from a hoverboard
If you experience a breakdown while using a hoverboard or mini-Segway, then it needs to be fixed urgently. Most often, owners of such devices are faced with repairing the wheel motor or replacing the camera. In this article we will describe in detail how to properly remove a wheel from a hoverboard yourself at home. Because the most common breakdown of a mini-Segway is associated with this part.
Please note that before repairing, read the entire article, and if the described methods suit you, only then proceed directly to the repair. In the event of a serious breakdown , we recommend that you contact a specialized store (where you bought the hoverboard) or a service center, where they will advise you on any issue.
Why remove the wheel?
When using a hoverboard for a long time, it is difficult to avoid breakdowns. Sometimes even the highest quality device can fail, despite the fact that manufacturers are constantly improving the strength and resistance of the device to mechanical damage and environmental conditions.
Children's hoverboards – 6-8 inches
Vehicles with small diameter wheels (6-8 inches) are usually equipped with hard tires. They are sensitive to the quality of the road surface . On a bad road, the hoverboard can be damaged by strong vibration (received while driving), fragments of small stones, etc. This can lead to damage to electronic components and possible damage to the case. When vibration occurs, the fasteners become weaker and the wires become frayed. It is better not to use such transport on the street.
Adult hoverboards – 10-10.5 inches
10" wheels are more versatile. Their design includes soft tires that reduce the effect of shaking when driving. There are two types of large wheels: with a tube in the tire and tubeless. Each type has advantages, but the disadvantage is the same. Often, mini-Segway owners notice that the tire is flat . There may be several reasons for camera malfunctions:
- Penetration by a sharp object caught in the way. For example, a sharp stone or a piece of glass.
- Formation of microcracks invisible to the eye , which are difficult to detect even when the camera is lowered into water. This situation occurs when transport is used for a long time and actively at low temperatures.
- The nipple is faulty or not tightened enough. If it breaks, it will have to be replaced; purchasing a special cap to protect against air leakage can also help.
Tubeless wheels can also get punctured. If the rim is deformed, the tire contacts it unevenly, and the air pressure gradually decreases, causing the hoverboard wheel to go flat. In addition, the seal of the gasket may be compromised. In most cases, repair or replacement is required, which requires removing the wheel.
Step-by-step instructions for removing a wheel from a hoverboard
Repairing a hoverboard at home is not at all difficult. First of all, you need to remove the wheel and check it for punctures or other defects. Then determine whether the part can be repaired or whether you will have to buy a new one.
What you need for disassembly
Before dismantling, we will prepare the tools that will be needed:
- Phillips screwdriver or screwdriver;
- hex wrench;
- bicycle mounts.
Stage 1: Disassembling the case
Using a Phillips screwdriver or screwdriver, carefully unscrew the screws located on the bottom of the case. Then we lift it and remove it. It is worth considering that on 10-10.5 inch models, part of the case is secured by a wire from the power button.
Step 2: Disconnecting from electronics
Disconnect the wheel motor from the motherboard and battery. The battery is secured with a plastic holder, the 4 screws of which are unscrewed with a Phillips screwdriver. Then remove the side board stand.
Stage 3: Dismantling
Now we see the mount that secures the wheel. Using a hex wrench, unscrew the 4 bolts and disconnect the gyrocycle part.
In the video you can see a complete disassembly of the wheel of the Ninebot Mini Pro hoverboard:
How to change a wheel on a hoverboard
It is possible to replace the motor wheel yourself, but this process is quite labor-intensive. Do not forget that after opening the case or replacing a part, warranty service will not be valid. Sometimes sealing the camera is not enough, so you need to go to the store to buy a spare part. To avoid making a mistake with your choice, consult a special forum or talk to the seller, otherwise the wheel you purchased may not be suitable.
How to replace the camera on a hoverboard
Anyone who has had to do this on a bicycle can change the camera. If you are sure that it’s all about it, then you can install a new one without even removing the motor wheel. To do this you will need mounting brackets for bicycle wheels.
- To begin, completely release the air by pressing the chamber nipple.
- To avoid damaging anything, carefully and effortlessly insert the mounting bracket between the rim and the tire.
- Next, we begin the process of disassembling the tire, and it is better to do this with the nipple.
- If necessary, remove the tire by hand. But if we only need a camera, we can easily get it ourselves.
After removal, we inspect the camera for punctures or other deformations. The best repair option would be to replace the camera with a new one. Now they are sold in any electric vehicle store in an assortment, so it is not difficult to buy the part. It is only important to know the diameter and width of the wheel of your Segway model .
Tape the camera
If the hole is not large, then it can be sealed using the same principle as for sealing bicycle wheels. Modern stores offer special kits for gluing (patches). Their advantage is that you can use the set in any circumstances and conditions. Even right on the street. The main thing is not to forget to take with you a compact repair kit and special pullers for installation.
At home, you can seal the hoverboard chamber as follows:
- Let's prepare the necessary tools: glue, patch and vice .
- Let's clean the surface of the camera from grease and dirt in the place where the puncture was found. In this case, we use alcohol or acetone. In the field, a clean cloth will do.
- Apply glue to one or both surfaces, depending on the requirements of the instructions on it.
- Press the patch firmly and hold for 10-15 minutes, during which time the glue should set.
When gluing, you can use classic Moment glue , but it will take more time to fix. In this case, we use a vice or some kind of press and leave the camera for a day. If you don’t have a special patch at hand, use a piece of rubber from another camera. Just pay attention to the fact that it must be well cleaned and without damage .
This video details how to dismantle and reattach the mini-Segway camera:
How to inflate a hoverboard tire back
After installing the tube and tire on the rim of the electric vehicle, you need to inflate the wheel to the pressure indicated on the tire. But first, let’s pump up the camera a little so that it straightens out. Using a bicycle or car pump with a pressure gauge, we achieve a pressure that usually does not exceed 2.5-3 atmospheres , otherwise the wheel may burst.
Installation
Using a metal brush, we clean the inner rims of the wheel, orient the tire so that the direction of its rotation corresponds to the direction of rotation of the wheel: there is an arrow on the side of the tire, put the tire on the rim so that the arrow corresponds to the direction of rotation of the wheel
Using the method described above, we bead the tire onto a rim and use a powerful compressor to pump air into it. If the compressor is powerful, the tire will immediately hit the rim.
Step-by-step instruction
First you need to prepare the necessary tools:
- socket wrench
- clean cloth
- wooden plank or block.
How to remove the rear wheel on a scooter:
Location of the main components on the scooter
- Choose a level place where all the work will be carried out. Due to the unstable surface, there is a risk of the moped falling to one side. Place the scooter on the center stand. If a similar procedure was last carried out a long time ago, the threaded areas of the parts should be lubricated with VD-40 aerosol product. It will help facilitate manipulation of oxidized rusty parts. Otherwise, difficulties may arise when trying to unscrew the nuts.
- Before unscrewing the nuts, remove the muffler along with the exhaust pipe. To do this, remove the seat and lower plastic frame. Then the bolts connecting the frame to the muffler are not completely unscrewed. The number of fasteners depends on the model - 2 or 3 pieces. Using a socket wrench, remove the fastenings to the cylinder. At this point you can remove the bolts. In this case, you should check for the presence of rubber gaskets that may fall out when moving the muffler. If there is black soot in the device, it is worth cleaning it with a heated blowtorch and a wire brush.
- To prevent the wheel from spinning, secure the brake levers with a belt, thereby pressing the pads. You can also block it using a wooden plank, inserting it into the disk. Now you can proceed directly to the planned repairs. After completing the procedure, the parts are assembled in reverse order.
Important!
If major defects in parts are found during dismantling, it is better to contact a workshop.
To remove the rear wheel you will need a socket wrench