Peculiarities
Before setting up the ignition, you should understand what elements it consists of in the Urals. This will allow you to avoid some mistakes and also configure it more accurately. If you bought the motorcycle secondhand, then the ignition may be homemade, in which case it will have to be redone.
The main source of the high-voltage pulse is the ignition coil, often called the bobbin. Can be used from Oka. It is installed separately from the main body. A chopper (cams), which is equipped with a device for advancing the ignition angle. A couple of candles. There is a set of wires for low and high voltage. This also includes power supplies, as well as their switch.
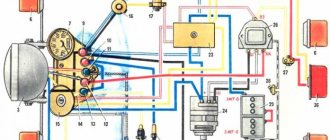
It is worth noting that, depending on the assembly, it may require 6 or 12 volts. The difference between these systems is in the coils. On twelve volt coils a B-204 coil is used, on six volt coils B-201. The connection diagram here is standard.
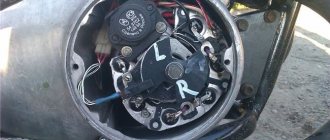
The breaker has a rather complex design, which consists of several elements. The housing contains a movable and fixed cam with a regulator, which operates from centrifugal force. There is also a capacitor that directly controls spark formation.
There is a piece of felt in the design; it lubricates the mechanism. Separately, it is worth mentioning the screw that secures the cam assembly; with its help, additional adjustment of the Ural ignition is made.
Replacing spark plugs before installing electronic ignition systems
Spark plugs are the last element of the spark generation system in any engine. They work under conditions of high pressure and temperature.
Sparking occurs on them when a high voltage pulse is applied. Therefore, it is not possible to test them, without a test bench, in domestic conditions.
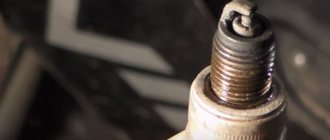
The serviceability of a working spark plug can only be judged visually - by carbon deposits on its tip or presence on the “skirt”. To ensure reliable engine operation, change spark plugs according to the motorcycle operating rules, without expecting them to work forever.
Choose the correct heat rating when purchasing spark plugs. Set the gap in the spark plug electrodes to 0.7-0.8 mm.
We hope that these problems with the spark plugs are not observed and, after purchasing (manufacturing) a non-contact type ignition system and replacing the spark plugs, we begin adjustment work.
Examination
If there is any suspicion of problems with the ignition, you should check that it is working correctly. Diagnosis is carried out in the following order;
- We check the mechanical component of the unit. We look to see if the cam mechanism is stuck; if there are problems with mobility, then it is worth checking its performance. Be sure to measure the gap between the cams; most often it turns out to be too small, which prevents sparks from forming;
- The next step is to check for the presence of a spark. To do this, turn on the ignition and force the cams to move using a screwdriver, creating a gap. The spark should be blue and white. If it is red or orange, then you need to look for a malfunction.
- We take a multimeter and measure the resistance at the bobbin terminals. Attention! The ignition must be turned off. On the primary winding the resistance should be 6 Ohms, on the secondary winding 10 Ohms;
- The resistance between ground and terminals is checked, in optimal condition it should be 6-15 Ohms, if more, then the problem is in the wire;
- The tester is also used to ring high-voltage wires. If the resistance tends to infinity, then it is worth replacing the wire; it is better to do it as a set;
- The last step is to check the condition of the candles. Electrodes should have a sand color. It is recommended to maintain a distance of 0.6 mm between them.
Actually, this is all that should be checked. Microprocessor varieties are also checked in approximately the same way. SoveK ignition is of this type.
Leave it to mechanics or install electronics
Perhaps not all older motorcycle models are running. The Ural motorcycle sits and rusts in my grandfather’s barn because it won’t start.
The wheels are spinning, the engine is not jammed. Maybe the spark goes into the ground, as they say. In short, you need to look at the spark generation system. But even a working motorcycle, with a contact ignition system, causes unexpected and unpleasant problems for its owner:
- won't start when you really need it;
- with new oil rings in the engine, the spark plugs become covered with soot;
- there is no required engine power when driving with maximum load;
- the maximum speed is not reached;
- The battery is slightly discharged and the engine does not start.
Tuning a Ural motorcycle with your own hands - this article will help you decide in which direction to modernize your Ural.
The contact ignition system creates a lot of problems, especially when the moving parts in it have already worn out, backlash has appeared, and the geometry of the elements has changed.
The solution is simple - all cam ignition is thrown out, a modern electronic non-contact type spark generation system is installed. You will no longer have to deal with the thankless task of cleaning contacts and endlessly adjusting the gaps in the breaker. All this is possible thanks to the simple, but quite reliable design of the motorcycle. For example, it is quite easy to set the thermal gap and adjust the valves in the Urals with your own hands, using only your own tools from the garage. This way you will gain valuable experience and save money on visiting the workshop.
Adjustment
If you have identified a problem with out-of-phase phases, then you just need to find out how to set the ignition on a Ural motorcycle. This will make your life much easier in the future. Please note that the electronic ignition on the Ural motorcycle is regulated completely differently.
So, you need to adjust the ignition of the Ural motorcycle. To work, you will need wrenches, a screwdriver, and it is advisable to take a test light. Adjustments are made in the following order:
- First, set the engine to the top dead center position of the first cylinder, and this should be the compression stroke. You can check this as follows: unscrew the spark plug, plug the hole with paper and crank the engine. When the resulting plug is knocked out, you can stop, this is the desired position.
- Loosen the fastening of the breaker body, after which it is turned all the way clockwise, and a 12-volt test light is connected to the contacts;
- Turn on the ignition and turn the breaker housing until the light turns on. As soon as it lights up, you should stop and secure the lid. This completes the setting of the advance angle.
Izh Jupiter 5 ignition adjustment is done in approximately the same way. Now you know how to configure this system on your motorcycle.
Previous entry Installing electronic ignition on a Ural motorcycle
Next entry Restoring a Ural tuning motorcycle
What does the contactless ignition system on the Ural and Dnepr motorcycle provide?
- No headaches for the motorcycle owner when operating it;
- Starting the engine in wet and cold weather;
- Failure-free operation of the ignition system;
- Increased driving characteristics of the motorcycle as a whole;
- Increased candle life;
- Starting the engine when the battery voltage drops to 6 volts;
- Constant, not changing over time, ignition timing;
- The ignition coil cannot overheat.
- Powerful, required color, sparking.
Messages [14]
1↑ Topic by roman811 07/14/2016 18:25:38
- roman811
- Experienced
- Inactive
- Registered: 06/12/2016
- Posts: 132
- Reputation:
Topic: ignition adjustment on the Dnieper
The wire adjustment is as follows: first I adjust the gap on the cams to 0.45 mm (I turn the slider so that the cams open as much as possible). Then I display the letter P (early ignition) on the flywheel, turn the ignition ON and magnetize the key to the coil. I begin to turn the ignition housing all the way slowly but the key and doesn’t fall ((. I set the gap on the cams to different values 0.4, 0.5. 0.6 but the key still doesn’t fall. Help, what’s wrong?
Added: 07/14/2016 18:25:38
I installed the runners from both the old and new models and to no avail. There are sparks on the candles.
2↑ Reply from NIKITA36 07/14/2016 18:39:28
- NIKITA36
- Assistant
- Inactive
- Name: SERGEY
- From: OSTROGOZHSK
- Registered: 25-10-2014
- Posts: 177
- Reputation: 25
- Motorcycle: YES
Re: ignition adjustment on the Dnieper
Why are you so attached to these keys with light bulbs?! Well, if the key does not fall, then the contact does not open - it may have a short to ground, or maybe the cam is not positioned correctly.
And again I am sending a train around the world. I don’t break my hands, I don’t scream out loud. And they won’t impose other people’s passengers on me - I put whoever I want on my train.
3↑ Reply from 16 18:52:46
- 666
- Technical support, materials scientist
- Inactive
- Registered: 06-05-2010
- Posts: 6,591
- Reputation: 602
Re: ignition adjustment on the Dnieper
So I don’t understand this masochism. some creature at one time spread this nonsense about keys and light bulbs in the ignition control and people are still suffering.. Roman. If you turn the ignition housing, put it in approximately the middle position. Then you set the crankshaft to the TDC position, and if necessary, use a screwdriver to check through the spark plug hole whether the piston is exactly at top dead center. Next, either use a screwdriver or something else to move the flywheel back a little (not to the front, but BACK), approximately 10mm from the TDC mark. (if you don’t understand, we set the ignition for you earlier).. Then you go and adjust the gap on the cam. gap from 0.4-0.6 mm. If you don’t understand how and where the flywheel is shifted relative to its position at TDC. then you simply adjust the clearance on the cam when the piston is at TDC. It will work 100% But the ignition timing will be slightly different.
(2 ratings, average 4.5 out of 5)
Settings
Now we adjust the ignition timing. We install the motor in accordance with the marks, connect all the wires. Next you need to adjust the position of the sensors. Next, we attach all the elements and check for sparking. If everything is fine, then you should drive 10-20 kilometers and check the set angle again.
The rotor lights up green when receiving an engine impulse, red during scheduled ignition. The tests revealed that some things still need to be improved. In the meantime, the processor was upgraded to a newer version and new programs were added to the program. The rotation, forward and other parameters are sent via serial communication to the computer for further analysis. It has, among other things, an ignition premise.
A fan motor is a good approximation of a pulse generator, but has its limits, mainly in terms of acceleration. My child was taken from the hands of a criminal, that is, the previous owner, brought and buried in a garage.
If necessary, adjustments are made, but if everything is done correctly, this will not be necessary. Knowing how to do contactless ignition on your motorcycle, you will not wonder how much this work costs in a workshop.
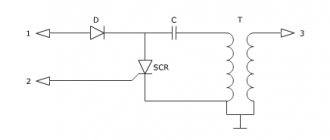
One of the main pain points of heavy Ural motorcycles is the ignition system. Although currently motorcycles produced by IMZ are equipped with Italian-made Ducati Energia electronic ignition, only about three percent of the bikes produced today are sold in the Russian Federation. Most of the owners travel across the country using outdated mechanical ignition in the Ural. Electronic one has a number of advantages.
Eventually it was redesigned. The reason for the failure was the poor aluminum five-wheel driver. The other not-so-great part was the rubber O-ring, which used to wear out and caused problems during assembly, but the main problem was the driver's fingers that screwed in the screws that secure the pressure plate springs. As a result of intensive work, the aluminum driver's struts could move in the longitudinal direction, which led to the screws securing the springs being pulled out or falling off.
Loose screws or broken driver parts can become trapped between the rotating elements of the prismatic drive and cause chucks to crack and even lock up the gearbox. There were also problems replacing friction discs. When assembling the clamping disc, the screws must be screwed to the driver's seat using regular screws. Worn screws often had threaded threads, causing the screws to break on the driver's aluminum pins.
