Hello, dear readers. We continue to study motorcycle-type carburetors. In the previous publication, we got acquainted with the main issues of the formation and ignition of a combustible mixture. Today we will study the main dosing system, consider its operating principle and adjustment methods.
Main dosing system: basic information
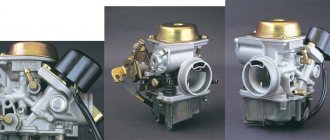
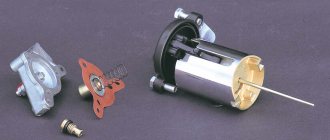
Modern motorcycle engines use carburetors with a metering needle.
This name is due to the design of the main metering system, since it is the conical needle that controls mixture formation in the range from 1/4 throttle lift up to full opening. The flow of fuel from most carburetor systems occurs under the influence of vacuum created by the movement of air flow. The total vacuum in the air path of the carburetor depends on the flow speed and resistance of the path. Let's consider this dependence in more detail.
The speed of air flow in different sections of the tract depends on the area of their flow section. Local contractions, provided that the continuity of the gas flow is maintained, causes an increase in its speed, which is accompanied by an increase in rarefaction. In modern carburetors, the air speed in the diffuser reaches 150 m/sec. When air moves, it overcomes friction against the walls of the duct and local resistance (nozzle, damper, etc.), which also leads to an increase in vacuum.
Of practical interest are the vacuums that arise in two areas: in the diffuser and in the mixing chamber behind the throttle. The figure shows the total vacuum curves in carburetors installed on engines of various types. The vacuum depends on the type, number of cylinders and operating modes of the engine. For a two-stroke single-cylinder engine, the vacuums are the smallest (curves 1 and 1′), for a four-stroke multi-cylinder engine they are the largest (curves 4 and 4′).
Change in vacuum in the mixing chamber P_k and in the carburetor diffuser P_g at different engine speeds n and throttle position φ_dr: 1 and 1′ - two-stroke single-cylinder engine; 2 — four-stroke single-cylinder; 3 - four-stroke two-cylinder; 4 and 4′ - four-stroke multi-cylinder
As the throttle opens, the vacuum in the mixing chamber decreases, and in the diffuser it increases. The nature of the change in vacuum in the diffuser and mixing chamber does not depend on the type of engine. Initially, when the throttle is opened by approximately 1/3, the vacuum in the mixing chamber decreases, and then remains almost constant (curves 1, 2, 3 and 4). Meanwhile, the nature of the change in vacuum in the diffuser is significantly influenced by its design. If in a carburetor with a diffuser of constant cross-section the vacuum increases continuously (curve 4′), then in a carburetor with a diffuser of variable cross-section, an increase in vacuum is observed only at the beginning of the throttle opening. With further opening of more than 1/3, the vacuum in the diffuser practically does not change (curve 1). With a constant throttle position and increasing engine speed, the vacuum increases in all parts of the carburetor air path.
A main metering system consisting of only a spray and controlled only by the amount of vacuum would supply too much fuel at low and medium throttle lifts and too little at high lifts. An over-lean mixture is especially dangerous because, in the worst case, it can lead to engine failure. This is why the conical dosing needle system was developed. Let's consider the principle of its operation.
Five random motorcycles:
RUB 927,000*
BRP Can-am Ryker 900 2019
97000 rub.*
Yamaha YBR 125 2005
KTM 450 Rally 2016
Kawasaki ZX-14R Ninja Special Edition 2016
Yamaha TW 225E Anniversary Special Edition 2007
Operating principle of the main dosing system
The needle moves inside the calibrated part of the atomizer and at low throttle lifts the cross section through which fuel is sprayed is small. As a result, fuel consumption is also low, which is required to maintain the correct mixture composition at low elevations. At higher throttle lifts, the conical part of the needle with a smaller diameter appears in the fuel spray zone, thereby increasing the flow area of the nozzle. This allows you to increase the fuel supply, as is necessary for normal engine operation. This design and the corresponding operating principle of the main metering system makes it possible to maintain the desired mixture composition, so the engine is able to operate correctly at any throttle position.
Interaction of the needle with the sprayer
Now that the principle of operation has become clear, the principle of adjusting the main dosing system becomes clear. Adjustment is carried out using a needle and a calibrated nozzle hole.
Adjusting the mixture composition
Adjustment with needle
In Dellorto carburetors, the needle is fixed in the throttle valve using a locking ring installed in one of the grooves (on the cylindrical part of the needle).
Conventionally, the grooves are numbered from the blunt end of the needle, that is, from the top. The higher the groove in which the locking ring is installed relative to the sprayer, the lower the needle is lowered. This means that in order for the conical part of the needle to exit the atomizer, the throttle must be raised higher. Conversely, if you need to engage the tapered part of the needle at lower throttle lifts, you need to raise the needle by moving the stopper to a lower groove (second, third...). For example, in practice, the consequence of a rich mixture may be slowness in gaining speed and a dull, deep exhaust sound. In this case, it is necessary to lower the needle by moving the locking ring to the grooves above.
However, very often it is impossible to tune the carburetor well by changing only the position of the needle. In addition to the position, it may be necessary to vary the geometric parameters of the needle (meaning the taper and length of the conical part). They significantly affect the carburetion process, and engine response directly depends on this. Thus, there is a need to replace it with another one with more suitable geometric parameters.
For each family of Dellorto carburetors there is a wide selection of metering needles with different geometries. As necessary, during the tuning process, you can select a more suitable needle and begin testing. For example, you may not get a rich enough mixture at a certain throttle lift with the needle raised as high as possible. In this case, you need to try a needle with the same taper, but in which the taper will begin earlier, i.e. the cylindrical part will be shorter. In certain cases, needles with different tapers can be used to better suit a particular type of engine. When conducting this type of experiment, it is always best to vary only one parameter at a time.
Adjustment using a spray gun
The atomizer has a calibrated hole at the end that communicates with the diffuser.
In Russian-language literature, the phrase “nozzle diameter” is often used, which means the diameter of this hole. As a rule, there is a certain set of nozzles of various diameters for a specific carburetor. As the diameter of the nozzle increases, the mixture becomes richer, and vice versa - it becomes leaner as it decreases. Of course, you can achieve the same effect by changing the diameter of the dosing needle. However, a needle of the appropriate diameter may be difficult to obtain. In this case, it is much easier to select a sprayer, if such a need arises at all, since Dellorto carburetors are initially optimized for the specific type of engine for which they are intended.
Thus, carburetor tuning is most often done by selecting jets, setting the needle height and selecting its shape, while the atomizer and throttle valve angle remain unchanged even with the appropriate replacement kits.
Main dosing system sprayer
The simplest atomizer is a tube connecting the main fuel jet to a diffuser. Engineers conventionally divide sprayer designs into “two-stroke” and “four-stroke”. Some nozzles (called the four-stroke type) have rows of holes around the perimeter, drilled all the way through into the main fuel well.
Sprayers differing in the design of emulsion tubes
Nozzle design for two-stroke engines
The nozzle is screwed into a nozzle (Generally speaking, a hydraulic nozzle is a short pipe for releasing liquid into the atmosphere or flowing liquid from one reservoir to another, also filled with liquid), fixed in the carburetor body.
Pairing the sprayer with the nozzle
As can be seen in the figure below, at the junction of the sprayer and the nozzle, an annular slot is formed, which turns into an annular cavity. The cavity is connected to the atmosphere through an additional air channel. This allows air to enter the diffuser through the annular slot. If the atomizer has holes for emulsifying fuel, air is also supplied to it through an auxiliary channel.
Annular gap between sprayer and nozzle
The inlet of this channel is usually located in front of the diffuser in its inlet part (under the letter b
in the figure below).
The hole next to it is the idle air duct. Sometimes, to reduce the influence of pressure pulsations in the intake receiver, the auxiliary channel communicates directly with the atmosphere. For example, as shown in the picture under letter a
, through the tube on the right side of the carburetor.
Methods for communicating the auxiliary air channel with the atmosphere
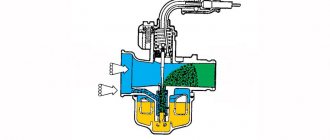
In total, the main dosing system works as follows. Under the influence of vacuum, the fuel rises through the nozzle. The flow of fuel is regulated by a jet and a metering needle. Part of the air passes through an additional channel and enters the annular cavity. As a result, intense mixing of fuel and air occurs in the area above the annular slot and the nozzle.
Operation of the main dosing system with a push-pull type atomizer: Fuel from the float chamber rises along the atomizer 6, passing through the nozzle 7, which, together with the needle 3, regulates the fuel consumption. The fuel is initially mixed with air passed through channel 2 in the annular gap between nozzle 5 and the atomizer. The emulsion enters the diffuser 4 and is mixed with air entering through the inlet device 1.
Along with the diameter of the atomizer, the adjusting parameter is the diameter of the air channel (the larger it is, the poorer the mixture), as well as the height of the protrusion of the atomizer and the nozzle into the diffuser. Options for sprayers and nozzles are presented in the figures below.
Sprayers varying in height
Various nozzle options
Let's take a closer look at the atomizer.
Under constant other conditions, the less the atomizer protrudes into the diffuser, the lower the height the fuel needs to rise from the float chamber, which contributes to an earlier start of the process of fuel atomization in the diffuser. The "low" spray is a characteristic feature of sports carburetors. On the contrary, with a high atomizer, the fuel mixture will be leaner in transient (unsteady) conditions.
The same physical principles apply to the operation of an air nozzle. Its protrusion into the diffuser creates resistance to the air flow, so a zone of strong vacuum is created behind the protrusion, which contributes to the flow of fuel. In other words, the higher the nozzle, the greater the vacuum behind it and the richer the mixture becomes. You can lean the mixture using a carburetor with a low nozzle height.
Five random articles about motorcycles:
Java 638-1-04
What's new in Java?
Last summer, the editors received the latest modification of YAVA-350 638-1-04 from VTO Motokov for testing. A beautiful motorcycle, to say the least! Upon quick inspection, the motorcycle seemed slightly taller than the base model we were used to. They began to figure it out. Indeed, the rear shock absorbers are mounted at a greater angle as a result of the mounting points on the frame being shifted forward. The combination of progressively coiled springs and damper angles ensures a smooth ride. There is no longer any need to stand up on the footrests when the rear wheel flies into a small hole or pothole in the road. The front wheel of our JAVA has a tire with a characteristic road tread (it is equipped with certain batches of motorcycles). With such a tire, the motorcycle feels confident when braking and turning. After some time, the driver gets the feeling that he will be able to drive a familiar turn with a large angle of inclination and, of course, at a higher speed. This is as long as the road is dry. Worth... Read more >>
How to remove cylinders easier in Java. Protective pads for studs
Protective gaskets for studs After long-term use of a YAVA motorcycle, especially in rural areas, it can be difficult to remove the cylinders: dust and sand, mixing with oil, tightly clog the holes for the studs.
In addition, during disassembly, some of this dirt gets into the crankcase, no matter how hard you try to close it. Head gasket I got rid of this trouble in the following way. I cut out six gaskets from raw rubber about 2 mm thick (according to the picture) and put them on the studs before installing the head. When the engine heats up, they vulcanize and reliably close the holes from dust. I have been successfully using this method for several years now. V. KOROTCHIKOV Gomel region, Ozerany 1989N07P33 Read more >>
Conversion of the ChZ-250 cross-country motorcycle into a multi-day motorcycle
Converting a CZ-250 motocross into a multi-day event Multi-day motorcycle competitions are the most versatile form of motorsports.
They require excellent physical fitness, cross-country and road bike skills from the rider, and reliability, good driving performance and endurance from the car. It is not for nothing that the international six-day competition is called the Motorcycle Olympics, thereby emphasizing its importance. In 1972, the Soviet team took fourth place at the six-day competition held in Czechoslovakia. This, of course, is a success: our athletes, like the winners, did not receive any penalty points in the main competitions (the winners were identified only by special tests). But in order to climb to the podium, much remains to be done. City, republican and all-Union multi-day races are held in our country. The number of athletes participating in them is relatively small. The growth of mass popularity, in addition to organizational difficulties, is hampered by the lack of technically advanced motorcycles. By the way... Read more >>
Voskhod 2M
The new Kovrov motorcycle “Voskhod - 2M” can be recognized by the front fork and engine, as well as by the inscription on the tool box.
Kovrov's Voskhod motorcycles have a long-standing reputation as simple, unpretentious and reliable machines. Thanks to this, they are in demand in cities and especially among rural residents, where dirt roads predominate, and for maintenance and repair they have to rely mainly on their own strength. Based on this, factory specialists, constantly improving the design of the motorcycle, are looking for solutions that can be applied to previously released models without complex modifications. In this way, it is possible to avoid an excessive expansion of the range of spare parts, and the owners, during the next repair, can modernize old machines by installing new components and parts. Voskhod-2M, mastered by the plant team at the end of last year, was no exception. It compares favorably with its predecessor by improving such important qualities as... Read more >>
Nozzle design for four-stroke engines
The design described below is currently also widely used for two-stroke engines, as it allows one to obtain a leaner and more homogeneous mixture in all modes.
The body of the four-stroke type atomizer is equipped with rows of holes, and the annular chamber that surrounds it is constantly in communication with the atmosphere, but does not communicate directly with the diffuser. This allows the fuel to begin mixing with air before it reaches the diffuser, forming an emulsion inside the atomizer. With this design, the nozzle atomizer has no protruding part into the diffuser.
The operating principle of the main dosing system with a four-stroke type sprayer is shown in the figure. The holes in the lower part are immersed in fuel, since they are below its level. The holes in the upper part are always open for air to pass through. When holes in the top portion predominate, the mixture becomes leaner, while increasing the number and/or diameter of holes in the bottom portion results in increased fuel consumption with intense emulsification. Due to the location of the holes throughout the entire area of the nozzle, the annular chamber, initially filled with fuel, becomes empty as the speed increases, since the fuel is consumed through these holes, which leads to an over-enrichment of the mixture at the beginning and to its depletion in the future.
Operation of the main dosing system with a four-stroke type atomizer: Fuel rises from the float chamber along the atomizer 5, passing through the nozzle, which, together with the needle 3, regulates the fuel consumption. The fuel is initially mixed with air passing through channel 2 in the annular gap between the nozzle and the body. The emulsion is mixed with air entering through the inlet device 1 in the diffuser and mixing chamber 4.
Simply put, the location of the holes in the nozzle body and their diameter significantly affect the flow of fuel and the engine response that depends on it. Thus, by varying the parameters of the holes, it is possible to achieve the optimal mixture composition for all operating modes.
Back to the past! We remember about carburetors: how to drive, configure and repair
A carburetor is a specific part of a car. At one time he frightened many handy car owners and even professional mechanics (it was not for nothing that the carburetor mechanic was always a separate, narrow specialist and was respectfully called a “shaman”!), and even more so now, when sacred knowledge has been practically lost. Many remember their carburetor cars with a shudder - the constant floating of idle speed, special starting techniques, failures and jerks in movement, caused either by heat, or humidity, or the Moon in Capricorn... Although some were lucky, the injection era of the second half of the 90s years, let's be honest, everyone was greeted with relief.
However, even today, in the third decade of the 21st century, you can cross paths with a carburetor car. Not everyone and not always have sufficient free funds when the need arises for some kind of budget auxiliary machine - for country construction, hunting/fishing, or as a “jump car” to get to the garage where a decent car is parked... Yes You never know the tasks for which an old and inconspicuous car (usually domestic) would be useful, which you don’t mind throwing anywhere and scratching without grabbing your heart and wallet. But if, among the dead injection rot, a well-groomed “carb” car comes across, many, crossing themselves, quickly walk past...
Take the same “jump car” - look how the prices for Matiz are inflated - 200-300 thousand are now being asked for a copy with rusty sills! For four times less money you can buy an Oka in excellent condition. But 99% OK - with carburetor engines, and many are scared off by unstable starting, jumping idle, jerking during acceleration and other hemorrhoids, for which there is no one to really turn to in terms of repairs... Or here’s a classic of the genre for a lover of active car sex: Niva and UAZ vehicles, which may well turn up in the form of “time capsules” from grandfather’s dusty garages, are very likely to have “carb” engines.
The same applies, for example, to the VAZ 2109/08 – one of the most balanced and successful cars in the domestic automobile industry of all time. If such a car turns up inexpensively and with a intact body, you should take it, regardless of the carburetor. “Devyatos” with its rear beam that practically does not protrude from the bottom after lifting the suspension and installing tougher tires is a very crawlable and passable vehicle, capable of performing ¾ of the Niva’s tasks, except for completely off-road cases! And in general, in the end, in 2021, a carburetor car may turn out to be the first and main car for some time - anything can happen...
In principle, almost any engine for an old carburetor car can be bought in its injection form and simply change the engines. Or not even the whole thing, but just the intake. But this procedure does not take five minutes and is often not very cheap... Such movements made sense at the beginning of the injection era, when owners of cars from early years of production sought to join the latest engine developments. Or if you are a mechanic working in a car repair shop, and you have a lot of different hardware at prices “for your own” or even free. But when we are talking about an old and inexpensive car, an auxiliary or even the main one, then changing the engine to an injection one is just throwing away money, time and effort.
This is a completely useless idea, because:
- A well-functioning carburetor paired with contactless ignition starts in any frost no worse than an injector!
- A well-tuned carburetor on domestic cars gives exactly the same dynamics as on the same engines, which were later “injected” without changing the design of the engine as a whole!
- A tuned carburetor has similar (or even lower) fuel consumption than an injector on the same engine!
But the key word in all this is “MOUNTED”... However, in reality, a carburetor is a fairly simple thing to resuscitate and adjust. But not everyone knows about it! Yes, Kolesa.ru is still not a step-by-step repair manual, and we will not go into the design features and life hacks of all existing varieties of carburetors, which will require a very thick book. Considering that the basic systems on almost all carburetors are identical with minor differences, we will simply give an easy-to-understand general course of action that will clearly demonstrate that there is no need to be afraid of the carburetor.
And anyone who does not shy away from repairing a car with their own hands, without being a professional in this field, can bring this unit into ideal condition.
Is it worth starting all this?
If fate has connected you with a carburetor car in 2021, two logical and reasonable questions arise that lie on the surface. Maybe just buy a new carburetor and screw it on in a quarter of an hour instead of the old, buggy one?
Not forbidden. And carburetors for almost the entire Russian automobile industry are available today and are not in short supply. But the cost of a new carburetor is 5000-6000 rubles (for some it’s just a trip to a cafe, and for others it’s even a third of their salary!), and the culture of their production is extremely low... The era has passed, and they are manufactured on long-worn equipment with defects casting and drilling, with channels clogged with chips and dust. Unfortunately, there is no guarantee that the new carburetor will not, due to fatal design defects, over-enrich the mixture or not keep idle... So it seems more rational to overhaul the old carburetor, which was already guaranteed to work in the past.
Second question: maybe use the services of a professional carburetor specialist and not get into such a complex unit yourself, without having any (or only a basic) understanding of its structure? Alas, you still have to roll up your sleeves. The fact is that not a single carburetor specialist will do what you need - a complete overhaul, cleaning and adjustment of the carburetor for its long and trouble-free operation. No one! And before, “shamans” (who are now, by the way, not so easy to find) never did this, and they won’t even today! Because otherwise they simply won’t earn money - nothing personal... Their field of activity is eliminating MINOR malfunctions of at least a living carburetor, when it is necessary to quickly deal with a local problem, cutting off 500-1000 rubles and sending the client home. Total disassembly of the carburetor in the format of a roadside express repair with soaking it for a day in a bucket of acetone - how do you imagine that?! Such a service was once offered only by carburetor factories that engaged in complete restoration repairs, and by carburetor shop foremen at large motor transport enterprises. In the Soviet and early Russian years, private car owners could come to the plant, hand over their carb and receive a rebuilt carb with a guarantee - washed, after replacing all wear parts and with a guarantee. But today such services are very rare, and this can only be done efficiently with your own hands.
So let's start by searching and reading a book on repairing and tuning your carburetor. Finding one, and for free, will not be any problem - torrents, knowledge bases of online clubs of old Soviet cars, etc. are at your service. Well, mastering it should not cause any problems. Carburetor books are not Kant’s ideas about the relativity of perception; they are small brochures in volume, but are written in a language that is understandable enough for any person who loves automotive technology, but is not a repair pro.
Complete disassembly and cleaning
Stage one and most important. It is completely useless to try to revive an old carburetor that has seen life without removing it from the car. Or rather, you can revive it, but you can never make it work stably for a long time! Trying to spray an aerosol cleaner, “carb cleaner,” into different holes is a waste of time and money. Problems with unstable operation in different modes will regularly arise over and over again, driving you crazy. The fact is that inside any carburetor there is a complex labyrinth of channels and passages, where various rubbish accumulates over the years of operation (or inactivity): fuel deposits, grains of sand, water and water-induced flakes and dust of corrosion of the zinc alloy body. And we need to wash and blow all these passages and tunnels.
First, you need to remove the carburetor from the engine and clean the outside of dirt and oil using a toothbrush and a syringe from a half-liter PET bottle of gasoline - with a stopper in which a hole is pierced with a needle...
...and then on a clean and empty table, COMPLETELY disassemble it down to the last screw! It’s difficult to decide on something like this because you’re not used to it, but in fact, we’re not looking at a 19th-century Breguet with a battle from Faberge. Carb is very good at sketching the appearance of the carburetor on a sheet of paper and laying out the extracted parts (jet jets, emulsion tubes, screws) on the sheet in accordance with the conventional diagram. Additionally, you can take pictures of the process on your phone.
Of the tools for disassembling any carburetor, as a rule, a flathead and Phillips screwdriver are sufficient for 95%. Some items may require a wrench, but this is likely an exception.
In principle, to completely revive a carburetor, it is not even necessary to understand the name of this or that unscrewed part (that this, for example, is the main fuel jet of the primary chamber, but this is the emulsion tube of the secondary chamber...). The main thing is to strictly record what was screwed in where, and when assembling, screw it in as it was!
Once we have disassembled it, we put all the large parts in a bucket and fill it with acetone. You will need three liters for about 300 rubles. Can be partially mixed with gasoline or white spirit. Stir and swirl the parts in the liquid to fill the channels and holes, and leave to soak for a day. After a day, we remove it, shake off the remaining flushing fluid and thoroughly blow with compressed air ALL the holes that we see. Ideally, a compressor for pneumatic tools; if you don’t have one, use a tire compressor with a thin spout, or even a foot pump. You can stop by a tire shop and ask for an air gun to blow it out - most likely they won’t refuse you and won’t ask for money.
Replacement of all elastic and rubber
Before this epic, it is necessary to purchase a repair kit for our carburetor, which includes most of the parts that can fail over time. Oddly enough, there is still no shortage of repair kits for the most popular and widespread carburetors on sale... The cost of a set is 300-350 rubles.
However, we don’t need everything from the repair kit... It’s better not to change parts with calibrated holes and sizes responsible for dispensing fuel and air (nozzles, tubes, needles, accelerator pump nozzle, etc. - in general, all yellow brass parts), leaving the old ones . New ones are often drilled and turned with unsatisfactory accuracy or no accuracy at all. But we definitely replace all the cardboard spacers, rubber-fabric membranes and rubber rings with fresh ones!
If gasoline gurgles in the float, buy a new float. They are sold separately and are not included in repair kits. Another important organ of any carburetor is the shut-off needle valve, which together with the float regulates the fuel level in the float chamber. It may be included in the repair kit or again sold separately. Like jets, the original valve is sometimes of better quality than a new one; whether to change it or not, you need to find out by blowing through the supply fitting with your mouth and making sure that the needle is tightly locked.
We assemble the carburetor in the reverse order according to the diagrams you drew during disassembly with the parts laid out on them and auxiliary photographs taken previously on a smartphone.
Setup and adjustment
Contrary to popular belief, car carburetors are devices with a minimum of adjustments. As a rule, all parameters for preparing a gasoline-air mixture are set CONSTRUCTIONALLY, by the geometry of the structure and the throughput of the nozzles.
In fact, the only adjustments that need to be made are setting the fuel level in the float chamber by bending the stop tab, adjusting the starting device and idle speed. The latter is usually done simply with a screwdriver on the tachometer or even by ear, and the former is often done directly on the carburetor installed on the car, although it is much more convenient to do this on the table during assembly. In this case, gasoline is supplied to the carburetor instead of a pump by injection from a plastic bottle squeezed in the hand through a piece of hose. If the assembly is carried out on a home kitchen table, it is permissible to replace the fuel with alcohol - so as not to stink in the apartment. You cannot replace it with water, because then it will be difficult to expel it from the fuel channels, but we also achieved this by thorough washing and subsequent purging...
Setting up the starting device for different models is carried out differently, but this process always involves setting certain gaps in millimeters according to the book. There is nothing complicated in the procedure, but its importance cannot be overestimated! Surely many remember how their carburetor car many years ago required a certain cunning algorithm of actions to start. Pull the choke out two-thirds, press the gas pedal twice, and after the engine catches, press the gas pedal again... Or any other combination of options - each “swallow” had its own quirks for starting. All this is the result of a monstrous underestimation of the importance of adjusting the starting device by both car owners and auto mechanics! A correctly configured carburetor start made the start of a cold engine extremely stable and monotonous like an injection engine. There have never been any intermediate positions at the choke handle - they appear only on a misadjusted carburetor. There absolutely could not be any pressing of the gas pedal during a cold start - again, they were only required by misregulated carburetors! The tuned carb starts the engine like an injector - the choke handle is pulled strictly all the way, we don’t touch the pedals, we turn the key and the engine starts reliably.

