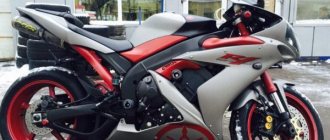
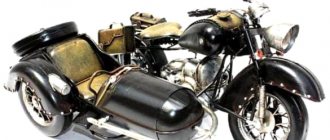
Repairing cracks in plastic parts
The 3M 05900 repair kit remains today the most reliable way to glue broken plastic parts.
It is not difficult to work with it, since step-by-step instructions are included in the package. For those who will do this, I can give only one piece of advice regarding preparing cracks for gluing: to give the crack a V-shape, use a utility knife blade. Just be sure to take precautions. Put a thick glove on your left hand, and wrap the blade itself halfway with electrical tape.
INSTALLING AUX. EQUIPMENT
| Name of works | Price, rub | Note |
| Xenon installation | from 1000 | |
| Alarm installation | from 1500 | |
| Installing a case with fastening | from 800 | |
| Slider installation | from 500 | |
| Installation of classic, chopper bars | from 800 | |
| Windshield Installation | from 500 | |
| Muffler replacement | from 500 |
Scooter painting technology
The procedure for painting the plastic of a scooter consists of the following steps:
- Disassembly and troubleshooting.
Before starting work, the scooter must be washed. All plastic parts are then removed and thoroughly inspected for cracks, scratches, dents and other changes in shape. It is possible that some parts will need to be replaced. The result of this stage is the division of all elements into two types: those that require repair, and those that can be painted immediately.At this point, clean the cases and let them dry. in a dry but ventilated place it begins to produce a primer; a hand should be enough. Make sure that it is evenly distributed, sprays from 30 cm and does not change the feel of the aerosol, making sure that it is always vertical, for example. Remember to follow the same procedure even if you are going to use paint. Once you're done, you'll have to wait at least 24 before painting, otherwise the color won't hold.
If the cases have scratches, you can repair them using plastic putty, which you can find at any paint factory. These are two containers that need to be mixed, one containing the resin and the other containing the catalyst. Of course, the staff will explain how to use it better, but remember that the more catalysts you put on the plaster at first, the heavier it is and vice versa. Apply a minimal amount of putty to the grooves using a putty knife and spread it well so that they are completely filled.
- Plastic repair.
There are quite a lot of technologies for repairing plastic. Let's look at one of them. Initially, you need to clean the surface of paint using sandpaper. Then heat up the soldering iron and take a fine mesh. Use a soldering iron to fuse the mesh into the plastic.Thus, the crack is eliminated. You can cool the plastic with water. Then you need to clean the repair area. After that we degrease the surface and then apply putty. Only after the putty has dried, it needs to be cleaned a little and you can start painting.
Remember, though, the less you use it, the less you take off! When the grout is dry, which is at least an hour later, place it until a piece of plaster is at the same level as the body. Whoever drives the vehicle develops a certain pride in their own mechanical "striester". It's a sign of passion for what many consider to be "art and lifestyle." This is true, in particular, for lovers of two wheels. Whoever owns a motorcycle is especially attentive to the care of his little pearl. Therefore, it is not uncommon that a centaur wants to give some kind of remodeling to the environment.
- Primer and painting.
First we select a primer. If repair work has not been carried out, you can buy a one-component composition. After repair, a two-component primer is used. Before priming the surface, it must be degreased.
The primer is applied in several layers and after complete drying, the surface must be made perfectly smooth. Before painting, the parts must be degreased again. The paint should be diluted in accordance with the requirements specified on the label.
As for the aesthetic defect or wear of some parts, you can draw plastic parts yourself. In the following steps we will learn how to do this. Coarse and fine sandpaper Tack or primer Anti-silicone spray Spray or spray paint Finish. The plastic parts of your motorcycle can wear out over time. In this case, it's a simple service to return the bike to new glory. But even if we won't be free to repaint the parts we prefer.
The main thing is to do everything with criteria. First we choose the right paint. There are different types on the market suitable for different needs. However, for painting hulls the search field is limited. The housings are usually made of plastic or fiberglass. Therefore, we exclude paints for metals and other materials. We can group body paints into two large groups: one-component and two-component. We will need to sand the plastic motorcycle frame with coarse sandpaper. We'll finish everything off with fine-grit sandpaper.
It is best to paint using a spray gun. The application of paint will be as even as possible, and there will be no drips. Photos of the scooter's painting indicate the main mistakes.
Spray painting a scooter indicates low professionalism of the owner. But in some cases a good result can be obtained. To paint in two or three layers, you need to purchase 5-7 cans of 0.5 liters each. The can must be shaken well. You can start painting.
We thoroughly clean every surface using an anti-silica spray. We will need to completely polish the entire area in order for it to be painted: there should not be too deep grooves or even overly smooth parts. Water-based paper softens in plain water. Sometimes, for a more precise finish, you can choose water and soap. After sanding, remove all traces of debris, so we remove plastic, paper and glass particles, and solvent is usually used.
After the sanding phase it is always good to apply a first coat of primer. This will create a uniform and consistent picture. It is good to make several passes, adjusting the pressure of the compressor or can. Each pass takes place at a distance of about 2 hours from the previous one. Only then will we be sure that the color will be below dry. During the polishing stage, it is recommended to wash the floor with a damp cloth.
The optimal distance is 20-40 cm from the surface. After 20-30 minutes. you can apply a second layer. If there are no drips, after 50-60 minutes. You can start coating the surface with varnish. If you wish, you can find a video of painting a scooter with your own hands. This will help organize the painting process more accurately.
The summer-autumn season is always reflected on the body of a moped or scooter. Every scratch and dent reminds of some event. Painting the moped will help erase their obvious traces. How to paint a moped or scooter with a spray can and make it look beautiful? By the way, with scooters the picture can be even worse. Plastic is fragile, repairing and painting a scooter is much more difficult technologically, because preparing the surfaces will take more time and materials.
In this way, the dust and dirt particles suspended in the air will stick to the ground, so we can make a perfect finish. Given the very difficult times, not everyone can afford to paint their moped. Why not try your hand at drawing? It's not difficult: the right equipment and a lot of patience are needed.
Preparation Before painting the engine, it is necessary to prepare it! Get 600 sandpaper and anti-rust paper. Thoroughly sand the entire frame, including the fork, removing any previous color or rust. Once the sandpaper has gone well throughout, remove the running board and side panels to keep them clean. After sanding, take a dry, greasy cloth and clean off any remaining dust. You can use a compressor or spray to paint the engine.
How and with what to paint a scooter yourself at home?
1 1 1 1 1 1 1 1 1 1 Rating 5.00 (2 Votes)
Today, such a means of transportation as a scooter is gaining increasing popularity among teenagers, young people, and older people. A modern, economical and easy-to-drive moped, now called the fashionable and modern name SCOOTER, will allow you to get to work after spending only half a liter of gasoline, give rides to friends or girlfriends, go to the nearest store in the country and much more. At the same time, situations often arise when the surface of your scooter may be damaged - hitting a curb or a large stone, the scooter may fall, you may get caught in another scooter, or even get into a small accident, as a result of which the paintwork of your two-wheeled friend will be damaged. Don’t get upset, rush to the car painters and count your losses.
You can repair most scratches and damage to the paintwork yourself. This guide will help you learn how to paint a scooter (moped) at home using an aerosol can. We will tell you about both repair and decorative painting of a scooter. Paint over scratches and abrasions, repaint the entire scooter in a different color, apply an emblem or design to the scooter’s gas tank - it’s all quite simple
What do you need to paint a scooter yourself?
Sandpaper , grit: 100 / 200 / 600 / 1200 (for wet/dry sanding) Primer – you can use either an acrylic primer or a metal primer Acrylic spray paints – choose the colors you want to paint your scooter in advance. Now there is a huge selection of colors and shades of paint, there are paints with special effects - metallic, pearlescent, fluorescent, hammer and others Acrylic transparent varnish - it will protect the paint from abrasion and damage, and will also add depth to the color and shine of the new coating of the scooter Respirator for protection from dust and paint fumes Solvent for degreasing the surface of the scooter before painting (you can use white spirit, kerosene or special degreasing compounds) Cloth napkins or just dry, clean cotton rags Masking tape and paper or covering film Putty with a mixing tablet Gloves to protect your hands from paint and putties Construction knife, screwdrivers and other tools for removing upholstery, plastic, etc. from the body before painting (in case of complete repainting of the scooter)
Preparing the scooter for painting
It had a few scratches after a little fall and now we will make it new again so that no one can guess what happened to me. If you are not interested in repair painting, but in completely repainting the scooter or applying an image using a stencil, then the preparatory work will be almost the same, except that to work with the stencil you will not need to process the paint with sandpaper. Now that we have everything we need to paint the scooter, let's move on to preparing our unit for painting. As an example, I will tell you how I painted my Yamaha Vino YJ50 scooter.
Step 1 Wash your scooter with warm water and soap
Step 2 Degrease all surfaces of the scooter that will be painted
Step 3 Cover the parts of the scooter that you will not be painting. This can be done using paper tape and paper or covering film.
Important Tip 1. Seal all the small cracks on the surface of the scooter in the parts that you are not painting. I accidentally missed a couple, and even though they were very small, the excess paint leaked through them and ended up in the wrong place, so I ended up having to remove the drips.
Important Tip 2: Do not use newspapers to cover the parts you are not painting. Ink from newsprint is printed onto the paint. Use clean printer paper, there is no such problem.
I covered all the emblems, serial number plates, etc., as well as all the parts that I couldn't remove from the scooter, but didn't want to paint.
Step 4 Sand all scratches and damaged surfaces with sandpaper. Start sanding with coarse sandpaper, then use finer sandpaper to finish the surface so that the surface is as smooth as possible.
Step 5 If the scratches are deep or there are dents on the surface of the scooter, use putty. Any automotive putty is best, because a scooter is almost a car
Step 6 If you used putty, go over the sandpaper again. The more thoroughly the sanding and smoother the surface, the better the paint will adhere.
Step 7 Wipe the surface with a clean, dry cloth to remove dust and dirt
Scooter painting process
Step 8 Next you need to prime the surface. One coat of primer is enough
Step 9 If, after the primer has dried, there are streaks and uneven spots somewhere, lightly sand with the finest sandpaper. Wipe everything again and degrease the surface of the scooter
Step 10 Before spray painting the scooter, shake the can thoroughly so that the contents have an even consistency. 20-30 seconds is enough. To avoid paint drips, paint the scooter from top to bottom, applying paint from a distance of 25-30 cm. Make sure that the paint applies evenly and all areas are painted equally well
Step 11 As a rule, the scooter is painted in 2-3 layers. Before applying the next coat of paint, let the previous layer dry, this should take 20-40 minutes (depending on whether you are painting the scooter indoors or outdoors and what time of year it is). We do not recommend painting your scooter outdoors at sub-zero temperatures or in the rain. After you have applied the final coat of paint to the scooter, let it dry for 1-2 hours
Scooter plastic painting
The main problem when painting plastics is poor adhesion of paints and varnishes to the surface of the plastic. But chemists found a solution and created a product under the scientific name adhesion activator (adhesion ter).
In the retail chain, this product is often referred to as 1K primer for plastic, although, in fact, it is not a primer. Often inexperienced painters call the same material a plasticizer, which is also completely wrong. The plasticizer is a thick, clear liquid used for painting very flexible plastics and is added directly to the primer, acrylic paint or varnish, while the adhesion promoter is applied directly to the bare plastic.
Painting a scooter is almost no different from painting a car bumper. The only difference is the different color scheme. In other words, you most likely won't find the exact same paint, even in a color matching lab. There is only one way out - to paint the part completely, in a similar car color.
BRAKES
| Name of works | Price, rub | Note |
| Bleeding one circuit of the brake system (one caliper) | 400 | with our liquid |
| Replacing the pads of one caliper | from 150 | |
| Installation of reinforced hoses (front, rear) | from 1200 | |
| Caliper repair | from 800 | |
| Re-assembly of working brake cylinders | from 400 | |
| Replacing brake discs | from 800 |
Spray painting
Do-it-yourself repairs are not a quick and painstaking task. Even to spray paint, you need to prepare the surface. I want the paint not to peel off and the new shiny sides not to be dotted with painted scratches.
Spray painting parts
In order for the paint to lay evenly and last as long as possible, actions are required as in the usual repair of a damaged surface: leveling, putty, primer and sometimes intermediate procedures. But which parts exactly require special attention?
Painting the main details
So, let's begin. The moped doesn't have many parts that need painting. First of all, these are the tank, sides and tail. Wings. The tank is made of steel and can be painted using automotive technology. If the dents are shallow, then they can be sanded and puttied along with the rest of the scratches. Then go over it with sandpaper, cover it with a primer and after drying apply paint. Both primer, paint, and varnish can be applied with a spray can. It will be necessary to give several layers after the previous coating has completely dried. You can apply stickers before applying the varnish. Under varnish they look richer and cannot be washed off with a high pressure washer.
Scooter decorated with stickers
Moped sides and fenders are usually made of thick ABS plastic. Putty and primer must be purchased specifically for this material. The sidewalls do not suffer much from use. Maybe they don't need to be painted? Only if the painting does not change the concept.
How to solder cracks correctly
The front part of the wing will most likely undergo extensive repairs. The cracks need to be soldered with a soldering iron and then with the same soldering iron, press in the wire mesh, which can be bought at a hardware store. This is a mesh for plaster. The cell size is two millimeters. The mesh will strengthen the fault. The scar from the soldering iron must be cleaned with coarse sandpaper and then puttied. Further painting operations are the same as with the tank. But there must be primer for plastic. Otherwise the paint will bubble.
Sealing a crack on a scooter
We restore plastic
The plastic of the scooter, although it is also made of ABS, is thinner. And there is a chance, if you start painting a scooter, you will ruin everything with your own hands. First, it is necessary to determine how many elements of plastic are lost irretrievably. Is the repair justified, or is it easier to find another part, a new one? A careful scooter owner never leaves plastic fragments at the crash site.
Even a piece crushed to smithereens can be folded like a puzzle and soldered on the wire mesh, which has already been discussed. Although for many scooters the Chinese have established the production of cladding parts. The new plastic is already painted and if the color does not match, it can be changed. Simply spray paint without additional preparation. Just matte it a little with sandpaper (to matte means to make the surface matte).
Severely damaged part after sealing
The entire process of restoring the plastic will take much longer than the rest of the scooter's painting. Repairing plastic with a soldering iron is quite a harmful task. All work must be carried out in well-ventilated areas.
Preparing for painting
Before painting, the area where the paint will be sprayed must be free of dust. Because electrified dust will stick to the paint and then no amount of sanding will remove this grain. If you are desperate to achieve the result you expected with a spray can, and still decide to take the plastic to professional painters, persistently warn them that there is no need to dry plastic in the drying chamber. Let him stay with them longer. In the drying chamber, the parts will simply shrink, like a pure wool sweater in boiling water. Afterwards, all this “beauty” can simply be thrown away. The facings will not stretch over the fastening points.
Coloring
The process of painting a motorcycle begins with mixing the paint. First you need to strain it several times, and then, if necessary, dilute it with a solvent.
We charge the spray gun, adjust the spray spot, and apply the first layer at a distance of 25 - 35 cm. It must be thin and is considered a developing film. After applying it, we look at the part to detect defects from previous work and eliminate them in time.
Working with a spray gun is a real skill. First of all, you should carefully adjust the remote control so that the applied layer is within the range of 80 - 120 microns. It should be held at right angles to the surface, with deviations of no more than 10 degrees. The paint is applied in strips, with an overlap of 4-6 cm. In this case, the hand moves at a speed of about 40 cm/s.
We are waiting for the paint to dry. Lightly sand the first layer and apply the second. Again, wait for the layer to dry, lightly sand it and apply the final third layer. This completes the painting of the motorcycle with your own hands.
Briefly about the work procedure
1. Remove damaged parts from the scooter and wash them thoroughly with laundry soap, leaving no traces of oils.
2. Glue the cracks according to the repair kit instructions.
3. Using polyester putty, achieve final evenness of the seam.
4. Apply one thin coat of adhesion promoter to the exposed plastic.
5. After ten minutes of exposure, apply 2-3 layers of acrylic primer.
6. Sand the primer with P 800 abrasive and apply 2 layers of paint.
7. If you have metallic or pearlescent paint, you need to apply a clear varnish after 40 minutes.
Most often, scooters are painted in two or three colors. To speed up the process, you must first apply different enamels one at a time, and then 40 minutes after using the last one, apply varnish to all parts at the same time. The difference in waiting time before applying enamel does not matter for each individual paint.
And one more important note. During preparatory work for painting a scooter, clean gloves should always be worn on your hands. This will protect the skin of your fingers from being rubbed by rough abrasives.
SUSPENSION
| Name of works | Price, rub | Note |
| Fork bulkhead, with replacement of oil seals. (reversal) | from 3000 | including dismantling and installation |
| Fork bulkhead, with replacement of oil seals. (telescope) | from 2500 | including dismantling and installation |
| Replacing steering column bearings on a classic | from 3000 | check the price with a mechanic |
| Replacing steering column bearings on a sportbike | from 2500 | check the price with a mechanic |
| Replacing rear shock absorbers | from 800 | |
| Replacing the monoshock absorber | from 1000 | |
| Replacing front wheel bearings with wheel removal | from 1000 | |
| Replacing rear wheel bearings with wheel removal | from 1500 | |
| Editing disks | — | check the price with a mechanic |
| Replacing chain and sprockets | 2500 | |
| Chain lubrication | 200 | |
| Changing the oil in the gearbox | 300 | |
| Chain tightening | 200 | |
| Removing and installing wheels | 500 | |
| Cleaning and Lubricating the Chain | 800 | |
| Replacing swingarm bearings | from 2000 |
Work order
You can easily master the process of painting motorcycles yourself without throwing away fabulous sums of money. In this case, observe the following procedure.
| Types of jobs | Processes and subtleties |
| Preparation. | At this stage, you need to decide on the upcoming scope of work: choose the color of the paint, the necessary putty and primer according to the parameters. If you have to paint individual components, for example, a tank, then you will need to resort to dismantling all unnecessary elements. |
| Puttying. | This is a layer of plastic material that smoothes out visible surface defects (dents, scratches, etc.). The putty will have to be applied in several layers, and the thickness of each should not exceed 1 mm, and the total thickness should not exceed 3 mm. This is due to the fact that at a higher value, high stresses arise in the thickness of the material, which can lead to the formation of cracks. A pause of approximately 20 minutes is maintained between each layer to ensure complete drying of the putty. The finished layer is processed with abrasives to the required geometry. |
| Padding. | On the prepared and leveled surface of the part, you need to apply several layers of primer with intermediate exposure. This will ensure reliable adhesion of the paint to metal or plastic. |
| Painting. | Uniform coverage and color can be ensured by the use of special paint guns. The distance from the exhaust hole to the surface of the part is maintained at approximately 30-50 cm to ensure maximum area coverage with the same layer thickness. You need several layers of paint: the more there are and the thinner they are, the better the final result will be. |
| Varnish coating. | This protective coating is applied in 3-5 layers. The work is carried out very carefully to avoid smudges. It will not be possible to eliminate them without removing the paint layer and repeating the previous steps. |
| Motorcycle polishing. | For this, various polishing pastes are used, which can be purchased at almost any auto store. Thanks to it, it is possible to achieve the ideal shine of a muffler or a painted part made of metal or plastic that has become dull from regular use. In addition, the polish eliminates minor irregularities and scratches on the surface. |
You will have to follow all the steps exactly, otherwise the result will be unsatisfactory and you will have to redo everything.
(1 rating, average 4 out of 5)
ENGINE
| Name of works | Price, rub | Note |
| Removing and Installing the Engine from the Frame | from 5000 | |
| Engine overhaul with removal and installation | from 20000 | |
| Gearbox repair with partial engine disassembly | from 10000 | |
| Block head bulkhead | from 5000 | |
| Valve adjustment of in-line 4-cylinder engines | from 3000 | |
| Adjusting valves on single-cylinder engines | from 1000 | |
| Clutch replacement | from 2500 | |
| Cleaning and synchronizing carburetors | 4000 | |
| Changing the oil with oil filter | from 500 | |
| Replacing the air filter | from 300 | |
| Replacing antifreeze | from 500 | |
| Compression measurement | from 500 | |
| Replacing spark plugs | from 200 | |
| Replacing clutch fluid | 400 | |
| Replacing throttle cables | from 500 | |
| Replacing the clutch cable | from 300 | |
| Replacing the speedometer cable | from 200 | |
| Clutch master cylinder overhaul | from 500 |
Useful tips
If you plan to repaint the motorcycle in a different color, you need to contact the traffic police to obtain permission. All actions to change color need to be legalized. Painting must be done using a special device in the form of a spray gun. This will allow you to spray the paint in an even layer. When applying the primer, do not rub it with a brush.
The surface to which the primer is applied must be painted immediately. After the paint is completely dry, it needs to be polished. This will eliminate minor flaws and make the surface more resistant to the negative influence of external factors. Such actions can be carried out using a drill with a felt wheel or a special polish.
What type of paint to choose
When choosing paint for a motorcycle, you need to consider two points: the cost of the composition and the complexity of its application.
The following types of paints can be used to paint a motorcycle:
- Nitro-enamel. They are in great demand because they are more affordable financially and do not involve any special difficulties in application. The advantage of this paint is also that it dries quickly and is available in various shades. Nitro-enamel paints also have their weaknesses. Firstly, the surface after application acquires a strong shine. Secondly, it is less resistant to chemical and mechanical influences. However, this coating is considered ideal for painting small elements.
- Alkyd paints. This type of paint is characterized by higher cost, which is its only drawback. The good thing is that with their help you can paint your motorcycle yourself without any problems. The coloring composition is characterized by a high degree of resistance to chemical influences and fading. Prices for alkyd paints are much higher than for nitro-enamel paints. This is due to the fact that they dry faster and are easier to apply.
When choosing paint for a motorcycle, you need to consider the frequency of painting. Budget options are not so durable, so the original appearance will be lost quite quickly.
Why you can trust us
We understand that leaving your bike in the wrong hands is not easy, so many people think about painting it themselves. However, in order to correctly carry out the painting procedure, you need a room that is protected from dirt and dust, as well as painting equipment. Some people think that spray paint is a good solution, but they cannot achieve an even coating. So, if you want your two-wheeled friend to be transformed, to sparkle with new colors and unique lines, then it’s best to contact us. It’s better to paint once and for a long time than to redo it later and end up spending more money on correcting mistakes.
Make an appointment and already at your first visit you will be able to see that our workshop is perfectly equipped, and all equipment and materials will be used to the fullest, without saving, because the main thing for us is quality.
Difficulties
Metallic paint has the following features. Whatever you buy, no matter how you shake the bottle, in the end it will work unevenly, spitting out metal particles or droplets. Therefore, when the container runs out, it cannot be used to apply the finishing, third, layer. It is better to put it aside and use it on the first or second layer of the next part.
After all work, the plastic must be left to dry for several days until the paint and varnish coating hardens.
What materials and tools need to be prepared
To paint a motorcycle you will need:
- Dye. Her choice depends on personal preferences and financial capabilities.
- Primer. This composition provides the necessary degree of adhesion. Some primers contain additives that resist corrosion. This point is especially important when it comes to painting parts made of metal.
- Putty. Using this plastic mass, dents, holes and scratches are smoothed out.
- Abrasives. Coarse and fine-grained materials that are designed to remove old coating.
- Protective materials. They are film products whose task is to protect those parts of the motorcycle that should not be painted.
Color selection
The choice of color for a motorcycle is always up to its owner. Most often, this type of transport is painted black, red or blue. In fact, motorcycle paint can be any color. But as for metallic, this composition is used extremely rarely, since it is not budget-friendly and is not easy to apply to the surface. Moreover, after spray painting a motorcycle, any defects, be it scratches or chips, are visible. In some cases, the motorcycle can be painted using three colors. One shade is used for the frame, the second for the tank, shields, and the third for small elements.