An ATV is a useful household, fashionable and functional appliance. Therefore, scooter owners dream of switching from two-wheeled to four-wheeled motor vehicles. It is quite possible to make an ATV from a scooter with your own hands, just like making an ATV from a walk-behind tractor with your own hands. To do this, you need to prepare the appropriate components and tools. This is a fascinating process that will result in a universal self-propelled vehicle.
The scooter is a lightweight motorcycle that can easily make an excellent ATV. The engine of this scooter is located under the seat, which is an advantage, since the all-terrain vehicle will have to be driven on rough terrain, rocky or muddy roads. The motor in this design will be reliably protected from dirt and moisture entering the system.
The scooter turns into a lightweight ATV that has all the advantages of popular all-terrain vehicles. The low weight is explained by the absence of a heavy body, which guarantees the maneuverability of the motorcycle, as well as its low inertia. Another advantage of an ATV assembled from a scooter is the fact that even one person can pull it out of a hole or sticky mud. This technique is perfect for both entertainment and simple household tasks. For example, with the help of such an ATV it will be possible to transport small loads. The advantage of motor vehicles assembled from a scooter is low fuel consumption.
Homemade ATV from a scooter
Homemade ATV made from a scooter: photo of production with a description of the homemade product, as well as video testing.
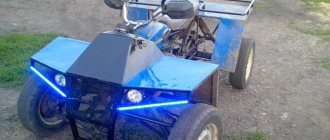
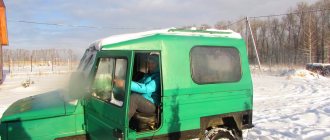
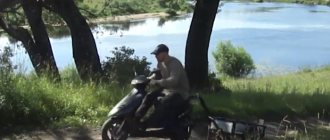
The author decided to accustom his son to technology from a young age; for this, the craftsman assembled an ATV from a scooter with his own hands. To build the homemade product, we bought a broken scooter, wheels from a walk-behind tractor, and some spare parts from a children's ATV.
Below are a few photos of the vehicle assembly.
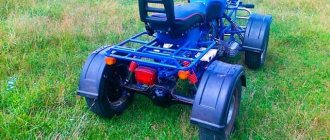
The front suspension is made, the levers are homemade, the steering knuckles are from a children's quad.
The rear axle with a star is mounted on housing bearings.
The engine with variator remained from the scooter.
The author installed wheels from a walk-behind tractor.
The result is this mini ATV.
The craftsman named his homemade product “Egorushka.”
We recommend watching a video of a homemade ATV.
Homemade ATV with an OKI engine | 85 photos of step-by-step assembly
Dear visitors to the “ Samodelkin Friend ” website, today we will look at step-by-step instructions on how to independently assemble an ATV with an engine from an OKA car with your own hands. The author and designer of the presented ATV is Alexey Brazgin. According to Alexey, he had long dreamed of assembling his own ATV, before starting construction of the machine, he looked through many forums, homemade sites, which was pleasantly surprised... Mother Russia is rich in Kulibins)) see the ATV section And began designing, collecting the necessary spare parts, components and assemblies . Basically, all the parts are taken from used domestic cars, for example, the OKA engine, VAZ suspension elements, NIVA-214 satellites, VAZ-2109 grenades. The frame is welded from corrugated pipe with sections: 20x40, 20x25 and pipes of 20 for the manufacture of suspension arms. Ball from the classics, OKA springs, silent blocks, also classic, 24 pieces. Drive shafts from a VAZ 2109, electrical wiring from a scooter, R-15 wheels, Forward Safari 540 tires. The fuel tank is also homemade, welded by Alexey from sheet stainless steel, tank capacity is 18 liters. The front and rear kenguryatniks are also homemade, welded from pipes.
This ATV is quite powerful and easily overcomes any off-road obstacles, holes, ditches, ditches with or without water, steep ascents and descents, deep and loose snow, this beast is no match for anything)
Well, let's move on to looking at step-by-step photos of the assembly of Alexey Brazgin's ATV.
Materials
- OKA engine
- VAZ suspension elements
- professional pipe 20x40 and 20x25
- pipe 20 mm
- OKA springs
- classic shock absorbers
- R-15 wheels
- tires "Forward Safari 540"
- fiberglass and epoxy resin
Tools
- welding inverter
- Angle grinder (grinder)
- drill
- set of wrenches
- spray gun
- roulette
- screwdriver
Step-by-step instructions for assembling an ATV with an engine from an OKA car with your own hands.
First quad bike
Second quad bike. Having a clear example makes it much easier to create your own equipment, but Alexey’s path faced a difficult task and more than six months of painstaking work.
It all started with the collection of spare parts and other scrap metal from the Domestic automobile industry)
OKA engine. Gearbox with grenades from VAZ 2109 Look at it from above) A satellite from NIVA 214, bored by a turner for a nine-wheel grenade. Satellite on a grenade. The frame is welded from professional pipe 20x40 and 20x25, suspension arms are made from pipe 20 mm. Before. Balls from the classics. Bottom from VAZ 2109. Silent blocks from classics 24 pcs. Reworking nine-arm fists and combining them with classics. The front shock absorbers were created by crossing OKI springs with its rear shock absorbers, and this is what happened. Bottom mount. Rear springs from OKI + classic shock absorbers. Steering. The radiator is located on the frame. The frame was pre-welded with tacks so that errors in the design could be corrected during the process. Steering wheel mount. Shortened drive shafts of VAZ 2109. Rear-wheel drive. Front wheel drive. Reworking the exhaust system. The resonator from the VAZ 2109 was opened and a partition was welded. Installation of radiator and engine cooling system. Gearbox lever. Fastening at the bottom. Transmission of torque from the gearbox to the gearboxes. View from the checkpoint. Original grenade from OKI, drive also from it. The fuel tank is welded from stainless steel, capacity 18 liters. Tank neck. R-15 wheels. Alexey in the process of construction. Tires “Forward Safari 540” Facing, beginning) Kenguryatnik. Front kenguryatnik. Basis for application of fiberglass and impregnation with epoxy resin. Homemade seat. First test ride on an ATV. Quad rides with the guys) Primer of the frame. Primer for the gearbox. The frame is painted black. Gearbox in blue. Working with fiberglass is very labor-intensive and painstaking.
Preparation for work, tools and equipment
First of all, you need to carefully consider when, where and for what purposes the future ATV will be used - hunting and fishing, motorcycling in nature, transporting goods, etc. It is on this basis that you need to make a choice of a “donor” vehicle, deciding how powerful the engine is needed, what kind of suspension is suitable, what kind of trunk, etc.
You can take ready-made drawings from the Internet, create them from scratch yourself, or combine both options and ready to remake them at your own discretion.
List of required tools:
- welding machine;
- Bulgarian;
- drill;
- a set of keys;
- various small tools - calipers, hammer, knife, screwdrivers, pliers, etc.
To make your own frame, you will also need equipment for bending pipes. If you don’t have one, you can rent it or outsource the necessary work to another craftsman. Only with remarkable skill can you bend the pipes manually by heating the bend with a gas cutter or torch.
- engine;
- frame;
- rear and front suspension;
- steering;
- brake system;
- cooling system;
- muffler;
- electrical equipment - battery, headlights;
- body, body kit
It is quite possible to make a muffler yourself. Everything else is to purchase used parts on the shadow market.
Parts selection
ATV frame
Depending on the “donor” and the design of the quad, you either have to make the frame yourself, or you can reconstruct a finished, used one.
The most important thing is that the engine is securely bolted to the bottom along the frame, which can be located either front or rear. The transmission and drive should also be firmly attached to the frame to avoid play.
Homemade frame
The material used is ordinary water and gas pipes with a wall thickness of no more than 3 mm:
- for spars - 25 mm;
- for crossbars and struts - 20 mm.
The pipes are connected using spot welding, followed by solid welding. Ears for attaching shock absorbers and levers are welded to the frame immediately. Brackets - during installation of units and components.
Reconstruction of an existing frame
To reconstruct a finished frame, you should remove everything, leaving the frame, dismantle the back part and build up the front. Then weld elements for fastening a complete set of components and assemblies of the ATV. When reconstructing a motorcycle frame, the seatposts should be moved back by 40 - 45 cm.
The front and rear luggage racks are cut out of a metal sheet and welded to the frame. Finally, the finished frame is painted; there is no need to varnish it.
Additionally, we recommend reading our expert’s article on how to choose a roof rack for your car.
We also recommend reading our specialist’s article, from which you will learn how to select and install a box on the roof of a car.
DIY ATV frame drawings
The false tank has a complex shape. It was not possible to bend it out of hardboard. Therefore, having wrapped the engine with plastic film, I began to fill the space intended for it with layers of polyurethane foam. After each layer, drying is mandatory, otherwise the thick volume of foam may not dry out inside.
Part of the Oka dashboard was used under the instrument panel. I secured it to the blank also using polyurethane foam. Since the foam is large-porous, the pores were filled with gypsum and then processed. When the shape of the blank began to correspond to the intended design and its surface became more or less smooth, I coated the blank with PF-115 paint.
See about copters: Buy a used quad: tips for buying a used quad
So, the blockhead is ready and to glue a high-quality product, it was required: 10 kg of epoxy resin, 1 kg of plasticizer for it and 1 kg of hardener, 15 linear meters of thin fiberglass fabric, 5 m of glass mat, brushes, gloves. It is highly advisable to wear breathing protection. And the more expensive they are, the more reliable they are. But, as you know, you can’t buy experience, so I gained it in the process of work.
I used transparent tape as a separating layer between the block and the product. The whole idiot covered it with stripes carefully, without any omissions. It only took 1.5 rolls of wide tape.
I diluted the resin in 200 - 300 grams with a hardener and plasticizer. I used measuring cups and syringes, which is not very convenient. Before this, I cut strips of fiberglass in such sizes that large canvases would lie on flat surfaces, and on uneven surfaces, pieces of fabric could repeat them without making folds. By the way, fiberglass stretches moderately along the diagonal of the weaves, “flowing around” the desired shape.
First, I thickly coated one area of the blockhead with epoxy resin, placed fiberglass on it and impregnated the top with resin again. The adjacent piece of fabric was glued using the same technology with an overlap of 3 - 5 cm. We had to work quickly - the resin sets quite quickly, and the higher its temperature, the faster. Yes, I also heated the resin a little near a powerful lighting lamp for better fluidity.
After covering the blockhead with fiberglass in one layer, I began to cover it with glass mat. The fiberglass mat I got was quite thick, and it turned out to be good for gaining the thickness of the product. But it does not hug uneven surfaces, so I used it only on flat (or slightly sloping) surfaces and without overlap.
Impregnation with resin was carried out in the same way as when working with fiberglass. Just keep in mind that it takes a lot of resin to impregnate glass mat, so you need to dilute it more. After gluing the glass mat, uneven surfaces were glued in several layers with cloth.
Each subsequent layer was applied after the previous one had set a little, so that the resin would not leak. And since the process of gluing the body kit took more than one day, after a day of break it was necessary to “roughen” the surface with coarse sandpaper and degrease it - after all, the resin cures completely during this time. The final layers on top of the mat were again covered with fiberglass, and not even just one layer.
Since I needed the surface, as they say, the smoother the better, and I didn’t have enough experience, dips and holes still remained - I filled them with resin alone, and with pieces of fiberglass applied there. There wasn't enough resin. I already bought more at the hardware store, in boxes.
After the glued body kit had completely dried, I made cuts in it, dividing the product into three parts: rear fenders and rear, false tank with seat, front fenders and front end. Carefully, slightly prying and pulling with his hands while picking, he separated the product piece by piece without much effort from the blockhead.
Now, having removed the parts, I began to process them separately, bringing them to the desired result. In general, ordinary preparatory and painting work using “all” technology: first, rough grinding with the removal of large bulges of resin and fiberglass; then painstakingly filling the recesses with putty and fiberglass; then grinding the outer surface and priming with a plasticizer. Finally - metallic painting and varnish with a plasticizer.
The blockhead also carefully cut it off and put it in the far corner - just in case. The body kit was attached to specially made and welded “in place” mounts on the frame.
Finally, I welded front and rear luggage racks from thin-walled steel pipes with an outer diameter of 20 mm, and in addition to them, “kangaroo bars” that replaced the bumpers.
Stages of assembling an ATV
To create a homemade ATV with your own hands, you need to go through 9 stages of work step by step:
- Acquisition and preparation of everything necessary;
- Welding (alteration) of the frame;
- Installation of suspensions, brakes, chassis, shock absorbers, wheels;
- Installation of engine, gearbox, drive assembly;
- Installation of the fuel system;
- Installation of electrical equipment - turn signals, headlights, dashboard, battery;
- Case manufacturing;
- Priming, sanding and painting the body, (if desired) sophisticated custom tuning;
- Installation of the body and seat.
After the final stage, the finished miracle of home-made equipment will need to be thoroughly tested, gradually making road (and off-road) conditions more difficult.
Homemade ATV from the outback: a toy for $3,000 without the right to travel
Belarusian villages are like this: behind unsightly-looking fences you can sometimes find a real treasure. It would seem, what can attract a small village between Vitebsk and the border with Russia, transit through which does not stop around the clock? Likewise, the hero of our material, Sergei, does not see much merit in the ATV he created with his own hands, which can easily be mistaken for a factory model.
“The idea was born thanks to the Internet: I saw enough and wanted to do it myself. Besides, I'm a biker, I have a lot of spare parts from my motorcycles. There have been similar models for a long time, there are plenty of Chinese ATVs, and more or less beautiful ones.”
A homemade ATV should definitely be considered “more” beautiful. Yes, upon closer inspection, some flaws are visible, but the development is not finished yet! What else were you looking at from Chinese models?
“I developed plans and drawings on my own, and began development with the purchase of four beautiful wheels with R16 rims. They cost 700 dollars. First I welded the frame - this was the most enjoyable part for me. Then I took up the suspension. At the front are BMW 3-series hubs, at the rear are from a Passat B3, machined onto 5-bolt discs. A ball joint from BMW was converted into levers from an Audi 80.”
BMW, Audi, Volkswagen are the permanent Belarusian top three in demand and in disassembled form. Just like Soviet motorcycles, which do not want to retire to their well-deserved retirement.
“I decided to install shock absorbers at the rear. The ones from Izh Jupiter turned out to be completely useless, so I put in a stronger one from the Dnepr. I would like a normal factory ATV, but their prices are sky-high. The brakes are a simple cylinder from an UAZ. There was a vacuum booster before it, but it turned out to be unnecessary: the ATV immediately skidded.”
Talking about shock absorbers, Sergei points to a Yamaha Grizzly all-terrain vehicle standing nearby, against which the road ATV looks like a toy. But that’s exactly the point: why make another one?
“According to the project, the ATV had to go fast, so we initially planned to install the engine from a motorcycle. But its use on the roads is prohibited. Of course, everything is at the inspector’s discretion, but in order not to put the ATV “behind the grid”, I decided to install a simpler engine, like a walk-behind tractor. This Lifan is enough to drive back and forth around the village. It cost 12,000 Russian rubles. I didn’t measure the consumption: I’ll pour as much as needed.”
“After the first ride, I realized that with a variator it was difficult for an ATV to start moving, and there wasn’t enough reverse gear. I installed a gearbox from Dnepr and covered the chain with a metal casing. So that your pants don’t get caught there, and as protection if the chain breaks, otherwise it can be very unpleasant. The “star” with a chain from Izh turned out to be explosive. Are the “stars” now such that the tooth cannot be hit properly? I plan to convert it to a timing belt. Now 4 gears and one reverse are available for movement. I only accelerated up to third gear, nowhere in particular.”
“The body was made of fiberglass. I took the wheel, made a pattern based on it, and worked long and hard on the body kit. I painted it, although there are a few streaks, but this is a preliminary version. Then I will take everything apart and bring it to its final appearance. Signals will be added to the rear like a car. The front part is not finished yet. I would like a beautiful bumper, but I don't have enough ideas. Someone would have given it! Headlights from Toyota Celica.”
When asked whether the bumper will be a power bumper or a regular one, Sergei grins modestly: such excesses in the form of excess iron are clearly useless, just to cover the front part from dust.
“The side drawers are made of waterproof plywood: one sheet of this material costs $90. Supports - furniture gas elevators. They were found at home, but they cope with their functions. “Music” from an ATV, waterproof, with a switch on the steering wheel, which also came from Izh. But I made a slight mistake with the speakers: it was supposed to be waterproof, but I just bought waterproof ones.”
“If I lived in Russia, I would be able to drive from and to work (this is about 4 km of good asphalt with a wide shoulder. - Author’s note ). But its operation is prohibited here, and you can’t drive it across the fields. So it turns out that for speed I have a good motorcycle, and for off-road use an ATV. And this is so, a toy. Although I’ve invested about $3,000 in it over the entire period.”
On this slightly sad note we part ways. The destiny of an almost finished ATV remains rural roads and rare trips to good asphalt under the threat of being stopped by traffic police officers. But Sergey is not discouraged and is going to equip a trailer to transport the device. Who knows, maybe one day the ATV will be covered with dust, but it would be nice if it was dust from roads, and not from endless parking.
Andrey GORELIK Photo by the author and the hero of the material ABW.BY
People's alteration: how a pensioner assembled a competitor for MTZ with his own hands
Do-it-yourself homemade ATV: how to make a decent device
An ATV is a vehicle equipped with four wheels. The main manufacturers of mini cars are: Yamaha, Polaris, BRP, CF Moto. Utilitarian quadrics are used as all-terrain vehicles, and stunt models are used for fast driving. The categories differ from each other in technical characteristics, which is taken into account when you need to assemble an ATV with your own hands.
Description of the vehicle
A modern ATV is equipped with four or six small wheels, but with increased maneuverability. The main technical characteristics include: light weight, all-wheel drive and low gear. Due to the unique configuration, the vehicle can easily travel on country roads. It can be used in summer and winter.
To make a homemade ATV, it is recommended to decide on its type:
- Utilitarian. The model has a lot of weight and good maneuverability. The vehicle easily carries several people and accelerates to 90 km/h.
- Stunt. Equipped with a narrow platform and radiator. The car weighs little and can accelerate to 137 km/h.
Preparatory stage
When assembling the structure yourself, the power of the motor, the type of suspension, and the need to install a trunk are taken into account. To perform the upcoming work you will need: a welding machine, drill, grinder, keys, hammer, pliers, jack. As a basis you can take:
- Motorcycle Ural.
- Motorcycle Izh.
- Scooter.
- Oka or Niva car.
If necessary, transport is assembled from motorcycle and car parts. If the frame is made independently, special equipment will be required to deform the pipes. In this case, it is recommended to separately make drawings of the frame for the ATV with your own hands. This will simplify the process of assembling components:
Selection of systems
The brake system uses new parts or with minimal mileage. It is dangerous to install old brakes. The muffler is removed from the old car or made independently from a pipe. If a frame from another machine is used, it must be securely bolted to the bottom of the motor. The power unit is installed at the rear or front. Experts advise securely attaching the drive and transmission to the frame.
If the frame requires reconstruction, the component elements are dismantled. The front part needs to be extended onto the frame. At the next stage, the components of the frame are welded. When reconstructing the frame of a motorcycle, the seatposts are moved back by 40-45 cm. Racks are cut out of metal and welded, which are then fixed to the frame. The resulting homemade quad part can be painted with any paint.
To make your own frame, use a regular pipe with a wall thickness of up to 3 mm. It is better to make the spars from a pipe with a diameter of 25 mm, and the struts from a 20 mm pipe. The elements are fixed by spot and then solid welding. In a similar way, the ears from the levers and shock absorbers are welded to the frame. It is recommended to fix the brackets when installing other components and assemblies.
Homemade tricycle from the Urals
The main advantages of a tricycle based on the Ural:
- good handling;
- the ability to develop sufficiently high speed;
- high power;
- comfort during long trips;
- a spacious body for transporting cargo weighing several hundred kilograms.
The predominant part of the components belong to motorcycles; the engine for the trike is suitable from a ZAZ-968. The most labor-intensive process is making the frame. In the design, it is a kind of connecting link on which all components and parts are installed.
Design Features
For inexperienced designers, when assembling a tricycle, the drawing will be an excellent guide to action. It is important to think carefully about the size issue.
The rear shock absorbers, which are similar to their automobile counterparts, are mounted on the upper beam. When driving on a road with uneven surfaces, the shock absorbers will react sensitively to them. The glasses are fixed to the beam by welding, which provides the desired comfort. The pipes are welded at the end together with reinforcing gussets - the fastening will be reliable.
Due to the fact that the power unit is installed in the rear, the center of gravity is there. With a sharp increase in engine speed, the front wheel lifts off the road and the tricycle rears up. This effect can be eliminated by placing the balance closer to the front wheel.
If the engine is slightly tired, it needs to be repaired a little. The exhaust system in this case is homemade, and the cooling system can be chosen as water or oil type.
Since the right hand is busy adjusting the gas, the gear shift lever, naturally, should be on the left side.
Assembly sequence
- The frame is constructed according to the drawing. Anything made of ferrous metal must be coated with a layer of primer and then paint.
- The rear axle must be in good condition. It can be removed from a Zaporozhets or Moskvich car.
- All main components and assemblies, represented by the engine, filters, exhaust system and oil cooler, are mounted on the rear axle.
- To have easy access to all parts and ensure ease of assembly, it is recommended to use a jack or lift. The frame must provide a reliable connection between the front fork, rear axle and engine.
- When fixing the elements, no backlash should be allowed; there should be no clattering. To avoid vibrations, make connections using locknuts.
- Fastening by welding is considered the most reliable. This must be taken into account when fixing it to the frame, rear axle and cross members.
- Attaching the fuel tank, seats, trunk and other accessories is done at the very end of the assembly, when the homemade trike is already put on wheels.
Power unit
The motor is removed from a sports or regular motorcycle, scooter, or car. Auto mechanics advise using a four-stroke engine with a power of more than 15 hp. With. The power units of scooters differ from other analogues in their low fuel consumption. An ATV based on a scooter weighs little, so it can be pulled out quickly if it gets stuck in sand or mud.
To transport cargo or drive off-road, a stronger motor is installed:
- from Izh-1, Izh-2 or Izh Jupiter with a power of 24 hp. With.;
- from the Urals 32 or 36 l. With.;
- from Oka two-cylinder engine 35 liters. With.
To transport heavy loads, a three-cylinder engine is installed. To drive in hot weather, a motor with a cooling system is used. It is not available on older motorcycles. In such units, the cooling system will need to be modified.
Front and rear suspension
Homemade ATVs are equipped with front or rear suspension. It is easier to mount a ready-made front suspension from an old motorcycle. You can use other options:
- Rear axle from the car. It must be shortened to fit the parameters of the quadric. The advantage of this method is the presence of a differential. The disadvantage of the bridge is its large mass.
- Cardan + gearbox on the rear axle. An independent suspension with high ground clearance is suitable for an all-terrain vehicle. In this case, the suspension arms are fixed to the frame using bolts.
To prevent the ATV from turning over while driving, it is recommended to tilt the front suspension strut. The shock absorbers are from Izha. If you have the financial opportunity, it is better to install gas-oil shock absorbers with pumping. They provide suspension adjustment based on the road surface.
The steering system of an ATV is similar to that of a car. A steering wheel or motorcycle handlebar is installed . Some experts advise combining 2 types:
- motorcycle handlebars, shaft and lever at the top;
- parts of the steering system from the car are below.
You can make the steering shaft with your own hands. For this, a pipe with a diameter of 20 mm and a wall thickness of 3 mm is used. You will need to install a travel stop at the bottom of the part.
ATV is basically any four-wheeled vehicle.
A quad bike is actually any four-wheeled vehicle, since “quadro” means “four” in Latin. For example, the Ural bike is great, too big, heavy and gluttonous, has a beautiful four-stroke engine with reverse gear and costs a pittance. Due to this factor, it is much cheaper and more fun for enthusiasts to create personal data systems for all-terrain vehicles.
The usual factory ATV adept is brilliant, neatly organized, strong and powerful.
Its homemade counterpart, which is slightly inferior in appearance, and even more so in terms of power.
It is logical that first of all it is necessary to find the “heart” of the future “beast” - the power unit. Absolutely anything will do, from a regular walk-behind tractor to a six-liter V12 - there are such precedents. In most cases, motorcycle engines are used - they are economical and small-sized.
To use high gear ratios under normal operating conditions, a Minsk or Ural engine will be sufficient. In summer, the issue of overheating arises, so you should choose air-cooled models. Another good option is Soviet-made boxer engines, the undeniable advantage of which is powerful traction and a completely unpretentious driveline.
There are two most common rear suspension solutions for ATVs.
- Gear-cardan system. The design turns out to be as lightweight and simple as possible, but there is no differential, which, in principle, can be sacrificed for the sake of the previously mentioned advantages.
- Using a road bridge. The design turns out to be extremely heavy, and if there is no desire to have an ATV with a car base, it is necessary to shorten the bridge, which is a very non-trivial task. The only advantage worth highlighting is the presence of a differential, which is useful when driving on highways.
There are huge possibilities for front suspension and steering. ATV suspension arms carry significantly less load than automobile ones; accordingly, they can be made independently, using available means. The best option is to create a suspension based on the existing Ural motorcycle.
Frame (drawings) The best solution is a durable structure made of pipes or profiles welded together.
Having prepared the necessary tools, donor vehicles and freed up time, you can begin to create your own ATV:
- We assemble the frame (frame). We connect the prepared metal beams, according to the drawing, to each other using spot welding. We check the structure and carry out full welding. Alternatively, you can simply remake the frame from the donor motorcycle - it will turn out no worse.
We install the engine. It can be placed both at the rear and at the front - the main thing is to secure it firmly with bolts to the bottom of the frame.
We mount the drive and transmission on the rear wheels. The drive does not need to be created independently - it is transferred together with the engine from the donor vehicle and installed on the frame. Again, it is necessary to properly secure the drive and transmission to the frame to prevent play.
We also install the steering from the motorcycle. Along with the steering wheel, the fuel tank also “migrates” to the ATV. In general, if you imagine the design, it will look like this: 3/4 of the ATV is the same Ural or another motorcycle, 1/4 is a homemade frame and suspension.
We install wheels from a small-sized vehicle (“Oka” or “ZAZ-968”). The rear wheels can go to the ATV together with the rear axle of the car, or they can be attached as follows: we take ready-made axles with disks, after which we attach a gearbox to the rear one for drive. and we install wheels on the rims, which can even be with low-pressure tires.
We install wheels from a small-sized vehicle (“Oka” or “ZAZ-968”). The rear wheels can go to the ATV together with the rear axle of the car, or they can be attached as follows: we take ready-made axles with disks, after which we attach a gearbox to the rear one for drive. and we install wheels on the rims, which can even be with low-pressure tires. We install wheels from a small-sized vehicle (“Oka” or “ZAZ-968”). The rear wheels can go to the ATV together with the rear axle of the car, or they can be attached as follows: we take ready-made axles with disks, after which we attach a gearbox to the rear one for drive. and we install wheels on the rims, which can even be with low-pressure tires. We assemble a single drive with a gearbox on the rear axle and an engine (again, it will be easier if it is completely rearranged from the donor vehicle). We do this as follows: we stretch the chain from the engine to the gearbox and secure it, after which we check the functionality. Ultimately, we fix the entire structure on the frame.
The front suspension is independent - this is more profitable in terms of time and money, since an all-wheel drive ATV requires significant modification of this unit by a professional turner, welder and electrician, which will take a lot of time. As an option, we purchase ready-made factory components for ATVs.
Gearbox and brakes
If the quad is assembled on the basis of a car, the chain drive is replaced. This greatly simplifies vehicle maintenance. A manual transmission is installed, as it improves maneuverability. The input shafts are directed to the front and rear axles. Wheels can be removed from small cars: Oka, Niva.
The brake system is selected taking into account the mounted wheels. The steering knuckles are removed from the Niva or Oka. To assemble an all-wheel drive model, you will need: car steering, transmission drive and differentials. In this case, the frame is not used. It is better to weld the structure to suit the engine size.
The suspension is also removed from the car. A gearbox is installed on the front-wheel drive model. The next stage is the manufacture of the body. For this you will need fiberglass, fiberglass. Experts advise using the first material, as it is easier to work with.
A drawing is pre-prepared and body elements are cut out from polystyrene foam. To fix them together, glue or foam is used. Fiberglass is glued to the foam. The resulting structure is attached to the frame. The body is well dried, primed, sanded and painted.
Tires of the required size are selected. If the vehicle will be used off-road, it is necessary to create the appropriate ground clearance (distance from the bottom to the surface of the earth). For this, R17 wheels are installed.
The resulting ATV is equipped with turn signals, headlights, a dashboard, and a battery. Electrical equipment is connected according to a pre-designed diagram. For this, wiring and a multimeter are used to check the voltage in the network. The next step is to install the seats. The vehicle is checked for serviceability, and the data displayed on the drawings is compared. A quadric, correctly assembled, is not inferior in technical and operational characteristics to finished vehicles.
Recommendations
It is worth considering that ready-made foreign samples most often have to be modified and modified. The thing is that they are not designed for deep snow. One of the most affordable engine “donors” are the powerful Ural and Druzhba gasoline saws. You can also use a Stihl saw as a base, which is slightly more advanced than previous samples. In addition, it is easier to find spare parts for newer engines.
It is useful to remember that a snowmobile with a chainsaw engine cannot carry large loads. In most cases, such structures are designed for one seat. But they are great for children. For driving at night, it is recommended to use headlights. They will also help out in bad weather.
Particular attention should be paid to the gearbox. In many ways, the reliability of the vehicle as a whole depends on it. The sprockets are secured to the track shaft with a nut.
You just need to make a suitable thread. They work in a similar way with the shaft and its sprockets.
Inexperienced and inexperienced people should equip their snowmobile with any simple handlebar. Even a standard road bike handlebar will do. But the simplicity of the control scheme will result in the complexity of manually adjusting the speed. The use of handlebars removed from mopeds or scooters helps to make riding easier. To avoid mistakes, it is recommended to draw up sketches and diagrams in advance, indicating dimensions and profiles.
The tip for transmitting mechanical force on the right must be longer than the same tip on the left. It is necessary to carefully consider the connection of any motor to the steering wheel. It is errors at this stage of work that often cause unpredictable behavior of the snowmobile - and they are very difficult to detect. A braking system is practically unnecessary for homemade snowmobiles. The only exceptions are children's models and items designed for travel to hard-to-reach places.
To learn how to make a snowmobile from a scooter with your own hands, see below.
ATV from a scooter: assembly features
An ATV is a useful household, fashionable and functional appliance. Therefore, scooter owners dream of switching from two-wheeled to four-wheeled motor vehicles. It is quite possible to make an ATV from a scooter with your own hands. To do this, you need to prepare the appropriate components and tools. This is a fascinating process that will result in a universal self-propelled vehicle.
The scooter is a lightweight motorcycle that can easily make an excellent ATV. The engine of this scooter is located under the seat, which is an advantage, since the all-terrain vehicle will have to be driven on rough terrain, rocky or muddy roads. The motor in this design will be reliably protected from dirt and moisture entering the system.
The scooter turns into a lightweight ATV that has all the advantages of popular all-terrain vehicles. The low weight is explained by the absence of a heavy body, which guarantees the maneuverability of the motorcycle, as well as its low inertia. Another advantage of an ATV assembled from a scooter is the fact that even one person can pull it out of a hole or sticky mud. This technique is perfect for both entertainment and simple household tasks. For example, with the help of such an ATV it will be possible to transport small loads. The advantage of motor vehicles assembled from a scooter is low fuel consumption.
How to make a snowmobile from a scooter with your own hands
So I decided to add to the logbook, but since it’s still winter, there’s no way to tune the car yet. But I can tell you about the homemade snowmobile in more detail. (if anyone is interested, of course? I wrote about it at the beginning.) I made it 5 years ago and for about 4 years it sat with friends for long-term storage. It was there because I started living in an apartment in the city. There is no place to store it, riding is a problem. But recently I moved to live in my own house. A DREAM COME TRUE ? And then the holidays and I decided to drag my snowmobile and reactivate it. I flushed the tank and carburetor, which had been sitting for 4 years. And I was surprised by the frost - 20, and the snowmobile started up the first time and drove as if I had ridden it yesterday? That's what a Japanese engine means. Now a little about what it is made of. -The engine is taken from a 50cc Honda scooter. In general, I really like the scooter: the engine is a FIND? READY MODULE FOR HOMEMADE. There is an electric starter, a built-in automatic transmission (variator), and a generator. forced cooling, el. ignition, low fuel consumption and low weight. Fastening with two bolts and then in the eyes of the salen blocks, when working there is no vibration. It’s also quiet, and so on. Can we endlessly list its advantages? -The frame is made of a 50 by 50 profile -The caterpillar drive is made of an extended wheel screwed to the hub (rear VAZ 2109) This makes it easier to remove the caterpillar for repairs. A sprocket from a motorcycle is welded to the hub, and a sprocket is also welded to the engine in place of the wheel, and this is all connected by a chain. -The caterpillar cart is made from profiles and corners from a school desk. -The hinges are salen blocks, used from the rear arms of Lada cars. And one flavor with a spring is used (REAR FROM THE OKA) -Guides for the caterpillar, they are called slips, are made of thick plastic water pipe. They hold the caterpillar when turning and do not allow it to slide. In the middle at the bottom there are rollers, these are sold in any store. They carry the entire mass of the snowmobile and it rolls on them along the smooth part of the track. On real snowmobiles, the mass goes along the slides, that is, plastic slides, they slide along the caterpillar inside like skis. But for this you need more engine power, and I fought for every gram of power loss. That's why I put my snowmobile on rollers and raised the skids a little. In the future I want to replace the rollers with rollers with bearings. -The caterpillar itself is from some kind of snowmobile, first I took it, and then I began to make suspension and drive using it. I didn't make the caterpillar myself. since this is the most important part. Cross-country ability and driving performance depend on it. -I made the skis from plastic extenders for snowmobiles, with a frame made of corners on top, and a rod at the bottom. It acts as a skate, helps with turns, movement on ice (guides the snowmobile and prevents the muzzle from spontaneously going to the side) and also protects the ski from wear when crossing asphalt. The ridge should be semicircular. then you can turn on the spot when you stand on ice or compacted snow. If it's straight, you won't be able to turn the steering wheel. -The bottom body is made of plastic lockers. And the top is made of galvanized sheet metal. -Seat made of leatherette. I think if you extend the muffler and run it under the seat, the seat will be heated. Weight 90 kg Engine 7 kg Speed 30 km/h on deep, loose snow. If you are traveling alone, if with two, then 20 km per hour. Speed on packed snow and ice is 45 km/h. It doesn't matter alone or together. THAT'S ALL. Maybe someone will also want to make a snowmobile after reading this. Is there still time and snow? If so, ask for advice?
I’m uploading a video clip below. By the way, it moves over small bushes like a tank, and uphill it also takes 30 degrees.
Source
TTRactor 125 part 1 (motorcycle track)
How to make an ATV from a scooter?
To assemble an ATV from a light scooter, you need to prepare a number of tools. Welding equipment and a grinder must be used in the work. You will also need a variety of hand tools, from screwdrivers to wrenches.
The workshop is equipped in a heated, well-ventilated room or outdoors under a canopy in the summer.
To make an ATV from a scooter with your own hands, the design drawings will need to be examined in detail before starting work. It is best to develop the scheme yourself, working out every detail of the future system.
You need to start assembly with the frame, which is taken from the donor scooter. It will need to be modified, additionally boiled and a trunk located in the front or rear made.
Additional material will definitely be needed to assemble the frame. It should be a thin-walled pipe with a round or square cross-section. It should not be heavy, otherwise the weight of the ATV will be large. Because of this, it will lose maneuverability and controllability, and too much load will be placed on the engine. Because of this, it can fail quite quickly.
It is not recommended to use water pipes, as they are very fragile and are not suitable for such purposes. To install all the necessary components and mechanisms, brackets are welded to the frame.
Frame
You need to start assembly with the frame, which is taken from the donor scooter. It will need to be modified, additionally boiled and a trunk located in the front or rear made.
Additional material will definitely be needed to assemble the frame. It should be a thin-walled pipe with a round or square cross-section. It should not be heavy, otherwise the weight of the ATV will be large. Because of this, it will lose maneuverability and controllability, and too much load will be placed on the engine. Because of this, it can fail quite quickly.
It is not recommended to use water pipes, as they are very fragile and are not suitable for such purposes. To install all the necessary components and mechanisms, brackets are welded to the frame.
Wheels
It is better to choose wheel rims from light alloy materials, since otherwise the weight of the vehicle will be significant. You can take wheels from a walk-behind tractor, the tread of which has a rather aggressive pattern. But for a light ATV you should not choose wheels from a car. They are large and heavy, so there will be a high load on the engine.
Motor
An ATV with a scooter engine will not differ in significant power. But when driving off-road, the driver will be able to get his share of drive. Once the frame is assembled, the motor can be mounted on it. This is a painstaking process that requires accuracy from the master. The motor must fit firmly into its seat. Otherwise, it will be subject to strong vibrations.
The motor shaft must be connected to the gearbox on the rear axle. To do this, you need to attach a chain drive to the gear. The transmission is installed immediately after this, bringing all controls, including those from the engine, to the frame. The pedals and control levers are secured to the appropriate seats.
Accessories
It is recommended to use the engine, power and ignition from one scooter so that the entire system functions smoothly. It is advisable to modify some components; for example, it is advisable to equip the ignition system with a battery with characteristics suitable for an ATV. It is better to take the fuel tank from a scooter, as it is large enough for such a system.
The front and rear axles are taken from a cargo scooter, since they are subject to heavy loads. If these system elements are not strong enough, they will quickly deform and fail.
Springs for the shock absorber can be taken from any motorcycle that is large enough. They are fixed on the frame movably, with a configuration resembling the letter “A”. You can purchase shock absorbers separately, as they should provide a smooth ride. New parts perform better than used parts.
Control can be either steering or motorcycle. The choice depends on the taste preferences of the master. The brake lever is connected to the transmission brake, connecting the system to the rear axle sprocket.
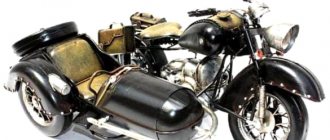
Trike for pennies: cool hot rod from a scooter and a cradle from IZH
Usually, by the word “trike” we are accustomed to understand something huge and sparkling with chrome, and the so-called “reverse trike” is generally the realm of fantasy, and this class includes such cars as the “Can-Am Spyder” and “Polaris Slingshot”.
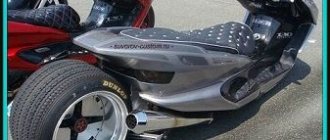
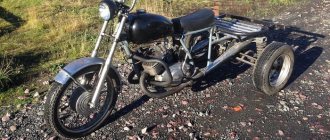
But if your hands grow from the right place, you can make one for pennies. The hero of our today's post assembled a reverse trike from spare parts that are available in any locality in our country - an old scooter and a sidecar from the IZH Planet motorcycle.
In one of the previous posts, I was rightly corrected - despite the fact that the stroller was installed at IZh, it was made at the plant in Vyatskie Polyany, so calling it “Izhevsk” is not entirely correct. In any case, today such a cradle is not difficult to find.
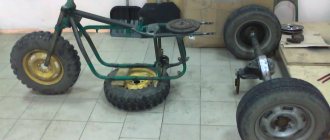
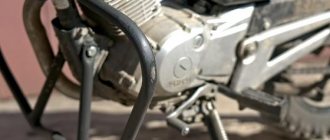
Just like the engine from a Chinese scooter, which already has a wheel, carburetor, muffler and other attachments. In other words, installing such a motor on any cart, for the trip you will only need a gas tank, a gas handle and a brake lever.
It is important that the 50 cc engine allows you to avoid problems with the traffic police. “Fifty dollars” do not need to be registered, and there is no need to register design changes. No paperwork, but everything is legal - isn’t this the dream of every DIYer?
Yes, not fast, but such a trike doesn’t need much. Lightweight stroller, 10-inch wheels with homemade front suspension arms and shock absorbers, even at a speed of 50 km/h it will take your breath away! How do you like this homemade product?
Source
Body kit
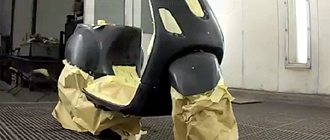
Exterior body kits can be made from fiberglass material or old motorcycles or cars. To make the body, it is recommended to glue a “blank” of plastic or wood. When using this technology, it is possible to fit the parts of the body kit to each other as efficiently as possible. Fiberglass is applied to the model, forming the parts of the body kit.
After this, the body needs to be sanded and primed. When the layer dries, special paint is applied. Then the operation of all systems and mechanisms is checked, and appropriate modifications are made if necessary.