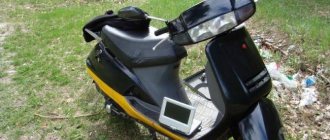
The point of this post, although labeled as a repair, is not at all about it as such (although it certainly is present). The point is a good mood, as well as the conclusion that haste is only good for catching fleas. If anyone is interested, welcome to cat. It will probably be funny for you too. So, the throttle handle of VZHIK began to bite a little: it opens easily, but for some reason it doesn’t want to close. I tried to work some magic with the free movement of the handle - it was completely purple. I think that’s it, bro, it’s time to take you to the service center. There is a lot of experience in repairing a bicycle and setting it up, but with two-wheeled equipment... In general, there is no experience at all. In order not to damage anything (it is quite capable of this), it was decided to go to the service center. They called me a day later. It’s a bit scary to ride this way, because if you bite at speed, and not close (well, suddenly?) - the throttle will tell you a lot of interesting things about you. I didn't want to wait. I wanted to catazza))) Therefore, it was decided (after smoking a certain number of forums) to disassemble the right remote control and drip a little lubricant into the cable jacket. At the same time, perhaps something else will turn out. it turned out to be something else. The culprit is a tiny rubber boot where the cable enters the remote control. It tore a little and the cable became the same lacerated wound and was biting, preventing the handle from rotating.
I’m standing under my windows, poking around. The day, I must say, was quite cloudy, and in the morning there was generally downpour: my wife didn’t even go with me, she chose a taxi. Well, I’m standing here, poking around, trying to assemble the remote control. The rain begins to drizzle, until it literally drizzles. The phone rings, my other half calls and asks to pick her up)))) I got it, as they say))) I’m assembling the remote control, everything is ok. I sit down, start it and... I understand that I assembled it incorrectly)))) The gas opens in the last quarter of the entire turn of the handle - the entire first three quarters are freewheeling. Such a speed limiter is 60 km/h with your own hands))) Well, I think, okay - this is bullshit, the main thing is that I figured out what and how - now I’ll meet my wife and fix everything. I met him, took him home and ran back to VZHIK to do everything right.
And it was already evening. And the rain has already stopped. I disassembled and assembled the remote control in half a minute. I’m standing there, trying to tighten it (my remote control is held together in two halves on the steering wheel with a pair of screws). So. I dropped some Loctite, attached the lower one, and am trying to attach the upper one so that I could then adjust it to the position on the steering wheel. The rain is getting heavier. I’m standing there like a moron and... ALTHOUGH THE SCREW WON’T GET IN!!! Electronic guts are sticking out of the remote control. I lovingly covered it with microfiber. He took off the cover. I tried to screw in the screw without assembly (I thought that I had stripped the thread). All OK. Everything is screwed in. I tried to screw it this way and that. Really TWENTY minutes. It's already quite RAIN. When…
... so as not to lose it, I put all the screws on the floor of the moped. And so I twist it, and my gaze falls on the polyc, on one of the screws from the remote control (I completely unscrewed the bottom one, thinking that this would somehow help). I look at it and... I pull out the top one, which I try unsuccessfully to tighten (and my thoughts are already changing my mind like: why did you even get here, since you don’t know what and how!!). I put it next to it... Stupor... Screws of different lengths. The top one is longer, the bottom one is shorter. I tried to screw the bottom one up, but it just wouldn’t reach)))) I assembled everything in 15 seconds. I checked the handle. Optimal free movement, everything returns to its place, everything is as it should be.
And here’s an oil painting: it’s almost dark, it’s pouring rain, a guy with a screwdriver and a cigarette is standing next to a bright yellow scooter and laughing out loud.
Conclusion: if you don’t know, look and remember how it happened. The rain was rushing me))) Such things.
PS But I was EXTREMELY happy with the fact that even if it was the first time, even if it was a trifle, I fixed it myself)))
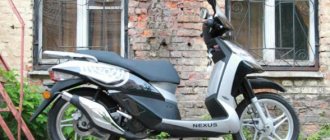
Operating manual (instructions) for scooter NEXUS F 22 S
WELCOME TO YOU, DEAR BUYER!
Now you are faced with the task of learning how to control the Nexus F22S scooter, after which you can satisfy your desire to travel and experience the feeling of flying. Unlike a car, you are not surrounded by a metal body. Only you and the road, connected into a single whole by the Nexus F22S scooter, obedient to your commands. And the reward for this is FREEDOM! To enjoy safe driving, you should first read this manual carefully. In it you will find information under the heading "NOTE", which will help you maintain the integrity of the Nexus F22-S scooter, as well as avoid injuries and accidents.
IMPORTANT INFORMATION.
1. Driver and passenger The scooter is designed to carry a driver and a passenger. Never exceed the manufacturer's recommendations for maximum lifting capacity.
2. Use the Nexus F22 - S scooter only on roads. The scooter is designed to be ridden exclusively on paved roads.
3.Read this manual carefully. Pay particular attention to the safety information contained in this manual. The manual is considered an integral part of the scooter and must be included with it if resold.
CONTENT.
| SAFETY INFORMATION Important safety information | Brakes Throttle grip Engine oil Tires Connectors and fasteners Lights, signals and switches Mirrors Fuel | Cleaning the air filter Inspecting the spark plug Adjusting the brake lever Checking the brake fluid level Replacing the brake fluid Inspecting the cable Lubricating the brake lever Lubricating the center support Inspecting the front fork Inspecting the steering Replacing the fuse Battery Electrical diagram Main technical parameters |
| DESCRIPTION Left and right view Dashboard | OPERATION Correct operation Starting Acceleration Parking Run-in period | |
| CONTROLS Main switch Steering lock Control handles Fuel cap Seat lock Front/rear brake lever Rear luggage compartment Engine switch | PERIODIC MAINTENANCE AND REPAIR Periodic Maintenance Maintenance Chart Engine Oil Gear Oil Change | |
| PRE-OPERATION CHECKS Pre-operation checks |
SAFETY INFORMATION.
Important safety information. The scooter is designed to carry a driver and a passenger. Never exceed the manufacturer's recommendations for maximum lifting capacity.
Always use protective equipment. Helmets have been proven to significantly reduce the incidence and severity of head injuries. Always wear a helmet, safety glasses, sturdy shoes, gloves and other protective equipment when riding.
Make yourself visible. Some drivers simply don't notice scooters. Make yourself visible: • Wear bright, reflective clothing. • Position yourself in the lane so that other drivers can see you. • Turn on your turn lights before turning or changing lanes. • Use your horn to warn other drivers. • Always turn on your headlights when driving, even during daylight hours.
SAFETY INFORMATION.
When driving, observe the specified requirements. Exceeding the limits set for the Nexus F 22 - S scooter is fraught with accidents. Never overestimate your own capabilities and do not exceed the speed limits specified for this vehicle. Remember that alcohol, drugs, fatigue and inattention significantly reduce your ability to make sound decisions and, as a result, your driving safety.
Keep your Nexus F22S scooter in good technical condition. For safe riding, it is important to inspect your Nexus F22 S scooter before each ride and perform the recommended maintenance promptly.
Recommendations for the load capacity of the Nexus F 22 S scooter. The Nexus F 22S scooter is designed for a driver and one passenger. When carrying a passenger, the driver may notice some changes in acceleration and braking procedures. However, if the Nexus F22-S scooter and its brakes are in good technical condition, you can safely carry a passenger and cargo within the load capacity specified by the manufacturer. Exceeding load limits or carrying unbalanced loads can seriously affect the Nexus F 22-S's handling, braking and stability. Inappropriate modifications and poor maintenance also significantly reduce safety.
DESCRIPTION.
| 1. Left and right rear view mirror; 2. Left and right brake; 3. Helmet hook; 4. Speedometer; 5. Main switch; 6. Battery; 7. Air filter; 8. Seat lock; 9. Tail light assembly; Speedometer. Indicates the speed of the scooter in km/h or mph. Odometer. Indicates the total distance traveled in miles. White numbers on a black background correspond to the distance traveled in miles. Tachometer. Indicates engine revolutions per minute. Turn signal indication <>. Flashes when the turn lights are on 1. Speedometer; 2. Odometer; 3. Turn signal indicator; 4. High beam indicator; 5. Fuel sensor. CONTROLS. | 10. Right and left reflector; 11. Oil reservoir; 12. Central support; 13. Pedal starter; 14. Side support; 15. Exhaust pipe; 16. Right and left rear turn signal; 17. Headlights; 18. Left and right turn signal; Fuel sensor. Indicates the amount of fuel remaining in the gas tank (the gauge does not operate when the main switch is in the OFF position). As fuel is consumed, the gauge needle moves from position “F” (full tank) to position “E” (empty tank). When the needle reaches position “E”, it is necessary to fill with gasoline with an octane rating of 90 or higher. There is no reserve gas tank. The display indicates the use of high beam. NOTE: *Use low beams so as not to disturb oncoming and driving drivers ahead of you. NOTE: *Do not leave the main switch in the ON position for a long time when the engine is stopped. This may drain the battery. * Lock the steering and remove the key after parking to avoid the scooter being stolen. |
| Steering lock. Turn the handles all the way to the left and lock the steering as shown below to prevent your Nexus F22S from being stolen: Main switch Press the key when it is in the OFF position. | Release the key. Turn the key to the LOCK position. |
| Switches located on the control handles. 1. Headlight switch. When the main switch is set to the ON position: 2. Turning light switch. Use this switch when turning or changing lanes. Press > when turning right; press < when turning left. When retreating, the switch returns to the center position. The turn signal does not turn off automatically. To cancel the signal, press the switch after it returns to the center position | 3. Horn button. Press to make a beep sound. 4. Starter switch. Use this switch when starting the scooter using the electric starter. 5. Light switch. NOTE: *Release the starter switch immediately after the engine starts. Do not reuse the switch if the engine is already running. * Do not keep the switch pressed for more than 4 seconds. |
| Fuel cap. Open: The gas tank is located under the seat. To open it, turn the brass cap counterclockwise. Close: Press down on the lid and turn it clockwise. Front brake lever. The front brake lever is located on the right control handle. Press down on the lever to activate the front brake. Front brake Rear luggage compartment. The compartment is located under the seat. Open the seat and you can store your helmet underneath. Helmet. | NOTE: *The key cannot be removed if the gas cap is not properly closed. Seat lock. To open the seats, insert the key into the lock and turn it as shown below. Return the seat to its original position and press down to secure it. Pull the seat up slightly to make sure it is securely fastened. Open the rear brake lever. The rear brake lever is located on the left control handle. Press down on the lever to activate the rear brake. Rear brake Helmet hook. The hook is used to place a spare helmet. Helmet |
PRE-OPERATION CHECKS.
Pre-operational check. Pre-operation checks must be performed before each ride on the Nexus F22-S scooter. Such an inspection can be carried out very quickly. Remember that guaranteed security is worth your time. Before using the Nexus F22S scooter, check the following:
| № | POSITION | PROCEDURE |
| 1 | Front brake | Check operation, free movement, brake fluid level and leaks. If necessary, add DOT3 brake fluid. |
| 2 | Rear brake | Check function, condition and free movement. Check the adjustment if necessary. |
| 3 | Throttle grip | Ensure that it is functioning as planned. Make adjustments if necessary. |
| 4 | Engine oil | Check the engine oil level and add it if necessary. |
| 5 | Tires/wheels | Check tire pressure and inspect them for wear and damage. |
| 6 | Connecting and fastening elements | Check all chassis fasteners. Tighten/adjust as necessary. |
| 7 | Lights/signals/switches | Check operation. |
| 8 | Fuel | Check the fuel level. Add fuel if necessary. |
Brakes.
| A. Free play 10-20 mm. b. Free play 2 - 5 mm. 1. Minimum level. Brake fluid. Check the brake fluid level. If necessary, add brake fluid. Recommended brake fluid: DOT3 Throttle grip. A. Free play 3 - 5 mm. Turn the throttle and check its free play to ensure proper operation. Make sure that when released, the hand returns to its original position due to the force of the spring. If necessary, contact your dealer to make the necessary adjustments. Tires. For best handling, durability and safety, always check your tire pressure before riding your Nexus F22S. Ensure that the total weight of cargo, rider, passenger and accessories does not exceed the maximum load capacity of the Nexus F22S scooter. Operating an overloaded scooter can result in tire blowouts, crashes and accidents. NOTE: Proper load distribution affects the scooter's handling, braking, acceleration and safety characteristics. Do not transport loosely secured items that could move while driving. Securely secure the heaviest items towards the center of the scooter and distribute the load evenly to the sides. Correctly adjust the suspension according to the load and check the condition of the scooter and tire pressure. Connecting and fastening elements. Before riding, always check the tightness of the connecting and fastening elements of the chassis. Have your dealer check the correct tightening torque. Lights, signals and switches. Check all lights. Make sure they are in working order. Check the operation of the switches on the control handles and the main switch. Fuel 1. Filler pipe 2. Fuel level Recommended fuel: Gasoline with 90 octane rating or higher. Fuel tank capacity: Total 6.0 liters | Brake lever. Check the free play of the brake levers and make adjustments if necessary. Make sure the brakes are working properly by testing them at low speed while driving. NOTE: If you feel a squeezing sensation when pressing the lever, the brake system is faulty. Do not ride the scooter until the brakes have been repaired. Contact your dealer for repairs. Brake fluid leaks. Press the brake lever several times. Check for brake fluid leaks from the joints of the pipes or the master cylinder. NOTE: *Brake fluid may damage painted surfaces or plastic parts. Immediately wipe any brake fluid splashes from the scooter. * If a brake fluid leak is found, contact the leader for immediate repair. Such leaks are a sign of a dangerous condition of the scooter. Engine oil. 1. Maximum level. 2. Minimum level. Make sure there is enough engine oil. If necessary, add engine oil. Recommended engine oil: for 4-stroke engines SAE 10W-40. NOTE: * Tire pressure should be checked and adjusted when the tire temperature is equal to the ambient temperature. Tire pressure should be adjusted according to the total weight of cargo, driver, passenger and accessories, as well as driving speed. Also pay attention to the tire walls. Tire inspection. Always check your tires before riding your Nexus F 22 S. Contact your dealer if the tread depth in the middle of the tire has reached the limit (as shown in the illustration). Replace the tire immediately if nails/glass shards become embedded in the tire or if there are cracks in the tire sidewalls. 1. Tread depth 2. Sidewall Minimum tread depth: Front wheel: 1.5 mm Rear wheel: 2.0 mm Mirrors. Adjust the mirrors as shown below for optimal visibility. Adjust the rear-view mirrors so that you can comfortably sit on the scooter and have a clear view of the traffic coming behind you. NOTE: * Do not fill fuel above the lower end of the filler neck (as shown in the illustration. When heated, fuel expands and may leak from the gas tank. * Immediately wipe up any fuel splashes with a dry, clean cloth. Fuel may damage painted surfaces or plastic parts. |
OPERATION OF THE NEXUS F22S SCOOTER.
| Engine starting. *Park the scooter before starting the engine. * Return the side support to its original position. * Check if there is enough fuel and engine oil. 1. Turn the main switch to the ON position. 2. Release the throttle completely and press the rear brake lever. 3. Press the starter switch. If the engine starts, do not touch the starter switch again. 4. If the scooter is cold, pre-warm the engine for 1 - 3 minutes at idle before riding. NOTE: * To prolong engine life, never accelerate hard when the engine is cold. * After starting the engine, always return the pedal starter to its original position. * Exhaust gases are toxic; they can lead to loss of consciousness and even death in a fairly short time. Do not run the engine in areas without adequate ventilation. Overclocking The speed can be adjusted by turning the throttle. Turn it towards you to increase speed or away from you to reduce speed. Increasing speed (left), decreasing speed (right) Running in the engine. The most important period when using a scooter is the first 1000 miles. We therefore urge you to read the information below carefully. Do not overload the engine for the first 1000 miles. The components of a new engine are ground in until proper operating tolerances are achieved. Long periods of full throttle operation or any conditions that cause the engine to become overheated should be avoided. | NOTE: *If the engine does not start, release the starter switch, wait a few seconds and try again. To avoid draining the battery, each attempt should last no more than 4 seconds. If the engine does not start after 4-5 attempts, turn the throttle 1/8-1/4 turn, and then press the starter switch again. * If the engine does not start with the electric starter, or the scooter has not been used for a long time, turn on the main switch, turn the throttle and use the pedal starter to crank the engine. Movement. 1. Press down on the rear brake lever with your left hand and grab the rear grip with your right hand. Slide the scooter off the main stand. 2. Sit astride the seat, placing your left foot on the ground to prevent the scooter from tilting. 3. Release the rear brake lever. 4. Look around to study the traffic situation and turn on your turn signal. 5. Slowly turn the throttle and drive away. Don't forget to turn off your turn signal. Parking. When parking the scooter, turn off the engine and turn off the main switch. Be sure to take out the key! NOTE: *The exhaust pipe becomes hot when the engine is running. Park the scooter in a place where it will not pose a danger to passers-by or children. * Do not park the scooter on a slope or soft ground to prevent it from tipping over. For the first 1,000 miles, keep your speed below 55 mph. 1. 0-300 miles: Maintain speed below 35 mph. 2. 300-500 miles: Maintain speed below 45 mph. 3. 500-1000 miles: Maintain speed below 55 mph. NOTE: *After 1000 miles, change the engine oil and clean the oil filter. If engine problems occur during the break-in period, contact your dealer immediately. |
PERIODIC MAINTENANCE AND REPAIR.
Periodic maintenance and minor repairs. Periodic inspection, adjustment and lubrication will keep the scooter in safe condition and ensure maximum performance. It should be taken into account that weather/road conditions, geographical location and many other reasons will increase the frequency of maintenance. The following describes the most important operations: inspection, adjustment and lubrication. NOTE: * If you are not familiar with scooter maintenance, please contact your local dealer. The scooter is intended for use only on paved roads. When operating the scooter in dusty conditions, as well as when riding in mud and wet weather, you should clean the air filter more often. Consult your local dealer for proper service intervals.
Periodic maintenance scheme.
| Position | DISTANCE TRAVELED, KM | Daily checks | ||||||||||||
| 300 | 1000 | 2000 | 3000 | 4000 | 5000 | 6000 | 7000 | 8000 | 9000 | 10000 | 11000 | 12000 | ||
| Engine oil | 3 | 3 | 3 | 3 | 3 | 3 | 3 | 3 | 3 | 3 | 3 | 3 | 3 | A |
| Engine Oil Strainer | O | O | O | O | ||||||||||
| Transmission oil | 3 | 3 | 3 | 3 | 3 | |||||||||
| Spark plug | Clean every 2000 km, replace if necessary | |||||||||||||
| Valve clearance | P | P | P | P | ||||||||||
| Valve train chain | P | P | P | P | ||||||||||
| Carburetor | A | A | A | |||||||||||
| Air filter | Clean the element every 2000 km, replace every 5000 km | |||||||||||||
| Electrolyte in the battery | A | A | A | A | A | A | A | A | A | A | A | A | A | |
| Fuel strainer | Clean every 1000 km, replace if necessary | |||||||||||||
| Braking system | A | A | A | A | A | A | A | A | A | A | A | A | A | |
| Drive belt | ||||||||||||||
| Screws and nuts of each component | P | P | P | |||||||||||
| Exhaust gas quality | Check and adjust regularly | |||||||||||||
| * If the specified mileage is exceeded, carry out maintenance similar to the intervals indicated in the table. | ||||||||||||||
| ** If you frequently drive in dusty conditions, the air filter element should be cleaned and replaced more often. | ||||||||||||||
| A: Check, clean, lubricate, adjust, replace if necessary; R: adjustment, O: cleaning, Z: replacement, R: tightening | ||||||||||||||
| Engine oil. 1. Measuring the oil level. A. Place the scooter on the center support. Warm up the engine for a few minutes. b. Stop the engine and wait a few minutes before removing the dipstick. With. The oil level should be between the minimum and maximum marks on the dipstick. If there is too little oil, add oil. NOTE: * Make sure the scooter is in an upright position when checking the oil level. A slight tilt to the side will give false readings. 2. Changing the engine oil. The engine oil should be changed after the first 300 miles and then every 1,000 miles thereafter. Check the oil level every 500 miles. If necessary, add oil of the specified brand. 3. Start the engine and warm it up for several minutes. When warming up, check for oil leaks. If present, immediately stop the engine and find the cause of the leak. Follow the steps below when changing the engine oil: a. Warm up the engine for a few minutes. b. Turn off the engine. Place the pan under the engine and remove the dipstick. c. Unscrew the drain plug and drain the oil. Changing transmission oil. The transmission oil should be changed after the first 300 miles. Replacement is then performed every 6 months or 3,000 miles, whichever occurs sooner. Oil change procedure: 1. Place the scooter on the center stand. 2. Place a pan under the crankcase. 3. Remove the oil fill bolt and oil drain plug. Drain the oil. 4. Reinstall the drain plug and tighten it. 5. Pour transmission oil into the crankcase. 6. Install the oil fill bolt. 7. After changing the transmission oil, make sure there are no leaks. Cleaning the air filter. The air filter should be cleaned at the specified intervals. When driving in dusty conditions, cleaning should be done more often. 1. Place the scooter on the center support. 2. Remove the left panel by unscrewing the screws. 3. Remove the air filter cover by unscrewing the screws. 4. Take out the air filter and remove the screws on it. 5. Remove the element and carefully but thoroughly wash it in solvent. Replace the filter if it is damaged. 6. Squeeze out excess solvent and allow the filter to dry. Inspect the spark plug. The spark plug is an important component. Its condition indicates the condition of the engine. Therefore, you need to periodically inspect the spark plug for damage. Ideally, during normal use, the color of the white insulator around the center electrode will turn light to medium brown. Deposits contribute to erosion and slow destruction of the electrode. If erosion and/or soot/other deposits become excessive, the spark plug should be replaced. Before installing the spark plug, use a thickness gauge to measure the distance between the electrodes. Adjusting the free play of the brake levers. 1. Lock nut; 2. Adjustment bolt. The free play of the front brake lever should be set at 2 - 5 mm at the end of the lever. The free play of the rear brake lever should be set at 2 - 5 mm at the end of the lever. Checking the brake fluid level. Insufficient brake fluid can allow air to enter the brake system, reducing brake performance. Before driving, make sure that the brake fluid level is above the minimum mark. If necessary, add brake fluid. Observe the following precautions: 1. When checking the brake fluid level, ensure that the top surface of the master cylinder is level. Replacing brake fluid. 1. Complete brake fluid changes should only be performed by trained personnel. 2. After dealers replace the following components during periodic maintenance or in case of leakage damage. a. Replace all rubber seals every two years b. Replace all hoses every four years Lubricate the brake levers. Lubricate the rotating parts of both brake levers. Recommended lubricant: SAE 10W40 engine oil. Lubrication of central and side supports. Lubricate rotating and rubbing parts. Make sure the center and side supports move smoothly. Side and central supports. Inspection of the front fork. Support the scooter securely to avoid the risk of it falling. 1. Visual inspection: Check for scratches or damage to the inner tube and excessive oil leakage from the front fork. 2. Operational checks: Place the scooter on a level surface. a. While holding the Nexus F22S scooter in an upright position, apply pressure to the front brake lever. b. Press down firmly on the control handles several times and check for smooth fork return. Steering inspection. Periodically examine the condition of the steering. Worn or loose bearings can become a hazard. Place a stand over the engine of your Nexus F22 scooter to raise the front wheel off the ground. Grasp the lower ends of the front forks and try to move them back and forth. If free play is felt, have your dealer inspect and adjust it. Inspection is easier with the front wheel removed. NOTE: * Support the scooter securely to prevent it from falling. Replacing the fuse. If a fuse is blown, turn off the main breaker and the circuit breaker in question. Remove the screws from the battery case. The fuse is located on the side surface of the casing. Install a new fuse rated for the specified current. Make sure the new fuse is securely attached. Turn on the switches and make sure the electrical device is working. Fuse: 15A. NOTE: *Do not use fuses with a higher amperage than specified. Installing an incorrect fuse can cause damage to the electrical system and possibly cause a fire. Battery. The Nexus F22-S scooter is equipped with a sealed and non-refillable battery. There is no need to check the level or add fluid. NOTE: *If the scooter is not used for a long time, the battery will be discharged. In this case, remove the battery and fully charge it. Store the battery in a place with good ventilation. | 1. Maximum level. 2. Minimum level. d. Clean the oil filter with solvent. e. Reinstall the filter and drain plug. f. Fill the oil and install the dipstick NOTE : * If the scooter is frequently used on rough roads, in cold weather or for short distance riding, the engine oil should be changed more often than indicated in the manual. Consult your dealer regarding this issue. Recommended oil grade: SAE 10W40 NOTE: * Do not allow foreign bodies to enter the crankcase. Drain so that no oil gets on the rear tire or wheel. 7. Apply oil to the surface of the filter and squeeze out excess (no oil drops). The filter should be damp, but not wet. 8. Reinstall the filter and filter cover. Recommended Oil: Same brand as engine oil NOTE: * Drain any oil that has accumulated in the clear tube every 1,000 miles. Air filter Screws The gap should be about 0.8 mm. When installing the spark plug, clean the surface of the ring gasket. Wipe off any accumulated dirt from the threads. Tighten the spark plug by hand and then with a wrench. Loosen the lock nut and turn the adjusting bolt in direction A to increase free play or in direction B to decrease free play. After adjustment, tighten the lock nut. NOTE: If you are unable to make proper adjustments yourself, contact your dealer for assistance. 2. Use only special brake fluid. Otherwise, the rubber seals may be damaged, causing leaks and poor brake performance. Recommended brake fluid: DOT3. 3. Top up with brake fluid of the same brand. Mixing fluids can cause dangerous chemical reactions and poor brake performance. 4. Be careful not to allow water to enter the brake system. This may lead to the formation of a vapor lock. 5. If it gets in, brake fluid will damage painted surfaces and plastic parts. Always wipe up spills immediately. 6. If the brake fluid level drops, check with your dealer for the cause. Cable inspection and lubrication. Inspect the internal cable and cable lug. If the cable does not run smoothly, contact your dealer to replace the component. NOTE: * Damage to the outer insulation of the cable may cause it to rust from the inside and cause difficulty in moving. Replace the damaged cable as soon as possible to eliminate the cause of the reduced safety. Recommended lubricant: SAE 10W40 engine oil Recommended lubricant: SAE 10W40 engine oil. NOTE: * If the center or side supports do not move smoothly, consult your dealer. NOTE: * If there is any damage to the front fork or the movement is jerky, please contact your local dealer. Wheel bearings. If there is play in the front or rear wheel hub or the wheel does not turn smoothly, have your dealer inspect the wheel bearings. Fuse location. Battery connection. 1. Remove the battery before cleaning its terminals. 2. Clean the terminals first, then apply a thin layer of Vaseline to them. Reinstall the battery. NOTE: * When installing or removing the battery, keep away from open flames. * When removing the battery, turn off the main switch. Disconnect the negative wire first and then the positive wire. When connecting, follow the procedure in reverse order (connect the positive lead first, then the negative lead). |
ELECTRICAL DIAGRAM OF NEXUS F22S SCOOTER.
MAIN TECHNICAL PARAMETERS OF THE NEXUS F22S SCOOTER
| Length x width x height | 1865 x 705 x 1142 mm | Engine Description | Single cylinder, four stroke, air cooled |
| Wheelbase | 1324 mm | Cylinder volume | 150 cc |
| Min. ground clearance | 150 mm | Compression ratio | 10,5:1 |
| Dry weight | 93 kg | ||
| Max. lifting capacity | 180 kg | Max. output power | 6.0 kW/8000 rpm/5.0 kW/7000 rpm |
| Max. speed | 120 km/h | Max. net torque | 8.0 N.m/5500 rpm/7.00 N.m/5000 rpm |
| Front tire | 120/70 — 12 | Max tank capacity | 6.3 l |
| Rear tire | 120/70 — 12 | Gasoline brand | 90# |
| Ignition mode | Condenser | Recommended motor oil | 10W40 |
| Spark plug | A7RTC | Lubricating oil volume | 0.9 l |
| Battery | 12 V 7Ah | Fuse | 15 A |
In our store you can buy a Nexus F 22 S scooter.
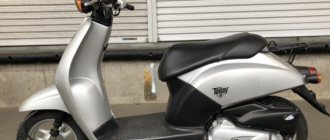
See also other articles about scooters and mopeds: Operating manual for the NEXUS BOOSTER scooter Nexus Alfa moped Operating manual (applicable to the Nexus Racer model) User manual (operating instructions) for the Vento scooter Triton R4 User manual (operating instructions) for the Nexus Master scooter User manual (operating instructions) for the Nexus Matrix scooter