Most modern gasoline cars are equipped with fuel injection systems, but before they gained dominance, all cars were equipped with carburetor systems. For this system to work correctly, the carburetor settings must be performed flawlessly. High-quality carburetor adjustment will reduce fuel consumption, make the engine run smoothly at idle, reduce the emission of harmful substances into the atmosphere and increase the overall engine life.
Most domestic cars have a carburetor system, and the question of how to adjust the carburetor will not lose its relevance for a long time. Many owners of rare old foreign cars also face the problem of how to adjust the carburetor. Since the principle of operation of carburetors around the world is no different, the algorithm of work will be the same.
The carburetor is the main component of the fuel system of any carburetor car. This is where air and fuel mix to form a fuel mixture that enters the engine's combustion chambers. A properly adjusted carburetor produces a fuel mixture in the required proportions. Such a mixture will not detonate in the cylinders, which will increase the life of your engine.
How to adjust the carburetor and when to do it
Do-it-yourself carburetor adjustment is done after using low-quality gasoline or when engine operation is no longer stable. For prevention, the manufacturer recommends flushing the carburetor with a special compound every 6-7 thousand kilometers.
Possible malfunctions in the carburetor:
- Fuel leaks on the carburetor. In this case, you need to measure the fuel pressure. This is done using a special pressure gauge. The operating instructions will tell you what the pressure should be. Typically it ranges from 0.2 to 0.3 atmospheres. If the pressure is normal, the problem is in the float chamber and the fuel level needs to be adjusted;
- Carbon deposits on spark plugs with the smell of gasoline. This clearly indicates a problem with adjusting the carburetor floats or a burnt valve;
- Rough engine idling may not only be due to the carburetor. This often happens due to incorrect adjustment of the throttle cable. To check, you need to disconnect the cable and turn the valve manually.
Before you adjust the carburetor correctly, you need to clean it thoroughly. It is recommended to use special liquids for cleaning. The jets cannot be cleaned with toothpicks or needles. Damage to the jets will lead to calibration failure. If the holes cannot be cleaned with aerosols, you can carefully clean them with a soft wire. When cleaning, do not use rags. Threads can clog the holes, which will lead to malfunction of the carburetor. If the aerosol does not remove all contaminants the first time, you need to repeat the procedure.
Engine operation before and after adjustment
Preventive and regulatory measures must be carried out in a certain sequence.
Carburetor maintenance steps:
- external cleaning of the device;
- visual inspection of the unit, which may reveal some problems;
- dismantling and cleaning the mesh filter element (this must be done every 60 thousand mileage).
- cleaning air jets;
- if necessary: setting the XX, PU and float assembly.
As a result of such simple measures, the engine will start easily, there will be no interruptions in its operation, the car’s dynamic characteristics will improve, no dark smoke will be visible from the exhaust pipe, fuel consumption will return to normal, and the engine noise will decrease.
Of course, many types of car maintenance work are not so easy to do at home. However, this does not apply to the system for preparing and supplying the fuel-air mixture.
Knowing what the carburetor diagram looks like, the principle of its operation, as well as the installation standards for the main parameters, each car owner of a car on which the DAAZ 2021 is installed is able to carry out most of the work on adjusting and repairing the device independently. This allows you to save material resources and time that you have to spend on trips to the service.
Setting up the float mechanism
The level of the fuel mixture in the float chamber is directly related to its quality. At an increased level, the mixture will turn out to be lean, which will negatively affect gasoline consumption and increase toxicity. Without adjusting the floats, the question of how to adjust the carburetor cannot be solved. The process of adjusting the floats includes the following operations:
- Adjusting the floats in relation to the lid and walls of the fuel chamber. If deformation of the float fixing bracket is noticed, it should be aligned manually;
- We adjust the bracket with the needle valve closed;
- We adjust with the float retracted and the valve open; the distance between the float and the valve should in this case be set to about 15 millimeters.
What to do with increased consumption
Before you tightly grasp the carburetor, be sure to make sure that the other systems are in good working order - the spark plugs are in working order, the high-voltage wires do not break through to ground, and there is compression in the engine cylinders (the minimum value for the VAZ 2108 is 11 Bar). Unscrew the spark plugs and check the condition of the electrodes.
Important. The color of the electrodes reflects the picture of the operation of the power unit. A black coating indicates that the mixture is over-rich, the proportion of gasoline in it is too high. White color indicates a lean mixture, the norm is a light brown tint.
Light brown is the correct color for the electrodes on the spark plugs
The most unpleasant problem is an increase in fuel consumption, which occurs for the following reasons:
- the economizer diaphragm is worn out;
- the main air jet or channels inside the unit are clogged;
- the needle valve, which limits the flow of fuel into the float chamber, does not hold;
- jets of unknown origin from a repair kit were installed.
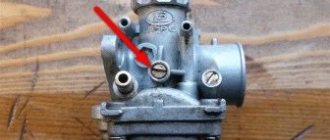
Location of the economizer cover
Note. Listed here are problems that you can solve on your own. If the recommended measures do not have an effect, then the malfunction is more complex and you will have to contact a carburetor repair specialist to fix it.
To check the diaphragm, remove the air filter housing (the cover is secured with 3 10 mm nuts, the housing with 4 8 mm nuts). On the left wall of the carburetor in the direction of travel of the car, find a triangular economizer cap screwed with 3 screws, unscrew them with a Phillips screwdriver. Underneath there is a spring-loaded membrane that needs to be checked and replaced if necessary.
Removing the filter on the figure eight
You can read more about adjusting the carburetors of OKA cars here:
To eliminate other causes, you will have to remove the top cover of the Solex by disconnecting the starter cable and unscrewing the 5 fastening screws with a Phillips screwdriver. Then follow the instructions:
- Unscrew the air jets, remembering where each one should be. Fuel jets are hidden under them in the wells; unscrew them with a thin screwdriver and pull them out with a toothpick. Blow through the calibrated holes thoroughly.
- Using a blower, suck the gasoline out of the float chamber along with the dirt. Fill all channels and diffusers with the product from an aerosol can, wait for the time indicated on it and carefully blow out the carburetor without removing it from the car.
- Take the removed cover of the unit, turn it with the floats up and try to blow into the fuel supply pipe, plugging the pressure release fitting with your finger. If air passes through, replace the needle valve as it will also allow gasoline to pass through unhindered.
- If you replaced all the jets before increasing the flow rate, feel free to unscrew them and throw them away, and return the standard ones to their place.
- Before assembly, make sure that the floats do not touch the walls of the chamber; if necessary, carefully bend them.
- Reassemble the Solex in reverse order and begin adjusting.
To remove the top cover of the Solex you need to unscrew 5 screws
Reference. Oddly enough, with a lean mixture, gasoline consumption also increases. Since the car “does not pull” due to lack of fuel, you solve the problem by pressing the gas too hard, or even pulling the “choke”, half closing the air with the damper. Naturally, fuel is consumed beyond the norm.
Setting the fuel mixture supply
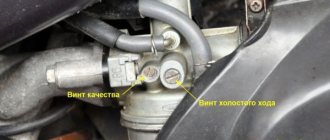
The carburetor control screws will help you figure out this setting. Before performing this procedure, you should know that the screws have a plastic factory press-on that limits the rotation of the screws (from 50 to 70 degrees). If turning in this range does not bring results, you need to break the press-on and turn the screws as much as necessary. Before setting the position of the screws, you should warm up the car engine to operating temperature.
To adjust the idle speed of the carburetor, you need to turn out the quantity screw and the mixture quality screw a few turns and, turning them, listen to the operation of the engine. When the engine starts to run smoothly, the carburetor idle adjustment is complete.
Carburetor adjustment with screws
First of all, before proceeding with the appropriate adjustment, it is necessary to debug the ignition system, make sure that the spark plugs are in good condition, adjust the fuel supply system, set the permissible gap on the device for automatically interrupting the current circuit, remove the gas pedal rod from the throttle valve and only then proceed to carburetor settings.
The engine must be warmed up to operating condition, otherwise after debugging “cold” during operation it will work completely differently. We completely disconnect the crankcase tube, completely eliminating the influence on the crankcase gas setting. The equipment you will need is a simple slotted screwdriver and preferably a tachometer (digital, since the dial does not show revolutions up to 10 units). In service centers, they could use a gas analyzer as a necessary, but not obligatory, one for fine tuning, but we will make do with the specified accessories.
- We reduce the number of idle speeds to a minimum using the “quantity” screw (the engine is running, but is about to stall).
- Using the “quality” screw, we look for the position at which the number of revolutions is maximum. We begin to screw it in, raising the speed; if the engine stalls, we unscrew it to the required criterion.
- We check the quality of the fuel mixture.
Give the gas sharply - the engine should not stall. If it suddenly stalls, then unscrew the “quality” screw until the engine starts working normally. The setup is complete.
Experienced drivers make such adjustments “by ear” based on the sound of the engine; for “confident” drivers, there are many instructions and training videos; for “beginners”, it is better to carry out the correct carburetor adjustment in the appropriate service centers.
Adjusting the carburetor draft
Before you begin adjusting the rods, you should remove the air filter cover so that nothing interferes with the process. First, using a caliper, measure the distance between the rod tips. According to factory parameters, it should be 80 millimeters. To adjust the length of the rods, you need to loosen their clamps.
Checking the strainer should be carried out when there is fuel in the float chamber. This will help you see if the shutoff valve is closing completely. After examining the valve, you need to clean and dry it. Problems with loss of power and engine failures occur due to obstructed fuel supply. This is another reason to thoroughly flush the carburetor.
The tightness of the shut-off needle can be checked using a rubber bulb, while listening for air leaks. If they are present, it is time to change the needle.
Preparing tools and devices
If you intend to thoroughly clean the carburetor of your V8, then you will not be able to do it without a compressor. To blow out accumulated dirt from the channels, it is necessary to supply air at a pressure of at least 6 bar. The remaining tools are common ones found in every garage:
- 2 screwdrivers - Phillips and thin with a narrow flat slot;
- a set of small open-end wrenches - 8, 10, 13 mm;
- round nose pliers;
- rubber bulb (syringe);
- 2-3 wooden toothpicks;
- rags.
Compressor for carburetor purging
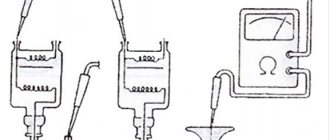
Note. It would be nice to have a tester or multimeter on hand to check the voltage. But if necessary, you can do without it.
Liquids for cleaning carburetor channels
A special product sold in aerosol cans (for example, from the ABRO brand) is excellent for cleaning channels. Do not use acetone or inorganic solvents, which corrode plastic parts, for cleaning. Buy new paper gaskets for DAAZ 2108 carburetors in advance (they will also fit the “nine”). You cannot buy or change jets, since the standard ones are designed for the entire service life of the machine, and fakes with large holes for fuel are often sold in repair kits.
This material will help you repair the carburetor mechanisms of VAZ 2106/2107 cars:
How to properly adjust a Solex carburetor
There are still many representatives of VAZ classics driving along the roads. Many of these cars have Solex carburetors under the hood. This carburetor is more economical and is capable of producing a higher quality mixture of fuel and air. For smooth operation of the engine, this carburetor must be properly tuned and adjusted. The class of carburetor masters is gradually dying out, so many people have to do the carburetor adjustments themselves.
Photo of the location of carburetor parts
General diagram of the DAAZ 2108 unit
Jet placement diagram
Scheme for purging the cover channels
Fuel nozzles are removed with a wooden stick or toothpick
Replacing the needle valve
This is what the floats installed on the Solex lid look like
Main dosing system: basic information
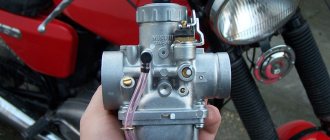
Modern motorcycle engines use carburetors with a metering needle.
This name is due to the design of the main metering system, since it is the conical needle that controls mixture formation in the range from 1/4 throttle lift up to full opening. The flow of fuel from most carburetor systems occurs under the influence of vacuum created by the movement of air flow. The total vacuum in the air path of the carburetor depends on the flow speed and resistance of the path. Let's consider this dependence in more detail.
The speed of air flow in different sections of the tract depends on the area of their flow section. Local contractions, provided that the continuity of the gas flow is maintained, causes an increase in its speed, which is accompanied by an increase in rarefaction. In modern carburetors, the air speed in the diffuser reaches 150 m/sec. When air moves, it overcomes friction against the walls of the duct and local resistance (nozzle, damper, etc.), which also leads to an increase in vacuum.
Of practical interest are the vacuums that arise in two areas: in the diffuser and in the mixing chamber behind the throttle. The figure shows the total vacuum curves in carburetors installed on engines of various types. The vacuum depends on the type, number of cylinders and operating modes of the engine. For a two-stroke single-cylinder engine, the vacuums are the smallest (curves 1 and 1′), for a four-stroke multi-cylinder engine they are the largest (curves 4 and 4′).
Change in vacuum in the mixing chamber P_k and in the carburetor diffuser P_g at different engine speeds n and throttle position φ_dr: 1 and 1′ - two-stroke single-cylinder engine; 2 — four-stroke single-cylinder; 3 - four-stroke two-cylinder; 4 and 4′ - four-stroke multi-cylinder
As the throttle opens, the vacuum in the mixing chamber decreases, and in the diffuser it increases. The nature of the change in vacuum in the diffuser and mixing chamber does not depend on the type of engine. Initially, when the throttle is opened by approximately 1/3, the vacuum in the mixing chamber decreases, and then remains almost constant (curves 1, 2, 3 and 4). Meanwhile, the nature of the change in vacuum in the diffuser is significantly influenced by its design. If in a carburetor with a diffuser of constant cross-section the vacuum increases continuously (curve 4′), then in a carburetor with a diffuser of variable cross-section, an increase in vacuum is observed only at the beginning of the throttle opening. With further opening of more than 1/3, the vacuum in the diffuser practically does not change (curve 1). With a constant throttle position and increasing engine speed, the vacuum increases in all parts of the carburetor air path.
A main metering system consisting of only a spray and controlled only by the amount of vacuum would supply too much fuel at low and medium throttle lifts and too little at high lifts. An over-lean mixture is especially dangerous because, in the worst case, it can lead to engine failure. This is why the conical dosing needle system was developed. Let's consider the principle of its operation.
Adjusting the mixture composition
Adjustment with needle
In Dellorto carburetors, the needle is fixed in the throttle valve using a locking ring installed in one of the grooves (on the cylindrical part of the needle).
Conventionally, the grooves are numbered from the blunt end of the needle, that is, from the top. The higher the groove in which the locking ring is installed relative to the sprayer, the lower the needle is lowered. This means that in order for the conical part of the needle to exit the atomizer, the throttle must be raised higher. Conversely, if you need to engage the tapered part of the needle at lower throttle lifts, you need to raise the needle by moving the stopper to a lower groove (second, third...). For example, in practice, the consequence of a rich mixture may be slowness in gaining speed and a dull, deep exhaust sound. In this case, it is necessary to lower the needle by moving the locking ring to the grooves above.
However, very often it is impossible to tune the carburetor well by changing only the position of the needle. In addition to the position, it may be necessary to vary the geometric parameters of the needle (meaning the taper and length of the conical part). They significantly affect the carburetion process, and engine response directly depends on this. Thus, there is a need to replace it with another one with more suitable geometric parameters.
For each family of Dellorto carburetors there is a wide selection of metering needles with different geometries. As necessary, during the tuning process, you can select a more suitable needle and begin testing. For example, you may not get a rich enough mixture at a certain throttle lift with the needle raised as high as possible. In this case, you need to try a needle with the same taper, but in which the taper will begin earlier, i.e. the cylindrical part will be shorter. In certain cases, needles with different tapers can be used to better suit a particular type of engine. When conducting this type of experiment, it is always best to vary only one parameter at a time.
Adjustment using a spray gun
The atomizer has a calibrated hole at the end that communicates with the diffuser.
In Russian-language literature, the phrase “nozzle diameter” is often used, which means the diameter of this hole. As a rule, there is a certain set of nozzles of various diameters for a specific carburetor. As the diameter of the nozzle increases, the mixture becomes richer, and vice versa - it becomes leaner as it decreases. Of course, you can achieve the same effect by changing the diameter of the dosing needle. However, a needle of the appropriate diameter may be difficult to obtain. In this case, it is much easier to select a sprayer, if such a need arises at all, since Dellorto carburetors are initially optimized for the specific type of engine for which they are intended.
Thus, carburetor tuning is most often done by selecting jets, setting the needle height and selecting its shape, while the atomizer and throttle valve angle remain unchanged even with the appropriate replacement kits.
Jets and accelerator pump
Owners of carburetor cars know that jets change, but they do not always understand why jets are needed and how their size affects the operation of the carburetor. Let's start with the fact that the engine sucks in air through a special hole made in a large diffuser. At the same time, a certain amount of fuel is drawn through the fuel nozzle. The engine displacement directly affects how much air the engine will draw through the diffuser in a certain time, as well as the amount of gasoline sucked in parallel with the air.
It is for this reason that large-volume engines have carburetors with small jets. Installing such a carburetor on an engine with a smaller volume will mean that the “original” jets in this carburetor will produce a mixture that is too lean for normal engine operation. To solve this problem, you should find jets from a carburetor, which was initially designed for a specific internal combustion engine volume or as close as possible to it. You need to select jets starting with the fuel jet, then select the air jet under the fuel jet. The selection is made from a group of jets for the first chamber, the second chamber is adjusted only after the first.
Now let's talk about the accelerator pump. The accelerator pump delivers additional fuel when the throttle valve opens, allowing for more efficient acceleration. The pump is activated using a special cam. On engines with a Solex carburetor installed, the indicated accelerator pump cam must be set to the largest one.
You should also pay attention to the so-called “spout” of the accelerator pump. When the valves are opened, fuel should flow in a clear stream and not drip even with a slight throttle opening. It is also important what position the nose occupies. The stream of gasoline must fall exactly into the area between the diffuser wall and the throttle valve, that is, the fuel is jetted directly into the manifold. The jet must not hit the diffuser or damper. If this happens, then after sharply pressing the accelerator pedal the car will not accelerate immediately, and a failure will occur. Self-refinement of the carburetor involves installing two spouts in the chambers to obtain better performance from the engine, or only one spout in the first chamber of the carburetor for a more economical mode.
Adjusting the air damper drive
If you don't take care of the drive, the car may stall. To do this, you will need a simple Phillips screwdriver and a 7 mm open-end wrench.
The positions of the damper are shown above with the “suction” extended and recessed.
To adjust the drive, do the following:
- drown the “suction”;
- Unscrew the rod fixing screw with a screwdriver (the spring will push it out vertically)
- Tighten the screw;
- Check the valve stroke.
Adjusting the starter
When setting up the VAZ 2107 carburetor, you need to adjust the starting device yourself. It is designed to confidently start a cold engine. When properly adjusted, the mixture is twice as saturated with fuel as when normally feeding a hot engine.
The starting device for carburetors from the 1107010 family is triggered at a frequency of 1500 engine revolutions.
A little theory about the starting device
If we look at the carburetor from the side, we can clearly see the channel through which vacuum is supplied to the opener body:
With the carburetor removed, if you look at it from the top, you can see the air vacuum supply channel:
On the disassembled carburetor you can see all the details of this diaphragm starting device:
The picture below schematically shows the starting device of the carburetor of the 1107010 family:
Let's figure out how the trigger mechanism works. By pulling the choke lever, the driver brings the starting device into a cocked state. The following actions occur:
- The three-arm lever is “cocked” with a cable counterclockwise;
- The telescopic rod is activated;
- The rod turns the air damper.
- The second arm of the lever presses on the throttle valve axis of the first chamber.
- The air flow damper closes completely. The throttle valve of the first chamber is slightly open for starting, creating a starting gap
Let's start adjusting the starting device
To adjust the starting device yourself, the first step is to remove the carburetor. Further:
Turn the choke lever to the closed position. In this position the device is turned on.
Now turn the carburetor over and measure the gap between the wall and the edge of the throttle valve (chamber 1). For VAZ 2107 carburetors, this gap is 0.85-0.9 mm. The gap can be measured with a feeler gauge or calibrated wire:
To adjust the gap to this range, you need to bend the drive rod on the throttle valve.
After this, we establish a gap between the channel wall and the edge of the air damper from below (in Fig. 2 below it is designated “A”). To do this, close the damper again, i.e. “cock” the device. Create an imitation of rarefaction of air by recessing the starter rod:
Picture 1
Now the rod has pulled the rod along the slot, and as a result the damper opens. Gap “A” should be 5-5.4 mm.
Figure 2
To adjust this gap, you need to turn the adjustment screw with a screwdriver, but first remove the screw plug from it:
To main
CARBURETOR ADJUSTMENT
Before adjusting the carburetor, disassemble and clean the sump at the gas tap and the gas tap itself. The presence of brown sediment in the settling cup is normal when consuming cracked automotive gasoline. After removing the sediment, the cup and mesh are rinsed with gasoline. Water that gets into the gas tank, even in the smallest amount, will periodically close the nozzle hole in the form of drops or cause leakage of the float chamber shut-off needle. Accordingly, the mixture will either become leaner or richer, causing interruptions in engine operation and backfires (“sneezing”) in the carburetor. To remove water from the gas tank, pour all the gasoline into a clean container and wipe the tank dry with a clean rag tied to a wire. The rag absorbs all the water. The gasoline that has settled in the container is poured back into the tank using a hose through a thick mesh filter or suede. The intake end of the hose should not reach the bottom of the dish. To avoid having to suck up gasoline with your mouth, proceed as follows: completely immerse the hose in gasoline and after a few seconds, when gasoline fills it, close the outlet end of the hose with your finger and remove it from the container. Only after the outlet end of the hose drops below the gasoline level is the pin on the outlet end of the hose removed, opening the way for gasoline. Particular care must be taken when pouring leaded gasoline. In this case, the devices shown in Fig. 22.
To ensure that the carburetor is not adjusted blindly, you should make sure that the passages in it for gasoline and air are clean, the assembly of parts is correct, the cables do not jam, the valves and needles accurately obey the control knobs, the gasoline does not leak and its level is normal. Level change in the float chamber within 1 - 1.5 mm
does not have a significant effect on the adjustment and can be ignored. The easiest way to adjust the K-30 carburetors of the M1A, K-125 and K1B motorcycles (Kievlyanin). Carburetors of all other domestic motorcycles - carburetor K-37 of the M-72 motorcycle, carburetor K-40 of the IZH-350 motorcycle, carburetor K-28 of the IZH-49 motorcycle, carburetor MK-17 of the motorcycle produced before 1941. TIZ-AM-600, carburetor K-29, used on IZH-9 and L-8 motorcycles, and currently installed on M-35 sports motorcycles, are identical in the location and number of adjustment devices and adjustment methods. The carburetors of the M1A, K-125 and K1B (“Kievlyanin”) motorcycles have three adjustment devices (Fig. 23).
1. Replaceable jet with a slot for a screwdriver, screwed into the lower end of the atomizer.
The standard replacement jet of the M1A and K-125 motorcycles is marked with the number 135, for the “Kievlyanin” - with the numbers 90 - 100, characterizing the throughput of the jet.
The replaceable jet regulates the quality of the fuel mixture mainly when the throttle valve is fully open. As the nozzle opening increases, its throughput increases and, consequently, the mixture becomes richer. Reducing the nozzle opening causes the mixture to become leaner. 2. Four grooves on the top of the cone needle with locking plate.
By moving the locking plate from one groove to another, you can change the position of the needle relative to the throttle valve, setting the needle higher or lower.
This achieves adjustment of the quality of the mixture at the middle positions of the throttle valve. When moving the lock plate up the needle, the mixture becomes leaner; when moving the lock plate down the needle, the mixture is richer. 3. Threaded fitting on the head of the mixing chamber, which serves as a stop for the sheath of the cable that controls the throttle valve.
The fitting is used to adjust the amount of mixture when the engine is idling. When the fitting is screwed into the head, the passage gap narrows under the lowered flap, and the engine crankshaft speed decreases. When the fitting is unscrewed, the damper rises and the speed increases. Adjusting the carburetor to operate the engine at low crankshaft speeds is carried out with a normally warmed-up engine, while the throttle handle on the steering wheel is closed completely. Then, if the engine stops working, unscrew the fitting on the head of the mixing chamber a few turns and, having started the engine, close the throttle handle a second time. If the number of revolutions of the engine crankshaft is too high, then very slowly tighten the fitting, adjust the required reduction in the number of revs and secure the fitting in the found position with a lock nut. Adjusting the carburetor by moving the conical needle in the throttle valve is carried out only if the driver is not satisfied with the acceleration of the motorcycle or fuel consumption, since the engine works quite well in any position of the needle. In both cases, the position of the needle is determined empirically. Throttle response will improve by moving the needle up, and fuel consumption will decrease by moving the needle down. The needle is also moved down in the case when the spark plug, after a short run of the motorcycle, becomes covered with oil soot. Adjusting the quality of the combustible mixture by replacing the main nozzle is necessary if the nozzle hole is damaged due to improper handling, for example, from cleaning it with a needle, steel wire, etc. If a new one is not available, the damaged nozzle must be calibrated. Carburetors of motorcycles M-72, IZH-350, IZH-49, TIZ-AM-600, IZH-9, L-8, M-35 have the following five adjustment devices (Fig. 24).
1. Screw for adjusting the mixture quality to obtain low engine crankshaft speeds at idle.
The screw is located horizontally;
When the screw is tightened, the mixture becomes richer and the engine crankshaft speed decreases slightly. 2. A thrust screw that limits the lowering of the throttle valve.
The screw is inclined.
The thrust screw regulates the amount of combustible mixture at low engine speeds with the carburetor throttle control handle on the steering wheel closed. When the screw is tightened, the throttle valve rises, increasing low speeds. 3. Grooves or holes at the upper end of the conical enrichment needle with a corresponding plate or wire spring clamp,
by means of which the enrichment needle is secured in the throttle valve at various positions.
The purpose of this device is to regulate the quality of the combustible mixture, starting from 1/8 of the rise of the throttle valve. In the last quarter of the spool lift, the regulating influence of the conical needle on the quality of the mixture ceases. If the spring lock is installed in the lower groove or in the needle hole, the mixture will be richest. The mixture becomes leaner as the lock moves up the needle, i.e., as the needle moves down relative to the spool. In M-72 motorcycle carburetors, due to the presence of several key holes in the needle and in the throttle valve, the needle can be secured in eight different positions by combining these holes. Fuel consumption from moving the needle from the lowest position to the highest position increases by 40%. 4. The main jet,
with the help of which the quality of the combustible mixture is regulated within the last quarter of the rise of the throttle valve.
5. Annular grooves on the float chamber shut-off needle.
If there is not one groove on the locking needle, but several, then by moving the needle in the lock the fuel level in the float chamber can be changed.
By changing the fuel level in the float chamber, the quality of the combustible mixture is adjusted throughout the entire range of carburetor adjustments. By moving the needle upward relative to the float, the combustible mixture becomes leaner; by moving it downward, it becomes richer. Adjusting the carburetor to obtain low engine crankshaft speeds.
The carburetor is adjusted only when the engine is normally warmed up, so it is most convenient to make the adjustment immediately after the trip.
Low crankshaft speeds at idle are adjusted in the following sequence. 1. Screw the adjusting fitting onto the head of the mixing chamber - the stop of the cable sheath. This is done so that the shell has free movement. As a result, when the carburetor throttle control is closed, the cable will not affect the position of the throttle valve. Loosen the locknuts on the horizontal screw for adjusting the mixture quality and on the inclined screw for adjusting the amount of mixture. Install a new spark plug or a spark plug with a clean insulator that does not raise doubts about its reliability. 2. Start the engine, set the ignition late and gradually close the throttle handle. If the engine stops, turn the inclined screw a few turns. This ensures stable engine operation with the throttle fully closed. If necessary, slowly unscrew the thrust screw until minimum but quite stable crankshaft speeds are obtained. By very slowly turning the horizontal screw for adjusting the mixture quality, they try to increase the number of revolutions of the crankshaft. Typically, the number of revolutions increases when the screw is unscrewed, i.e., due to the leanness of the mixture. It is necessary to obtain the maximum number of revolutions with uninterrupted alternation of flashes. By unscrewing the inclined screw, i.e., reducing the gap under the throttle valve, the engine crankshaft speed is reduced to the minimum stable speed. By unscrewing the horizontal screw, they try again to increase the number of revolutions of the crankshaft and then reduce them by unscrewing the inclined screw. Adjusting the carburetor to obtain low speeds at idle consists of alternately performing two operations: increasing the number of revolutions by depleting the mixture, which is achieved by unscrewing the horizontal screw, and reducing the number of revolutions by reducing the gap under the lower edge of the throttle valve, which is achieved by unscrewing its inclined stop screw When stable engine operation at a low crankshaft speed is achieved, the mixture is slightly enriched by turning the horizontal screw about a quarter of a turn and carefully locking both adjusting screws with nuts, preventing them from moving from the adjusted positions. The free movement of the cable sheath is reduced by unscrewing the adjusting fitting. It is impossible to completely eliminate the free play of the shell, because in this case, due to an accidental change in the location of the shell and turning the steering wheel, the spool rises, and the number of revolutions of the engine crankshaft increases. Drivers often obtain a low engine crankshaft speed using a simpler method than described above, namely, by tightening the horizontal screw almost to capacity. Indeed, this reduces the engine crankshaft speed, but not because of the small amount of correctly dosed mixture, but because of the large enrichment of the mixture, at which its combustion rate sharply decreases. This method is unacceptable not only due to the sharp increase in fuel consumption. Rapid deposition of soot on the spark plug insulator (due to incomplete combustion of fuel) will cause misfire, make starting difficult and will confuse the motorcyclist when further adjusting the carburetor for throttle response and full power, since color and condition are used to control the quality of carburetor adjustment, along with engine operation bottom of the spark plug insulator. Having assumed from the presence of soot that the mixture is too rich, the motorcyclist will lower the adjusting needle, thereby leaning the mixture at all middle positions of the throttle valve. This will cause the engine to overheat. Successful adjustment for throttle response and full power requires that low crankshaft speeds be adjusted correctly, i.e., that they be obtained as a result of leaning the mixture by turning out the horizontal screw with minimal lift of the throttle valve. When adjusting the carburetor, you may encounter the following phenomenon: when you try to reduce the crankshaft speed, the engine stops. Carburetors become unsuitable for low speed adjustment when the bottom edge of the throttle valve and the bottom of its guide in the mixing chamber become severely worn. Relatively rapid wear of the throttle valve and the lower part of its guide occurs due to the operating conditions of the valve. During operation, the throttle valve moves up and down and vibrates under the influence of the pulsating flow of the combustible mixture. Due to wear, the throttle valve does not fit tightly to the guide, which is why foreign air penetrates into the cylinder at low crankshaft speeds. With increasing lift of the spool, the influence of air entering through the leaks loses its significance, but the spool begins to knock strongly. If the mixing chamber guide is severely worn, then installing a new spool will not reduce the flow of air penetrating through the leaks and, therefore, the suitability of the carburetor for regulation will not be restored. When repairing a carburetor, the mixing chamber guide is bored and a large-diameter throttle valve is installed. You can also install a bronze sleeve after boring. Carburetor adjustment at middle throttle valve positions.
The operation of a motorcycle engine mainly occurs at the middle positions of the throttle valve, when the quality of the combustible mixture and, consequently, the amount of fuel consumption depend on the position of the enrichment needle in the throttle valve.
When moving the needle up in the spool, the mixture is richer and throttle response improves, but fuel consumption increases. When moving the needle down, the mixture becomes leaner and throttle response worsens, but fuel consumption decreases. If fuel consumption is normal and the driver is satisfied with the motorcycle's throttle response, then there is no need to change the position of the enrichment needle. When moving the needle down to reduce consumption, the opposite phenomenon may occur, i.e., an increase in fuel consumption. The essence of this phenomenon, which at first glance contradicts the general rule, is that when the mixture is leaner, throttle response deteriorates, and with poor throttle response, the time spent in lower gears required to accelerate the motorcycle before switching to a higher gear increases. But driving in lower gears is associated with an increase in fuel consumption, so it is often possible to only needlessly reduce the acceleration of the motorcycle without achieving a reduction in fuel consumption. On the contrary, by raising the needle and slightly enriching the mixture, you can significantly improve the traction properties of the motorcycle without causing an increase in gasoline consumption, since the motorcycle will quickly pick up speed before switching to higher gears. It is absolutely necessary to lower the needle sequentially by 1 - 2 positions if the spark plug is covered with soot. It is recommended to raise the needle by 1 - 2 positions if, during a smooth increase in speed, backfires occur in the carburetor and if detonation knocks appear in the engine. Adjusting the carburetor with the throttle valve fully raised.
Adjusting the quality of the combustible mixture by replacing the main jet is required when the size of its hole increases due to damage to the jet when cleaning it with steel wire or as a result of operation for several years.
Adjustment is also necessary when installing a carburetor of the wrong brand on the engine and when preparing the engine for sports competitions. By modestly increasing the size of the jet orifice, power is increased and the risk of engine overheating when driving at wide open throttle is reduced. When the nozzle opening is reduced, the power is reduced and it becomes quite possible for the engine to overheat with jamming and burnout of the piston, especially when the motorcycle engine is operated for a long time with the throttle fully open. You can increase the size of the jet to obtain the most power as long as the speedometer shows an increase in speed. Of the two jets that provide the motorcycle with equal speed, it is safer to install the larger jet in terms of engine safety. The correct choice of jet to obtain maximum power is checked by the condition of the spark plug. To ensure that the middle throttle positions do not affect the condition of the spark plug, after driving with the throttle fully open, you should quickly close the throttle, depress the clutch, turn off the ignition and, stopping the motorcycle, remove the spark plug. If the spark plug is selected correctly, then its end should be dark in color, and there should be no signs of soot on the bottom of the insulator. Adjusting the engine to maximum power for long-term movement with the throttle wide open may only be necessary for an athlete when preparing a motorcycle for sports competitions (see the section “Preparing a motorcycle for sports”). For the average motorcyclist, during normal operation, it is of greater interest to maintain normal fuel consumption at a sufficiently high maximum speed. However, since every driver, when driving on a good road on a completely serviceable and well-adjusted motorcycle, naturally wants to test his motorcycle while moving at full speed, you need to be familiar with the elementary methods of detecting and preventing engine overheating for reasons related to carburetor adjustment. If, when checking the quality of the mixture with the throttle fully open, traces of melting—small drop-shaped tubercles—are found on the bottom of its insulator based on the state of a correctly selected spark plug, then the driver should keep in mind that there is a danger of damage to the pistons and their rings from overheating due to insufficient performance main jet. But since driving with the throttle fully open during normal motorcycle operation is rare, there is no point in increasing the main jet and disrupting the carburetor adjustment for normal fuel consumption. It is recommended to avoid prolonged movement with the throttle fully open and use the technique used by athletes who, while driving a motorcycle with the throttle fully open, do not hold the throttle control stick motionless on the stop, but slowly and smoothly close and open it within a full turn of the handle. Using changes in the fuel level in the float chamber when adjusting the carburetor. Changing the fuel level in the float chamber, for example, increasing it, is used when all other adjustment methods do not eliminate the phenomena characterizing a lean mixture. Lowering the fuel level is used as a way to lean the mixture throughout the entire adjustment range. Adjusting the carburetor by moving the enrichment needle and changing the fuel level in the float chamber becomes especially important for two-cylinder two-carburetor engines when adjusting the uniformity of the cylinders. The SUM carburetor (Fig. 25) of the BMW-R-35 and AVO-425 motorcycles has, for adjustment to low speeds, a horizontal screw 1
that limits the closing of the throttle valve and a vertical screw
2
that regulates the composition of the combustible mixture.
When unscrewing screw 1
, the engine crankshaft speed decreases, and when screwing it in, it increases.
When screw 2
, the mixture becomes richer, and when screwed in, it becomes leaner.
To adjust at middle positions and full opening of the throttle valve, jets of different capacities are installed. The need for such adjustment may arise only when there is a significant change in performance, indicated by numbers on the square thickening of the nozzle. Three jets located on the tide of the float chamber of the carburetor of the BMW-R-35 motorcycle are designated 30
,
60
,
65
and are screwed into holes with the same designations.
At low speeds, jet 30
, at middle positions of the throttle valve, jet
60
65
is activated .
The technique for adjusting the carburetor to operate the engine at low crankshaft speeds is the same as for carburetors on domestic motorcycles.
Previous page
| table of contents | Next page |
Troubleshooting other problems
Among minor problems, the most common problems are idle speed. They are decided depending on the reason:
- The electric valve that opens the idle jet does not work. Check the voltage supply to it with the ignition on, and then unscrew the valve and watch how it retracts the needle. If this does not happen, replace the part.
- The idle jet is clogged. Again, unscrew the valve and blow through the calibrated hole.
- The rubber o-ring on the valve has become loose. As a result, air leaks occur, causing the engine to operate unstably. Replace the seal.
- The rubber ring sealing the idle channel is torn or weakened. It is put on a thin brass tube pressed into the carburetor body. To get to it, you need to remove the unit cover.
- The channels supplying the fuel mixture for idling are clogged. The issue is resolved by washing and purging, as described in the previous section.
Idle valve with jet
Advice. If the idle speed disappears due to the fault of the electric valve during a trip, you can organize the fuel supply directly. Unscrew the element, remove the jet and remove the valve needle. Put it in place and calmly continue your journey, and upon arrival, replace it.
Replacing the trigger diaphragm
When the car stalls during a cold start, you need to change the trigger diaphragm. Due to the breakthrough, it does not retract the air damper, causing the engine to “suffocate.” The unit is located on the right side (in the direction of travel), its square cover is held on by 4 screws. Unscrew them and change the diaphragm.
Replacing the accelerator pump diaphragm
When you feel a “failure” when you press the accelerator and accelerate the car, your actions should be as follows:
- Check the accelerator pump diaphragm, located under the cover on the left wall of the carburetor (in the direction of travel of the car). If it is torn, replace it.
- Remove the air filter housing and the top cover of the Solex. Underneath it, look for nozzles built into the fuel supply diffusers. Pry them off with a screwdriver, pull them out and blow them out. Replace the rubber ring if it is torn.
- Test how well the accelerator pump lever presses the diaphragm. If play is detected, change this lever.
The nozzles are removed using a screwdriver
The last malfunction lies in the electronic unit EPHH, which controls the operation of the electric valve. If the “eight” stalls when coasting in gear, then the reason is precisely this block. Changing it is not a problem; the price of this part is low.
Replacing the EPHH block
As a rule, after eliminating the listed problems, carburetor adjustment is not required. But if you notice a change in speed in one direction or another, then the settings can be slightly adjusted.
Diagnostics of VAZ 2108 carburetors - video
Carburetors used on the VAZ-2107, or those whose use is possible
Fundamentally, all these devices can be divided into only two groups.
The former trace their history back to the Weber carburetor modified for the first VAZ cars. This is a structural division of the Italian company Magneti Marelli, which works closely with the FIAT concern. Namely, this is where all the VAZ classics came from. After significant reconstruction, the family received the generic name “Ozone”. They were installed on the VAZ-2107 on the assembly line. The second direction consists of more advanced, yet simple, French Solex devices, produced in Russia by the same factories for the next generations of VAZ cars. The change in the vector of development had an effect, when the first front-wheel drive cars were developed with the participation of German and French companies. As more economical, these carburetors were also adapted to the families of Tolyatti cars with a longitudinal engine. For VAZ-2107 with 1.5 and 1.6 liter model 21053-1107010-20 ; the car will become more economical, although engine output will decrease in some modes. But this is a completely different carburetor; it was not used on production cars, and its adjustment is completely different.
- 2107-1107010 — the carburetor is equipped with a number of parts for working with the electronic forced idle system (EFI). Configured for the operation of a vacuum ignition timing regulator.
- 2107-1107010-10. The same device, but much simpler, does not have a vacuum supply tube to the regulator and is not equipped with a valve and switch for the EPHH system.
- 2107-1107010-20. The most common modification. Controls a vacuum regulator, not intended to work with capricious EPHH.
All these models are structurally very similar, but differ in a number of calibration data; accordingly, the difference in adjustments is mainly numerical in nature.
Situations in which adjustment is necessary
New chainsaws are supplied by the manufacturer with already adjusted carburetors. This is called standard adjustment. But for the normal running-in process, it is necessary to reduce the maximum engine speed and adjust the carburetor. After break-in, the chainsaw needs fine tuning to achieve maximum engine efficiency.
Also, a signal for cleaning and adjustment is increased fuel consumption, which negatively affects the operation of the exhaust system. Simply put, the chainsaw begins to smoke heavily and the muffler becomes clogged with carbon deposits, which in turn will lead to a decrease in power.
If there is too much fuel in the mixture, engine parts are poorly lubricated and premature wear occurs. Also, a poor quality mixture can cause the engine to jam due to overheating (this is one of the reasons why the chainsaw will not start).
This is what a jammed, overheated piston looks like from a disassembled chainsaw with an incorrectly configured carburetor.
Adjustment is necessary when the engine does not idle, stalls, or does not develop full power. Carburetor adjustment should be carried out with clean air and fuel filters. We also recommend reading an interesting article that details the main reasons why a chainsaw starts and immediately stalls.
Let's sum it up
If you’ve read this far, it means you really want to understand how to set up your motorcycle’s carburetor, and the time spent writing above was not wasted. In fact, tuning the PZ30 carburetor, and others like it, is not the most difficult task and only looks like something incomprehensible. If configured correctly, even the famous Chinese quality will not interfere with the normal operation of the engine, although there will be nuances, such as the need to adjust the idle speed after each cleaning. But if you are patient and take one free evening, then as a reward for your time spent you will receive not only a motorcycle that responds to the throttle and consumes a minimum of fuel with maximum efficiency, but also a longer engine life. Which is, at least, nice, even though the piston engine for most Chinese motorcycles is quite inexpensive.
Having understood the nuances of tuning the PZ30 carburetor, you don’t have to be afraid of other carburetor models; the tuning algorithm, with very rare exceptions, will be absolutely the same.
Images used: china-moto.ru, alicdn.com, snegokhod-kayur.ru, jawa-store.ru, omoimot.ru