Do-it-yourself Delta moped repair
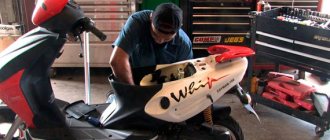
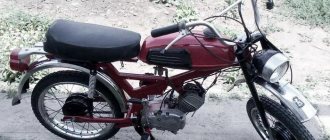
The Delta moped is widely used in many countries around the world. Its popularity among different segments of the population is associated with the low cost of the moped itself, high performance characteristics, and ease of maintenance. Most owners carry out repairs on the Delta moped with their own hands, without the help of qualified specialists. The simplicity of the design does not require a large amount of knowledge in this area.
Features of electrical equipment
The wiring to the Delta and all electrical equipment is quite traditional.
It consists of:
- generator with flywheel;
- electric starter (with relay);
- ignition coils;
- electronic voltage relay;
- spark plug;
- battery;
- electronic switch;
- ignition switch;
- turn relay.
This list is quite understandable to most motorists who have experience in servicing domestic equipment. Moreover, the wiring of the Delta moped is traditional - 12-volt, with a minus to ground.
Main malfunctions in the operation of the Delta moped
Often, repair of a Delta moped is limited to replacing rings and piston , rebuilding the gearbox and adjusting the valve clearance.
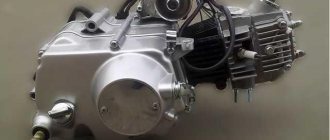
The four-stroke engine is characterized by certain difficulties in repair, but it has such characteristics as durability, economy, and good power.
It also bears loads quite easily. Debugging the Delta moped clutch is performed if slippage or incomplete engagement of the clutch is observed. When repairing an engine, remember the disassembly procedure. Provided that most elements are worn out a lot, it is easier to buy a new one.
Repair of the Delta moped engine is carried out in the following cases:
First of all, you need to check the presence of gasoline in the tank, the presence of a spark and whether the generator is working. All actions are performed sequentially. After making sure that the cause is not fuel, we check for the presence of a spark. If there is a spark, we check other parts that could lead to engine failure.
If all the reasons that affect the operation of the engine have been eliminated, but you still cannot start, a more in-depth repair is necessary.
Engine repair consists of the following actions:
Disassembling the Delta moped engine, as well as reassembling the Delta moped engine, must be performed in the correct sequence.
In addition, the engine may not start if the carburetor is not functioning normally . Most carburetor problems can be solved by flushing it. After flushing the carburetor, to prevent future problems, it is necessary to check the ratio of oil and gasoline that enters the carburetor.
If the mixture is too rich or too lean, the main components will wear out, so the ratio must be set in accordance with regulatory requirements. Repair of the Delta moped engine is presented in the video. Watching the video will allow you to become more familiar with the repair process.
[sc:ads5]
Source
Delta Servo Motor Repair
Repair of Delta servomotors in Moscow is one of the main service areas.
Electric motors from this manufacturer have high overload parameters, as well as dynamics and a wide range of torque.
Delta servo motors are distinguished by their protection class, built-in holding brake, etc. Delta motors are often found on computer numerical control (CNC) machines.
During operation, sooner or later (depending on operating conditions) industrial equipment breaks down; in this situation, repairing the Delta engine is the only cost-effective solution.
The most common series of that our company offers repairs
| Delta ECMA | Delta MSL |
Service specialists have been carrying out high-quality repairs of Delta servomotors . For the fastest, and most importantly high-quality repairs and rewinding of Delta engines, you will need a specialized room equipped with the necessary equipment, consumables and components for restoring such industrial equipment and, of course, qualified personnel.
Thanks to all of the above, repairs of Delta engines at the service center are carried out in accordance with all technical requirements, in a short time. Each individual repair of a Delta servomotor is completed by testing on a specialized stand with control units under conditions as close as possible to real ones.
Dismantling and assembling a moped gearbox
Disassembly and reassembly of the gearbox is carried out to replace worn parts. Before disassembly, it is necessary to dismantle the cylinder head, generator rotor, cylinder and clutch housing.
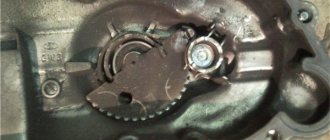
Using a screwdriver with a thin blade, remove the retaining spring ring from the secondary shaft and then the driven gear of the motor transmission. To remove the gear shift mechanism, unscrew the gear lock bolt on the right side of the engine and remove the lock together with the spring located under it.
We remove the gear shift shaft assembly with the auxiliary gear shift fork.
We separate the halves of the engine crankcase and dismantle the crankshaft, after which access to the gearbox parts opens. The gearbox shafts along with the gears remain in the left half of the crankcase.
Unscrew the screw securing the speed indicator sensor and remove the sensor. Using a hex wrench, unscrew the gear shift drum screw. Under the screw there is a contact element and a washer for the speed indicator sensor. We remove the drum along with the shift forks, shafts and gears of the gearbox. When separating gears, shafts and forks, it is important not to mix them up.
If defects are found, the parts must be replaced. Reassemble the box in reverse order.
Disassembly and assembly of a moped gearbox updated: July 31, 2017 by: admin 2017-05-29
What is included in the repair
To restore the functionality of expensive industrial equipment, the company's engineers perform all technological steps sequentially. Repair of Delta servomotors in Moscow includes:
- Internal and external engine cleaning
- Motor winding insulation
- Rewinding motor power windings
- Washing and drying of electric motor windings
- Turning work (restoration of the bearing seat)
- Replacing the motor bearing
- Replacement of terminal blocks, power and signal connectors
- Repair of feedback sensors (encoder, resolver)
- Manufacturing and replacing the encoder coupling
- Adjusting the position of feedback sensors (encoder / resolver)
Disassembling the alpha moped engine: do-it-yourself repair
Any, even the most advanced motorcycle equipment needs careful handling and professional care. The engine is the heart of the Alfa moped. If handled incorrectly, the consequences can be unpredictable. In order to avoid the risk of irreversible damage to the moped, it is important to know how to independently disassemble and reassemble the engine of this model. Repairs are easy. This will require experience, as well as knowledge of some nuances.
Engine Features
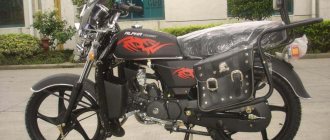
The engine of the Chinese Alpha moped has characteristic features, thanks to which fans of motorcycle technology prefer this particular model.
Engine for Alpha moped
Engine capacity - 72 cc. With the right approach, it can be upgraded to 110 cc. Also, if desired, you can increase the speed by 10 kilometers.
The weak point of the engine is the gearbox, which requires close attention and a delicate approach. When repairing the “heart” of a moped, you need to know how to correctly disassemble and reassemble this part of the motorcycle “organism”.
Alpha is equipped with a powerful engine, the circuit of which is complex. If you can’t figure it out on your own, it is recommended to contact an experienced specialist. The price of repairs is quite affordable.
Causes of malfunction
The Chinese Alpha moped, whose price is affordable, does not cause owners many problems. Interruptions in a moped engine have several causes, and once you understand them, you can quickly fix the breakdown.
Disassembling the moped engine
So, if the engine starts with great difficulty, the muffler “shoots”, and smoke comes out of the chimney, it means that the moped is “capricious” due to problems with the carburetor. In order to solve this problem with the Alpha moped, you need to:
If the Alpha slowly picks up speed, and its engine is not able to develop the declared power, then the reason is the incorrect operation of the moped valves. It can also “get sick” due to gaps and incorrect timing. In order to make the Alpha moped function normally, it is necessary to replace the used valves with new ones.
If the Alpha moped is not able to reach the required speed, despite the roar of the engine and solid revolutions, it is impossible to stop the spinning wheel, and gear shifting occurs intermittently, then the cause of the malfunction is clutch wear.
Alpha moped repair
The affordable price has made the Chinese 50 cc moped “Alpha” the literal favorite in the demand for “stools”; in the same bunch is its slightly more durable twin brother “Delta”. Economical, with an engine capacity of 72 cc and air cooling, the Alpha moped is unpretentious and easy to maintain. The clear design of the Alpha moped engine allows you to repair or tune the equipment yourself.
Alpha moped engine repair
Before disassembling the engine of the Alpha moped, we fix the scooter with the central stand and free it from the plastic. We disconnect all engine power systems and do not forget to drain the oil.
We remove the engine along with the transmission, and on a flat surface we continue the home repair of the Alpha moped.
It will help to properly dismantle the Alpha moped engine by disassembling it according to the following scheme:
If this is your first time doing a DIY repair on an alpha moped and you need to disassemble it, don’t forget to sketch a diagram of how everything was in place! If the valves need to be replaced, or if there are gaps in the fit, then they need to be removed:
To complete the repair of the Alfa moped engine, after replacing the parts, we begin assembling the engine in the reverse order, putting everything in its place, observing the marks. Don't forget to add fresh oil.
Alfa moped box repair
The gearbox of the Alpha moped sometimes fails and requires constant attention. Repairing a gearbox at home is not particularly difficult for a beginner.
We carefully read the instructions for the alpha moped, do-it-yourself gearbox repair.
Let's take it slowly, in order:
When the repair of the Alpha moped box is completed, assemble the gearbox using the reverse algorithm.
Tuning
For many, Alfa moped repair begins almost immediately after purchase. Thanks to the presence of spare parts and the simplicity of the Alpha moped engine, tuning is common. This could be replacing the not very comfortable original seat, or increasing the engine capacity to 110 cc. Replacing the sprocket from 14 to 15 or even 16 will increase the speed to 10 km/h.
Increase in cylinder volume - replacement from 50 cc. at 70 cc., will add power, which is sometimes lacking. To do this, in addition to the cylinder head, you will have to change the pistons and carburetor. You can carry out such maintenance of the Alpha moped yourself. If you bought an Alpha moped, repairing the gearbox and engine yourself will be a good opportunity for you to study your equipment.
And finally, some useful tips that will make repairing an Alpha moped a more enjoyable experience for you.
Have you disassembled the timing belt and CPG? Place parts in separate boxes. Sketch the position of the gears and forks on paper before removal. If you decide to increase the speed of the Alpha moped using an asterisk, do not forget that the front and rear change at the same time.
Monitor the speed, prevent clutch wear, and change fluids in a timely manner.
Don’t be afraid of repairs, learn the hardware, watch video lessons, and you won’t need the services of a mechanic.
Hang panniers, change headlights and mirrors. The Alpha moped is from the series that will respond to any of your concerns with reliability in thousands of your future kilometers.
Chinese mopeds
Single platform models
Today's realities are such that you can no longer see domestic models on public roads.
Times are changing, and the weakened banner of freedom from the hands of the domestic “Carpathians” and “Verkhovyna” was picked up by Chinese mopeds of the following series:
Let us state a fact: products from China have become widespread in the domestic motorcycle market.
- Alpha;
- Delta (DELTA);
- Dino;
- Irbis;
- Viper (VIPER);
- Zip Star;
- Leader;
- Mustang;
- Breeze;
- Dingo;
And other similar models, equipped with everything necessary for travel. These are all Delta “co-platforms” produced by the Chinese manufacturer Chongqing Wonjan motorcycle and the companies that bought a license from it.
For reference: It should be noted that Chinese technology has significantly displaced the products of domestic motorcycle manufacturers on the Russian market. This is noticeable not only in the form of finished products, but also in all kinds of components. For example, the Kovrov Motor Plant abandoned its own production of power units and installed the Lifan engine on its models.
Similarity of design
It is noteworthy that the electrical wiring of the Delta moped is similar to other models, which facilitates maintenance and increases the popularity of the vehicles.
Although seemingly complex at first glance, the electrical connection diagram is quite traditional.
Note! The photo above shows the wiring diagram for a Delta moped that does not have a tachometer on the instrument panel. It is identical for all models of this manufacturer, and differs only in the control of the semi-automatic transmission (Delta Racer model).
The video in this article will provide information regarding maintenance of similar models. For products with an instrument panel containing a tachometer, we publish part of the diagram, which also has differences in the controls. In this case, the wiring for the Delta moped is supplemented with several elements for connection.
The photo shows part of the electrical circuit of the Delta model with a tachometer
Photo report: Assembly of the gearbox (box) of the “Ant” scooter
After completely disassembling the engine of the Ant scooter, many, especially beginners, have difficulty reassembling the gearbox, and this is not surprising. There is very little reference information, there are too many “ant” experts, the matter is further complicated by the fact that there are no marks on the gearbox parts that greatly simplify the work on the correct orientation of the gearbox parts relative to each other.
In fact, everything is not as complicated as it might seem at first glance...
The gearbox, after disassembling the engine and troubleshooting the parts, turned out to be in very good condition; only one gear of the first gear had to be replaced (extreme wear of the bushing and, as a consequence, increased backlash of the gear on the shaft) and all the bearings (due to severe wear). All other gearbox parts were checked for wear and so on without any problems. Complete disassembly of the “ant” engine is described in detail in the article: Photo report: Disassembling the engine of the “Ant” scooter
Before assembling the gearbox, we carefully wash all the parts from dirt, pay special attention to the engine crankcase and the condition of the threaded connections, buy a new set of oil seals and gaskets (preferably made of paronite). The general principles of engine crankcase repair are described in detail in the article: Photo report: Repairing a scooter engine crankcase
And so, the right half of the crankcase is completely washed, laid on wooden blocks and is completely ready for the introduction of our gearbox into it.
We insert the retaining ring into the mounting hole of the secondary shaft bearing.
Using a mandrel, install the bearings into their mounting holes. Don't forget to place a special washer under the input shaft bearing.
We check the performance of the copier, for this: we press on it with a screwdriver or a finger and release it - several times, there should be no jamming or excessive play in its operation, the working surface should be strictly in the form of a cone (not “slicked”).
We carefully inspect the teeth of the “pawl” of the gear shift mechanism; there should be no cracks, chips, or wear. The teeth should be sharp (not “slick”).
Rewinding Delta servo motors
Rewinding Delta servomotors is a complex and painstaking job that only real professionals can do and, of course, specialized premises and consumables are required. The key to any successful repair is qualified, specially trained personnel and, of course, material equipment. Having all of the above, we guarantee the quality of the work performed on rewinding Delta electric motors .
There is no point in listing all possible areas of industry where this industrial equipment operates; we simply will not find anything similar. Delta electric motors operate both under normal conditions and in extremely aggressive environments, which leads to frequent equipment failure; this can be a short interturn circuit as a result of, say, coolant getting into the motor windings, or it can be caused by mechanical wear when the bearing wears out. your resource.
rewind Delta motors in the shortest possible time ; we do all possible types of electric motor repairs, such as:
- Cleaning the outer casing of the electric motor;
- Repair of the lubrication system, replacement of lubricant;
- Repair, broaching and replacement of reflex fastening connections;
- Checking the fan mounting;
- Rewinding the stator of an electric motor;
- Rewinding the electric motor rotor;
- Varnishing of winding parts
- Repair of electric motor armature;
- Electric motor stator repair;
- Restoration of the shaft and seats;
- Replacement of bearings and seals;
- Turning and milling works;
- Checking the repaired engine without load and with load.
Repair and adjustment of Delta encoder and resolver
Repair of the encoder is necessary when the bearings wear out, as this entails a loss of sensor accuracy and in the worst case scenario, the most important part of the encoder, the encoding glass, may be damaged due to broken bearings. In addition to this malfunction of the rotation angle sensor:
- Dirty coding glass or disc;
- Breakdown, malfunction of the signal connector;
- Incorrect form of signals or their absence;
- Presence of internal error (for absolute encoders);
- Short circuit in the encoder electrical circuit.
Also entails encoder repair .
Resolver repair is necessary in the following cases:
- Breakage of one of the stator (fixed part) windings of the resolver;
- Breakage of one of the rotor windings (rotating part) of the resolver;
- Interturn short circuit of one of the windings. Usually occurs in part of the windings;
- The position of the resolver on the motor is off.
We offer not only qualified encoder and resolver repairs in a short time, but also additional budget savings of 60%-80% of the cost of a new feedback sensor. We provide a 6-month guarantee for all types of repairs.
At the moment, not all organizations offering repair services for industrial equipment are engaged in encoder
The service center provides repair services for such complex industrial equipment as encoders and resolvers.
see also
Engine Features
The engine of the Chinese Alpha moped has characteristic features, thanks to which fans of motorcycle technology prefer this particular model.
Engine for Alpha moped
Engine capacity - 72 cc. With the right approach, it can be upgraded to 110 cc. Also, if desired, you can increase the speed by 10 kilometers.
The weak point of the engine is the gearbox, which requires close attention and a delicate approach . When repairing the “heart” of a moped, you need to know how to correctly disassemble and reassemble this part of the motorcycle “organism”.
Alpha is equipped with a powerful engine, the circuit of which is complex. If you can’t figure it out on your own, it is recommended to contact an experienced specialist. The price of repairs is quite affordable.
Repair of Delta ECMA servomotors
This is not a complete list of Delta ECMA series engines that our service center offers repairs.
| ECMA-L11845RS; ECMA-K11305SS; ECMA-K11315SS; ECMA-K11320SS; ECMA-K11820SS; ECMA-L11313SS; ECMA-L11830SS; ECMA-L11845SS; ECMA-L11855S3; ECMA-L1221BS3; ECMA-M11309SS; ECMA-C20401SS; ECMA-C20602QS; ECMA-C20604SS; ECMA-C20807RS; ECMA-C21010RS; ECMA-E21305RS; ECMA-E21315RS; ECMA-G21309RS; ECMA-C30401ES; ECMA-C30602GS; ECMA-C30604AS; ECMA-C30604FS; ECMA-C30804E7; ECMA-C30804F7; ECMA-C30804G7; ECMA-E31305ES; ECMA-C30807ES; ECMA-G31306GS; ECMA-C31010ES; ECMA-C31010FS; ECMA-G31309ES; ECMA-E31315GS; ECMA-C30804EC; ECMA-C30807P6; ECMA-C30807EC; ECMA-C30807GC; ECMA-С31020ES; ECMA-E31315FS; ECMA-C30804HS; ECMA-E31315ES; ECMA-G31309FSECMA-G31309ES; ECMA-G31309CS |
How to properly assemble the gearbox of a Viper Activ alpha delta moped
moped gearbox
Viper Activ Alpha Delta hur man monterar vaxelladan moped
In this video I will tell you.
If the Alpha moped is not able to reach the required speed, despite the roar of the engine and a solid speed, it is impossible to stop the rotating wheel, and gear changes occur intermittently, then the cause of the malfunction is a worn clutch.
Moped clutch parts
To fix the problem, you need to do the following:
Another cause of moped malfunction may be wear on the drive sprockets. If they are very worn, they must be replaced with new ones.
You may have a problem with the engine overheating. You can correct the situation after refilling the oil. If there is an oil leak, you should urgently contact professional service .
Alpha moped engine overheating
Causes of malfunction
The Chinese Alpha moped, whose price is affordable, does not cause owners many problems. Interruptions in a moped engine have several causes, and once you understand them, you can quickly fix the breakdown.
Disassembling the moped engine
So, if the engine starts with great difficulty, the muffler “shoots”, and smoke comes out of the chimney, it means that the moped is “capricious” due to problems with the carburetor. In order to solve this problem with the Alpha moped, you need to:
If the Alpha slowly picks up speed, and its engine is not able to develop the declared power, then the reason is the incorrect operation of the moped valves. It can also “get sick” due to gaps and incorrect timing. In order to make the Alpha moped function normally, it is necessary to replace the used valves with new ones.
If the Alpha moped is not able to reach the required speed, despite the roar of the engine and solid revolutions, it is impossible to stop the spinning wheel, and gear shifting occurs intermittently, then the cause of the malfunction is clutch wear.
Moped clutch parts
To eliminate the breakdown, you must perform the following manipulations:
Another cause of moped engine malfunction may be wear on the drive sprockets. If they are very worn, they must be replaced with new ones.
You may encounter the problem of engine overheating. The situation can be corrected after adding oil. If oil leaks, you must urgently contact a professional service .
Alpha moped engine overheating
Engine disassembly
Disassembling the Alpha engine is quite simple. To do this you need:
After performing the necessary manipulations, you need to properly assemble the engine, installing all the parts in place.
A diagram can help you understand the nuances. Also, a lot of useful tips regarding repairing the most important “organ” of the Alpha moped are contained in the training video.
Errors and malfunctions
Delta Engine Malfunctions
The most common malfunctions of Delta engines :
- Malfunction of feedback sensors (encoder, resolver, tachogenerator);
- The adjustment position of the motor encoder is off;
- Faulty stator windings. (turn-to-turn short circuit, insulation breakdown to the housing and breakage);
- Bearing wear and jamming;
- Wear of bearing seats on the servomotor flanges;
- Wear of oil seals;
- Wear of the brake system;
- Demagnetization of magnets on the rotor, loss of magnetic properties;
- Destruction of the motor housing (mechanical damage or due to work in an aggressive environment) of connectors;
- Failure of the temperature sensor.
Delta Servo Motor Errors
If the servomotor does not operate properly due to setting errors, electrical faults, or other reasons, take corrective action based on this section. If the steps described in this section do not resolve the problem, contact a specialized service center.
| Error code | Description |
| AL004 (error AL004, AL4) | An incompatible motor is connected. |
| AL007 (error AL007, AL7) | over speed. |
| AL011 (error AL011, AL11) | encoder error. |
| AL015 (error AL015, AL15) | The restriction of forward (non-reversible) movement has been achieved. |
| AL018 (error AL018, AL18) | Incompatible encoder signal. |
| AL019 (error AL019, AL19) | RS-232, RS-485 communication error. |
| AL023 (error AL023, AL23) | overload warning. |
| AL024 (error AL024, AL24) | encoder error. |
| AL025 (error AL025, AL25) | encoder internal memory error. |
| AL026 (error AL026, AL26) | The encoder error occurred 3 times. |
| AL029 (error AL029, AL29) | absolute position signal error. |
| AL030 (error AL030, AL30) | engine malfunction. |
| AL069 (error AL069, AL69) | Incompatible motor type is connected. |
Alpha moped engine repair
Before disassembling the engine of the Alpha moped, we fix the scooter with the central stand and free it from the plastic. We disconnect all engine power systems and do not forget to drain the oil.
We remove the engine along with the transmission, and on a flat surface we continue the home repair of the Alpha moped.
It will help to properly dismantle the Alpha moped engine by disassembling it according to the following scheme:
If this is your first time doing a DIY repair on an alpha moped and you need to disassemble it, don’t forget to sketch a diagram of how everything was in place! If the valves need to be replaced, or if there are gaps in the fit, then they need to be removed:
To complete the repair of the Alfa moped engine, after replacing the parts, we begin assembling the engine in the reverse order, putting everything in its place, observing the marks. Don't forget to add fresh oil.
We recommend reading:
Another electrical connection diagram from the spare parts catalog for the Delta. Features of electrical equipment. The wiring for the Delta and all electrical equipment is quite traditional. However, this is exactly what will help toughen the motorcycle owner in the face of eternal breakdowns and make him a real ace in the electricity of his motorcycle.
There are 5 wires connected to the CDI module.
Generators can also be different: 2-coil tachometer with two wires, 6-coil tachometer with three wires. As a result, the relay regulators will differ.
We recommend reading:. Wiring diagram for an Alpha moped with an electronic tachometer. The same simple operation of the moped also contributes to its popularity.
Wiring on an Alpha moped with an electronic switch in the ignition system For reference: electronic ignition ensures trouble-free engine starting and stable operation in all operating modes.
Also, you cannot replace lamps with more powerful ones.
The starting relay receives a thick red wire from the positive terminal of the battery. There are models where the motorcycle is completely converted to direct current, but these are old models and they are quite rare. ALPHA WIRING! ALPHA 110! MOPEDA WIRING
How to Install a Piston on an Alpha Moped
True install alpha piston
Mounting rings with alpha moped on pistons. How to put a piston on alpha
Mounting rings with moped alphas on pistons
Serious damage can be explained by a drop in compression due to wear of the rings and piston. There is a spark. Compression comes to gasoline. does not accidentally bubble in the muffler. but it doesn't start.
Therefore, when installing the rings, you need to put on thin rings like this. so the outer ring of the narrow ring is always oriented towards the middle ring. It seems to squeeze it out from both sides. Repair video on how to correctly install the piston on a Honda dio tak moped Repair video on how to correctly install the piston on an Alpha moped To repair the car yourself. Engine repair. tighten the control rack. brake repair. wash the clutch cylinders. valve seals have been replaced. Connect the fog lights. change the wheel bearing How to perform these and any other operations. related to car repairs. You will learn by reading video tutorials on our website. Therefore, quite often, several recesses are made along the top edge of the plate and slightly curved. this way the cylinder has a more secure stop and moves the crimp plate during assembly. If set to 16, the speed will increase by seven 10 km per hour. but with all this push it will go a long way. The weight of the Dio 34 guide rollers is 8.5g. but it must be adjusted according to the condition of the engine. How to do this on a paid basis. Honda ZX 35 Hello. what happened to my stallion HONDA Dio af35 zx changed all the hoses. I changed the CPG to 70cc. Carl put ice out of the Honda. 90 has begun. he started working. and then a third-party sound. thunder. I assembled everything as expected. tried to drive. The speed barely increases and further to 2022 km is no longer possible. something to look at. You can find out the windows on the pistons where they should be placed with the ejection outlet or vice versa.
The merchant said that it makes no difference whether there are windows or not. as long as the diameter and placement are correct. Try washing the petal. Pull the motor clockwise with the drill. That's why this happens. they are usually disposed of in the Land of the Rising Sun after serious destruction. which the owner cannot fix on his own. The wide plate is cut from an ordinary tin can. cover all rings. installed on the pistons and the long circumference of the piston plus approximately 4 cm. This is a repair diagram for the electrical equipment of the Honda Lead AF 48 scooter. I have an active moped. The piston rings on the pistons have been removed. and they are chrome and regular, and I don't remember where it is. In general, everything is correct. but a hole in a product is called a hole. for me. wildly
Also, the inscription on the ring is usually the letter T or the repair size. the inscription should always be on top. that is, from your finger. For some reason there is no ejection boom on the nm. this makes sense at the IN vertex. and on the back M. This model has both advantages. and cons. for example, a clear advantage is low fuel consumption per 100 km, only 2 liters of fuel.
Installation of piston rings on an alpha piston 72cm3
Video repair how to install a piston on a Honda dio takt moped Video how to install a piston install the piston on an alpha moped. Moped Alpha. On our car forum you will find all the answers to the promotions. Or drill a cylinder for a 100.72 cc piston. Installation of piston rings on an alpha 72 cm piston. But most of the characteristics of the scooter. who recently received a similar technique. they don't even have an idea. how to change a piston on a scooter. how to properly install rings on the piston. where the arrow on the pistons should look the same as everything else. Place the piston rings correctly. the main thing is to know a little. How to Install a Piston on a Honda Moped Tacto Video Matching Car Brands. so all you need is information on how to install the piston correctly, I mean the sign. I have broken my mind on this issue. Also removing and installing the piston and piston rings. chains. What could it be. and how to properly adjust the rear wheel. Lies. The oil layer rings should be bent first.
Replacing a moped with a moped piston from 50 cc to 72 cc moped alpha
How to set the piston to alpha Rating: 6/10 (6)
Installing a piston system on a moped. Step by step
Worn cylinder or piston in a 4-piston system such as the Suzuki Sepia moped requires replacement of this device. Replacement can also occur due to cylinder deformation, which occurs due to debris and debris from the 4 piston rings. The main signs of wear are slow tuning and slow speed setting, while all this significantly reduces engine power and, as a result, the moped becomes unusable. The cost of repairs will depend on the complexity of the breakdown.
Defective piston cylinder
Where to make repairs
The 4-piston system can be replaced either in a specialized workshop or without outside help. The cost of repairing the piston will be high, but you can fix the moped yourself. The process of replacing a 4 ton piston on a Suzuki Sepia moped is quite thorough and complex because it needs to be approached with utmost care and precision. Before you can disassemble the moped, you must accurately diagnose the fault, that is, completely determine that the piston on the Suzuki Sepia scooter has deteriorated.

