Improving the filling
To tune a scooter, you also need to replace its CVT with a sports model - such devices are adjusted to the new engine characteristics much better and more accurately.
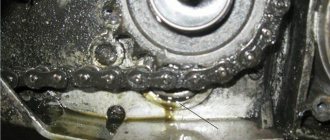
Manufacturers equip modern models of tuning CVTs with a rod lubrication system to increase the efficiency of the entire transmission part of the scooter. Smoother and easier movement of the variator along the hub will significantly improve the scooter's throttle response. You can also increase the performance of a scooter with the help of proper installation of a tuning cylinder-piston group. Installing the latter is the most radical and effective method of increasing the performance and power of a scooter.
The tuning cylinder-piston group usually comes with a cylinder head, the shape of the combustion chamber of which is optimized
If the owner also plans to install pistons with a larger diameter, it is important to ensure the ideal technical condition of the crankshaft and bearings - otherwise they will very quickly fail due to heavy loads. At this stage, tuning the scooter can be completed, since for other improvements it is easier to buy a more powerful vehicle and not bother installing expensive tuning parts
Honda Dio AF fork repair
After disassembly, all that remains is to assess the degree of wear of the elements (replace if necessary), clean the shock absorber from dirt, fill it with grease and reassemble it in return order.
To repair a Honda Dio fork, you may need fresh boots, plugs and bushings, as well as other parts.
The bushings can be turned by a turner. Material: coprolon, as a more wear-resistant material.
After repair, the fork will become simply unrecognizable and is in no way inferior in softness to the Honda Tact. The result of the repair will gradually begin to be lost after 3.5 thousand. km driven on our roads.
Dirt is a terrible enemy of these (and not only) shock absorbers; pay attention to the condition of the dust plugs and boots.
Tuning features
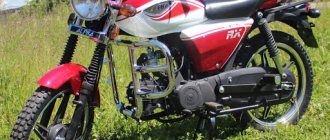
Tuning an Alpha moped is a rather fertile topic. There are a lot of options for improving the qualities of the model, and the cost of tuning is much lower than for a Chinese scooter of the same price category. The simplicity of the structure makes it possible to improve both the engine itself and external elements at your discretion.
Tuning Alpha can be carried out in different directions and, before starting improvement, it is worth paying attention to those qualities that will be changed. This modification should not be confused with styling - it only changes aesthetic indicators and does not in any way affect the functional characteristics
Tuning an Alpha moped with your own hands is a very interesting task, which over time can greatly captivate the owner. The ability to refine the characteristics implies making both external and internal changes that can improve the functionality of the model. Many hobbyists purchase an Alpha moped as a future base for realizing their own ideas.
Dimensions of coprolon (fluoroplastic) bushings for Honda Dio AF-25
| Parameter | Size (mm) |
| Inner diameter of glass | 35,4 |
| Upper bushing outer diameter | 35,3 |
| Upper bushing inner diameter | 27,5 |
| Top bushing height | 30 |
| Bottom bushing outer diameter | 34,8 |
| Bottom Bushing Inner Diameter | 27,2 |
| Bottom bushing height | 30 |
| Thickness of the bottom of the lower bushing | 5 |
| Holes in the lower bushing | 2,5 — 3,2 |
Running in a moped with an updated engine
When the moped is assembled with a new motor configuration and run in gentle modes, try to reach maximum speed in deserted conditions. It may turn out that the chassis and brakes can no longer cope with the power of the engine. The spokes of the rear wheel are curled by torque, and in order to brake the moped you will have to release the brake parachute. While driving, the silent blocks of the shock absorbers fall out and wobbling begins. This means that next on the replacement list will be shock absorbers, a motorcycle front fork with a wheel and a disc brake system.
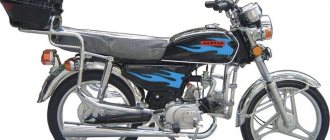
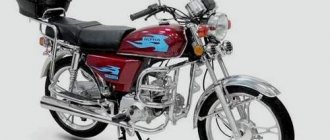
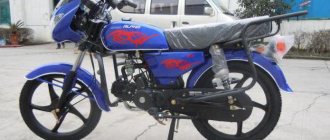
The Alpha moped is one of the most popular in the post-Soviet countries. This is not surprising, because this model is excellent value for money. The characteristics allow us to consider the moped practically a universal one, and the wide possibilities for modification help to significantly expand them. The use of such a moped is not only convenient, but also economical - fuel consumption per 100 km is only about 2 liters with a factory equipped engine. The combination of low weight (about 80 kg) with a load capacity of up to 120 kg makes this model very attractive.
However, used models sometimes experience problems with ignition, which negates all the advantages of the moped. It’s not very difficult to get your iron horse back into service and understand why the Alpha moped won’t start. To do this, it is not even necessary to contact specialists - with due attention, all the work can be done with your own hands.
Consequences of untimely replacement
If you don't change your air filter, at best its performance will deteriorate over time. The moped will lose power and stop idling. Also, dust getting into the carburetor will clog all the channels, which will lead to unstable operation. The worst case scenario may be that dirt gets into the engine itself. Large particles will leave deep scratches on the cylinder bore and on the piston. The valve assembly may fail. Accordingly, a major overhaul of the engine will be required, so you should not neglect replacing the air filter. The consequences can be dire.
The frequency of replacement depends on the level of road pollution in the area. The cleaning system should be carefully inspected periodically.
Tuning of external parts
By improving the external parameters, you can improve not only the aesthetic appearance of the Alpha moped, but also increase its aerodynamic performance and make movement more comfortable. The following is usually used for tuning external elements:
- Replacing the seat with a wider and more comfortable one.
- Installing protective panels will help prevent leg fractures and protect them from damage.
- Replacing the wheels with wider ones will increase the stability of the moped. This is especially true when replacing an engine.
- Installing a windshield helps improve travel comfort. But at a speed of more than 40 km/h it already begins to affect the aerodynamics of the moped.
- Replacing disks has a more decorative meaning. The standard wheels on the Alpha are also quite drivable.
- Replacing the plug. If the Alpha moped will be used to travel on uneven roads, for example, in the forest or outside the city, you can replace the forks. Strengthening the shock absorbers helps soften the load on the wheel.
- Replacing LEDs can also be a great solution. You should not use xenon diodes, as they will dazzle drivers and will not be better in terms of lighting quality than conventional ones.
If desired, tuning can be completed by styling the moped by performing airbrushing or changing the color of the body. An excellent solution to highlight a moped would be to install LEDs under the fenders or on protective panels.
Tuning an Alpha moped is a very rewarding activity that can captivate the owner in the direction of improving his model. Design and assembly features make it possible to improve Alpha in absolutely any direction. This makes it very convenient for both beginners and experienced hobbyists.
Tuning an Alpha moped can increase power and other characteristics of the vehicle, such as its speed. Practical advice and recommendations.
Many owners of Alpha and Delta mopeds want to tune their moped in order to improve its performance, increase speed and traction, because nothing in the world is perfect. Tuning the ALPHA moped can turn a seemingly ordinary ordinary worker into an almost cool racing bike. It is possible to overclock the engine volume from the existing 72 to 110.
Checking work
The most adequate assessment of the work done after reassembly is a ride on the updated motorcycle. It’s not for nothing that they say that after changing the oil, a motorcyclist ends up with a completely different piece of equipment in his hands. The fork should be elastic, stable, not sag or be too stiff.
Changing the oil in the fork of Alpha and Delta mopeds
Repair of fork for moped Alpha, Delta. Change of oil. Replacing oil seals
A vehicle such as a scooter is increasingly gaining popularity. Its suspension includes such a part as the front shock absorbers of the scooter. They are simply irreplaceable on our roads. It is the shock absorbers that soften the ride over all irregularities, potholes and bumps. If they were not there, then other parts that are not designed for such a load would suffer. Thanks to its suspension, the scooter can ride not only on a flat road, but also on moderately broken ones and withstand falling into potholes. Although the scooter is intended for smooth roads and the city. I once fell into a 10 cm deep hole on a Honda Dio scooter. The same thing happened with a passenger. I think if it weren’t for the scooter’s shock absorbers, not only would it have broken, but I and my passenger would have been sent on a short flight with a hard landing.
Over time, the front shock absorbers of the scooter lose their properties and require repair or replacement. How long it will take for this to happen depends on the quality of the roads, your riding style on them and, of course, on the shock absorbers for the scooter themselves. You will feel it yourself when replacement is required, since every hole and unevenness will be more and more noticeable. There will be a characteristic knocking sound in the front fork of the scooter. If you turn a blind eye to this for a long time, the shock absorbers will completely lose their shock-absorbing properties and, over time, more expensive parts may be damaged. Therefore, as soon as you feel that every unevenness in the road is transmitted to you, that is, you feel the road with your body, then the shock-absorbing properties have become unusable.
The rear shock absorber of the scooter suffers the most. Therefore, replacing them in a scooter is often more urgent than replacing the front ones. One of the signs that the front shock absorbers of a scooter have become unusable is the following: if the scooter is rocked in place, the front fork shock absorber may jam or not return to its standard position on its own. If it sags, you will feel it because the scooter has become a little lower. If you lift the scooter's handlebars up a little, you will see that it has risen and returned to its previous position. But this is before the first load. This front shock absorber needs to be urgently replaced or repaired.
Alpha moped repair
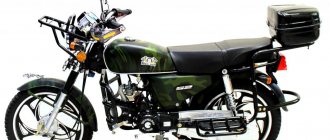
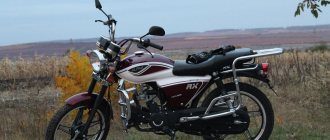
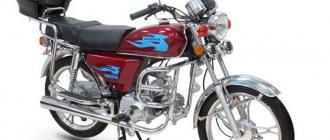
The affordable price has made the Chinese 50 cc moped “Alpha” the literal favorite in the demand for “stools”; in the same bunch is its slightly more durable twin brother “Delta”. Economical, with an engine capacity of 72 cc and air cooling, the Alpha moped is unpretentious and easy to maintain. The clear design of the Alpha moped engine allows you to repair or tune the equipment yourself.
Alpha moped engine repair
Before disassembling the engine of the Alpha moped, we fix the scooter with the central stand and free it from the plastic. We disconnect all engine power systems and do not forget to drain the oil!!!
We remove the engine along with the transmission, and on a flat surface we continue the home repair of the Alpha moped.
It will help to properly dismantle the Alpha moped engine by disassembling it according to the following scheme:
- remove the muffler and exhaust pipe;
- remove the camshaft gear cover;
- unscrew all 4 bolts from the cylinder cover;
- remove the top cover and cylinder head;
- We look at valve wear, internal contamination and the condition of other system parts.
If this is your first time doing a DIY repair on an alpha moped and you need to disassemble it, don’t forget to sketch a diagram of how everything was in place! If the valves need to be replaced, or if there are gaps in the fit, then they need to be removed:
- Place the head on a level place. To prevent the valve from being damaged during dismantling, it is better to place a layer of thick rubber or a rag under it;
- we select the socket head, place it on the valve plate and hit it hard with a hammer;
- release the crackers, remove the top plate and valve washer;
- remove the valve and guide bushing.
To complete the repair of the Alfa moped engine, after replacing the parts, we begin assembling the engine in the reverse order, putting everything in its place, observing the marks. Don't forget to add fresh oil.
Alfa moped box repair
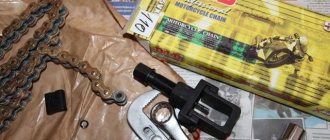
The gearbox of the Alpha moped sometimes fails and requires constant attention. Repairing a gearbox at home is not particularly difficult for a beginner.
We carefully read the instructions for the alpha moped, do-it-yourself gearbox repair.
Let's take it slowly, in order:
- We first dismantle the cylinder, then the rotor and clutch block;
- carefully remove the retaining ring (you need a screwdriver and a thin knife or blade) and the drive gear;
- To remove the speed unit, unscrew the fastener - the bolt on the back side.
- remove the gear shift fork;
- remove the crankshaft and drum.
When the repair of the Alpha moped box is completed, assemble the gearbox using the reverse algorithm.
Tuning
For many, Alfa moped repair begins almost immediately after purchase. Thanks to the presence of spare parts and the simplicity of the Alpha moped engine, tuning is common. This could be replacing the not very comfortable original seat, or increasing the engine capacity to 110 cc. Replacing the sprocket from 14 to 15 or even 16 will increase the speed to 10 km/h.
Increase in cylinder volume - replacement from 50 cc. at 70 cc., will add power, which is sometimes lacking. To do this, in addition to the cylinder head, you will have to change the pistons and carburetor. You can carry out such maintenance of the Alpha moped yourself. If you bought an Alpha moped, repairing the gearbox and engine yourself will be a good opportunity for you to study your equipment.
And finally, some useful tips that will make repairing an Alpha moped a more enjoyable experience for you.
Have you disassembled the timing belt and CPG? Place parts in separate boxes. Sketch the position of the gears and forks on paper before removal. If you decide to increase the speed of the Alpha moped using an asterisk, do not forget that the front and rear change at the same time.
Monitor the speed, prevent clutch wear, and change fluids in a timely manner.
Don’t be afraid of repairs, learn the hardware, watch video lessons, and you won’t need the services of a mechanic.
Hang panniers, change headlights and mirrors. The Alpha moped is from the series that will respond to any of your concerns with reliability in thousands of your future kilometers.
www.real-biker.ru
Photo report: Replacing scooter front fork bearings
Repairing the front fork of a scooter or motorcycle
The front fork of both a motorcycle and a scooter consists of literally the same parts, they just differ from each other in size, and, in some cases, in design and principle of operation. If a front fork breakdown occurs, you must not let the situation get worse and fix it as soon as possible.
In order to carry out any work with it, it is necessary to naturally remove and disassemble it.
So, disassembly and assembly are carried out in a certain order in the following way:
- First, remove the wheel and front fender from the motorcycle, then unscrew the nut securing the stay and remove the spring. During this, if the need or any inconvenience arises, the steering wheel can also be removed. Next, you need to unscrew the coupling bolts of the lower bridge and grasp the sliding pipe with your hands, and only then remove the feather with the bridge. If you are unable to remove the feather, then you can wrap the feather bunny back a little and hit it several times with a wooden hammer or a block, then the process will go faster.
- If it is convenient for you, you can remove the headlight along with the cap and the gasket with the cover. If something prevents the cover from being removed, then you can loosen the locknut and coupling bolt, the so-called upper bridge.
- Then you need to unscrew the oil seal housing with a spanner wrench and remove it, unscrew the oil seal housing nut so that it becomes possible to remove the boot and oil seal. After this, you will be able to unscrew the rod axis and drain the oil. And then you need to remove the sliding and supporting pipes.
- Next, you should remove the upper bushing with the sealing ring and, turning the supporting pipe over, remove the piston with the rod and spring. By the way, it is worth remembering that in order to remove the lower piston or lower bushing you need to remove the corresponding retaining rings.
- Well, that's all, the disassembly of the front fork is completed, now you can start servicing or repairing it. After work, it is reassembled in the reverse order, paying attention to the wear of the rubber O-rings. Even with minor damage, they should not be installed on the fork, because they are the ones that hold the oil inside and do not allow it to leak out. And after you have assembled everything, you need to slightly loosen the coupling bolts of the lower bridge and lightly tap it with a hammer, and only then tighten the bolts. In this way, you can avoid distortions that could appear during assembly.
- If you want to simply disconnect the front fork from the frame assembly, then you also need to follow a certain procedure. First, unscrew the fork leg nuts and remove them. Afterwards, you need to unscrew the coupling bolt of the upper bridge together with the steering wheel, and only then unscrew the steering column rod nut. Next, you need to remove the protective cap and the upper cone so that you can carefully remove the balls of the upper bearing. Well, in the end, you need to carefully disconnect your fork from the motorcycle frame, just be careful not to lose the balls of the lower bearing. Naturally, assembly is done in reverse order.
And what is worth paying attention to is the abundant lubrication of the running tracks of the cones with lithol, on which the balls are actually placed, twenty pieces per bearing.
- If you have problems adjusting the column bearings, then there is a certain procedure for this case. It is necessary to unscrew the coupling bolts of the lower and upper bridge and loosen the locknut of the column rod.
- In this case, the rod nut is tightened so that the front fork can rotate quite freely relative to the motorcycle frame, but also so that there is no large play. Only then can the coupling bolts and locknut be tightened.
- If you just want to pour oil into the hydraulic shock absorber, then to do this you just need to unscrew the nut securing the stay, but, on the contrary, to drain it, unscrew the fixing axis of the rod and begin to slowly rock the fork.
- Malfunctions can also include knocking, rough operation and small oil leaks. In general, all faults must be eliminated in a timely manner.
- The repair itself comes in two types: planned and restorative. The first involves replacing oil seals, anthers and the so-called glass. Sometimes it may be necessary to change the oil. During the restoration of a motorcycle or scooter fork, as a rule, straightening or even replacement of the non-moving pipe of the fork itself is required.
- The fork is straightened if there are small bends in the feathers, and if such bends are too large, then you will have to change it completely. Traverses can also be repaired only when using special equipment. If you have difficulty turning the steering column, then most likely the cause will be worn bearings.
- Dismantling the front fork stays, for example, a scooter, is carried out with the front part facing removed. And for the convenience of this dismantling, it is recommended to remove the plug completely.
Let's get started
So, the battery is ready to charge. Connect the terminals of the charger to the battery. The red terminal is to the positive terminal of the battery, the black (or blue) terminal is to the negative terminal. Don't mix up the polarity!
Most modern chargers automatically set the charge current and charging time. But if it is possible to set the charging current, it is chosen by dividing the nominal capacity of the battery by ten. For example, with a capacity of 4 Ampere-hours, the charge current should be 0.4A. In this case, the charging time will be approximately 10 hours.
You should not charge a motorcycle battery with a car charger if it cannot charge with a current of less than 1A. High charging currents can damage the battery.
Battery care rules
The battery requires proper storage and care. Here are some requirements for proper operation of a scooter battery so that it will last a long time.
First, do not allow the battery to be discharged to more than half its capacity. In general, the battery should not be allowed to be stored in a discharged state. If you feel that the scooter starter is having difficulty cranking the engine, recharge it as quickly as possible.
The battery must be kept clean, since dirt accumulating on the terminals contributes to the rapid discharge of the battery due to current leakage. Keep contacts clean and free of oxides.
In order to prevent a short circuit at the battery terminals, which can permanently damage the battery, you need to spare no expense in purchasing fusible links, preferably factory-made ones. Homemade fuses, which often fail, can only make the situation worse.
It is unacceptable to store the battery at temperatures below -5˚ Celsius, as well as overheating the battery above +50˚. The battery can be charged with currents ten times lower than indicated in the battery capacity characteristics. There is NO need to recharge the battery. When overcharged, water begins to actively evaporate, and energy accumulation stops.
Measure the voltage at the output terminals with the engine running, it should be between 13.5-14.5 Volts. If abnormal, check the scooter's voltage regulator.
If your scooter is equipped with a serviceable battery, check the electrolyte level at least once a month. If the level drops, add distilled water. Plain water causes the battery to fail faster.
You should always remember that equipping a scooter with a radio, additional headlights, and an alarm requires the scooter owner to check the battery charge more often, since all these devices require additional electricity.
source
How to change gears on a motorcycle correctly
All movements you make with the pedals must be smooth so as not to damage the transmission.
When changing gears, change one speed at a time. It is not advisable to jump.
To understand how to change gears on a motorcycle, you need to carefully study the controls. There are motorcycles with manual transmission and semi-automatic.
Method one
Motorcycles with manual transmission. All actions in this case occur in the following sequence. Pick up speed. Take off the gas. Engage the clutch. Press the gear shift pedal. Release the clutch, then the shift pedal and add gas.
To start the motorcycle, place it in neutral. After this, remove the gas and squeeze the clutch, at the same time turning on first gear. Taking your foot off the gear pedal, apply gas and release the clutch. Now add gas.
To upshift, you need to lift the gas, engage the clutch and press the gearshift pedal. After this, release the clutch, release the shift pedal and add gas.
To downshift, you need to remove the gas and engage the clutch. After this, sharply add gas, and when the speed begins to drop, press the gearshift pedal. Release the clutch and shift pedal and add gas. Once the motorcycle has stopped, be sure to put it in neutral.
Method two
Motorcycles with semi-automatic transmission. On these motorcycles, gear shifting is easier. Take off the gas and change gears. The clutch and gearbox are connected here.
Before starting the engine, place your bike in neutral. In order to engage first gear, you need to remove the gas and press the gear lever down. To increase the gear, you need to remove the gas and lift the gear lever up. To downshift, on the contrary, you need to apply gas and immediately remove your hand from the gas. When the speed starts to drop, change the speed and add gas. Now you know how to change gears on a motorcycle.
Other options
In addition to the above method, you can increase the performance of a moped such as its power and speed using other tricks. For example, you can increase the power of your scooter by replacing the muffler, replacing it with a compatible resonant pipe, and tuning the transmission.
You can also choose a sports variator for your scooter and install a reinforced belt.
If you don't know how to further increase the power of your moped, try replacing the standard exhaust pipe with a sports one. With its help, you will increase the power of the scooter by up to 15%, increasing the maximum speed. Finally, replace regular brakes with disc brakes, standard brake pads with sports brake pads, and select brake hoses with reinforcement.
After all the work involved in trying to increase the speed and power of the scooter, do not forget about your safety and the safety of other road users. If you doubt the correctness of your modifications to the moped, contact the service, where they will give you practical advice or carry out a set of improvements yourself. Remember that your life may depend on the quality of work to increase the power and speed of equipment.
How to remove the front fork on an alpha moped
I was thinking about changing the oil in the front fork on an Alfa, I looked on the Internet and found how much to pour (in the Alfa 120 ml, in the Delta 160 ml (in each leg)), but I couldn’t find any exact criteria about what kind of oil to pour there.
Questions: Have you changed the oil in the fork? Which one did you fill and how many ml? At what mileage did you decide to change the oil?
Added after 5 minutes
I’m also thinking about replacing the front drum brake with a disc brake, but since there is no mount for a caliper on the fork legs, I’m thinking of installing a complete fork or just the legs from Parton King 50. But I don’t know the size of the fork from King and whether it will fit into the Alpha yokes
There, as far as I know, the oil is not changed but topped up as needed. They suggested oil to me and 20. spindle in common parlance.
Added after 2 minutes
I’m also thinking about replacing the front drum brake with a disc brake, but since there is no fastening for a caliper on the fork legs, I’m thinking of installing a complete fork or just the legs from Parton King 50. But I don’t know the size of the King fork and whether it will fit into the Alpha crossbars [/ quote]
Take and measure the diameters of the pipes with a rod of both. And compare. But there is no reason to install a disk drive on 50 cubic meters. And then decide for yourself.
I changed it and barely opened the feathers. Clamped in a vice in a barbaric manner, removed the decor on the fork and clamped it in it. So I opened it. I temporarily filled it with 10w40, at least better than the original oil. I poured it to the edge in clamped fork. (This might be correct, but it’s temporary)
They also pour a transmission (a wide variety), there is a special one. oils for this, for example Motul fork oil expert of different hardness 7.5W 10W 15W. (Light, medium, hard)
Hydraulic oil MGP-10 TU U 00152365.111-99
Hydraulic oil MGP-10 is a composition of low-viscosity, low-solidifying petroleum oil, depressant, dispersant, anti-wear, antioxidant and anti-foam additives.
Intended for use as a working fluid in hydraulic shock absorbers of automobiles
Ensures shock absorbers operate over a wide temperature range.
Good anti-wear characteristics. Physico-chemical indicators: No. Name of indicator Indicator value 1. Color, CNT units, no more than 5 2. Kinematic viscosity, mm2/s at minus 20°C, no more than 1000 at plus 20°C, not less than 35, 0 at plus 50°С, not lower than 10 3. Pour point, °С, not higher than minus 40 4. Flash point, determined in an open crucible, °С, not lower than 145 5. Acid number, mg KOH/g oil, not more than 0.15 6. Corrosion effect on metal withstands 7. Mass fraction of water, %, no more than none 8. Mass fraction of mechanical impurities, %, no more than none 9. Change in rubber volume after aging, %, ranging from minus 6 to plus 6 10. Tribological characteristics on a four-wheel drive: welding load (Рз), N, not less than 2820 critical load (Рк), N, not less than 710 scuffing index (Iz), N, not less than 324 Added after 6 minutes
If it doesn't start
When the Alpha moped does not start, the muffler fires and black smoke comes out of it, this means that you have a problem with the carburetor. Black smoke says a lot, a lot.
Firstly, since there is smoke, the fuel burns, and the piston throws it into the exhaust. This means the CPG is ok, and most likely the valves too.
Secondly, smoke indicates proper ignition, the candle gives a spark, otherwise smoke could not have formed.
Thirdly, smoke is almost a combustion process, which means the problem is in the carburetor, the fuel mixture is not supplied correctly.
To fix these problems, you need to clean the carburetor and air filter, also make carburetor adjustments and tighten the bolts thoroughly.
If your moped takes a long time to accelerate, it’s as if someone has “castrated” the engine and the power reserve seems to have disappeared – the problem is 100% in the valves, they should be replaced.
After a thousand kilometers, the engine needs to be checked for the first time, subsequent checks should be performed every four thousand kilometers. All checks should be performed only on a cold, already cooled engine.
Alpha has both pros and cons, for example, an undeniable plus is its low fuel consumption per hundred kilometers - only 2 liters of fuel.
The moped can be loaded with one hundred and twenty kilograms, while it itself weighs eighty-one kilograms. The Alpha moped is equipped with an air-cooled engine, two brakes: front and rear, four-speed manual transmission, 2 shock absorbers.
Additionally, the Alpha model is often equipped with mudguards on the rear and front wheels. They will help protect the driver and engine from water and dirt.
Alpha has a 4-stroke engine, which must be diagnosed and repaired according to the following parameters:
- Adjusting the valve clearances, such a need arises if characteristic knocking noises appear in the cylinder head, or violations in the clearances are found.
- Removal and subsequent installation of the cylinder head is necessary when the combustion chamber is clogged with carbon deposits, as well as for replacing and grinding in valves.
- Complete disassembly of the cylinder head - if the valves are no longer sealed, also to replace oil scraper valves and caps.
- Removal and installation of the entire cylinder, generator rotor and electric starter.
- Also removing and installing the piston and piston rings, chain.
- Disassembly and assembly of clutch, crankshaft, gearbox.
Disassembling the Honda Dio AF fork shock absorber
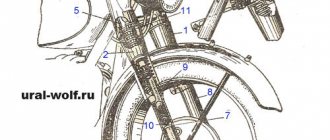
Understanding is not difficult. First, the fork shock absorbers need to be removed; to do this, you need to unscrew 2 bolts from the yoke, on each stay, and pull the shock absorber out of the yoke.
The shock absorber is made up of a glass (10), two bushings: the top (through (5)) and the bottom (blind (8)) made of fluoroplastic (coprolon), a rubber bumper (9), a retaining ring (4), anther (3) , a plug (1), 2 springs (6), a spring stopper welded onto the feather (7) and the feather itself (2). To disassemble the removed shock absorber, you need to pull out the boot and retaining ring, and if there are no problems with the first, then you may need to rummage around with the other. There are 2 lugs at the ends of the locking ring; you need to insert two awls into them, squeeze and then remove the ring.
After this, the feather should quietly crawl out of the glass, but it happens that the upper sleeve sticks to the glass and does not allow the feather to be pulled out. All methods are good here - WD-40 and a little warming up. You may have to crush it and pull it out in pieces.
Features of moped tuning
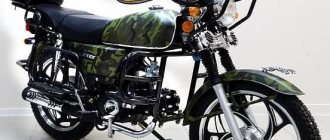
The alpha moped is one of the most popular mopeds today. Its popularity is due to its low price and the large number of opportunities it gives its owner. Most often, models with an engine capacity of 100-125 cm3 are chosen for purchase. This power is enough to accelerate the moped to 100 km/h and feel comfortable
Alfas are also famous for their low fuel consumption, which is also very important. But, perhaps, the main advantage of this moped is its maintainability, because there is not a large amount of electronics, and all power units, in principle, are quite simply designed
In general, the alpha moped is a pretty good motorcycle for rural areas or small towns, where it is much faster and more convenient to travel on two-wheeled vehicles. However, every Alpha owner sooner or later comes up with the idea of modifying and tuning the moped. What to do in this case?
Since I have problems with the “patient”, and the waiting time for spare parts exceeded all reasonable limits, I “opened” with a leaking fork. I covered more than 1k km in less than a week. (for some it’s a small matter, this is the first time I’ve achieved such mileage in a week on a moto). Fortunately, the spare parts arrived, I immediately went and received them, I was afraid to wait for delivery from this store, they might drag it out for another month.
The spare parts sat for a couple of days, and on the third day I decided to go and rebuild the fork. No sooner said than done. In the evening after work I went to the dacha; naturally, I didn’t do anything at night, but in the morning my quest began.
As a preface, I would like to say that I am a beginner in the repair and maintenance of motorcycles, but with cars, my experience in “homemade” repairs has already exceeded 20 years. Well, okay, let's go...
A hot June post-apocalyptic post-quarantine morning has arrived. Such familiar summer sounds could be heard from all sides: the buzzing of flies and horseflies, the chirping of grasshoppers, the chirping of birds... Oh, what am I talking about, I’m lost)))
So: I woke up, got dressed, and drank coffee.
The next step is to disassemble the Babayka. I went out into the yard, put the bike on the center stand, and jacked up the front part to hang the front wheel.
(small note: I’m describing how I did it, but I’ll try not to forget to indicate a more optimal procedure)
First, I disconnected the speedometer cable, unscrewed and hung the brake caliper on the arch. So far everything is simple.
Next I removed the wheel. The process is not complicated, it’s not worth describing, I don’t remember the keys, 17 and 22, I think. I loosened the lower bolts in the stays (a very funny procedure, since the glass constantly tends to spin along with the bolt; I fixed it with the partially inserted axle of the front wheel).
After the wheel came the turn of the “under-clipons”, everything there is hexagonal, again, I won’t tell you the size. And then I saw something that did not make me happy at all, namely, holes for a huge hexagon (14 mm, as it turned out after measuring). There was no such thing in my household at that time.
All the numerous attempts to “invent” a hexagon from improvised means were not crowned with success: bolts turned to size were rolled up, hexagons wrapped in foil were twisted... In a word - trouble.
I really didn’t want to have to walk in the heat to the “auto parts” because... The nearest auto parts store is about one and a half kilometers from the house. But there is no choice, I decided to fry. I won’t describe this hike either, but the result was the acquisition of a 14mm hexagon and the same head. Naturally, I have a head for 14, but it is in a suitcase, it is in the car, and the car is near the house in Moscow)) But at the dacha there are plenty of torque ratchets stored.
I trudged home, took the grinder and tore apart the newly acquired hexagon. You ask - “What for?”, I will answer - if you take a piece of a hexagon, fix it in the head, you will get an excellent hexagonal head that can be safely used with ratchets.
The tool is ready. I loosened the upper fastenings of the feathers, pulled off the plugs and unscrewed them slightly. Then I thoroughly loosened the upper and lower fastenings of the feathers, and finally pulled out the “patients”.
Then everything went much easier. I unscrewed the top plug on one of the feathers (here you should be careful, hold the plug, because the spring is in a slightly compressed state), turned it over, drained the oil while pulling out the spring. Then I removed the boot and unscrewed the bottom bolt. After this action, the “crowbar” came out of the glass without any effort; the retaining ring and the seal remained in the glass. I pulled this out too, no difficulties arose. There was also some kind of washer under the oil seal, I don’t know what it’s called correctly.
I repeated all the actions performed with the left pen on the right one, and ended up with a completely disassembled fork.
I washed everything with kerosene, cleaned it, dried it, dried it and started putting it back together. Again, the process is not difficult, just don't rush it.
I pressed the new oil seals using old oil seals, boots, a rag and a sewer pipe of a suitable diameter. After the seals there are retaining rings; I simply installed them by hand and adjusted them a little with a thin flat-head screwdriver.
I poured in some oil, pumped it, and started adding it to the required level. The manual says that after a complete overhaul you need to fill in 285 ml. oil, but there was nothing to measure the volume, so I used the second option indicated in the same manual: in a fully compressed state with an uninstalled spring, there should be 195 mm from the top of the crowbar to the oil level. Using available materials, I made a probe of the required length, and then “added and measured” several iterations. Then I baited and tightened the plug as far as possible without installing it on the motorcycle.
The process of installing the feathers, wheels, clip-ons, calipers and the rest of the tripe is not very interesting, everything is the same as during disassembly, only in reverse order.
As a result, I got a working fork, a good mood and a new experience that will come in handy someday.
Appearance
And if tuning a moped with an engine may seem too boring, then by transforming the appearance of the “Alpha”, everything becomes much more interesting. In fact, if you are going to make a really decent tuning, then you can’t do without imagination
It is important to imagine the future appearance of the moped - what colors it will be decorated in, what character it will have, aggressive or classic. Make a few sketches, and then you will get a more interesting result.
We will tell you what can be added and modified.
The first, and most common thing, when you are tuning an alpha moped is updating the rear view mirrors. The factory mirrors on the Alpha moped look quite sad, so you can buy new ones. A good idea would be to install mirrors with turn signals, which will not only improve the appearance of the moped, but also make the mirrors more practical.
Speaking of turn signals, the turn signals on the Alpha moped are quite small, although they shine well. There is nothing stopping you from updating them, for example, painting them, changing the light bulb to a brighter one, or simply buying new turn signals. The same applies to the brake light and headlight.
Some people prefer to replace the disks with more interesting ones. Of course, buying and installing new discs is not the easiest option, but the result will be much more noticeable than, for example, replacing turn signals. In general, the wheels of a moped play an important role in the appearance, so if you choose some unusual wheels, the result can be a completely new look.
Downloads
When braking and changing gears, you should ALWAYS try to sit as far away from the tank as possible, resting your knees on the tank. The landing helps load the rear wheel, which is unloaded by braking at the front, and helps the torque limiter work. If you are sitting in the back, the likelihood that the rear wheel will start jumping when shifting down is significantly reduced.
There are a lot of myths regarding gear shifting. Simple rules:
- the faster you shift, the less you wear out the clutch;
- the higher the rpm, the faster you shift;
- you can and should slow down with gears;
- you can move from 5th to first gear (understanding why this is necessary and what will follow);
- you can and should shift at high speeds;
- Shifting gears without a clutch causes minor wear to the fork and camshaft.
Shifting up gears with clutch
To understand the upshift technique, perform the following experiment. Drive in second gear with the throttle slightly turned off. Now, without closing the gas handle - squeeze the clutch - you will see how the revolutions instantly rise. Close the throttle. When the load in the form of the rear wheel disappears, nothing prevents the engine from spinning up and the speed increases rapidly. That is why speed in gear shifting plays an important role. If you shift quickly, then you may not close the throttle; at the moment when the clutch is depressed, the speed rises and immediately the gear shifts up and the clutch returns. If you do this quickly, then the revolutions rise by only 1000-1500 to provide optimal conditions for upshifting with the clutch.
To change gears up with the clutch, you need to quickly squeeze the clutch, shift up and release the clutch so that the revolutions at which the next gear is engaged do not exceed the revolutions of the gear from which you are shifting by more than 1500. If you do this slowly, you need to close the throttle at the moment when the clutch is depressed, if quickly, you can hold the handle in the same position or barely close the handle. An important criterion is the speed at which you started shifting up and the difference between the speed at which you depressed the clutch and at which you released the clutch - the difference should not exceed 1000 - 1500 revolutions. With practice, gear shifting will become automatic and will not require attention.