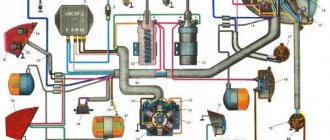
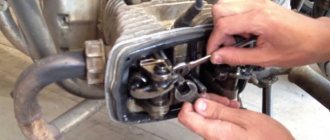
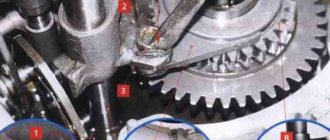
Some motorcyclists, owners of not only Stels SB 200, Racer Skyway 200, but also absolutely any other Stels, Racer, Patron, Irbis, Minsk, Omaks, Lifan and any other motorcycles, may encounter an unpleasant situation when the bike does not start. And there is only one symptom: something explodes. In this article we will help you deal with this problem.
First, let's describe this situation in detail. Approach the bike, turn the ignition key, press the engine stop button. Then press the electric start button. And instead of starting the starter and, of course, the crankshaft, you hear an unexpected crack somewhere inside the motorcycle. Also, you can see on a voltmeter (if your bike like the Stels SB 200 has a voltmeter) how the voltage drops. So what's the problem?
If you start to disassemble the bike and look for the source of the crackling noise, you will hear it from the starter relay. This is exactly what comes out. There may be two reasons. Let's start with the most common reason: low battery charge. It may seem to you that this is nonsense, because you recently charged the battery or some other reason not to believe it. But trust me and charge the battery well. You can read about how to properly charge the battery on our website. After this you will be able to start the motorcycle. If the battery is constantly draining while riding and as a result the motorcycle does not start at some point, it is recommended to check the charging relay.
If you still cannot start your motorcycle with a properly charged battery, a less common problem is poor contact in the wires that make up the engine starting system. These are wires from the battery to the relay, from the relay to the starter and ground to the frame and engine. It is necessary to inspect all wires for good tightening and clean contacts.
Thus, you will solve the problem of the Stels SB 200 motorcycle not starting, which is accompanied by an accident. Check the technical condition of your motorcycle regularly.
If you just hear a loud cracking sound when you turn the ignition key from the engine compartment, do not rush to immediately blame the starter for all your troubles. There may be several reasons for this phenomenon, and failure of the starter solenoid relay is only one of the most common malfunctions. Today we will talk about why the starter started to break down and what to do to restore its functionality.
Main starter relay
The car's electric starting system includes, in addition to the starter and relay, also starter on/off elements, various connecting wires, the main power source (battery), etc.
The starter relay or VR is activated after turning the key in the ignition switch. The BP armature and the freewheel lever move, and the bendix engages with the flywheel crown. This ensures normal engine starting.
To be able to adjust the system, you need to disconnect the current wiring from the VR. The control terminal is marked on the terminal with the letter M.
Then the battery is removed from its original place and connected to the M and S terminals marked on the terminals. Thus, the purpose of the operation performed is to shift the bendix. And in order to connect the BP to the starter, you must first adjust the gap between the bendix and the stop. It is also recommended to adjust the gasket located between the drive and the BP.
Emergency engine starting methods
When the starter does not click or make any sounds at all, the engine can be started if it is closed “directly”. This is not the best solution, but in cases where you need to go urgently and there is no other option, you can use it.
Let's consider the situation of how to start the engine directly using the example of a VAZ-2110 car. So, the sequence of actions will be as follows:
- engage neutral gear and set the car to the handbrake;
- turn on the ignition by turning the key in the lock and open the hood, since we will carry out further actions in the engine compartment;
- remove the air filter from its seat and move it to the side in order to get to the starter contacts;
- disconnect the chip going to the contact group;
- use a metal object (for example, a screwdriver with a wide flat blade or a piece of wire) to short-circuit the starter terminals;
- as a result of this, provided that the other components listed above are in good working order and the battery is charged, the car will start.
After this, install the chip and air filter back. An interesting fact is that in most cases the engine will continue to be started using the ignition key. However, you should remember that the breakdown still remains, so you need to look for it yourself or go to a car service center for help in order to fix it.
Emergency engine start
We offer you another method that will be useful to you if you need to start the engine in an emergency. It is only suitable for front wheel drive passenger cars with manual transmission! The algorithm of actions is as follows:
- it is necessary to jack up the car by hanging any of the front wheels;
- turn the hung wheel outwards all the way (if the left wheel - then to the left, if the right wheel - then to the right);
- wrap a tow rope or strong rope around the surface of the tire 3-4 times, leaving 1-2 meters free;
- engage THIRD gear;
- turn the key in the ignition;
- pull strongly on the end of the cable, trying to spin the wheel (it is better to do this not in place, but with a slight run-up);
- when the car starts, first of all set the gear to neutral (you can do this without pressing the clutch pedal) and wait until the wheel stops completely ;
- lower the hanging wheel to the ground.
Additional VR starter
On modern cars, an additional VR starter is a priori provided. On older cars, the relay is installed and connected independently.
The advantages of installing an additional VR are obvious:
- Protects the starter device from burnout of contacts in the lock, which occurs for various reasons (long start-up, banal wear, etc.);
- It has a positive effect on the loading of contacts of the same ignition switch, as a result of which the contacts remain operational longer;
- Protection of the starter from a situation where, due to a “glitch” of the key in the ignition switch (the engine has started, but the starter continues to spin).
You can check whether the additional VR is installed on the car like this:
- Look in the “black box” (fuse box);
- Turn on the starter device in the engine purging mode - if the additional relay is on, then the starter must turn off on its own after a few seconds.
Connection of additional VR
Here's how to connect:
- Fix the relay in any convenient place (you can on the stud of the glass cleaning fluid reservoir);
- Connect the cable to the starter;
- Remove the red wire from the flat terminal of the main relay, and in its place insert the wire from the additional VR;
- Connect the other wire of the new BP with an 8 mm tip to the positive of the starter;
- Place contact 30 of the additional VR onto the released contact of the main VR;
- Screw the short wire numbered 85 to the body (ground).
Additional relays can be purchased in stores. They are sold as a kit, where everything is provided for proper self-installation.
Forget about fines from cameras! An absolutely legal new product - NANOFILM, which hides your license plates from IR cameras (which are installed in all cities). More details at the link.
- Absolutely legal (Article 12.2.4).
- Hides from photo and video recording.
- Installs independently in 2 minutes.
- Invisible to the human eye, does not deteriorate due to weather.
- 2 year warranty
Starter relay description purpose device repair photo video
Share “Starter relay description purpose device repair photo video”
The movement of any car begins with starting the engine . If you want to understand the principles of operation of the main components of a car, we recommend starting your study with the starting system.
One of the most vulnerable points of this system is the starter relay. Almost everyone has heard about this detail, but not many understand the principle of its operation. Before we start talking about the starter relay, it is worth noting that the design of the car simultaneously has two parts with the same name, only the first is responsible for turning on the starter, it is usually located in the engine compartment, and the second is the starter solenoid relay.
Motorcycle starter and its repair
The main starter malfunctions may be the following. When the starter is turned on, the traction relay does not operate and the armature does not rotate.
It is also possible that there is an inter-turn short circuit in the winding of the starter traction relay, a break or short to ground, a jamming of the traction relay armature, and no one can rule out a malfunction of the contact part of the switch.
When the starter is turned on, the traction relay is activated, but the armature does not operate or does not rotate intensively enough. The reasons may be:
To check the functionality of the starter traction relay, a voltmeter or ammeter is inserted into the power circuit of the traction relay winding, and a gasket with a thickness of 12.8 to 15.0 mm is installed between the restrictive ring and the drive gear. The thickness of the gasket depends on the type of starter. Then the relay is turned on. The winding supply current should not exceed 23 A, and the voltage should not exceed 9 V. If these values are higher, it means that the relay or starter drive windings are faulty. If there are deviations in the operating parameters of the starter from the nominal ones, the winding must be checked to see if there is a short circuit in it.
WHAT IS A STARTER RELAY
So, let's start with the basics. Two relays are responsible for the starter. The first is installed in the engine compartment. The design can have its own housing or be installed in a common unit.
In this article, we will be much more interested in the second relay, which is responsible for the operation of the starter, namely the retractor. It performs the following functions:
- redistributes energy between the starter and the electromagnetic relay;
- feeds Bendix gears;
- synchronizes the starter components,
- returns the gears to their original position after you turn off the engine.
In the automotive world, this unit has two names: traction and retraction. The first is most often used in specialized literature, the second is popular.
To understand why a starter solenoid relay is needed, let’s look at the engine’s operation schematically. To start the engine, the crankshaft must begin to rotate. Only after this does the fuel-air mixture ignite in the combustion chamber.
Usually the engine starting process takes place within a second. The role of the relay in it is quite simple. Thanks to it, the gear elements engage with each other. It synchronizes the operation of the starter. This unit also removes the bendix from the flywheel.
Selection of parts
The best option is electric starters from the Kherson plant, which are used in tractor starting engines, as well as in small-class boat engines. However, you need to be very careful in choosing components - components marked ST353, 367 or 369 are suitable for the Ural. You should not purchase the ST366 starter, which was installed on the Zaporozhets - it has a reverse direction and a different shape of the Bendix casing, incompatible with a motorcycle engine . For such an electric starter, you should purchase a crown from the Buran snowmobile - it requires only minimal modification. Be careful - you need a unit with a top-mounted retractor relay, since, being located at the bottom, it will interfere with changing the oil in the engine.
It is also possible to install an electric starter from a VAZ-2109 car or a more modern unit from a VAZ-2110, but in this case you will have to make the crown yourself, using a professional metalworking machine. To create a spare part, it is better to use steel grade 40-X or another that meets the hardness standard 35-42 HRC/E. For imported motorcycles, the electric starter must be selected especially carefully - many owners of two-wheeled equipment say that components from industrial generators or powerful garden equipment are a suitable option. However, you will definitely have to grind the crown for the starter yourself, since unification is a distinctive feature of domestic motorcycles.
Main components and operating principle of the engine starting system
To understand the operation of the starting system, it is worth first considering the design of the car starter. The purpose of the starter is to start the engine. The starter device for all cars is identical, they differ only in size or parameters. So, the design consists of the following required elements:
- Electric DC motor;
- Bendix;
- Starter solenoid relay.
The main role here is played by the electric motor, and the bendix and starter relay are auxiliary elements. The electric motor includes standard elements such as a stator, a rotor, and a starter brush assembly. Bendix, even the smallest detail, plays a very important role. It is necessary to transmit rotation from the electric motor to the gear ring of the engine flywheel, thereby ensuring starting.
Until 2000, the bendix was located on the same shaft as the rotor, and then a new arrangement appeared, where the bendix began to have its own separate shaft and rotate through a gearbox.
That’s why we sometimes hear the name “gear starter”. The starter retractor relay is a more complex element and performs several functions at once:
- Redistribution of electricity supplied from the battery between the electric magnet of the starter relay and the electric motor;
- Synchronization of the operation of all components when starting the engine;
- Feeding the Bendix gear until it engages with the flywheel ring gear;
- Returning the working gear to its original position after starting the engine.
The principle of operation of the starter is as follows: in order to start the car engine into operating mode, it is necessary to forcibly rotate the crankshaft until the fuel mixture in the cylinders begins to burn.
Typically, it takes quite a bit of time to start a working engine. The task of the starter retractor relay is to maintain the engagement of the Bendix gear with the flywheel and rotate the crankshaft equally until the start occurs. No more and no less. If you hold it longer, you can break parts, and if you hold it longer, the engine won’t start.
DIY tuning
The starter installation procedure described above requires fairly good skill and special equipment. Therefore, if you do not have an argon welding machine or a lathe, you should find out in advance where you can use the services of professionals of the appropriate profile. All manufactured fastening parts and gears must have minimum tolerances, since the reliability of the installed electric starter depends on this. The starter itself must be in good technical condition - to make sure of this, it is worth checking the bushings and shaft. If all these conditions are met, the electric starter will serve you for many years, providing maximum convenience for starting your motorcycle engine.
DIAGNOSTICS AND REPAIR
CHECKING THE SYSTEM
Before checking the solenoid relay, you need to test the starter itself. This check will allow you to understand what exactly is not working in the system. Insert the key into the ignition and turn it.
Next you will need to open the hood and get to the starter. You must make sure that this is the case. To do this, bridge the two contacts. They are made in the form of two copper bolts. These structural elements are attached to the rear of the solenoid relay (on the body). If, after the manipulations you have performed, the mechanism rotates, then the problem is in the solenoid relay.
In some cars, reaching the starter is very difficult, and sometimes even impossible. In this case, you will have to partially disassemble the system and dismantle the device itself.
After removing the starter, place it on the ground. Place the battery nearby. Connect the leads of the two devices. In this case, the battery ground is connected to the starter ground.
When the wires are connected, the starter solenoid relay will operate. At first there will be a rather loud click. If the mechanism operates too slowly, be sure to check the contacts. This situation may be caused by the fact that they are burnt.
To the operating room!
Let's look at repairing a failed starter using the example of the Honda XR250 Baja. Fortunately, there is no lining on the motorcycle, and the part we are interested in is easily accessible.
Place the device on the stand. To get to the starter, remove the exhaust pipe. To do this, unscrew the four nuts on the flanges of the pipes. The bolt on the clamp just needs to be loosened.
Opening the starter. Remove two bolts. Both housing covers are removed, the armature easily comes out of the rotor (this is a permanent magnet). Be careful and prudent: do not confuse the order of the washers on the armature shaft!
Checking the retractor relay with the starter removed
It is more convenient to check the functionality of the relay with the starter removed. But before dismantling, several operations are performed to identify the problem:
- Check the reliability of the terminals, the condition of the battery, remove oxides from the contacts and terminals of the battery.
- Make sure that the wiring is securely fastened to the starter with nuts. If corrosion is noticeable, clean the contacts with fine sandpaper.
- Check the condition of the starter enable relay.
The starter is removed after disconnecting the wires that go to it and unscrewing the mounting bolts. In some cars, this operation will take a lot of effort, since the unit may be located in a poorly accessible engine compartment.
After removing the starter, it is cleaned of dirt, the oxidized contacts are treated with sandpaper, and the test begins in the following order:
- The unit is placed next to the battery, from the terminals of which there are wires with “crocodiles”.
- The positive and negative terminals are connected to the corresponding contacts on the retractor.
- The free end of the negative wire is touched to the starter housing and the result is observed:
- If there is a distinct click in the relay, then it is working;
- If the retractor does not show “signs of life,” it needs to be replaced or repaired.
WHAT DAMAGES CAN BE IN THE EXTRACTOR RELAY
Usually the whole problem lies in burnt contacts or their sticking; other faults include:
- coil burnout,
- mechanical damage,
- natural wear and tear of parts.
In the latter case, the starter solenoid relay will need to be replaced. There are a number of signs that most likely indicate that the problem is in this particular node, these include:
- After the engine starts, the starter continues to operate. This is indicated by a clearly audible buzzing sound.
- When you turn the key in the lock, you can hear a distinct clicking sound. This means that the main system starts, but the starter does not work.
- When you turn the key, the starter idles. The engine remains inactive.
These signs most likely indicate that the malfunction is related to the starter solenoid relay.
HOW TO CONNECT
Many motorists are afraid that after they repair the solenoid relay, they will not be able to connect it. In reality, the connection diagram is quite simple. Moreover, you compose it yourself.
To carry out reverse dismantling, you must first mark the disconnected terminals. This will allow you to connect everything correctly after the repair is completed. Also, before installing the relay, you need to clean the contacts. For degreasing, use a modern liquid sold in automotive stores.
REPAIR
It is worth recognizing that on machines of the same series, the starter solenoid relays are very similar. The most striking in this context is the following automobile line:
In principle, all starter solenoid relays have the same design. Accordingly, their repair process is similar. The main differences lie in the fastening systems. Also, cores can have different designs. But the general scheme is very similar.
So, in order to repair the starter solenoid relay, you first need to dismantle and disassemble it. Here, in fact, lies the main problem. In most cars, these units are non-separable. All that remains for the driver in this case is to make a replacement.
This is interesting: Installation diagram of window lifter cables for UAZ loaf
It is very important to maintain a clear sequence during repairs. Otherwise, you risk not only damaging the part or other systems, but also getting injured. The process itself consists of the following stages:
- Disconnect power from the battery.
- Clean the part from dust and dirt. Otherwise, foreign particles may get inside the unit, causing damage to it.
- Unscrew the brush assembly nut.
- Remove the contact from the bolt.
- Unscrew the clamping screws. They are the ones that connect the relay to the ground of the car.
- Unscrew the ends of the nuts.
- Divide the device in half.
- Replace the core.
- Reassemble.
Before putting the device back into the car, start it. Reinstallation should only be carried out after preliminary testing. Once everything is assembled, do a few test runs. Only after this go on the road.
WHAT ELSE CAN BROKE?
Most damage to the solenoid relay is associated with the burnout of certain of its elements. Most often, electromagnetic circuits burn out. Windings and contacts are also subject to similar destruction. In some cases, the cause of failure is metal fatigue.
However, ignition problems are not always associated with the starter or solenoid relay. If the repair does not give the desired results, check the electrical circuit. Also look at how much charge the battery has.
Every car owner can check and repair the solenoid relay. The process itself does not take much time, and its complexity in most cases depends on how conveniently the starter is located.
Share “Starter relay description purpose device repair photo video”
How to Check the Starter Relay on an Alpha Moped
ELECTRONICS OF ALPHA AND DELTA MOPEDS Due to the fact that more and more owners of devices with engines of the 139FMB type and lights at recess are faced with six-coil generators (replacing the motor or preferably a more powerful generator), there is a need to write this article. First, let's figure out what the differences are. The picture shows a diagram
The electrical equipment of the mopeds under consideration consists of a source and consumers of electronic energy, auxiliary devices and an electronic network. Electrical equipment ensures timely ignition of the working mixture in the engine cylinder, operation of lighting devices and
The most popular scooter in Russia and Ukraine is the Viper Active. And here everything is very simple, a decent appearance, an established network of product suppliers, a reasonable price and a truly bassy and beautiful exhaust sound, which is sometimes misleading, and creates the memory that the Viper Active is installed on
about all the electronics on a moped. In this video we will tell you in general terms how the wiring in the bike works. Enjoy watching. Wiring on Chinese mopeds Alpha, Delta and its repair
Drawings and photos of electrical circuits of mopeds. I sketched out a few things for anyone who needs to figure it out! There are also 2 types of voltage regulator: 4-pin and 5-pin. The diagrams show only 4-pin. Generators for them are different. You can find a generator for a 5k regulator by the fact that it does not have windings
1 Ignition module (CDI) 2 Ignition coil 3 Spark plug 4 Alternator 5 Voltage regulator 6 Battery 7 Fuse 8 Starter 9 Start button 10 Start relay 11 Tachometer 12 Ignition switch 13 Brake light 14 Transmission neutral indicator 15 Instrument panel backlight 16 Headlight
Starter relay for Chinese motorcycles and scooters - alternative replacement
The purpose of the video is to save the nerves and money of the owners of Chinese motorcycle equipment to check
your relay
maybe from the link.
How to check the starter relay on a scooter
Main tasks of the relay
. Problems with the electric starter itself are not considered.
The “Delta”, “Alpha”, “Leader” and “Mustang” mopeds use a 12 V battery with a capacity of 2.5, 3.0 or 5.0 A/h (Table 6.1). Inside the case, the battery is filled with a chemical reagent and electrolyte. Battery maintenance involves periodically checking the level and density of the electrolyte.
The source of electricity for mopeds is a generator (magneto), the rotor of which is mounted on the left axle of the engine crankshaft. Flywheel type generator, alternating current, with excitation from permanent magnets. To diagnose a generator, special equipment is required. Disassembly
One of the main elements of the moped's electrical system is the voltage regulator-rectifier. The appearance of the voltage regulator-rectifier is shown in Fig. Rice. 6.6. The voltage regulator-rectifier performs two functions: it ensures the voltage in the moped network within the range of 12.0-14.5
The Delta, Leader and Mustang mopeds use a contactless CDI ignition system. The CDI ignition system eliminates the weak link of the traditional ignition system
, i.e. wear out quickly and require frequent adjustment of breaker contacts. The abbreviation "CDI" comes from the first letters
Spark plugs (Fig. 6.11) recommended by the manufacturer for A7TC or A7RTC SX four-stroke engines. Analogues of these spark plugs are NGK C7HSA or NGK CR7HSA, Champion Z9Y. The technical characteristics of the spark plug are given in table. 6.9. The gap between the spark plug electrodes should be 0.6-0.7 mm. Regulatory replacement
The electromagnetic sensor of the ignition system (Fig. 6.12) is located on the stator mounting plate in the left engine cover. Checking the electromagnetic sensor of the ignition system You can test the electromagnetic sensor of the ignition system without removing it from the engine; for this you need to: measure
The starting system includes the starter, starter relay and starter drive. The appearance of the starter is shown in Fig. 6.13. The starter is a mixed-excitation DC electric motor and is designed to start the engine. On mopeds “Alpha”, “Delta”, “Leader”, “Mustang”, etc. can be installed
The starter is removed in the following order: placing the moped on a flat surface, disconnect the “-” terminal from the battery; disconnect the terminal wire from the starter (Fig. 6.17); Unclench the spring ring lock with pliers and remove the starter sprocket along with the chain from the splines (Fig.
If the starter does not turn when you press the start button, you can check
, connecting directly to the power source (Fig. 6.20). With this connection, the starter should rotate. If the starter does not rotate, you need to disassemble the starter housing and check the starter parts: brush length
Car starter connection diagram
A lot of time has passed from the time the car was created, or rather the introduction of a starter into it, to the present day, but the scheme has remained virtually unchanged. The first connection diagram for the starter looked approximately as shown in the figure below, now it has changed a little, which I will explain below.
The battery positive (1) is connected by a thick wire to the starter terminal (3). The starter current at start-up can reach hundreds of amperes. Next, the plus, through the generator (2), is supplied to the ignition switch (5). After closing the ignition switch contacts, the intermediate relay coil (4) is energized, which closes its contacts. One of the relay contacts is connected to the positive wire, therefore, after their closure, the windings of the solenoid relay are energized. We will look at how the starter and solenoid relay work in another article.
Such schemes were used in Soviet-made cars; foreign cars, if they used them, moved away from such schemes very quickly. The first starters were massive and had low efficiency. Consequently, the control circuits required the same not small currents. An intermediate relay is used to pass these currents. Modern starters have less power. This was achieved by using permanent magnets on the stator poles and installing a step-down gearbox on some models. This made it possible to get rid of the intermediate relay and supply voltage from the ignition switch directly to the coils of the solenoid relay.
Computer keyboard circuit Starter blocking device Simple starter blocking Power supply for 9-volt radio equipment from the car's on-board network Circuit of a desulfating charger Simple stabilized power supply with super-available parts Laboratory power supply controlled by a microcontroller Laboratory power supply from an AT power supply Power supply from an uninterruptible power supply
Motorcycle starter lock
Bibliographic link to the article:
// Modern equipment and technologies. 2012. No. 5 [Electronic resource]. URL: https://technology.snauka.ru/2012/05/946 (access date: 04/12/2021).
Ph.D. tech. Sciences Gumelev V.Yu.,
Ph.D. tech. Sciences Kartukov A.G.,
The starter blocking relay 2612.3747 is used to automatically turn off and block the starter when the engine is running. It is installed on engines of vehicles of the KamAZ and URAL families [1, 2].
The appearance and installation of the relay in the cabin of the URAL-4320-31 car are shown in Figures 1 and 2. The relay is installed to the left of the steering column under the instrument panel.
a – appearance of the relay; b – arrangement of elements on the circuit board
Figure 1 – Starter interlock relay 2612.3747
a – relay mounting; b – placement and connection of the relay using a plug connector
How to make a start button instead of an ignition key in a car with your own hands
Oddly enough, this issue very often worries motorists and not only for aesthetic reasons - in the spirit of the times. The contact group located behind the ignition key very often fails, and changing it is far from an easy task.
In older cars, often the wires from the starter itself are connected directly to contacts inside the contact group, which close when the ignition key is turned. When the starter is activated, a very large amount of energy is consumed, which means a large current flows (the contacts strike a spark). Over time, a burnt deposit forms on the contacts or they completely burn out, no longer providing reliable contact. Newer vehicles have a separate relay that closes the starter contacts when the ignition key is turned.
The starter clicks but doesn't turn over
Inspection of starter brushes on VAZ-2110
Very often, when the starter malfunctions, it is not the mechanism itself that is to blame, but its retractor relay. It is important to understand that when you turn on the ignition, it is not the starter that clicks, but the mentioned relay. Malfunctions consist of one of the following reasons:
- Failure of the power wire that connects the starter windings and the traction relay. To solve the problem it is necessary to replace it.
- Significant wear on starter bushings and/or brushes. In this case, they need to be replaced.
- Short circuit on the armature winding. You can check this using a multimeter. As a rule, the winding is not repaired, but another starter is purchased and installed.
- Short circuit or break in one of the starter windings. The situation is similar to the previous one. The device needs to be replaced.
- The fork in the bendix is broken or deformed. This is a mechanical failure that is difficult to fix. The optimal solution in this situation would be to replace the bendix or the fork separately (if possible).
The main advantages of using a relay in the starter power circuit:
— Such a system is more reliable, since the relay is designed for high currents and lives much longer. — The relay can always be replaced — The contact group behind the ignition key works for a very long time, since it only turns on the relay that takes the main load.
Regardless of whether your starter is turned on by a relay or directly by a contact group, all operations to connect the starter are still performed by turning the key.
First you need to determine which contacts are responsible for the start and connect them to the start button.
To do this, you need to disassemble the plastic protection under the steering wheel of your car. Very often, a connector with all the necessary wires is connected to the contact group of the key well at the back. There should be locking tabs on both sides of this connector. You need to press on them and pull out the connector.
If you have an old car, inspecting the contact group connector you will most likely find the two thickest wires. Very often one of them is red - these wires are directly connected to the starter. If you connect them with the ignition key turned, your starter will most likely start spinning.
Then you can go the simple way. You can simply install the button and connect these two wires to it, placing the button in a place convenient for you. The button should be non-latching, that is, when pressed, it should close the contacts, and immediately after you release it, open it.
Do not forget that you will operate the button in the same way as a key. We press the button, wait until the starter spins, and as soon as the engine starts, release the button.
But do not forget that very large currents will pass through the button and most likely such a button will burn out.
We used a vandal-proof chrome button - it failed after about half a year.
If you have a newer car and the starter in it is connected using a relay, you will need to find among the many wires exactly those that are responsible for controlling the relay.
To do this, you can ring the tester in resistance measurement mode on all the wires on the car body. All wires that ring are marked as ground (or minus), since they are all shorted to the body.
Next, touch each of the remaining wires with one tester probe and the other probe to the body in voltage measurement mode.
We need to find the wire on which 12 Volts appears exactly at the moment you turn the key, that is, when your starter starts spinning.
If you find this contact, you need to check how the system works.
— Find some kind of contact on which, relative to ground, there is always 12 Volts.
— Turn the ignition key to ignition mode (the starter must be turned off)
— Check again the wire you found:
* check that it is not connected to ground and is not short-circuited to the body,
* check that voltage appears on it when you turn the key to the starter mode
- Now try using a separate wire to connect the wire that you found in the paragraph above to the wire that always has 12 Volts.
If after connecting your starter turns over, then you have found the wires that connect when you turn the key so that the starter turns over.
Your work is finished here. You just need to bring these wires to a convenient location on the dashboard and connect the button to them.
If your car is an old model, it is best for you to install a separate relay to turn on the starter and close only the relay contacts, which in turn will connect the starter contacts.
You can see which contacts are responsible for what on the relay body, or you can open it and see how it works.
Oddly enough, it makes absolutely no difference where to connect + (plus) and where - (minus) on the contacts of the relay coil - in any case, it attracts the desired contact and connects the line.
That is why you can use the positive contact with 12 Volts already connected to the relay. It can be connected to the coil contact. Accordingly, the second contact is connected to ground through the button.
It is these two wires - minus (ground) - the second contact of the coil that must be brought out in a place convenient for you and the button connected to them.
The remaining relay contacts for the main line must be connected to the wires on the contact group that connect the starter.
Don't forget about high power when connecting these wires. The wires must be very thick and the connections very secure.
The wires can be directly soldered to the relay contacts, but most likely this will be a mistake, since it will be quite difficult to replace it later. In our case, when heating the contacts with a soldering iron, they melted the plastic body of the relay and moved, closing the contacts inside the relay.
It is best to find a remote connector for such relays, which is sold separately. Unfortunately, it does not please with its reliability or quality of workmanship.
The wires on the connector pins are very thin and very difficult to hold on to. We recommend that you remove each pin and solder secure thick wires to them.
For convenient connection, you can attach screw terminals to the wires.
It is best to place the relay in a place where it will be convenient for you to reach it later to replace or check the operation of the system.
Remember that you do all the above actions at your own peril and risk; we do not recommend that you undertake such complex electrical work if you do not have skills in electrical engineering. We wish you good luck in all your endeavors.
Troubleshooting motorcycle electrical equipment
The hit parade of malfunctions in motorcycle electrical equipment is as follows:
1. Poorly screwed battery terminal.
Symptoms: The motorcycle shows no signs of life at all, or the instrument panel lights up, but when you press the starter button, the relay clicks and everything goes out (if an alarm system with an autonomous siren is installed, it starts screaming).
Reasons: Even a well-tightened terminal can come loose when driving on bad roads. If it's not tightened well, it will come loose anyway. A weak current still flows through the poor contact, but the high current required to operate the starter leads to sparking and complete loss of contact.
Treatment: Tighten the battery terminals securely. Poor contact at the terminals leads us to the following malfunction.
2. Low battery
Symptoms: The starter turns poorly, the sound signal is barely audible. The battery voltage is below 12.4V. (During starter operation – below 8-9V). If an alarm system with an autonomous siren is installed, when you press the starter button, it starts screaming.
Reasons: Old battery, long-term storage in a discharged state, undercharging due to oxidized wiring, malfunctions in the generator or relay regulator.
Treatment: Charge or replace the battery. You only need to charge the battery by disconnecting it from the motorcycle. The fact is that chargers are usually stabilized in current, that is, they provide the 1 or 5 Amperes we need (depending on the type of battery). There is usually no such control over the voltage, and with a current of 5 Amps the voltage can be 20 Volts or higher. For a disconnected battery, such voltage does not pose any danger. On the contrary, you can try to pump up a battery that does not want to accept a charge by briefly increasing the voltage to 25V. But for other electrical devices on a motorcycle, such voltage can be fatal. If the new battery is soon discharged again, it is necessary to diagnose the electrical equipment and troubleshoot problems. Constantly recharging the battery using a charger will lead either to its complete death, or, what is much worse, to the death of the relay regulator.
3. Overcharged battery
Symptoms: The battery is hot, boils, whistles. The voltage on the battery with the motorcycle turned off is above 13V, and with the motorcycle running - above 15V.
Causes: Malfunction of the relay regulator or oxidized wiring
Treatment: Check all electrical wiring, paying special attention to the ignition switch and the harness connector going from the generator to the relay regulator. Carry out diagnostics of the relay regulator.
4. Short circuit in wiring
Symptoms: The tidy shows no signs of life, the headlight or turn signals do not work.
Causes: A frayed wire, or a sensor connector shorted to ground, a turn signal broken off in a fall, etc. Despite the simplicity of the malfunction, it can be quite difficult to find the cause, especially if the short circuit sometimes appears and sometimes does not.
Treatment: Check fuses. The main fuse is usually installed directly on the starter relay, connected by a thick red wire to the battery. The remaining fuses are collected in a neat block, on the cover of which it is written which fuse is responsible for what. Having determined which fuse has blown, we narrow down the area of troubleshooting that must be found. After all, a frayed wire can cause a fire. Never use bugs instead of fuses!
Procedure for checking the electrical equipment of a motorcycle.
How to connect a starter relay: rules for connecting a relay
As you know, normal functioning of a car is impossible without a good and clear start. When setting up the electric starting system of a car, great importance should be paid to the “starter-relay” circuit. It is important to know how to connect the starter relay so that no difficulties arise in the entire starting system.
Main starter relay
The car's electric starting system includes, in addition to the starter and relay, also starter on/off elements, various connecting wires, the main power source (battery), etc.
The starter relay or VR is activated after turning the key in the ignition switch. The BP armature and the freewheel lever move, and the bendix engages with the flywheel crown. This ensures normal engine starting.
How to properly connect the starter relay
To be able to adjust the system, you need to disconnect the current wiring from the VR. The control terminal is marked on the terminal with the letter M.
Then the battery is removed from its original place and connected to the M and S terminals marked on the terminals. Thus, the purpose of the operation performed is to shift the bendix. And in order to connect the BP to the starter, you must first adjust the gap between the bendix and the stop. It is also recommended to adjust the gasket located between the drive and the BP.
Additional VR starter
On modern cars, an additional VR starter is a priori provided. On older cars, the relay is installed and connected independently.
The advantages of installing an additional VR are obvious:
- Protects the starter device from burnout of contacts in the lock, which occurs for various reasons (long start-up, banal wear, etc.);
- It has a positive effect on the loading of contacts of the same ignition switch, as a result of which the contacts remain operational longer;
- Protection of the starter from a situation where, due to a “glitch” of the key in the ignition switch (the engine has started, but the starter continues to spin).
This is interesting: Wiring diagram for VAZ 2114 power windows
How to connect the additional starter relay
You can check whether the additional VR is installed on the car like this:
- Look in the “black box” (fuse box);
- Turn on the starter device in the engine purging mode - if the additional relay is on, then the starter must turn off on its own after a few seconds.
Connection of additional VR
Here's how to connect:
- Fix the relay in any convenient place (you can on the stud of the glass cleaning fluid reservoir);
- Connect the cable to the starter;
- Remove the red wire from the flat terminal of the main relay, and in its place insert the wire from the additional VR;
- Connect the other wire of the new BP with an 8 mm tip to the positive of the starter;
- Place contact 30 of the additional VR onto the released contact of the main VR;
- Screw the short wire numbered 85 to the body (ground).
Additional relays can be purchased in stores. They are sold as a kit, where everything is provided for proper self-installation.
How to pay TWICE LESS for GASOLINE
- Gasoline prices are rising every day, and the car's appetite is only increasing.
- You would be happy to cut costs, but is it possible to live without a car these days!?
But there is a completely simple way to reduce fuel consumption! Don't believe me? An auto mechanic with 15 years of experience also didn’t believe it until he tried it. And now he saves 35,000 rubles a year on gasoline! Read more about this at the link.
The motorcycle won't start...
What could this be and what should I do? Our advice:
FIRST. Pay attention to whether the starter works when you press the button.
If it turns slowly and the lights on the dashboard go out, then most likely your battery is simply dead, look for an option to charge it.
If there are zero such options, try to jump start the motorcycle (read about this below) in order to get to the nearest motorcycle/car repair shop to find out the cause of the malfunction or at least to recharge the battery.
SECOND. The starter doesn't turn at all.
There may be three options:
- The side stand is up and the bike is in gear. It happens to everyone) Remove the bandwagon!
- The battery has reached zero - charge the battery.
- There is a problem with the starter or fuse. The solution is either calling a mechanic, or a motorcycle tow truck to a motorcycle service center, or.
THIRD. The starter is operating normally.
We check the fuel valve; if it is suddenly closed, open it.
And, just in case, again it happens to everyone, we look to see if there is gasoline in the tank.
FOURTH. If everything is in order with this, then we look at the spark plugs.
Unscrew the spark plugs. Are they damp and smell like gasoline? This means they are flooded. This can be for two reasons - you filled them or there is a malfunction in the motorcycle.
If you did this, for example, you turned off or started the motorcycle incorrectly, then you can fix it as follows.
Dry the spark plugs, blow them out and heat them. !We do not clean with a wire brush!
Next, put the dry spark plugs in place and try to start the motorcycle. If the motorcycle works, then !hurray! we continue our way.
TIP: purchase and carry a spare set of candles with you; once filled candles can stop working at any time, even if you bought them just yesterday.
If after the above steps the motorcycle does not start, then there is a clear malfunction either in the presence of a spark or in the fuel supply. You will have to take the motorcycle to a specialist motorcycle service center.
The candles are fine, they are dry.
FIFTH. Checking the fuel supply.
Remove the fuel supply hose from the carburetor/injector.
Carefully! There must be gasoline in the hose, and it may be under pressure.
If there is no gasoline there, then the problem is most likely in the fuel pump or fuel tap.
And if you can try to solve the problem with the faucet yourself (rinse, blow out, clean), then it is better to entrust the problem with the gas pumps to specialists, so as not to make things worse.
All these actions led to nothing?
What does it mean “the starter takes over the current”?
The main reasons why the starter can take on current are:
- Lack of good contact on electrical wiring and elements of the ignition system;
- Sufficiently low electrical or high mechanical resistance;
- Failure of the constituent elements (due to the deterioration of the bushings, the armature begins to touch the starter when rotating). This leads to strong heating and destruction of parts. The gearbox also needs to be checked, because it may also need additional lubrication.
Your actions
To understand the true reason, it is necessary to carefully study the mechanism and check all its elements. The first step is to determine the location of this mechanism. Access to it is usually very limited, but you can get it by hand. It is also important to make sure that the battery is charged, since drivers often leave the car with the headlights on, and their work greatly drains the battery.
If the battery is in perfect order, then you should check the starter, for this you will need a power class=”aligncenter” width=”600″ height=”402″[/img] So, a thick wire is supplied from the battery to the starter, which is connected to a large bolt on relay (this is the positive terminal). You need to connect the positive contact of the multimeter to it, as a rule, this is the red wire. And the black wire with a negative contact must be connected to the ground of the car. And when you turn the key in the ignition, check what the instrument display shows. If the battery is working well, the voltmeter will show twelve volts, and the starter will make characteristic clicks. If clicks occur and the display shows less than twelve, then perhaps the reason is not in the starter, but in the battery or ignition switch.
To check the malfunction, you need to purchase a long screwdriver with a well-rubberized handle. Next, you need to disconnect the wire that comes from the ignition switch from the solenoid relay. Next, you need to short-circuit the positive terminal with the bolt from which the wire was removed, using the metal part of the screwdriver. This operation will allow current to be supplied directly from the battery to the relay. The car should start. If you managed to do this, then this means either the lock or the relay is faulty.
If you were unable to perform such a manipulation, this check did not produce any results, then you will have to remove it and deal with it. Before checking the relay, it must be cleaned of various contaminants. Next, connect the starter to the battery. We connect the positive contact of the battery to the relay output, and the negative contact to its body. As a result, a click should occur and the gears should begin to move. This way we know that the relay is working properly. If this operation does not produce results, then the relay must be repaired yourself or purchased a new one. The cost of the relay is not high. If you buy a new one, do not forget to buy the same one (go to the store with the old relay).
After checking the relay, I recommend checking the starter itself. There is a terminal in the place where the relay was; you need to connect the positive alligator clip from the battery to it, and the negative one to the housing. If the gear works, then the reason is in the relay. The second element that may cause poor starter performance is its armature.
The fact is that in a situation where the bendix rotates very slowly, and the battery is fully charged, it is necessary to remove the armature. Next, you need to check the housing winding and the winding short circuit - these are the main reasons for the failure of the starter armature. To check the functionality of this element, you need to use a tester and check the voltage between the windings and the rotor housing. The tester should show at least a million ohms, or even more. If the data is lower, the anchor needs to be replaced.
From my experience I know that checking the bendix, brushes and windings play an important role in the good performance of the machine. If the relay does not work, then it is necessary to check the brushes and the winding. To check, you need to use a regular light bulb (12 Volts) with two wires that are connected to the brush holder and to ground. When checking, the starter must be connected to the battery. If the lights come on, this means that the brushes are faulty. In the same way it is necessary to check the winding.
It is important to remember that if several starter elements break down at the same time, it is advisable to purchase a new one rather than try to replace one part at a time.
If one part fails, then it needs to be replaced. The new part must be identical to the part being replaced. It is not advisable to purchase analogues; this may lead to undesirable consequences in further work.
Video “Checking current leakage”
The recording shows how you can check at home whether there is a current leak on a JEEP car.
Kickstarter: How does it work, what is it?
Modern motorcycles start at the press of a button and do not require any effort to start the engine. But this wasn't always the case - before the introduction of comfort technology, bikers had to work their legs hard before setting off on a journey. The procedure of “kicking” the start pedal marred the mesmerizing ride of racing against the wind, and sometimes led to injury. To avoid such troubles, modern bike fans need to know how to start the engine using the pedal.
The kickstart mechanism consists of several parts and the force applied to the kicker is transmitted to the gearbox, so the system can be divided into two main sections. The first of them is a trigger assembly, which consists of:
• starter gears; • many fastening elements.
These parts transfer the power of the biker's legs to the transmission. The kicker pedal is attached to one end of the kicker arm, and the other goes through the starter cover and is connected to the gear. To prevent the pedal and rod from dangling, it is held in a certain position by a specialized mechanism. It consists of an external spring and a clever starter device that has two built-in hard stops.
Because the kick starter gear moves 180 degrees, it only has teeth on one side
One keeps the kicker arm from rotating 360 degrees clockwise, and the other prevents it from rotating 180 degrees. Between these two points, the pedal operates through a 180-degree range, rotating counterclockwise (toward the rear wheel). The spring tension holds the lever upright and returns it to the upright position after each kick.
All other parts are installed on the main shaft on the transmission side, including:
• starter clutch spring,
• several fasteners for fixing elements.
The starter clutch spring pushes the main shaft gear against the starter clutch, causing the two gears to engage. In this case, the gear of the main shaft of the starting mechanism has teeth on the inner surface, which coincide with similar elements on the starter clutch.
This spare part is equipped with two square keys cut inside. They allow it to be secured to the main shaft, so when the starter clutch moves, the main shaft turns with it. On the left side there is a bearing in which the main shaft is installed. Behind it are located:
• starter clutch spring;
• washer and nut for fixing all elements.
The starter sector gear matches the starter main shaft gear, so when the kicker pedal is pressed, the shaft rotates. At the same time, to prevent the lever from rotating 360 degrees, the gears are connected. Therefore, the main shaft has a turning radius of 180 degrees, that is, it moves between the stops.
The starter clutch and starter main gear are mounted on the transmission shaft.
Another engineering feature allows the starter mechanism to disengage from the starter clutch when the kicker lever is at the 12 o'clock position. The secret is that the two ramps are located on the starter main gear, just inside the outer row of teeth. They line up with two much larger ramps that are located inside the starter cover called the cam disc.
Detailed photo of starter main gear
When the ramps are aligned, the starter main shaft gear moves down and it disengages it from the starter clutch. This allows the main shaft to rotate freely as normal.
Detailed photo of the inside of the starter cover
Proper gear alignment is critical, so engineers marked the two outer teeth on the starter main shaft gear with straight lines on the top. When assembling the gearbox, the first tooth on the starter wheel should be between them on the gears. If you look closely, you can see how the ramps push the starter main shaft gear towards the transmission.
Assembled kickstarter with pedal in vertical position.
Assembled kickstarter with pedal in down position.
When the kicker pedal is turned counterclockwise, the ramps on the starter main shaft are no longer aligned with the ramps on the cam plate. As a result, the starter clutch spring can advance the starter main shaft gear so that it aligns with the starter clutch. This is what the first stage of starting a motorcycle engine looks like - driving the transmission shaft.
Source
How to hook up a button to the starter via a relay and connect
Today, drivers of old cars often want to see a convenient button on the instrument panel that can easily activate the starter. They want such modernization not only for aesthetic purposes, but also for purely practical ones. We will learn from the article how to connect a button to the starter via a relay.
Contact vulnerability
In cars manufactured more than ten years ago, the starter wires are always connected directly to the ignition switch contacts. The engine starts only after the driver turns the ignition key to the extreme position.
This option for connecting the starter is simple and effective. But contacts are always a problem. Moreover, when the starter device is activated, a huge amount of voltage is generated, causing sparking. Where there is a spark, the contacts burn out, oxides accumulate on them, etc. As a result of this, over time, problems arise with starting the engine; motorists are looking for alternative ways to turn on the starter, including directly from the battery.
How to connect a starter via a relay
As you know, in cars of recent years of production, which do not have a button, an additional relay is provided that controls the starter. In this way, the lock contacts are relieved, which now bear less of a load.
- Systems with a separate relay are more reliable because they last longer.
- The ignition switch contacts also “live” much longer.
- An additional relay can always be upgraded.
How to connect a button to the starter
However, the topic of this article is connecting the starter via a button connected to the same relay. How can this be accomplished?
Connecting a button in a car where there is no additional relay
First of all, you should find the contacts responsible for turning on the starter. Then integrate them with the button.
The modernization algorithm generally looks like this:
- The plastic trim under the steering wheel is disassembled;
- There is a connector connected to the ignition switch contacts (as a rule, this connector has locking tabs);
- Press the tabs to release the connector and pull it out.
As a rule, on older cars, after inspecting the connector, two cables with a large cross-section are found. The red one is responsible for controlling the starter.
Note. You can check whether the wiring is really responsible for controlling the starter like this. Turn the ignition key all the way, short-circuit both wires from the removed connector. If the starter turns on, then that's what they are.
- The button is placed in a place convenient for the driver;
- The found wires are connected to it.
How to Start a Scooter with a Chainsaw Starter
Every person has the sun.
About the flycatcher, the bicycle, the Chusovaya River.
An unusual way to start the engine on a Super Sport Acar scooter
A somewhat unusual way to get a 139QMB engine on a Chinese Super Sport Acar scooter
Problems with the new battery (couldn't use the e/starter) and on top of that the starter motor started slipping pushed me to find another way to start the 139qmb in the scooter. I've always been drawn to snowmobile launches. don't stomp. I just lifted and pulled the cord.
Carefully inspect the generator side of the engine with the guard and generator impeller removed and notice that the diameter of the internal generator threads for the stripper matches the threads of the Friendship ratchet. The thread pitch actually differed by about 25 mm. I tried and it wrapped about half a turn. For me, firstly, the main thing was to check the effectiveness. Just holding the chainsaw starter tightly in your hand, and the second one. via cable. The ratchet was engaged and the engine began to turn as needed. He then started having an iron casing protect the impeller instead of plastic.
