Every fan of racing against the wind feels the bike as part of themselves, caring for it and protecting it like a close friend. Naturally, in addition to routine repairs, replacement of chains and oils, the time comes to restore the appearance of the seats to their original condition. This raises the question of what material to choose for upholstering motorcycle seats. We tell you in detail how to avoid making a mistake when choosing it.
Required materials and tools
Before repairing a motorcycle seat, you need to collect everything you need for the job.
List of necessary resources for reupholstery:
- Seat material. Of course, it is best to take leatherette; it is great for all types of designs. However, if desired, any other type of matter that you like will do. So feel free to choose what you think will be perfect. The only thing worth emphasizing is the slipperiness of the material. To avoid falls and discomfort, you should take rough or rubberized material.
- Base (soft part of the seat). Even foam rubber will do for comfortable movement. Any soft base that restores its shape is perfect for these purposes. The layer thickness should not be large. 1-2 centimeters is enough.
- Glue. You need a durable and easy-to-set viscous adhesive. Such as “Moment” will do.
- If the seat is designed for two people and there is a handle (border), then cardboard will be needed to create a durable strap. You can also use a suitcase handle or something similar as a border. Of course, the handle has more of an aesthetic purpose than a safety feature. However, its presence is necessary due to the conditions of operation and transportation of passengers.
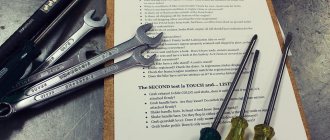
Tools:
- a sewing machine will be needed to give the material the shape of the seat and firmly secure the material to the base;
- hammer, for hammering in staples after tightening;
- furniture stapler and staples for it;
- pliers to remove old staples and for other small jobs.
You can not only reupholster the old seat, but also remake it for greater comfort. Having come up with seat options for a motorcycle, sketch out a small sketch to make it easier to imagine the essence of the work.
Preparatory stage
The reason for seat repair is either long-term use or an emergency situation that leads to slight deformation. You need to select the appropriate material.
Genuine leather has considerable advantages. While some people pay attention to the beautiful design and natural color, others value elasticity and strength, the ability to withstand pressure without consequences.
The skin really does not harm your health and is able to provide microcirculation of air. The surface will not allow moisture, oil or gasoline to pass through. There is no fading, despite direct sunlight. Manages to withstand hot sun and frost.
Alcantara has become a worthy rival. The developed artificial suede is close to the strength and wear resistance of a natural product. The surface is soft and pleasant to the touch, despite the roughness and texture.
Dirt-repellent properties are considered important, preventing the seat from easily getting dirty while traveling. Alcantara is also breathable and does not require special care. The color scheme can be the most unexpected.
A fairly standard set of tools is assembled. You need screwdrivers, wrenches, a hammer, a stapler, staples, a marker, scissors, sandpaper, a spatula and foam rubber. Find a sewing machine with a retractable foot and a hair dryer with power. Construction is best suited.
What causes saddle wear?
First of all, the material is strongly influenced by sunlight. Leave your pet in the open air for a couple of hours, and ultraviolet rays cause the rich color to fade. The heated upholstery also expands. Therefore, when the owner sits on the seat, small folds form, due to which the material begins to crack and wear out.
Household factors also influence. Accidentally catching a rivet from jeans can damage the integrity of the fabric. After this, air enters the resulting hole and bubbles form. In addition, long-term use causes dents.
How to choose or sew a motorcycle cover yourself
Publication date: November 28, 2021. Category: Motor vehicles.
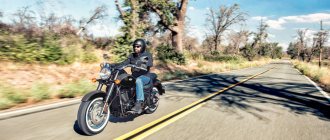
Every owner of two-wheeled equipment who cares about the condition of his iron horse knows that during long-term parking of the equipment it must be protected from sunlight, snow and rain. It is much easier to think about the safety of the “bike” before an expensive paint replacement is required. This task is best accomplished with a motorcycle cover, which is selected not only based on the parameters of the vehicle itself, but also depending on the specific operating conditions.
Today, motorcyclists have a fairly wide selection of such accessories.
Padding
After purchasing everything you need, you can get to work. So, how to cover a motorcycle seat:
- First you need to remove and disassemble the old seat. In most cases, to remove the saddle, the passenger handle is unscrewed and the brackets are removed. The base is almost always made of plastic. Therefore, do not use much force when soldering the seat, as this may break the frame.
- After removing the chair, disassemble it into its components. If the seat frame is in excellent condition, it can be used further. Otherwise, it is worth sanding it down and soldering it in places where cracks and dents have formed. Separate the cover and passenger handle. Carefully unravel the old seams with a razor blade. Most handles are made on the basis of nylon and leather braiding and mounting bolts.
- After disassembly, cover the frame with foam rubber. If you make a layer that is too thick, you will fall through while riding, and vice versa, a layer that is too thin will provide rigidity. It is recommended to make the thickness approximately 1-2 centimeters.
- Spread the glue evenly on the foam and base. After a short wait, 2-4 minutes, connect both parts.
- Wait until the glue has completely dried, then remove the excess foam from the sides of the seat.
- Now take the old seat cover and trace it with chalk or a piece of soap on the new material. It is worth making a sketch with a reserve. Then cut out the sketch.
- Try it on using a light stitch of thread.
- Machine sew the fabric with two seams for greater strength.
- Cover the passenger handle. Cut out the material as well, with a margin. After gluing, cover the handle on both sides, this will add beauty to the product.
- When the motorcycle seat cover is finished, put it on the saddle and tighten it well so that there are no folds and the fabric is elastic. Before stretching, spread a thin layer of glue on both parts.
- Nail the cover from the inside with furniture staples. Then pull it from the center to the edge, trying to ensure that the folds go towards the corners. This work process is difficult to complete alone, so ask someone to help you.
- After tensioning, excess sections of material are cut off, and the staples are driven into the frame until the end.
- Now install the handle. Measuring in advance at what length the ends need to be bolted. It is better to tighten it as much as possible so that there is less gripping and stretching.
- After cutting the ends of the belt, burn them with a lighter to prevent the material from unraveling. After this, secure the handle from inside the seat with bolts.
This completes the process of reupholstering the seat. As you can see, you should choose the material with which the least problems will arise. It should be moderately elastic, smooth and take shape well at angles.
If you don’t want to do this yourself, you can always contact a studio, where for a small amount, 2-4 thousand rubles, your seat will be completely reupholstered with high-quality and stable material.
Filling the base
When your frame blank is ready, the next step is filling it. A good option is polyurethane foam, on which softer fabrics, felt, foam rubber and other porous materials are attached on top.
To create the desired shape, you can take thinner materials and use them in more layers. When creating a “frog” saddle, sometimes it is enough to find old Soviet seats from the “Ural” or “Dnepr” as a blank. And then work wonders only with the case.
Removing and disassembling seats
To reupholster the seats, you must first dismantle them, remove them from the interior to the workplace, disassemble them and remove the old upholstery. Each car interior has its own characteristics. Therefore, it is impossible to create one instruction that is universally suitable for all seats. Let's look at the main points that are similar for most cars.
Most front seats are fairly easy to remove from the interior. The front seats slide on the tracks (slides). They are bolted to the floor at the front and back. Typically, the places where the slide is attached to the floor are covered with plastic covers. To get to the bolts, you need to move the chair to its extreme position (forward or backward, in turn).
Front seat mounting
- Before removing the seats, you must disconnect all electrical wiring plugs at the bottom. If the seats have side airbags, you need to disconnect the battery and wait 3 minutes before disconnecting the connectors at the bottom of the seats.
- Carefully remove the seat from the interior, do not scratch the plastic trim of the interior with the slide. You can wrap the sharp corners of the seat slide with rags before dismantling. This will protect the interior from accidental scratches. The second front seat is removed in a similar way.
- To remove the rear seat, you usually need to first remove the lower part of the seat. There are two different methods that are used to secure the bottom of the rear seat. These are two bolts or two latches on the front that secure the seat to the floor. You need to unscrew or snap off the bottom of the seat and pull it out. After removing the lower part, the bolts securing the rear seat back become visible. After unscrewing them, you need to move the seat back up and remove it.
- Disassemble the seat. You will need a large area in which to work comfortably with the seats. This can be done either on a large table or on the floor. First you need to disconnect the seat back from the seat itself. You need to fully recline the backrest with the seat mechanism. Remove the skids. To disassemble the front seats, it may be necessary to remove plastic trim parts.
- Before removing the upholstery, the headrest must be removed.
- Remove the old upholstery from the seat and backrest. The upholstery is usually attached to the seat frame and soft base with special staples. There can be quite a lot of such staples (rings). To remove the old upholstery you need to cut off all these rings. They are not easy to cut. You can use a special tool, wire cutters or metal scissors. It is necessary to draw a diagram of the location of the fastening rings so that, when installing new upholstery, you know where to install the new brackets. During disassembly, you can also take photographs of the stages. This way, you will know which bolt was unscrewed and where it came from.
The upholstery can be attached with rings to metal rods built into the upholstered part of the seat structure. In this case, the seat upholstery must be lifted from the edges to see the fastening points, and all fastenings (rings) must be cut off. Instead of rings, there may be textile fasteners (Velcro), then you just need to pull the upholstery to remove it.
Rigidity frame
- masking/stationery tape
- epoxy resin
- fiberglass/fiberglass
- fiberglass putty
- construction mesh
- sheet metal (for more advanced skill levels)
Initially, you take masking and stationery tape as tools. The painting shop is needed as a primary base. You use it to cover the workspace on the frame. Paste regular stationery tape on top, which is needed to protect the painter's tape from soaking.
Binders are applied to the created canvas, which form our seat - epoxy resin that impregnates layers of fiberglass or putty with fiberglass. Construction nets are often placed in the foundation to give the form greater strength.
Note that the thinner layers you use, the easier it is to give them the desired rounded shapes. The seat must exactly follow the contours of the frame, since after drying it will be more problematic to change its shape. Your workpiece should not have any cracks or wavy outlines relative to the frame; it must fit snugly and evenly.
And yes, if your seat is held on by bolts, you can reasonably take care of this right away. It is convenient to make bolts or other parts of fastenings part of the frame and glue the bolt heads into resin so that they do not get lost anywhere and already know their rightful place.
Experienced craftsmen or those who know how to work with metal make frames from sheet iron, sometimes even making complex frames using welding.
After the main workpiece has dried, we move on to the next stage of work.
Honda CB400 motorcycle seat upholstery.
1) Disassemble the motorcycle seat. From the inside, the Honda CB400 saddle looks like this.
In order to disassemble the saddle, you need to unscrew the passenger handle and remove all the brackets. Here's what I got.
I was lucky, the shape of the saddle was still in very good condition.
Then we take the seat cover and the handle for the passenger apart, undoing the old seams with a sharp knife. As we can see, the cover of the Honda CB400 motorcycle (2000 model year) consists of two parts, the seam runs along the circumference where the front part of the seat is adjacent to the gas tank.
The handle for the passenger consists of a nylon base, a leatherette braid and two washers (brackets) for fastening the handle to the motorcycle saddle.
2) We cover the base of the motorcycle seat with a sheet of foam rubber 1 cm thick.
I made the brush from a piece of the same foam rubber, of which there is so much in the roll that the rest will still have to be thrown away.
Place a layer of glue on both surfaces and wait 3 minutes.
We glue.
That's it, let's take it to dry. After the glue has dried, remove the excess foam on the sides.
3) We sew a new cover and handle for the passenger.
We use chalk or soap to outline the old cover with a small margin. Then we cut it out.
We try it on and see where the seam will go.
We baste with a simple tie and try it on. Everything is in place
We stitch on a machine. It is better to have two seams for strength. And we move on to making a handle for the passenger. You'll have to do a little sewing here. With a margin of length, measure a piece of leatherette for the braid and cut it out.
Using white thread (this is more convenient) we outline the places where the seams will go.
Here's what I got.
I honestly admit to you that I have never been a tailor. I looked at how to pass thread in my old sewing machine “Chaika-152 M” on YouTube)) And therefore I can give the most practical advice to lamers like me. It is better to sew with a wide seam, as in the photo below, since the jambs are not noticeable. If you use a regular, “straight” seam, every deviation, even half a millimeter, is very noticeable. I screwed up one belt this way
4) We put a new cover on the motorcycle seat.
Before tensioning, both surfaces, the cover and the saddle, must be coated with glue. Then we staple the cover from the inside, pulling it tightly from the center to the edge. It is better to push the folds towards the corners. I tried it alone. It turned out to be complete garbage.
Then I decided not to suffer and leave it as it was until my brother came to the rescue. At the same time, I thought that the leatherette would stretch a little, which would allow it to be pulled tighter. I waited two days for help from my brother, and it turned out very well. During this time, the leatherette actually stretched a little, and then with four hands we were able to pull it tightly and without wrinkles.
Please note I did extra work. You can reupholster the seat of a Honda cb400 motorcycle in one piece! The staples went over the seam
Then we cut off the excess leatherette from the inside with a knife and punch the staples with a hammer so that they go into the plastic all the way. We get the result.
5) Attach the handle for the passenger.
We measure the length of the handle and attach the staples. Try to pull it harder, because, firstly, the leatherette stretches a little, and secondly, so that the second number does not have the habit of grabbing this handle! The girls we ride should passionately wrap their hands around the heroic chest of the number one, and not hold on to a leather belt! Otherwise, why do we need a motorcycle))?
The new belt turned out to be almost one and a half times wider than the original one. I didn't bother making new staples; I folded the new belt so that the fold was not visible from the outside and secured it with old staples.
Then we cut the belt to length and melt the ends with a lighter so that the base of the belt does not unravel.
Screw on the new handle.
Let's evaluate the result.
I repeat once again, the result exceeded all expectations, but the process could have been significantly simplified. Later, when reupholstering the seat of my brother's motorcycle, we took into account all the mistakes. But more on that in the next article.
All.
What to look for when buying a case
First of all, it is necessary to take into account that not every awning is designed for outdoor conditions. Cheaper seasonal products fade quite quickly and are only suitable for use in a garage or covered parking lot. Waterproof, all-season and sealed covers will serve faithfully in any conditions. One example of such awnings is the all-weather Oxford Aquatex canopy, costing from 1,600 to 2,400 rubles, depending on the size of the “bike”.
Speaking of dimensions. Self-respecting manufacturers pay more attention to tailoring their products, and always offer customers a whole line of accessories of different sizes (for scooters, small, medium and large motorcycles). Such capes take into account more design features of “bikes”, so they have better characteristics.
For example, motorcycle covers from the Swiss company IXS, which produces high-quality motorcycle equipment, are made according to patterns in 5 sizes.
Seat reupholstery with airbag
Airbag-equipped seats may have a plastic cover that deploys when the airbag deploys, similar to that found on the dashboard or steering wheel. However, most often, the area with the airbag on the seat is simply covered with upholstery. At this point, the upholstery has a weakened seam that should rip easily when the airbag deploys.
If the seams in the side of the seat where the airbag is located do not meet certain specifications, then in a crash it may deploy too late or in the wrong direction.
Sewing station for sewing upholstery with control of seam characteristics.
There is special equipment (Durkopp Adler sewing station 550–867) for stitch control when sewing upholstery for seats with airbag. Thread tension and stitch length are controlled to meet industry standards. The sewing station produces a seam that is strong enough for the seat to be used and, at the same time, must ensure that the seam breaks when the airbag deploys. Such a system is expensive and not available to every workshop.
You can use the following technique for seats with airbags. Sew with thread of normal thickness on the top and bottom of the area where the airbag should fire. The seams are secured at the ends. The place where the seam should separate when the airbag deploys is stitched with a thinner thread. A seam with a thinner thread is made to overlap the previous seams, but is not secured.
For the top seam, use nylon thread (Bonded Nylon Upholstery #69 T70). The stitch length should be at least 6 mm and the tension should be reduced.
The airbag deploys with tremendous force and speed. A seam with such threads and with such a stitch length will not be able to hold such force.
Types of motorcycle covers
There are several types of cases on sale today:
- For individual motorcycle parts. Protective seat covers help preserve seat upholstery for longer and increase driver comfort while driving. There are also products on sale to protect the tank, the paintwork of which wears off quite quickly from the motorcyclist’s knees. In addition, such cases are usually equipped with additional pockets for storing small items and gadgets (navigator, phone, etc.). Steering wheel covers most often serve a purely decorative function.
- Awnings. This motorcycle cover completely covers the iron horse and reliably protects it from harsh weather conditions. As a rule, such accessories are made of durable, moisture-proof material that is resistant to ultraviolet radiation.
The latter type of case is more popular, as such products are more durable and provide a higher level of protection.
Workpiece processing
This includes all subsequent routine. If you worked with epoxy resin or putty, then remove the workpiece from the masking tape and peel off the remaining stationery to get an independent part. Next, we check how tightly and evenly the resulting workpiece fits against the frame. We mark all the necessary technical holes in order to drill them carefully.
We painstakingly sand the surface of the resin with fiberglass using abrasives from coarse to fine.
Read also: How to become more literate in 10 steps