Cars admin26.02.2020
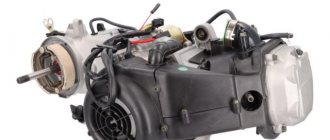
The Japanese scooter Suzuki Sepia is considered a fairly popular model in Russia and other countries, in particular due to its attractive appearance and simple design of the engine and other parts. But problems with this scooter are quite common and are caused by malfunctions of such components as the CPG, carburetor and variator. It is important to carefully monitor their condition to prevent damage. As for the carburetor, the Mikuni carburetor is used here; the Suzuki Sepia is ideal for this carburetor model, which is also used on other equipment. In particular, you can see a similar model on the no less famous Suzuki Adress scooter. The carburetor is characterized by its simple design, good quality and the ability to quickly adjust. But judging by the frequent problems of owners, it will be extremely difficult to adjust the carburetor for optimal operation of the scooter; the entire procedure will have to be carried out exactly according to the specified rules. If you are the owner of a Suzuki Sepia, get ready to clean the carburetor frequently, because its location is so inconvenient that the carburetor becomes clogged with dust very often. Below is a carburetor setting option.
How to adjust the carburetor on a Suzuki Let's 2 scooter
Adjusting the carburetor on a 2T scooter
Cleaning the carburetor Suzuki Lets 2
The most detailed carburetor setting is H.H. .Scooter.2.A carb adjustment. X
Suzuki Let's 2: Little Engine Tyr-Tyr-Tyr)
How to adjust a scooter's carburetor
How to adjust the carburetor on a scooter. Theory (My Tact 24 Part 7)
WITH YOUR OWN HANDS: CLEANING THE CARBURETOR Suzuki Lets 2
Carburetor SUZUKI LET'S-1, LET'S-2, LET'S-2 NEW
Brief description of connecting the SUZUKI LETS 2 carburetor power system
The scooter smokes and rides poorly on a cold engine: the EC is to blame
In order for a scooter engine to operate efficiently and steadily, it needs the correct fuel mixture, which is prepared in the carburetor. Depending on the condition of the engine, cylinder volume, quality of gasoline and other factors individual for each scooter, additional carburetor adjustment may be required.
Before getting down to business, it is strongly recommended to put things in order in the fuel system, namely: clean the carburetor and air filter, and also adjust the fuel level in the float chamber.
The carburetor should only be adjusted on a well-warmed engine. That is, before setting up, you need to drive the scooter for 10-15 minutes.
The carburetor usually has two adjustment screws. The smaller one is the mixture quality screw. The larger one is the idle speed screw. However, there may not be a mixture quality screw - then the quality adjustment is carried out by manipulating the throttle needle.
The factory settings are as follows: the quality screw is unscrewed by 1.5-2 turns, the idle screw is unscrewed by 2.5 turns. What does it mean? This means that the screws must first be tightened clockwise until they stop, and then unscrewed back the appropriate number of turns. It is from these initial settings that you should begin tuning. And in principle, if at the same time the engine runs stably and the scooter accelerates without failure and to maximum speed, you don’t have to adjust anything in particular. But if this is not the case, then adjustments cannot be avoided.
So, put the scooter on the stand. The motor must be running (and it must be warmed up before tuning).
Unscrew the quality screw 2 turns. Now you need to adjust the idle speed. Turn it slowly (clockwise) - the engine speed will increase. At some point the clutch will engage and the rear wheel will begin to rotate. Then turn the screw back a quarter turn.
Do-it-yourself cleaning of the Mikuni carburetor of a Suzuki Djebel 200 motorcycle.
The other day I went to clean the Mikuni carburetor of a Suzuki Djebel 200 motorcycle and decided to make a short article about it, although everything is so simple there, compared to blocks of 4 Keihin carbs, that it’s not even interesting. But if it is useful to someone, I will be glad.
The process is so simple that even a child can do it. The Mikuni carburetor from the Keikhin carburetor, which are installed on Sibishki, is structurally no different - they are both membrane ones. For cleaning we need any carburetor cleaning liquid and a pair of screwdrivers. I got into the carburetor because my float chamber gasket had dried out and the carb began to leak. In order not to wait for a carburetor repair kit, I decided to stupidly put the float chamber cover on the sealant, although I usually don’t do this - pieces of sealant can get inside the carburetor and clog the jets. Accordingly, I also needed gasket sealant.
How to adjust a scooter's carburetor
In order for a scooter engine to operate efficiently and steadily, it needs the correct fuel mixture, which is prepared in the carburetor. Depending on the condition of the engine, cylinder volume, quality of gasoline and other factors individual for each scooter, additional carburetor adjustment may be required.
Before getting down to business, it is strongly recommended to put things in order in the fuel system, namely: clean the carburetor and air filter, and also adjust the fuel level in the float chamber.
The carburetor should only be adjusted on a well-warmed engine. That is, before setting up, you need to drive the scooter for 10-15 minutes.
The carburetor usually has two adjustment screws. The smaller one is the mixture quality screw. The larger one is the idle speed screw. However, there may not be a mixture quality screw - then the quality adjustment is carried out by manipulating the throttle needle.
The factory settings are as follows: the quality screw is unscrewed by 1.5-2 turns, the idle screw is unscrewed by 2.5 turns. What does it mean? This means that the screws must first be tightened clockwise until they stop, and then unscrewed back the appropriate number of turns. It is from these initial settings that you should begin tuning. And in principle, if at the same time the engine runs stably and the scooter accelerates without failure and to maximum speed, you don’t have to adjust anything in particular. But if this is not the case, then adjustments cannot be avoided.
So, put the scooter on the stand. The motor must be running (and it must be warmed up before tuning).
Unscrew the quality screw 2 turns. Now you need to adjust the idle speed. Turn it slowly (clockwise) - the engine speed will increase. At some point the clutch will engage and the rear wheel will begin to rotate. Then turn the screw back a quarter turn.
Now you need to test how the scooter will behave when riding. Accelerate on a flat road.
- If the scooter accelerates sluggishly, it means the mixture is not rich enough. Then tighten (clockwise) the mixture quality screw a quarter or half a turn. At the same time, the mixture will become richer (there will be less air in it, more gasoline).
- If the scooter accelerates normally, but not to the maximum, then the mixture is over-rich. In this case, you need to unscrew (counterclockwise) the mixture quality screw a quarter or half a turn to lean the mixture.
If you have turned the mixture quality screw, then you need to adjust the idle speed using the method described above.
With an ideal setting, the scooter should accelerate without dips or jerks, stably, and reach maximum speed.
Please note: This article and the images in it are subject to copyright. Partial or complete reproduction on other resources without permission is prohibited.
Source
Carburetor suzuki address 100
The standard speed of the Suzuki Address 100 scooter is 80 km/h, which is very low for 100cc. Therefore, it is worth thinking about tuning the engine.
1.
The first step is to install a new variator on the scooter, I decided to go with Polini Speed Control, but unfortunately this variator for the 50 cc version of Suzuki and the weights weigh only 6.5g. Therefore, I had to buy other Malossi weights weighing 10 grams. After replacing the variator, the dynamics increased significantly and the maximum speed increased by 4-5 km/h.
2.
Next comes the power system. A Dell'orto carburetor with a 21 mm diffuser was chosen. A Polini Marchald filter was also purchased for this carburetor. After installation, I had to make adjustments. In the end, I decided to install the 105th jet and lower the needle down. Now the acceleration has become faster, and the maximum speed has increased by 5-6 km/h.
3.
The next step will be tuning the clutch. To improve the start, I decided to buy a blue Polini spring. It is tougher than standard. After the replacement, the start became much faster.
4.
It is worth paying attention to the exhaust pipe, there are a lot of plugs in it. We cut the pipe, cut out all the partitions and weld it again. As expected, the scooter noticeably increased its maximum speed.
Result:
After tuning, the result was a very dynamic and fast device. Now instead of 80kmh the scooter goes 120.
can someone please tell me how to set up the carburetor | Topic author: Harivamsha
tell me how to set up the carburetor on a suzuki sepia zz scooter, here’s a carburetor like in the photo
Dmitry (Keitha) mikuni!!! there is an adjustment bolt on the outside for adjusting the air, but there is a screw on top of the fuel inside under the cable cover, I don’t remember exactly, but in my opinion 3-4 turns back after fully tightening
Vitaly (Miki) what the hell is the screw under the cable cover, the gasoline is adjusted on this carb with a needle
Alexey (Esther) The needle regulates the stable supply of fuel; the screw inside under the cover is an air jet; they need to regulate the stability between the fuel mixture and air (If you set it up correctly, the scooter will spend as much gasoline as it is written in its characteristics) - (If you set it up incorrectly, it will eat a lot gasoline and this wakes up a very rich mixture, which is very unprofitable. And if you unscrew the screw completely, then a very lean mixture will come out, maybe it will start on the running board, spin the wheel but there will be no power, you will sit down and press the gas and it will stall!
Alexey (Esther) Take the carbu apart.
pull out the needle and put it on the middle division into thirds!
Dmitry (Keitha)……sorry mixed up fuel with air..
Sergey (Unmesha) Where is the idle speed adjustment bolt, tell me Dmitry,
Sergey (Unmesha) Where is the idle speed adjustment bolt, tell me Alexey,
Alexey (Esther) Long on the outside
Andrey (Halayudha) Please post a photo of what a quality screw looks like! I simply don’t have it, and I’m looking for the reason why the moped won’t start!
Alexey (Esther) https://suzuki-sepia.clan.su/publ/5-1-0-78 look here
Viktor (Rasesh) I’m also going through all this right now, but I ran into one problem, my fuel consumption is crazy, I drove about 15 km and it consumed 3.5 liters. If anyone knows what the problem is, please tell me if there are similar problems somewhere. This carburetor is very capricious. There is also a 2nd carb, so there is no mixture adjustment bolt there at all. If anyone knows how to set it up, please post.
Alexey (Esther) Alexey, please tell me where to start, this Mikuni has overcome me. No matter how much I adjust it, it won’t start and immediately stalls
Alexey (Esther)
Illya (Munir) Dmitry, where is the find+fuel+bolt.
Dmitry (Keitha) The fuel bolt is like a plastic cover, where the cable is attached to the throttle
Ruslan (Webber) changed the piston to the idle, it works like a chasiki, you sit down, you give it to the gas, it stalls, what's the problem?
Yury (Gjurd) high fuel consumption in my native Mikuni, no matter how much I adjusted it with a needle, everything was useless, I bent the float a little, I’ll check for overflow again, the vacuum holds the norm, tell me, maybe someone has come across this and reduced the consumption at least a little
Alexander (Balamani) Hello. I have a pacifier next to the cable. As I understand it, with a needle. But after a complete overhaul it runs at half throttle. I’m right, I think the mixture is sparse or rich
Alexander (Balamani) The guys gave me such rubbish, but today I found everything, including the tax and the battery charger. So ask questions. To reduce consumption, it is necessary to replace the main jet. The one under the needle has a 0.6 mm hole
: How to adjust the carburetor on a Suzuki Let's 2 scooter
Adjusting the carburetor on a 2T scooter
Cleaning the carburetor Suzuki Lets 2
The most detailed carburetor setting is H.H. .Scooter.2.A carb adjustment. X
Suzuki Let's 2: Little Engine Tyr-Tyr-Tyr)
How to adjust a scooter's carburetor
How to adjust the carburetor on a scooter. Theory (My Tact 24 Part 7)
WITH YOUR OWN HANDS: CLEANING THE CARBURETOR Suzuki Lets 2
Carburetor SUZUKI LET'S-1, LET'S-2, LET'S-2 NEW
Brief description of connecting the SUZUKI LETS 2 carburetor power system
The scooter smokes and rides poorly on a cold engine: the EC is to blame
In order for a scooter engine to operate efficiently and steadily, it needs the correct fuel mixture, which is prepared in the carburetor. Depending on the condition of the engine, cylinder volume, quality of gasoline and other factors individual for each scooter, additional carburetor adjustment may be required.
Before getting down to business, it is strongly recommended to put things in order in the fuel system, namely: clean the carburetor and air filter, and also adjust the fuel level in the float chamber.
The carburetor should only be adjusted on a well-warmed engine. That is, before setting up, you need to drive the scooter for 10-15 minutes.
Suzuki scooter code table
Scooter designation | Scooter model | Model code | Frame number | engine's type | Year | Additionally |
| CA11A | Ran | CF50 | CA11A-100001- | — | 1983 | 4 l. With. |
| CA12A | Chance | CA50 | CA12A-10- | — | 1983 | 4 l. With. |
| CA13A | Bara | CY50 | CA13A-100- | — | 1983 | 3.8 l. With. since '84 4 l. With. |
| CA14A | Gemma Quest | CS50 | CA14A-100- | — | 1986 | 6.5 l. With. |
| CA14B | Shoot | CP50C | CA14B-100001- | — | 1984 | 6.5 l. With. since 1985 Disc brake |
| CA15A | Love III | CX50D | CA15A-100001- | — | 1984 | 6.0 l. With. |
| CA17A | Ran | CF50 | CA17A-10- | — | 1988 | 4.2 l. With. |
| CA18A | Carna | CI50DG | CA18A-100001- | — | 1985 | 6.5 l. With. |
| CI50DGH | CA18A-204765- | 1987 | ||||
| CA19A | Hi | CH50S | CA19A-100001- | — | 1986 | 6.5 l. With. |
| CH50SJ | CA19A-235167- | 1988 | ||||
| CA19B | Hi-R | CH50RH | CA19B-100001- | — | 1987 | 6.5 l. With. |
| CA1AA | Gemma Quest | CS50DC-2 | CA1AA- | K2F27 | — | 6.5 l. With. |
| CA1BA | Mode GT | CR50DC | CA1BA-100001- | — | 1987 | 6.5 l. With. |
| CA1CA | AddressTune | AD50T | CA1CA-100001- | — | 1988 | 7.0 l. With. Disc brake |
| AD50TK | CA1CA-124855- | 1989 | ||||
| AD50TL | CA1CA-152645- | 1990 | ||||
| AD50TM | CA1CA-160799- | 1990 | ||||
| CA1CB | Address | AD50 | CA1CB-100001- | — | 1987 | 6.5 l. With. |
| AD50K | CA1CB-170387- | 1989 | ||||
| AD50L | CA1CB-203272- | 1990 | ||||
| CA1CC | Address way | AD50W | CA1CC-100001- | — | 1988 | 6.5 l. With. |
| CA1DA | Hi-UP | AE50 | CA1DA-100001 — | — | 1988 | 6.5 l. With. |
| AE50L | CA1DA-124210- | 1989 | ||||
| AE50N | CA1DA-160874- | 1992 | ||||
| CA1DB | Hi-UPR | AE50R | CA1DB-100001- | — | 1989 | 7.0 l. With. Disc brake |
| AE50RL | CA1DB-132088- | 1990 | ||||
| CA1EA | Sepia | AF50 | CA1EA-100040 | — | 1989 | 6.8 l. With. |
| AF50L | CA1EA-171966- | 1990 | ||||
| AF50M | CA1EA-192366- | 1990 | ||||
| AF50MM | CA1EA-227226- | 1991 | ||||
| CA1EB | Sepia ZZ | AF50ZZL | CA1EB-100032- | — | 1990 | 7.0 l. With. Disc brake |
| AF50ZZZ | CA1EB-147409- | 1991 | ||||
| AF50ZZM | CA1EB-219148- | 1991 | ||||
| AF50ZZN | CA1EB-232523- | 1992 | ||||
| CA1EC | Sepia ZZ | AF50ZZM | CA1EC-100001- | — | 1991 | 7.0 l. With. Disc brake |
| CA1EC | AF50ZZS | CA1EC-106446- | 1995 | |||
| CA1FA | Address V50 | AG50M | CA1FA-100037- | — | 1990 | 6.8 l. With. |
| AG50N | CA1FA-126207- | 1992 | ||||
| CA1FB | Address V50 tune | AG50TM | CA1FB-100027- | — | 1991 | 7.0 l. With. Disc brake |
| AG50TN | CA1FB-121699- | 1992 | ||||
| Address V50 | AG50T | CA1FB-129179- | 1995 | |||
| CA1HA | Sepia | AJ50P | CA1HA-100001- | — | 1993 | 6.8 l. With. |
| AJ50R | CA1HA-116509- | 1994 | ||||
| AJ50S | CA1HA-129644- | 1995 | ||||
| CA1HB | Sepia RS | AJ50SP | CA1HB-100001- | — | 1993 | 6.8 l. With. Disc brake |
| AJ50SR | CA1HB-106802- | 1994 | ||||
| AJ50SS | CA1HB-109264- | 1995 | ||||
| CA1HC | Sepia ZZ | AJ50ZZP | CA1HC-100001- | — | 1993 | 7.2 l. With. Disc brake |
| AJ50ZZR | CA1HC-142259- | 1994 | ||||
| AJ50ZZS | CA1HC-166416- | 1995 | ||||
| AJ50ZZT | CA1HC-176588- | 1996 | ||||
| AJ50ZZW | CA1HC-183715- | 1998 | ||||
| CA1JA | AP50 | AP50RF | — | — | — | 2N: not for Japan |
| CA1KA | Let's | AS50T | CA1KA-100001- | — | 1996 | 6.8 l. With. |
| AS50V | CA1KA-241778- | 1997 | ||||
| AS50W | CA1KA-308837- | 1998 | 6.3 l. With. | |||
| Let's 2 | AZ50T | CA1KA-131220- | 1996 | 6.8 l. With. | ||
| AZ50W | CA1KA-312667- | 1998 | 6.3 l. With. | |||
| AZ50UW | CA1KA-320427- | 1998 | ||||
| AZ50DW | CA1KA-322827- | 1998 | ||||
| Let's 2-L | AZ50LV | CA1KA-218619- | 1997 | 6.8 l. With. Low landing | ||
| AZ50LW | CA1KA-309557- | 1998 | 6.3 l. With. Low landing | |||
| CA1KB | Let's 2-S | AZ50SV | CA1KB-100001- | — | 1996 | 6.8 l. With. Disc brake |
| AZ50SW | CA1KB-106536- | 1997 | 6.3 l. With. Disc brake | |||
| CA1LA | Street magic | TR50V | CA1LA-100001- | A153 | 1997 | 7.2 l. With. Disc brake 12″ discs |
| CA1LB | Street magic S | TR50SV | CA1LB-100001- | A153 | 1997 | 7.2 l. With. Disc brake 12″ discs |
| Street magic -II | TR50SDV | CA1LB-111571- | 1998 | |||
| CA1MA | Verde | UR50W | CA1MA-100001 — | A148 | 1998 | 6.3 l. With. |
| CA1NA | Address | UG50W | CA1NA-100047- | — | 1998 | 6.3 l. With. Disc brake 12″ discs |
| CA1PA | Let's 2 | AZ50LX | CA1PA-125423- | A196 | 1999 | 6.1 l. With. |
| Let's'2-L | AZ50X | CA1PA-122783- | 1999 | 6.1 l. With. Combined brakes | ||
| CA1PB | ZZ | AZ50R | CA1PB-10- | A155 | 2000 | 7.2 l. With. Disc brake 12″ discs |
| CA41A | Let's 4 | UZ50FK | — | A404 | 2004 | 5.0 l. With. (Four-stroke) Electronic injector Manufactured in China |
| CA41A | Let's 4 Pallet | UZ50GK | — | A404 | 2005 | 5.0 l. With. (Four-stroke) Electronic injector |
| CA42A | Address V50G | — | — | A404 | 2005 | 5.2 l. With. (Four-stroke) Electronic injector |
| FA14B | Mollet | FE50 | FA14B-100001 — | — | 1986 | 6.1 l. With. Front disc 12″ |
The principle of operation of a carburetor on a scooter
The design of a scooter carburetor is quite complex, but most of them have standard elements. The main task of any carburetor is to create a high-quality fuel mixture. Also, most scooters are equipped with a float chamber on the carburetor, so if you do not know how to adjust the carburetor on a 2t or 4t scooter, first study its structure.
The principle of operation of the carburetor is as follows: after pressing the throttle, the valve on the carburetor is activated, it is called a Venturi tube, the needle rises in the valve and the formation of a fuel mixture begins by mixing gasoline and air. An open throttle increases the supply of mixture to the engine, which is why the scooter starts to move.
A faulty carburetor will prevent the engine from starting, so it must be kept in as good condition as possible. Before adjusting the carburetor on a 50cc scooter, identify the main signs of failure. The main consequences may be:
- Inability to start the scooter;
- The engine runs intermittently and often stalls;
- Power is significantly reduced.
Idle speed adjustment
Does your scooter not work properly when idle and often stalls? Most likely your idle speed screw is not adjusted sufficiently. Before the procedure, be sure to warm up the engine, then find the idle screw, which is present on absolutely all scooters. You will have to warm up the scooter for 10-15 minutes, this will allow you to achieve optimal engine performance.
After this, you need to turn the idle speed screw, where clockwise rotation increases the speed, and unscrewing it decreases it.
We offer to use the services from - tuning No. 1 in Russia
The largest selection of spare parts for tuning motorcycles and motorcycles
In the warehouses of the company https://hdtuning.ru/ you will find:
* fantastic camshafts and hydraulic lifters by Bob Wood (Wood Performance), easily adding 15-20 horses to your engine. And on the Milwaukee 8 too.
* Freedom Performance exhaust systems, whose Russian distributors we are. More than 30 sets in stock.
* all kinds of gaskets and seals for Twin Cam, Sportster, Evo, both individual and in sets, the price of which will pleasantly surprise you
* clutch sets from the manufacturer Energy 1, both in standard and reinforced versions (the “extra plate” option - where there are a couple more discs and a more powerful spring)
Setting the air screw
The carburetor also has a jet responsible for the amount of air located under the cover. The jet is located in the air channel, so when you tighten the screw, the throttle rises and the air flow increases. At the same time, the engine speed increases.
Configuration is carried out as follows:
- completely tighten the screw and unscrew it 4-5 turns;
- the engine should start to stall;
- gradually tighten the screw until the speed increases to maximum;
- upon reaching maximum speed, you can unscrew the screw ¼ turn;
- adjust the idle speed screw for optimal speed.
Adjusting the fuel level
The float chamber allows you to have a constant flow of fuel in the carburetor, which is always replenished, but it is important to remember that you cannot have an excess of gasoline in the float chamber. Gasoline is drained using a special hose coming from the chamber; you will have to check the amount of fuel with the engine running. Raise the hose above the carburetor as shown in the picture below and check the fuel level. It should not differ much from the mark indicated in the picture. There is a holder antenna located on the needle inside the float chamber; it can be used to regulate the amount of fuel inside the float chamber.
Please also take into account the fact that before adjusting the carburetor, you should only have high-quality gasoline with a normal octane number. Otherwise, you will have to completely drain the bad gasoline not only from the gas tank, but also from the float chamber; it must have a special drain screw.
Setting the mixture quality
The quality of the mixture plays a key role in the operation of the entire scooter, because incorrectly configured parameters will lead to the scooter choking, consuming a lot of fuel and increasing wear on the piston group. That is why the combustible mixture must be in the optimal quantity; a lean mixture indicates a loss of power and frequent overheating of the engine, a rich mixture is characterized by high fuel consumption and the presence of heavy carbon deposits in the combustion chamber.
There are two ways to adjust the quality of the mixture - with an adjusting screw or the needle level in the damper. In some cases, the carburetor design assumes the absence of an adjusting screw, so adjustment is carried out only with a needle. The standard procedure for adjusting the screw is to rotate counterclockwise and clockwise; in the first case, the mixture becomes lean; tightening the screw indicates that the mixture is richer. In the case of a needle, you can enrich the mixture by raising it up; the lean mixture is set on a lowered needle.
Important: adjusting the quality of the mixture should also be carried out with the engine warmed up for 10-15 minutes.
The instructions for most scooters say that there is a standard setting for the mixture quality, where the screw should be unscrewed only 1.5-2 turns. Therefore, if it is impossible to accurately adjust the mixture, stick to this indicator.
The needle is adjusted by raising or lowering it; it has markings and a special locking ring that sets the current height. Accordingly, if you find a lean mixture, you will have to raise the ring level by 1 notch. Having achieved optimal performance, your scooter will operate smoothly and correctly, it will consume fuel in normal quantities, and the power will correspond to the characteristics.
Source
Other answers in this thread
#2 OGNIS
- Participant
- Group: New users
- Posts: 24
- Registration: 29 June 06
#3 Serega®
- bad character
- Group: Users
- Posts: 950
- Registration: 09 March 06
#4 AsaD
- Participant
- Group: New users
- Posts: 47
- Registration: 13 March 06
#5 Red Baron
- Participant
- Group: Users
- Posts: 83
- Registration: 13 July 06
Post edited by Red Baron: 13 July 2006 - 09:13
#6 OGNIS
- Participant
- Group: New users
- Posts: 24
- Registration: 29 June 06
#7 Red Baron
- Participant
- Group: Users
- Posts: 83
- Registration: 13 July 06
#8 AsaD
- Participant
- Group: New users
- Posts: 47
- Registration: 13 March 06
#9 wolf
- Participant
- Group: Users
- Posts: 46
- Registration: 04 September 06
#10 arthur77
- Participant
- Group: New users
- Posts: 10
- Registration: 23 September 06
#11 wolf
- Participant
- Group: Users
- Posts: 46
- Registration: 04 September 06
#12 IGOR (MOTOUA)
- Authority
- Group: administration
- Posts: 2,256
- Registration: 12 March 06
wolf (12/11/2006, 10:59 pm) wrote:
#13 Strikernia
- motoua racer
- Group: Users
- Posts: 1,518
- Registration: 03 March 06
Blah, a similar situation on Dio (not mine) once the pipe got clogged, and the second time a friend stuck the loads in like a glove, so the valve didn’t work properly.
#14 wolf
- Participant
- Group: Users
- Posts: 46
- Registration: 04 September 06
#15 IGOR (MOTOUA)
- Authority
- Group: administration
- Posts: 2,256
- Registration: 12 March 06
wolf (12.12.2006, 22:21) wrote:
not adjustable if not installed (missing): - air filter - throttle - needle (in the throttle) - XX jet - main jet
(with screws and I can