Scooters with simple 50 - 150 cc engines have flooded the market and are now found on every corner. Why is this happening? First of all, they captivate with their low cost, unpretentiousness and every year the better and better quality of the main components and their assembly. Regardless of the year of manufacture, the entire scooter, and especially its motor, is subject to regular maintenance; this is the main requirement for maintaining the performance of the motors. One of the important adjustments that should be done regularly is adjusting the valves on a four-stroke scooter.
Many owners of scooters and motorcycles are afraid of this procedure due to ignorance and fear of damaging the engine. We believe that adjusting the valves on a 4t 80cc, 50cc, 150cc scooter is a task that any motorcycle owner can handle with a small set of keys and desire. Below, you will find step-by-step instructions on how to adjust the valves on a scooter with a 139qmb and 157qmj motor.
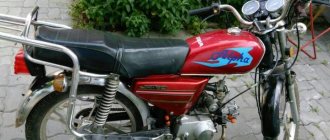
How to adjust valves on an Alpha moped - instructions
Opening the valve will be simple - you just need to press on it.
In the case of the Alpha moped design, a rocker arm presses on the element, moving under the influence of the camshaft cam. Next, you need to act in strict sequence: completely cool the engine to the temperature in the garage. If the moped was used before the procedure, it is better to let it stand for at least two hours to cool down - this way you can avoid burns not only from the elements that are directly affected, but also from neighboring parts; turning off the ignition is mandatory so as not to accidentally start the engine; placing the moped on a stand for stable holding in an upright position;
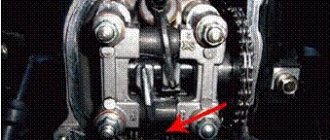
The side cover of the motor head is unscrewed
At this stage, a spare gasket may be required, as wear and careless removal can cause rupture. It is recommended to use a heat-resistant sealant;
it is necessary to align the mark that is applied to the head sprocket with the mark that is located on the head body
The crankshaft can be turned using the kickstarter leg: this method is not very convenient due to the arrangement of the elements on opposite sides. It is better to call a person nearby for this stage. For easier rotation of the crankshaft, the spark plug can be unscrewed;
dismantling the head cover using a 17 key. One element is located at the bottom and the other at the top;
you need to slightly tighten the locknut of the adjusting screw;
you need to take a feeler gauge 0.05 mm thick, and then insert it between the valve stems and the screw to adjust. If the probe passes too freely, you will need to tighten the locknut, and if it does not pass or passes with difficulty, loosen it;
As stated above, you need to carefully tighten the adjusting screw so that the feeler gauge moves with slight resistance, but is not completely blocked. This indicates that the gap is set correctly. If the probe cannot be inserted, you need to loosen the screw and then gradually tighten the structure. The feeler gauge should not be left in place when adjusting the gap - this may lead to tool breakage. In this case, you need to constantly check the width of the gap - it should not change;
the same must be done with the other valve; Installation of all removed parts occurs in the reverse order.
To check the correct operation, you just need to start the engine after fixing the engine valve. You need to make sure that nothing is leaking or making unnecessary sounds. You can drive a few hundred meters near the garage so that the tools are nearby to fix any problems. It is allowed to increase the gap by hundredths of a millimeter - this does not lead to malfunctions. If everything is done correctly, all the signs of malfunction described above will completely disappear, and the motor itself will serve for years.
A very useful and visual video on how to adjust the valves on a scooter:
Size of gaps
What I don't like about Chinese scooters is that they don't have any adjustment data. There is information about this on the Internet, but it is not always reliable.
It’s your right to believe me or not, but for my clients I adjust the gaps within the following limits:
- On engines of the 139QMB series (regular Chinese eighties), I set the gap to 0.05 mm - on both the intake and exhaust valves - the same.
- On engines of the 157 QMJ series (ordinary Chinese hundred and fifty) I set the intake to 0.05 mm and the exhaust to 0.07 mm
How to adjust valves on an Alpha moped: instructions
The Alpha moped has a motor - an exact copy of the engine produced by Honda for many years. The scheme, worked out over the years, works on the Honda Supe Cub, on the Monkey, Gorilla and Jazz models. They performed inhumane experiments on this engine, pouring sunflower oil instead of motor oil. There was a slight smell of roasted sunflower seeds, but the engine was running. This video is very popular among owners of any equipment that has such a motor. The Chinese motorcycle industry has spoiled almost nothing. If you monitor the condition of the moped in general and the motor in particular, the equipment will last quite a long time.
Internal structure of the Alpha moped engine
Proper Engine Maintenance
When purchasing a new Alpha moped, after a thousand kilometers of gentle mileage, you need to change the oil and adjust the valves. The engine parts have become accustomed to each other, the excess has been scraped off and now the unit can be returned to normal operating modes. Semi-synthetic oil is quite suitable, this engine does not rev high, and valve adjustment is a necessary maintenance item for any moped and even motorcycle.
What happens in the motor?
During engine operation, thermal expansion of all parts and valves occurs. If the valve clearance is greater than the nominal one, the shock loads on the entire gas distribution mechanism will increase and, ultimately, it will fail. When the gap is larger than required, such a roar is heard from the engine that it will be impossible to ignore it. If the gap is smaller, then the valves will simply tighten due to thermal expansion and stop opening. The moped will not start. It is worth watching a video once about the principles of operation of a four-stroke engine to understand how the moped works and how to adjust it. You can make a video yourself showing the process of setting up the engine of the Alpha moped.
https://youtube.com/watch?v=UMLraOKb-Fk
Customization Tools
So, how to adjust the valves on an Alpha moped? What is needed for this? It is necessary to provide access to the adjustment mechanism. At the head of the engine there are two small hex caps, on top, there are the intake valves, and on the bottom, towards the exhaust pipe, there are the exhaust valves. Adjusting the intake valves is easier, everything is visible. When removing the lids, do not lose the rubber ring that seals them. And in order to adjust the exhaust valves, if there is no lift, it will be more convenient to place the moped on its left side. You will need a special square wrench for the adjusting screw and an eleven wrench for the locknut. Feeler gauges for measuring gaps.
How is the adjustment done?
You can preview some video on this topic. The gap is measured between the top of the valve and the adjusting screw. We take the dipstick that says “0.05”. We loosen the nut, and, placing the feeler gauge under the bolt, use a special four-sided wrench to adjust the gap until the tip of the bolt easily touches the feeler gauge. If the dipstick comes out with little effort, the gap is smaller than necessary.
https://youtube.com/watch?v=mdkHxdwbhMY
The first time it is quite difficult to feel the necessary effort. And each time, you will need to start the moped to understand how the adjustment went. But over time the skill will develop. Typically, the valve clearance at the intake is smaller than at the exhaust. This is due to the fact that the exhaust valves heat up more due to the temperature of the exhaust gases. But in this motor the clearances are the same and easy to remember.
Additional tool
In the standard set of tools for the Alpha moped there is no special key to adjust the gas distribution system of the moped. It is customary to contact specialists with this question. If you plan to thoroughly maintain your moped, you should get one. Also on the list of useful wrenches and accessories is an alternator puller and a castle wrench for unscrewing the clutch castle nut.
When handling any equipment, production culture is important. If you do not carry out all the work with a hammer and chisel, the moped will serve faithfully for many years.
https://youtube.com/watch?v=2VmCrIbXakY
Gaps
Here is the combustion chamber of an ordinary Chinese scooter engine.
During engine operation, the valves heat up to significant levels. And in order to compensate for the expansion coefficient of the valve and the entire timing belt as a whole, there is a small gap between the valve and its opening mechanism. Called thermal.
In our case, the gap that we will adjust is between the valve and the rocker arm adjusting bolt. By tightening the adjusting bolt within the required limits, we can adjust the thermal gap as much as we need.
But do not forget that the gap should not be very large - otherwise the mechanism will work with a shock load and quickly fail. And very small: the valve will heat up, hit the rocker arm and burn out.
Preparing for work
For small parts like fasteners, you need to prepare an empty jar or box so as not to lose anything. It is desirable that each type of fastener (differentiated by diameter) has its own compartment - this way, during assembly, incorrect installation of parts, unnecessary noise due to instability of fixation and complications when driving after assembly are eliminated.
The room temperature should be 18-25 degrees, since at a lower value it will be uncomfortable to work due to deteriorated sensitivity of the fingers. In winter, it is necessary to warm up the garage to the specified values. Another reason is the nature of the gaps themselves. They are thermal, therefore, during repairs and maintenance at a different temperature, incorrect settings and deterioration of the engine condition in the future are possible. Before gaining direct access to the engine, you will need to remove the seat and put it somewhere where there are no dirty parts.
How to check the solenoid valve and starting enrichment on a 4t scooter?
Many owners of Honda scooters and owners of mopeds of other brands have to independently repair and maintain their equipment, as well as perform tuning. Sometimes situations arise when it is problematic to start a cold moped due to the fact that the fuel does not fill the required volume of the float chamber, or the gasoline is mixed with air in insufficient concentration. Having figured out how to check the solenoid valve on a scooter, you can solve these problems yourself and quickly warm up the engine in the morning. Let's look at this in more detail.
Adjusting valve clearances
A few tips to remember:
- After adjusting the valves, it may happen that you will also need to adjust the carburetor.
- The scooter engine does not tolerate anything unnecessary. Therefore, make sure that he doesn’t get anything.
- Adjustments can only be made at idle.
Before starting work, forget the expression that a good repairman always has extra parts. Find something to put all the nuts and bolts into. When I first disassembled my scooter, I put the bolts in the order in which I removed them, so that later I wouldn’t mix anything up or forget anything.
To adjust the valve clearances, you must first get to them.
1. Remove the seats. To remove the seat you need to unscrew the bolts that hold it in place. Often these are 4 bolts in the trunk itself, under the seat, sometimes in addition there are 1-2 more bolts in the back where the trunk is attached and 2 screws near the legs. When we unscrewed everything that holds the trunk, it can be easily removed. Before us is a motor that is no longer covered by plastic.
2. Remove the fan cover. Now we need to remove the fan cover, it can be secured with 2 nuts and 2 screws. This way you can find the dead point in order to adjust the valve clearances.
3. Remove the cylinder head cover. Next, you need to remove the cylinder head cover. Often it is attached with 2 screws and 4 bolts. Unscrew and remove the cover.
Now we need to drill down where we have the intake and exhaust valves to find TDC (top dead center). The inlet is always from above, and the outlet is always from below.
TDC is the place where the piston in the cylinder is permanently fixed at the top. But searching for TDC only sounds scary; in fact, finding it is quite simple. You need to take a regular 13mm wrench and turn the hexagon clockwise (the hexagon is located on the generator cooling impeller). You need to turn the hexagon until the “T” mark stamped on the flywheel coincides with the side protrusion of this flywheel. When adjusting the valve clearances on a 4-stroke scooter, you can immediately see 2 TDC. 4. We are looking for the camshaft sprocket, there are 3 holes and 2 valves (the valves are closed). Our task is to place the holes correctly. To do this, you need to ensure that the piston is at top dead center.
5. Valve adjustment. Now we need feeler gauges to set the valve clearance to 0.05 and 0.1 mm. First, take a 0.05 mm feeler gauge. It must be inserted between the adjusting bolt and the inlet valve (from above). If the gap fits tightly (but not end to end), then the gaps are set correctly. But if the gap is wide or narrow (butt-to-tail), then loosen the locknut of the adjusting bolt. To increase the gap you need to turn the key counterclockwise, to decrease it - behind it. We adjust so that the dipstick fits tightly and tighten the locknut, after which you need to re-check the clearance setting. Now we take a 0.1 mm feeler gauge and do the same operation with the bottom valve (release).
That's all, this completes the setup and adjustment of valve clearances on a 4t scooter. Now we put everything back together in reverse order. Take your time to do everything correctly and tighten all the bolts. By the way, do not mix up the bolts and watch out for the plastic, it is very fragile, especially on Chinese scooters.
At the end, we check whether there are any extra parts (nuts, screws) left.
If you are looking for valve clearances on a scooter, then there is no clear answer to this question. The gaps may vary significantly depending on the cubic capacity of the scooter. To find out exactly what the valve clearances are on your scooter, see the manual. I can only say that for most mopeds these gaps are 0.05 and 0.1 mm.
Tools
- Small pliers or special wrench
- Open-end wrench 9
- 14mm socket wrench or socket
- Socket wrench 8
- A set of measuring probes, preferably with a pitch of 0.02 mm
We free access to the cylinder head: depending on the scooter model, we remove the hood or seat tank. We find the valve cover there, unscrew the four 8mm bolts and remove it from the engine.
The valve cover looks like this. In my case, to get to it I had to remove the hood, saddle and seat tank.
- we remove it. If you are too lazy to remove it, just take out the plug. The plug is located in the upper part of the case and can be removed using a regular screwdriver. Through the plug we will control the position of the marks on the rotor.
We insert a 14 mm socket wrench into the center of the generator casing and turn the engine (clockwise) until the “T” mark (from the English “Top” means top, in our case the piston position is at TDC) on the generator rotor is exactly opposite the ledge.
After the mark on the generator coincides with the ledge on the engine crankcase, we check what position the camshaft is in. The camshaft should be in a position where both valves are closed. And it gets into this position every second revolution of the crankshaft since it rotates twice as slow.
The correct position of the camshaft is determined by its sprocket. The sprocket should become the large hole facing up, and the small holes and the marks that are knocked out near them should become parallel to the plane of the valve cover connector.
This is ideal, but in practice the asterisk rarely becomes the way we need it. And the chain is often to blame for this - and the camshaft begins to slightly fail to catch up with the crankshaft. If your sprocket has become a little crooked, then by and large it’s nonsense. But if you have it for some reason, then this problem needs to be solved very quickly - otherwise sooner or later the valve will bend.
Once again, check that the “T” mark on the generator rotor is opposite the protrusion, and that the camshaft sprocket is in the correct position. Unscrew the locknuts on the adjusting bolts.
We unscrew the adjusting bolts a little, insert a measuring probe between the valve and the adjusting bolt and, without removing it, tighten the adjusting bolt with our fingers, clamp the adjusting bolt with pliers and secure it with a lock nut.
After tightening the locknut, check how easily the dipstick moves. Ideally, the feeler gauge should move between the valve and the bolt with barely perceptible force.
- If the dipstick moves without effort, loosen the locknut and tighten the bolt a little.
- If the dipstick moves with difficulty or becomes jammed, loosen the bolt.
Starting concentrator, electrovalve - device, diagnostics
This detail is small, but very important. It is this that helps start a cold scooter engine without difficulty in any weather. Only thanks to it the scooter starts easily with half a turn. Thanks to it, the scooter does not shoot into the muffler like domestic motorcycles, but idles quietly and smoothly. Thank the Japanese for inventing this thing! - I say in all seriousness.
What is this - a starting enrichment agent? This is essentially an additional small carburetor, standing parallel to the main one. It is connected to the main carburetor by three channels - air, emulsion and fuel, drilled in its body. The air is taken in before the throttle valve, the emulsion (mixture) is supplied after it, directly into the carburetor outlet pipe. Gasoline is taken from a common float chamber. Thus, with some stretch, the enrichment can be considered an independent device. It’s a stretch, because it is, nevertheless, structurally inseparable from the carburetor.
Now let's look at the drawing.
The carburetor has a small additional fuel chamber 7, which is connected to the main float chamber 8 through the start jet 9. The tube from chamber 7 leads to the mixing chamber into which air is supplied and from which the air-gasoline mixture goes into the engine. A valve 6 can move in the mixing chamber, similar to a carburetor throttle valve, only much smaller in size. Just like in the throttle valve, there is a spring-loaded needle in the starting valve, which closes the fuel channel when the valve is lowered. When starting a cold engine, the valve is raised (open). At the first engine revolutions, a vacuum is created in the emulsion channel and gasoline located in chamber 7 is sucked into the engine, causing a strong enrichment of the mixture and facilitating the first flashes in the engine.
After the engine has started, but has not yet warmed up, it needs a rich mixture. The enricher works like a parallel carburetor; gasoline enters it through jet 9, mixes with air and enters the engine. When the engine is running, alternating current from its generator is always supplied to the contacts of the ceramic heater 2 of the thermoelectric valve of the starting system. The heater warms up the drive 3. Inside it, obviously, there is a gas or liquid boiling at a low temperature and a piston connected to the rod 4. When the drive is heated, the rod gradually extends by 3-4 mm and through the pusher 5 sets the damper in motion. Valve body 1 is wrapped in thermal insulation (polyethylene foam) and covered with a rubber boot.
Thus, the engine warms up along with the thermoelectric valve and the mixture gradually becomes leaner. After 3-5 minutes, the damper closes completely and the degree of enrichment of the mixture on a hot engine is set only by the carburetor idle system. When the engine stops, heating of the valve stops, the damper drive cools down and under the action of spring 10, pusher 5, rod 4 and damper 6 return to their original position, opening the channels for subsequent start-up. Cooling down and returning to its original position also occurs within a few minutes.
This enricher design is used on almost all modern scooters. Older models may use a design without an electric heater; heat is transferred to the drive through a copper heat-conducting cylinder directly from the engine cylinder. Sometimes, there is also a manual drive of the damper through a cable from the handle on the steering wheel (“Choke”).
Now the “diseases” of the system are 1. The air channel may be clogged with dirt. In this case, the mixture becomes very rich, even after the engine has warmed up. 2. The jet may be clogged with dirt. It is very thin and this happens quite often. In this case, the enricher works in the opposite way - it leans the mixture, making starting difficult. 3. Contact with the heater “tablet” is broken. The valve does not heat up and does not close. The engine runs all the time on an over-enriched mixture and does not develop the required power. The resistance at the valve contacts is easy to measure; it should be in the region of several ohms. 4. The antennae on the pusher 5 are broken, usually due to careless handling when removing the valve, and although the pusher moves, the valve is closed all the time, since it does not rest on it. Symptoms - as in paragraph 3. 5. Drive 3 is out of order. The rod does not extend or almost does not extend when heated. Symptoms - the same as in point 3. Checked by heating the actuator assembled with the valve or separately, for example with boiling water. The drive cannot be repaired.
Reed valve on a scooter - repair, replacement, purpose
Most scooters from well-known manufacturers are two-stroke, because they have simplified characteristics. Such scooters have one important part - a reed valve.
If the reed valve breaks, it can have very bad consequences for your scooter's engine. Repairing a reed valve is a very simple procedure; in most cases it is easier to replace it with a new one. But if you are new to engine repair, then you are unlikely to know where this part is located. The reed valve is located in the intake manifold on top of the engine, see the photo for more details. The photo shows the valve location of most Japanese mopeds, but there are other locations.
Working principle of reed valve
This part is very important in the operation of the engine, because after receiving the fuel mixture into the cylinder, the valve closes and thus the fuel does not return to the carburetor. The reed valve must be precisely adjusted and free from any defects, because when the piston approaches the dead center, it tries to push the fuel mixture out. But the petal valve does not allow this to be done even in small quantities, because it has good tightness.
What can happen if a reed valve breaks?
If this very important part is broken, worn out, and begins to leak air, the fuel mixture will flow back into the carburetor. And the result will be a loss of power, since the engine simply will not have enough fuel. Then, after fuel enters the carburetor, gasoline is thrown into the air filter. Also, one of the consequences of a faulty valve may be a lack of response to adjusting the throttle.
Adjusting valve clearance on 4-stroke scooters
Is your engine knocking or is it just time to check the valves? We read, ask questions. Adjusting the valve clearance Whether to adjust it yourself or in a workshop, everyone decides for themselves. I would like to note that adjusting the valve clearance is not such a difficult task; anyone who knows how to turn nuts can handle it
All you need is attention and accuracy. This article will help you
When it is necessary to make adjustments - After the first 500 km, then according to the table of prof. works; – The scooter does not start or starts with difficulty; – Has difficulty gaining momentum; – Constantly stalls; – The motor makes a ringing noise.
Attention, it is not only incorrect valve adjustment that can cause these problems. Descriptions of common problems, possible causes and solutions will be published on our website
Attention: – Adjust the gap only ON A COLD ENGINE! – Remove the seat carefully, the plastic is fragile, especially at low temperatures! – It is possible that after adjusting the gap, the carburetor will need to be adjusted (read on the website). – Before removing the cylinder head cover, it is advisable to wipe the engine
After removal, make sure that no foreign objects get into the engine. – The author of the article does not bear any responsibility for possible harm caused by incorrect adjustment.
– Pliers – Phillips screwdriver – 9 and 8 mm wrenches (heads) – Feeler gauge for setting the valve clearance (we will need 0.05 and 0.1 mm).
Step 1. Preparatory work. Prepare 3-4 jars or other containers for screws, nuts and other small parts. This way we won’t lose anything during the work process.
Removing the seat. Here we will need a 10mm socket wrench and a screwdriver. There are 4 nuts in the luggage compartment that need to be unscrewed (two on the sides of the seat lock and two on the bottom). Under the rubber foot mat there are 2 screws, which we also unscrew (see photo).
Next, carefully remove the seat along with the helmet box (luggage compartment). There is an engine underneath
Now the motor is free and nothing bothers us.
Step 2: Fan cover.
To adjust the valves, we must find the top dead center. To do this, remove the plastic fan cover for the generator:
Unscrew 2 nuts (M8) and two screws and remove the lining:
Step 3: Cylinder head cover. Remove the cylinder head cover:
To do this, unscrew 4 M10 bolts and 2 nuts (the gasoline supply pipe is screwed on with nuts). Now we remove the cover and see the following picture:
To align the protrusion and the TDC mark, use a socket wrench and rotate the fan CLOCKWISE until TDC is reached. To find out that this is really TDC, lightly move the key, while the valve rocker arms should not move. If they move, then this is not TDC, turn the fan further, CLOCKWISE, until the mark and the protrusion align.
Well, we have found the top dead center, now we can start adjusting the valves.
Attention! If you are installing a new head, before adjusting, unscrew the valve adjustment screws as much as possible! Otherwise, due to carelessness, you can bend the valves. Step 5: Adjust/Check Valve Clearance
To check the gap, take a 0.05 mm feeler gauge and try to insert it between the intake valve and the adjusting bolt
Adjusting / Checking valve clearance. To check the gap, take a 0.05 mm feeler gauge and try to insert it between the intake valve and the adjusting bolt
Step 5: Adjust/Check Valve Clearance. To check the gap, take a 0.05 mm feeler gauge and try to insert it between the intake valve and the adjusting bolt.
If this fails (due to the absence or insignificant gap) or the gap is too large, then loosen the M9 lock nut and turn the adjustment bolt with pliers or a suitable wrench. Clockwise - the gap decreases, counterclockwise - increases. At the same time, hold the feeler gauge between the valve and the adjusting bolt.
The probe should fit tightly between them, so that the probe can be moved, but when moving, there should be no scratches on it. Tighten the locknut while holding the adjustment bolt with a wrench or pliers. After tightening, check the gap again.
So we adjusted the intake valve.
We do the same with the exhaust valve. Access to it with a probe is difficult, but possible. The gap here should be 0.1 mm.
The valve adjustment is now complete. We reassemble in reverse order, putting all the parts in place (head cover, fan cover, seat).
Let's see if we have forgotten anything. Tighten all screws, bolts, nuts accordingly
We work with plastic carefully! May break, especially at low temperatures
Signs that a check is needed
If difficulties arise with starting the engine and in a number of other situations, it is necessary to be able to check the functionality of the starting enrichment. Thoughts about a malfunction of the solenoid valve may arise in different cases.
Let's take a closer look at the main reasons:
- the first morning start of a cold scooter engine is problematic;
- it is difficult to start a cooled scooter engine after a long stay;
- fuel consumption significantly exceeds the consumption indicated in the passport;
- The scooter's power unit is quite unstable at idle;
- a warm engine does not maintain speed, and a cold engine functions intermittently.
Any of these problems should make the scooter owner think about a possible malfunction of the solenoid valve.
A faulty enrichment device can be in two positions:
- with the solenoid valve needle constantly extended;
- in the initial state, when the needle does not protrude.
It is necessary to be able to check the functionality of the starting enrichment if difficulties arise with starting the engine.
Each case has a different effect on the operation of the motor. The first situation makes it difficult to start the engine of a cold scooter. An attempt to start the engine by pressing the kickstarter, as well as starting with an electric starter, are unsuccessful. In the second case, the engine starts without problems, but during operation it consumes an increased amount of gasoline. Increased fuel consumption is associated with engine operation on a highly enriched mixture.
Iirbis virago (alpha) 110 – question for readers
pivo_msu Actually, here's the story. On the eve of the New Year, I said goodbye to city life and moved to my house outside the city. Naturally, I work in Moscow, and I go to work at least three days a week. In principle, now such trips do not pose a problem, because it is only an additional 50 minutes of time (plus what it was like when living in Moscow on the way from home to work). However, the summer season is ahead, and I, including myself, need to be at work on Fridays. You understand that I will have to go back home through traffic jams “in the name of all summer residents.” So I had the idea to buy a motorcycle, moped or scooter in order to get through traffic jams with less loss of time. The motorcycle has fallen out of favor as a class, because there is simply no time yet to obtain category “A” licenses and the extra money to purchase them. The scooter is not bad, but the maximum speed of 60 km/h can negate all the advantages of maneuverability in traffic jams. But, as it turned out, there are mopeds with an engine, according to documents, 49.9 cubic meters, but in reality all 110. Accordingly, the documents are like for a moped (you don’t need a license, and even after a beer get-together you can go), and the engine capacity is like a light one motorcycle, and a speed of about 100 km/h will suit me quite well. Further analysis of the situation showed that the Chinese company Irbis does such things. It should be noted here that initially I had an extremely negative attitude towards the Chinese automobile industry, which automatically transferred to their motorcycle industry. On the other hand, there is no alternative (documents from the moped plus a low price). So maybe there is an option to try.
At the moment, the price of the issue does not exceed 30,000. In principle, this is the amount that I can afford to spend, roughly speaking, right now, understanding that the price will rise by the season. In this regard, a question for readers - who will advise what? Tasks: I need a light motorcycle with documents for a moped (real maximum speed under my 85 kg + backpack is at least 90 km/h). Price no more than 30,000. Operating conditions: 70% - trips from home to work (100 km one way), in the summer on Fridays, when the car ride is very long. 30% - fishing trips not far from home, but perhaps with excess weight and on bad roads. Estimated annual mileage is 3000 km. Service life is at least three years. Possibilities for self-repair: Hands grow from where necessary (270,000 miles on domestic cars, in all that time I was in the service only twice, and I did everything myself, including replacing and overhauling the engine). But time and reliability are important.
It is important that the moped can be repaired in a day (maximum two) and that either the parts are available or they can be easily replaced with improvised means. And it is important that the “moped” does not break down on the road, or that a certain number of “weak” parts break down, which you can carry with you and replace on the road in 20 minutes
In this regard, who has experience in operating mopeds, “mopeds” and scooters - is such a concept against traffic jams realistic? Is the option with Irbis suitable, or would you recommend other options? This is the “question for the audience” today. I'm waiting for opinions.
Tags: How to adjust valves on an alpha 110cc moped
Starting enrichment on a 4t scooter - description and purpose
Not all motorcycle enthusiasts know what an electric valve on a scooter is for. This device is also called a starting enricher. It is responsible for the volume of the air-fuel mixture, which fills the cylinder chamber through a nozzle when starting a cooled scooter engine. A feature of small-capacity motorcycles is the engine’s need for a rich mixture during a cold start of the scooter engine. The fuel entering through the carburetor is mixed with air in a certain concentration thanks to an electric valve connected to the carburetor.
The starting enricher is responsible for the volume of the air-fuel mixture
If the starting enrichment is functioning and there are no breakdowns of the power unit, starting the engine is not a problem even in the cold season. There is no doubt about the importance of the electric valve in ensuring trouble-free starting of the engines of modern mopeds and scooters. However, if difficulties arise with starting the engine, interruptions in operation and excessive power consumption of the engine, it can be assumed that problems have arisen with the starting enrichment. That is why it is important to know its structure and be able to check its functionality.
Adjusting valve clearances
When should you check clearances? According to the instructions, for the first time - after the first thousand kilometers, then - every 4000 km.
But if a characteristic clicking sound, similar to a clattering sound, is heard from the cylinder head earlier, you should not wait for scheduled maintenance. In addition, check the valve clearances after disassembling the head or replacing the timing chain.
Many four-stroke owners put off checking, not being confident in their abilities. In fact, this work is not so difficult, and all you need from a special tool is a set of probes.
Where to begin? First of all, the engine should be completely cooled. If the engine has been repaired, it is convenient to make adjustments with the engine removed from the motorcycle.
Most 50 cc engines are equipped with a SOHC timing belt, that is, with a single camshaft in the cylinder head. The clearances in the valve mechanism are adjusted by screws located at the ends of the rocker arms. There are two designs: one is common on engines with a gearbox (for motorcycles, scooters, minibikes and ATVs) (Fig. 1), the other is on scooters with a CVT (Fig. 2). The sequence of operations in all cases is almost the same, except that the sizes of the keys used vary.
Fig 1Fig 2
Note
:
Valve clearances are adjusted on a cold engine (15-30°C).
Note:
To determine the TDC of the compression stroke, just look at the location of the camshaft cams. If the cams are pointing "down", the piston is at TDC on the compression stroke.
Using a feeler gauge, measure the gap between the pusher and the valve stem. For engines with a volume of 50-100 cc. cm, valve clearances are 0.03-0.07 mm. (Exact details can be found in the repair manual for your specific scooter model)
The design of the motors provides special hatches or covers in the cylinder head for access to the adjusting screws.
Unscrew the nuts securing the cover of scooter motors (Fig. 3), and remove the cover (Fig. 3a)
Fig 3 Fig 3a
or a threaded hatch in the cylinder head of engines with gearboxes (Fig. 4).
Why adjust valves?
Many “riders”, when purchasing equipment, have little interest in its needs, which leads to rapid engine breakdown. The role of the valves is to supply the air-fuel mixture to the combustion chamber and remove exhaust gases. They operate under constant temperature conditions, and as you know, when heated, the metal begins to expand. Thermal expansion, together with gap deviation, leads to the fact that the valve may not close completely and the pusher is pinched, or vice versa, to too large a gap between the pusher and the valve.
If the intake valve has too large a gap between the pusher, then the combustion chamber is filled less with the mixture and the pusher breaks, and if the exhaust valve, the ventilation of the cylinder deteriorates. In both cases, this is felt as a loss of power and dynamic characteristics of the engine. When we talk about excessive clearance, then in this case the consumption may increase and a characteristic clattering sound can be heard.
That is, the engine requires adjustment of the gaps if:
- hard to start;
- does not start;
- stalls while driving;
- starts and stalls;
- consumption has increased;
- the maximum speed has decreased;
- a clattering sound is heard at the gas distribution mechanism;
- 500 km have passed since replacing the piston and cylinder group.
Gas distribution mechanism of the FMB 139 engine
The gas distribution mechanism of the FMB 139 engine is equipped with a camshaft located in the cylinder head. The valves are arranged vertically and V-shaped and are driven by a rocker arm, which in turn is driven by the camshaft lobes. This system is very similar to the Moskvich 412 timing belt, only there is only one cylinder and two valves.
The camshaft is driven by a chain drive. It, in turn, is driven by a gear located on the axis of the generator rotor, which is the axis of rotation of the crankshaft.
Operating principle of a membrane enricher
The membrane starting enrichment works on a different principle. When the engine is not warmed up, the valve is in the open position. Starting the engine causes a vacuum in the area of the intake manifold, which is transferred to the membrane thanks to the thermal valve. Under the influence of reduced pressure, the membrane tries to rise, opening a channel responsible for supplying additional air volume.
Further heating of the cylinder to operating temperature causes the valve to close and lower the spring-loaded valve associated with the needle. As a result, the supply of additional fuel is cut off. Such a system with a membrane functions in a clear connection with the engine temperature, which ensures a more correct dosage of fuel.
The membrane starting enrichment works on a different principle.
to "Automatic starting enrichment of scooter"
Hello! I have a question: if the enrichment channel is broken (the one that goes into the float chamber, this will greatly affect the operation of the carburetor
The malfunction you are talking about can affect the operation of the carburetor in cold start mode, that is, the enrichment simply will not perform its function, so the engine will start poorly when cold - that’s all. The enricher does not affect the other carburetor systems in any way, so you can safely ride.
Hello, please tell me if the wires on the enrichment chip are placed incorrectly, could this cause it to not work correctly?
Alexey, is the polarity wrong? Or what? I changed the polarity and connected it this way and that way - it works either way or that way.
Please tell me whether the +12V power goes to the enrichment device directly from the ignition switch or through some device after starting the engine
Volodya, the enrichment is powered directly from the generator, bypassing the ignition switch. That is, after the engine starts, power from the generator begins to flow to the enrichment unit; after the engine stops, the power stops.
Thank you very much for your answer.
Yes, yes, polarity. Thanks for the answer
Hello! Please tell me what is the diameter of the fuel pipe outlet? Is this tube threaded or pressed into the body?
Grigory, the diameter of the tube is 3.36 mm, unfortunately, I can’t measure the hole into which it goes - I have nothing. The tube is pressed into a hole without a thread and is removed from the body with simple pliers. There is another additional jet inside the tube.
Thanks for the answer. I pulled out the tube, it turned out to be drilled through. The jet was located at a distance of 5-7 mm from the upper end of the tube. Please tell me, is there one or more holes in the nozzle? If there are several, are they the same in diameter as those located around the circumference of the tube?
I have one hole in the jet - located in the center of the tube closer to the place where the tube is inserted into the carburetor. There are also several holes located on the outer surface of the tube. The size of the holes in the nozzle and on the surface of the tube are clearly different: the hole in the nozzle is much larger than on the tube itself.
Please tell me how to set up the carburetor on the stels taktik 50 49cc scooter. I give full throttle, he yells and drives at a speed of 30 km, what should I do?
Anonymous, if your engine reaches maximum speed (screams), but the scooter does not pick up speed, then the carburetor clearly has nothing to do with it. To begin with, remove the variator cover and see if everything is in order with your variator, clutch and belt.
I would like to ask you to measure the diameter of the nozzle of the fuel tube of the starting enrichment. This can be done using a needle, having first smoked its conical part, then insert it into the hole of the nozzle and turn it. Measure the location of the formed risk with a micrometer or caliper. I'm happy with an accuracy of 0.1 mm.
I measured it as you asked: 1.06 mm. I cannot vouch for the accuracy of the measurements...
The scooter is not a factory, it fills the float chamber with gasoline but it doesn’t flow into the cylinder, what should I do?
Andrey, first I would measure the compression and check the spark, and then...
Andrey, at least tell the admin what kind of engine you have, 2-stroke or 4-stroke. Each engine has its own “sores” under the word “won’t start”!
Admin
: If the starting enricher is faulty, then an enriched mixture will constantly flow, the engine will run rough, consume gasoline, and driving will be very unprofitable.
Please tell me what the compression should be on a 4t scooter?
10-12kg per square centimeter, ideally...
Hello! Tell me, the VentoTriton R4 (50 cc) SCOOTER starts well. The black spark plug is slightly filled with gasoline. The smoke is black. When you give it full throttle, the revs drop. maybe something with the enrichment?
Yes, it's quite possible. Remove it and check.
In short, there were holes in the carburetor membrane. I sealed it now. patched) everything worked.
A 4-stroke, after releasing the gas or a short stop, it starts to move jerkily, does not pick up speed, and when the throttle is opened strongly, it almost stops altogether. It doesn’t always happen, it just started recently. The variator and clutch are fine. Even when the throttle is opened slightly (at idle), the engine gets very excited, the wheel starts to rotate, and when the throttle is released, it does not calm down immediately. I can’t adjust the idle, during a cold start it gets very excited, spins the wheel, soon calms down, starts to stall, I have to rev it up to warm it up. after a five-minute drive (at idle) the wheel rotates. What could be the reason?
How to check the solenoid valve on a scooter
Let's try to figure out how to check the solenoid valve on a scooter or moped.
This is a simple operation. Let's start in order:
- You should check whether the enrichment channel is closed by the solenoid valve needle. Start the cold engine and observe the change in idle speed. At first they are increased and then decreased to the desired frequency. In this case, you can make a conclusion about the serviceability of the starting enrichment and not search for its faults;
- If the scooter starts without problems, but the engine speed does not decrease after reaching operating temperature and remains high, there is a high probability that the starting enrichment is faulty. In this case, it is necessary to check the functionality of the solenoid valve;
Checking the solenoid valve on a scooter
- If the power unit can be started only after long and exhausting presses on the kickstarter, the carburetor is not clogged, the gasoline level in the float chamber is set correctly, and the compression has not dropped, then most likely there are problems with the operation of the starting enrichment, and it needs to be checked.
So, we have come close to testing the scooter's starting enrichment for operability. To perform this operation, it is necessary to disconnect the wires connecting the solenoid valve to the scooter's electrical network. Then you should unscrew the fastening of the solenoid valve to the carburetor body and remove it. Next, you will need to prepare a pair of insulated wires, the length of which will allow you to connect the terminals of the starting enrichment to the battery.
When connecting, there is no need to observe polarity, since the solenoid valve is powered from an alternating voltage network. It is important to pay attention that the ends of the wires freed from insulation do not touch each other. All that remains is to connect the wires to the chips and supply 12 volts from the battery to the enrichment unit.
With a working enrichment device, after a couple of minutes you can see the needle gradually moving out of the device body. The amount of stroke can be determined by measuring the extension of the rod before applying voltage and after turning off the power. For a faulty solenoid valve, five minutes after connecting to the battery, the needle will remain in the same position. If there are no defects in the wiring, then we can conclude that the enrichment unit is faulty.
Don’t be upset and try to repair the solenoid valve - the cost of a new one, depending on the model of the moped, varies between 5-7 dollars. When purchasing, it is advisable to have an old starting enrichment with you or clearly find out from the seller whether the spare parts he offers correspond to the brand of the scooter.

