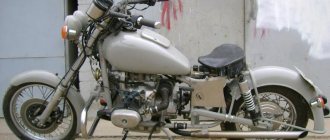
The most important part of any motorcycle is its frame. It is the frame that largely determines the silhouette of the motorcycle (not just custom), and therefore its appearance. It depends on the frame what type of motorcycle your “Dnepr” will be after the conversion: chopper, classic, enduro or sportbike. All this is, of course, relative, because, in my opinion, only a chopper can be built from the Dnepr.
So, before you is a cleanly washed frame of the Dnepr. What can be made from it? And you can do a lot, especially if you completely cut it into pipes. But this should be considered as making a new frame, not altering it. Remodeling involves relatively minor intervention in the design.
The most popular frame modifications are:
- Frame extension at the rear (behind the engine). Allows more legroom for the driver. Usually the frame is extended by 5-15 cm with a corresponding extension of the driveshaft. The amount of elongation usually depends on the height of the biker.
- Frame extension at the front (in front of the engine). Allows you to implement the “American landing” with a boxer engine. In this case, the controls for the brake system and gearbox are transferred to a rod located in front of the engine at a height that is individually selected to suit the height and length of the driver’s legs. This is precisely the principle implemented in the Russian Ural-Wolf. I note that the height of the “pedals” on this motorcycle is chosen approximately and on average. As a result, the driver’s legs are unjustifiably “lifted” up.
When extending the frame at the front, a standard length driveshaft is typically used.
- Frame extensions . Used to install a thicker rear wheel. From personal experience, I have verified that it is possible to install a rear wheel no more than 200-210 mm wide. When installing a thicker wheel, you have to use either a broken driveshaft with an intermediate bearing, or a gearbox that allows you to shift the output of the driveshaft to the side.
In fact, a standard Dnieper pendulum can accommodate a wheel no more than 120 mm wide. In this case, there will be approximately 3-5 mm between the tire and the cardan. gap I consider it optimal to slightly widen the frame and pendulum to accommodate a wheel 130-150 mm wide. It is with this wheel width that the conversion will have optimal ride quality.
- Changing the angle of the front fork . A very popular and controversial remake. You need to know that an increase in the fork angle of more than 33 degrees entails a strong deterioration in the handling of the motorcycle (this is due to the general geometry of the motorcycle and is described in textbooks and some popular motorcycle magazines).
Also, increasing the angle of inclination heavily loads the standard Dnieper fork stays and leads to their rapid failure. Also, from personal experience, I have repeatedly observed traverses and upper frame pipes cracked while driving. Therefore, in my designs I try not to increase the angle of the front fork (33 degrees - maximum).
- Tilt of rear shock absorbers . It is used to make them work more efficiently and improve the appearance of the structure (according to many people, vertical Dnieper shock absorbers look unaesthetic).
It should be taken into account that the inclination of the rear shock absorbers must be optimally selected, since with a significant increase in the inclination angle of the standard Dnepr shock absorber, the load capacity of the motorcycle is greatly reduced. This can lead to the fact that even traveling with a compact passenger will be impossible.
- Various smaller improvements:
– Installation of cups under the tapered bearings of the front fork. A very useful modification, but requiring the manufacture of new crossbars.
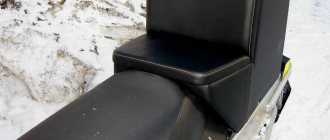
– Lowering the saddle line. Typically used when extending a frame.
– Raising the frame at the front is done by lengthening the front tubes. Etc.
Now you know what kind of frame you need and you can start cutting the standard Dnieper frame. Here you need to be guided by the principle “measure twice, cut once.”
How to make a bobber from the Urals or Dnieper
In the process of developing a bobber project from a domestic motorcycle, it is necessary to carefully think through all the details so that the custom turns out to be harmonious. A motorcycle usually goes through the following stages of modification:
- The old bike is completely disassembled.
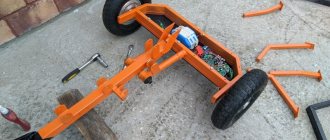
- The frame is cut down and takes on a triangular shape.
- All excess parts are trimmed and discarded.
- Wide wheels are selected.
- The front fender is removed, and the rear fender is made shorter.
- The engine is rebuilt and polished.
- The motorcycle parts are painted.
- Other stylistic modifications are being made: seats, mirrors, etc.
The most labor-intensive part is, naturally, altering the frame and installing the wheels. But in general, Russian customizers do all the work during the winter and spend about 60,000 rubles on the whole process. However, the cost may increase if you buy some special tuning elements.
Where to begin
It's worth starting with developing a concept. Pencil and paper to get started. And then, when all the details line up into a single, at least internally non-contradictory concept, you can use a three-dimensional graphic editor to recreate in volume and color the bike into which you want to turn the IZH Jupiter 5.
The motorcycle should ultimately look like a more or less classic bobber, if not like one from the 30s, then at least like one from the 50s. Yes, today there is another direction for creating bobbers, when they are made with modern “filling”, but this is clearly not the best option when it comes to IZ Jupiter 5. In this case, it is better to make the classic version. This is both simpler and more harmonious.
It should be a motorcycle with a fairly low seat. The steering wheel is wide, but not particularly large, making it easy to drive off-road. Thanks to the shock absorber system, the seat should have good springing. There should be no unnecessary body kit on the bike.
We are not just talking about some kind of hanging containers, be it containers for things or for a helmet. You will also have to remove some of the frame sheets. This is done to achieve the motorcycle’s maneuverability, lightness, and therefore relative performance, which is so needed on rough terrain.
Popular custom Ural-bobber models
Ural M67-36 Bobber
Donor: Ural M67-36 1979.
Stages of work:
- Disassembling the entire motorcycle and polishing all engine parts.
- Installation of pistons with a diameter of 79 mm from VAZ.
- Replacement of springs, valves and head gaskets.
- Extension of the kick starter leg by 5 cm.
- Reducing ground clearance by 10 cm.
- Changing the angle of the fork and shortening all its parts by 7 cm.
- Changing the design of the rear suspension and lengthening the frame, cardan and rear pendulum by 15 cm, as well as changing the mounting for the seat.
- Personal assembly of wheels from rims and spokes and installation of 19-inch tires.
- Installation of a custom-made electronic ignition system.
- Lengthening and giving a teardrop shape to the gas tank from the Ural M-61.
- Restoration and installation of headlights and dashboard also from Ural M-61.
- Purchase and installation of new turn signals, air and fuel filters, electrics, mirrors, brake lights.
- Polishing throttle and clutch handles.
- Manufacturing and fastening of fiberglass wings.
Chopper from the Urals - how to turn a dream into reality, and what you need for this
Custom motorcycles always looked more impressive and gave their owner much more positive emotions than a regular factory model. The idea of modifying and reincarnating motorcycles appeared back in the 50s. American bikers began to actively remodel their motorcycles, not only painting them in the original color, but also modernizing power units. Some created completely unique models, installing a new exhaust system, beautiful wheels on their motorcycles, modifying the optics, and even such elements as a tank or wings. But what if you try to modify a Soviet motorcycle, for example, Ural or IZH. After thinking a little, we decided to tell you about how to make a chopper from the Urals.
What is a chopper?
First of all, you should understand what motorcycles of this class are. The first choppers appeared in the USA around the 50s. This class became very popular due to the fact that it had a very comfortable seating position, which made traveling on a motorcycle a pleasure. The thing is that the chopper has a high steering wheel, with a clearly inclined front fork. The front wheel of this class of motorcycle is narrow, and the rear wheel is much wider.
Choppers are also distinguished by a small tank and a large engine. And what is important, the very first choppers were made by the same American bikers who created a chopper from an ordinary production motorcycle. Most often these were bikes from the Harley Davidson company, until engineers began producing serial models of Harley choppers.
Choppers are not only a cool and unusual appearance, but also a comfortable ride. The upright riding position allows you to ride a bike like this for quite a long distance before you get tired, which is not the case with sports bikes, for example. But creating a custom chopper with your own hands allows you not only to have a lot of imagination, but also to create a motorcycle just for yourself, which is good news.
What will you need to build a chopper from the Urals?
Many bikers who have ever thought about building a custom motorcycle have never even tried to get started. The thought that this requires a good understanding of technology, and the whole process is very complicated, completely discourages the desire to create the motorcycle of your dreams. This is completely the wrong approach. In fact, as soon as you start making your first chopper from the Urals, you will realize that everything is actually very simple and you were worrying in vain.
So, in order to make a real chopper out of a Ural motorcycle, we don’t need much. First of all, of course, you need a donor if you don’t already have one. If you are just planning to purchase a Ural motorcycle, then it is better to immediately look for a working bike so as not to waste time. Here it’s worth saying right away why we choose the Ural and not another motorcycle.
Firstly, the Ural is equipped with a fairly powerful engine, which is very similar to the displacement engines of chopper motorcycles. And secondly, the Ural motorcycle has everything we need to build a chopper. Otherwise, apart from spare parts from an old VAZ or ZAZ, we will need practically nothing.
Brand popularity
Although Ural is found everywhere in the Russian Federation, a large number of manufactured mopeds are sold to other countries. Only three percent of the total volume remains in Russia. This is due to the considerable cost of the motorcycle. For the same price it is possible to purchase a used car of excellent quality.
Realizing that this bike was very popular abroad, I decided to reconstruct it, started buying spare parts abroad, and carrying out the assembly in the Russian Federation. About a thousand bikes are produced annually and are already sold in advance. It’s hard to imagine which countries they drive on.
Chopper from the Urals - start of work
Having selected a decent motorcycle and checked its engine for performance, you can begin to create a motorcycle - the Ural Chopper. All we need to do to create a chopper is to lengthen the front of the bike and work on the rear wheel and suspension. Let's try to break down the construction process step by step.
Drawing
The process will go much faster if you make a drawing or approximate picture of what the resulting motorcycle will look like. There are quite a lot of drawings of chopper frames on the Internet, so choosing the right one will not be so difficult. If you are confident in your abilities, then you can do without it.
Perhaps the only difficult stage that you will have to face is the alteration and welding of the frame. The whole secret is to place the steering rack at the right angle, which will ultimately change the angle of inclination, allowing you to set the front fork at the required degree. It is worth saying that a lot of attention needs to be paid to welding this place, since this area will receive quite heavy loads.
Having finished with the front fork, you need to work on the rear part of the future motorcycle - Ural Chopper. As a rule, bikes of this class are quite long due to the large rear wheel. That is why we need to weld the frame so that we can install a wide wheel on the axle. Naturally, this part of the frame should also be given a lot of attention. In general, if you have not done welding before, then it is better to entrust this task to specialists, because safety comes first.
Lubricant selection
Pouring fresh lubricant into the Ural fork is a responsible procedure. It is necessary to choose the oil very carefully, because the motorcycle clutch is completely submerged in lubricating fluid. Motor oil should not be poured into a four-stroke Ural engine, because it has an inappropriate viscosity coefficient. Oil for bikes has a completely different set of additive elements.
- If the motorcycle is used all year round, which is surprising given the cold winters of Russia, pour a universal consumable into the engine. This oil has certain advantages over others because it contains special additives. Thanks to them, the lubricant is effective in low and high temperature conditions. Manufacturers of lubricating fluid that is poured into motorcycles carefully and for a long time test it under different temperature conditions.
- If the bike is used only in the summer, you can fill it with summer oil. This lubricant is common and perfectly lubricates internal combustion engines.
- When choosing the lubricant that you will pour into the bike, you need to take into account its viscosity index. In order for the engine to function smoothly, a fluid lubricating fluid is required that does not thicken in low temperature conditions. If the engine is significantly worn out, you can pour viscous lubricant into it, because a worn-out engine smokes when driving. Most Urals owners believe that even low-quality petroleum products are unable to harm the internal combustion engine.
- Since the Ural bike is considered a high-class motorcycle, its engine has characteristics that allow it to function under increased loads, even with severe wear. The Ural manufacturer recommends pouring M8B1 lubricant into it. It does not have the best reputation, but the internal combustion engine functions perfectly when it is filled.
Latest improvements
If you manage to weld a high-quality frame, then you can assume that most of the work has already been done. The only thing I wanted to add was the angle of the front fork. We do not recommend tilting it more than thirty-three degrees. This value is the most optimal for choppers, because the greater the angle of inclination of the front fork, the worse the motorcycle will handle. In our opinion, 28-30 degrees will be more than enough to make the motorcycle look like a real chopper from the Urals, and at the same time handle well.
The last stage is the final assembly of the motorcycle. The engine and other main mechanisms are installed on the frame. The front wheel and handlebars are finally in place and we can see for the first time what our bike looks like after the rework. But in general, the frame is not the only thing that can be done with a Ural motorcycle.
True motorcycle enthusiasts can put all their soul and money into their custom motorcycle, and end up with a Ural Chopper that will delight them for a long time. Installing and reworking the exhaust system, upgrading the fenders, seats, lighting fixtures are just a small part of what can be changed. When modernizing the appearance, you can fully express your imagination or borrow ideas from ready-made choppers.
Motorcycle engine tuning Ural and Dnepr.
Greetings to owners of heavy domestic Ural or Dnepr motorcycles who are not satisfied with the standard factory engine power of these bikes - this article is for you. Here we will look at how to increase the power of the stifled engines of these motorcycles on our own, but I want to immediately warn you that without a familiar turner, boring machine, milling machine and thermal operator, it will be impossible to achieve our plans. Therefore, choose some factory in your city or a well-equipped workshop in advance and make acquaintances there, since the modification of some parts in an ordinary garage is not feasible.
In general, domestic boxer engines of these motorcycles have good potential for boosting, since in these engines the piston stroke has a shorter distance than the piston diameter itself (the piston stroke is 68 mm, and its diameter is 78 mm). That is, these engines can be quite revving (not like the Japanese, but still), but at the factory they are clearly strangled, and the quality of engine parts, compared to the Japanese or European motorcycle industry, to put it mildly, is not good.
And now, in general, spare parts from such basement “firms” have appeared on sale that factory Soviet parts seem to be the height of perfection. So before you start tuning your engine, as I will describe in this article, first do a major overhaul (replace worn gears, shafts, etc.), but only from Soviet parts, of which the local population still has plenty of them in Russia and the CIS ( especially somewhere in the outback). And find Soviet pistons from the 6 volt Dnepr MT-9 (or K-650), with a spherical bottom - they will be useful for raising the compression ratio of your engine. So let's get started.
Engine head.
The head of any engine is very important, because through it the engine cylinders are filled with a combustible mixture and exhaust gases are removed. And the more efficiently the cylinders are filled and exhaust gases are removed more efficiently, the greater the power of any engine.
The first thing we will start with is bringing the factory head of your boxer to normal condition. First, dry out the head valves and remove the valves. If you have a Ural motorcycle head, then it is more strangled than the Dnieper one, since the diameter of its valves is only 35 mm exhaust, and 38 mm inlet. Bore out the original Ural valve seats and press in normal Dnieper valve seats with a diameter of 38 and 40 mm in their place. Any mechanic in a car repair shop knows what kind of fit should be when the saddles are pressed in correctly (the saddles must be made of durable malleable and heat-resistant cast iron), so go there. There they will bore (remove) the Ural valve seats for you, and correctly press in the enlarged Dnieper valve seats.
Now you will need Dnieper valves, but when purchasing, check the evenness of their stems (a leftist is enough), the standard of straightness is up to 0.03 mm (you can check by rolling the valve stem over a piece of glass, and a feeler gauge thicker than 0.03 mm should not be inserted between the glass and the valve stem , and ideally even thinner). You won’t be able to check what the valves should be made of, but it’s still useful to know - alloyed alloy 40X9 for the inlet valve and heat-resistant steel EP303 for the exhaust valve. Soviet parts are made from these alloys.
Having purchased the valves, measure their diameter with a micrometer and select new guide bushings made of cermet or bronze for them, but so that the gap between the valve stem and the bushing is no more than 0.04 mm. (by the way, when purchasing, immediately measure both the bushings and valves). The inner diameter of the bushing is measured with a small indicator bore gauge. You can read how to press in bushings using the example of automotive ones, because the principle of pressing is the same, only the device needs to be made specifically for your head (see the device and how to use it here).
A pressed Zhiguli bushing into the boxer head and a valve seal.
I want to assure many boxer engines that 90% of all NEW heads for boxer engines are now sold with an inflated value of up to 0.5 millimeters!!! clearance between the guide bushing and the valve stem. I repeat once again - NEW heads, so after purchasing a new head, immediately dry out the valves and change the bushings, or valves with thicker stems (to get a gap of 0.04 mm). By the way, I advise you to press in the Zhiguli factory bushings, since they have a special groove on which a very useful valve seal is placed (see photo).
Also check all three necessary chamfers on the valve plates: at the inlet of the seat there should be a chamfer of 60°, which will ensure maximum filling of the cylinder at the inlet; at the outlet of the seat there should be a chamfer of 30°, which will give the outlet minimal resistance; and a working chamfer of 45°, which will be in excellent contact with the valve disc, providing excellent tightness.
The next operation will be replacing the standard springs with springs from a foreign car, for example from Avdotya (Audi 100). This must be done, since the speed of your engine will increase after tuning, and the standard springs will not cope with the inertia of the valves and their pushers at higher speeds. And Audi springs are stiffer and this stiffness, as well as their progressive characteristics, will not allow the valves to hang at high crankshaft speeds.
Springs from Audi, spring plate and valve modification for crackers from Audi. 1 — springs from Audi, 2 — valve crackers from Audi and grooves on the valve for them.
To implement this idea, you will need to shorten the valve stems slightly (up to 90 mm), and cut three grooves at the ends of the stems for Audi spring locks (see photo). And the cut ends of the valve stems (at the point of contact with the rocker arms) will need to be hardened or cemented (whatever thermal agent you find at the factory, do it).
When assembling, do not forget to check that the rocker presses exactly in the center of the valve end, because on most factory heads this alignment is incorrect. Using thin adjusting washers placed on the rocker axis, ensure that the tip of the rocker presses exactly in the center of the valve end, this is important.
Before assembly, it is advisable to bore the inlet and outlet channels of both heads a little (about 1.2 - 2 mm) with a rolling cutter, and then polish their walls to a mirror shine - this will improve filling, the engine will breathe better and this will increase power. Don’t forget to thoroughly wash the entire head to remove any processing products.
Well, one more improvement of the head. It is necessary to make and screw in fittings for the longer threads of modern spark plugs, because all normal (for example, iridium) spark plugs have a long thread. And it’s time to introduce modern spark plugs, which are designed for up to 200 thousand kilometers, into our boxer engines. It’s better, of course, to make two fittings, as I did on my Dnepr, in order to install two spark plugs on each cylinder in the future. You can see this in this article, and there you will see how easy it is to install a homemade electronic ignition on a domestic boxer engine.
Those who want to go even further, in the endless path of tuning, can install hydraulic valve compensators from a foreign car on the engine of a Dnepr motorcycle (the Dnepr has more oil pressure than the Ural, since the oil pump is more efficient). This will allow you to forget about frequent valve clearance adjustments. To implement this idea, you first need to select the hydraulic compensators themselves at disassembly (we adjust their diameter as fashionably closer to the diameter of the standard pushers, so that less aluminum is removed when boring the standard holes in the crankcase), and valve springs from the same machine.
Having measured the exact diameter of the compensators, it is necessary, based on this diameter, to bore the holes (in which the standard valve tappets move) in the Dnieper crankcase, so that the hydraulic compensators move in the bored holes with a gap of 0.04 mm.
Round fitting for pressure sensor.
And for them to work (compensating for valve clearances), oil under pressure must be supplied to them from the lubrication system of the Dnieper engine. The easiest way to supply oil to the hydraulic compensators is from a standard oil pressure sensor (we connect the fitting to the sensor, which is shown in the blue photo on the left, but it will need to be welded to a steel tube, and a clamp is not needed) and then through steel tubes, and from the tubes are screwed into the crankcase T-shaped fittings through which oil is supplied directly to the hydraulic compensators in the crankcase (see photo below).
Supply of oil pipes from the sensor to the hydraulic valve compensators.
But the main thing in this alteration is to install valve springs from the same machine as the hydraulic compensators. Since the expansion joints are heavier than the standard Dnieper pushers and the standard Dnieper springs do not have enough elastic force to cope with the inertia of the heavier expansion joints (at speeds above 4 thousand), and interruptions in engine operation will occur.
The last thing that needs to be done here is to drill a hole in the bottom of the compensator (in all four), into which a standard aluminum rod will rest, which pushes the valve (more precisely, the steel tip of the rod).
Camshaft.
The engine, with a modified head, will “breathe” even deeper and more efficiently at high speeds if you increase the valve opening stroke slightly (by 1.5 - 2 mm). And to do this, you need to weld metal onto the camshaft cams, increasing the profile of the cams. By the way, on the Dneprov MT-1036 model, a camshaft with a higher cam profile (than other models) was already installed at the factory, so it makes sense to look for this shaft. If possible (a normal factory or a workshop with good specialists), then you can order a new camshaft, but with a 2 mm larger cam profile, from 20X steel, followed by carburization.
Welding should be best done with an argon arc apparatus, fusing the metal a little at a time onto the top of the cam, and at the same time, the entire camshaft should be immersed in a bath of cold water (add cold water as it heats up). This is necessary, otherwise the shaft will move when heated. Having welded a little metal onto all 4 tops of the cam, we process them and constantly check the profile using a template made in advance from cardboard.
The profile of all four cams should be exactly the same in both height and egg shape, and once this is achieved, the cams should be polished to a mirror finish. After polishing, it is advisable to harden the cams to a hardness of HRC 43-48 (it is better to contact a familiar thermal specialist). By the way, you can increase the service life of the camshaft by modifying it a little more, but we read here how to do this.
After modifying the camshaft, no matter how hard we tried, it could still move, and not only from welding, but most likely from hardening. This is necessary and important to check by placing the shaft in two prisms and bringing the nose of a dial indicator to it in different places (where there are no cams). We check the shaft by turning it in the prisms and following the indicator arrow. And if there is curvature, then the matter can be corrected if you drop a drop of metal in the middle of the shaft using electric welding (where there is no cam) and you will immediately see that the shaft will bend slightly in the opposite direction.
This way you can completely remove the curvature by constantly checking the shaft with an indicator after each drop of welding (at the end we grind off a drop). Just practice first on some unnecessary roller or metal rod.
I would like to warn you that it is pointless to carry out painstaking modifications to the camshaft if you do not replace all the bearings, especially the crankshaft bearings with high-quality Japanese ones. Also, the piston and crankshaft must be new. And the most important thing I want to say is: with an increase in the profile of the cams, the engine power will increase only at high speeds, and on the contrary, it will drop at medium and low speeds.
Why this happens cannot be explained in a nutshell, and I highly recommend reading more about this in this article, after reading which you will understand that modifying the camshaft, as described above, is in most cases not justified. After this, you will have to constantly rev the engine and work the gearshift foot twice as often, which is not good for a chopper - its engine must be pulled from the bottom. If you are building a motorcycle in the café racer or streetfighter style, then it makes sense to bother, but again let me remind you that your engine must be brought to the ideal (start, as I already said, by replacing the bearings with branded ones, replacing the carburetor jets with ones increased by 40%, replacing exhaust to forward flow, etc.).
Piston group.
When modifying the pistons, we will take into account two main circumstances. The first is to increase the compression ratio, and the second is to make sure that the pistons do not meet the valves at the top and the crankshaft cheeks at the bottom. And as I said at the beginning, in order to increase the compression ratio, the Urals will need MT-9 pistons with a convex bottom, which is already 6 mm higher than the Ural one, and therefore it will provide an increase in the compression ratio.
Refinement of the piston group. 1 - excess aluminum was removed from the piston skirt, 2 - a copper tube that pours oil onto the bottom inside the piston, 3 - a sample of 12 by 12 mm.
But the catch is that it is impossible to rotate the Ural crankshaft with pistons from the MT-9, since the crankshaft cheeks will rest against the lower edge of the piston skirt. To eliminate this, you need to sharpen the Dnieper pistons so that only 3 mm of aluminum remains on the side of the piston skirt (where number 1 is in the photo) to the lower oil scraper ring. (see photo).
After this modification, the pistons and crankshaft will no longer interfere with each other. But when the piston goes to bottom dead center, check that there is a gap of at least 1 mm between the ground part of the piston skirt and the crankshaft cheek (so that as the pistons wear and are repositioned, the parts do not meet during operation, plus a thermal gap).
You should also cut out window 3 (see photo) in the skirts of both pistons, 12 mm wide and 12 mm high. This is necessary so that the piston does not catch the oil supply tube on the bottom of the piston during operation (but more on that a little later). You will also need to cut out the same 12 by 12 mm window on the cylinder (see photo below).
After all the grinding and adjustments, ensure that both pistons have exactly the same weight in grams. Next, assemble the piston and install the heads, then, bringing the pistons to TDC, fill in engine oil through the spark plug hole to check (one by one) the compression ratio. To do this, you need to divide the larger amount of fluid that will fit in the cylinder at BDC by the smaller amount of fluid that will fit in the combustion chamber at TDC. It should be approximately 9.0 - 9.2. (standard engines have a compression ratio of 6.5 - 7).
A cylinder with a cutout at the bottom for the oil supply pipe.
When turning the crankshaft of a Ural engine with Dnieper pistons by hand, make sure that the piston does not meet the valves (this will immediately prevent you from turning the crankshaft by hand). You should also make sure that there is a gap of at least 1 mm between the fully open valve and the piston. This can be checked by sticking plasticine or window putty, a couple of millimeters thick, onto the bottom of the piston.
The valves will leave a clear imprint in the plasticine. If the piston touches an open valve (or two), then you should make a cut on the piston with a milling cutter. Such samples are made on more modern Dnieper pistons (and on pistons from foreign cars too).
By the way, you can increase the compression ratio on a Dnepr motorcycle without changing the standard piston if you grind off the mating plane of the engine head, but by how much? This depends on the degree of compression you want to achieve, as well as on the thickness of the bottom of the pistons. After all, after you grind (butt) the head by, for example, 2 mm, you should use a milling cutter to select the same 2 mm for the valves, otherwise the piston and valves will touch each other and will not allow the crankshaft to rotate (do not forget about the 1 mm gap between piston bottom and open valves).
Cooling and lubrication system.
After the above-described alterations, the antediluvian air cooling system (if you can call it that) should be improved. This is especially true for Ural motorcycles, whose ancient cast-iron cylinders are barely able to keep the engine from overheating, even with a standard compression ratio of 6.5. What can we say, if we raised the compression to 9, then without modifications overheating is guaranteed.
By the way, KMZ factory engineers long ago took into account that cast iron cylinders are the stone age, and after the notorious lower-valve cacique (K-750) they began to install aluminum cylinders with a cast-iron liner, which are much more efficiently cooled, on all overhead-valve engines of subsequent Dnepr models.
It’s a pity that Irbit engineers riveted cast iron cylinders (cast iron cylinders) that constantly overheated in the heat until the end of the 90s, until the more advanced Ural Voyage appeared, and then the Wolf, on which they finally repeated the cylinders like those of the Dnieper, making them aluminum , and fastening them with through studs (probably after a few years enlightenment came to the minds of the engineers of the Urals).
So, what am I talking about? Moreover, ideally, cylinders from Volk should be installed on older Ural motorcycles. But before that, they should be shortened by as much as 10 mm (and their fastening remade with through studs, as on the Dnieper), since the Wolf has a piston stroke that is 10 mm longer than that of a regular Ural. But it’s better, of course, not to spoil the Volkov cylinders, but also install a crankshaft from the Volk, and then the engine capacity will also increase to 750 cubic meters, but this is a topic for a separate article. In general, to be honest, for me the Dnepr motorcycle is much nicer and easier to tune than the Ural, no offense to the owners of the Urals, of course.
Additional oil pump in the Ural crankcase. 1 - copper tube is screwed into the pump body, 2 - the tube outlet is sealed with sealant.
Okay, enough philosophy; Regardless of which cylinders are on your boxer, you still need to do the following: firstly, you need to bring additional coolness to the bottoms of the pistons - the zone of the highest temperatures. To do this, to the standard Ural oil pump, through an adapter and an extended roller, we connect another Ural, or better yet, a more efficient Dnieper oil pump (see photo).
And connect a separate oil line to it, which is connected further through the oil cooler (in series), then bifurcates and pumps oil precisely to the bottoms of the pistons from the inside. Check that both oil supply tubes are directed exactly to the bottoms of the pistons from the inside (bring the piston to BDC and bend the tube, pointing it at the bottom of the piston from the inside, but so that it does not touch the piston skirt).
Oil radiator from a foreign car
An oil cooler can be found at the dismantling of foreign-made motorcycles, since many road Japanese motorcycles are air-oil cooled, and our boxer is worse. The radiator can be fitted even from Zaporozhets - it even has air/oil cooling. And in the crankcase itself, the oil volume should be increased to 3 liters, using a higher aluminum sump (see photo below), they are already on sale. The additional volume of oil will have a good effect on the temperature of the engine, along with the radiator.
Enlarged aluminum oil pan.
Power and ignition.
All that remains is to install electronic ignition on your boxer, as described in the article about its installation (link above in the text), as well as normal vacuum carburetors from a Japanese motorcycle, which will add power. Just don’t forget to switch to higher octane gasoline, since your compression ratio is no longer seven, but nine! The engine speed will increase to 7500, and new possibilities will open up for the boxer engine and the motorcycle as a whole. And since the speed has increased, some standard bearings may not be able to cope with the speed. Therefore, as they wear out, I advise you to replace them with branded ones, and I advise you to read how to choose a bearing and recognize its markings here.
And of course, it wouldn’t hurt to install tuning gears for the third and fourth gears in the gearbox in order to reduce their gear ratios (from 1.7 to 1.55 - third gear, and from 1.3 to 1.09 - fourth gear). And also install the tenth pair of gears in the rear axle gearbox (read how to do this correctly in this article). This will allow you to move at speeds exceeding a hundred without overclocking the engine.
That seems to be all. Who wants to read about the history of the improvement of my Dnepr motorcycle, then click here and read for good measure.
If you tune the engine of a Ural or Dnepr motorcycle as described in this article, then the capabilities of your bike will be much higher than serial factory motorcycles, and you will get great pleasure from a sharper start and an increased maximum speed, but the motorcycle was created precisely for pleasure; good luck to everyone!
If this article is useful to you, please share it on social media. networks by clicking the buttons below. Thank you.
RќСЂР°РІРёС‚СЃСЏ