Damage to the bumper is a common car breakdown. You can get a hole not only as a result of an accident, but also by simply driving unsuccessfully onto a curb or by inattentively parking: posts, low fences and other protrusions often lie in wait for motorists in their yards.
The easiest way to fix it is to replace the part, but not everyone is ready to go through such an expensive procedure. Alternatively, you can solder or seal the hole. Both methods are effective.
If the bumper was manufactured using the cold mechanical pressing (molding) method, then it will not be possible to solder the crack. In this case, special types of glue come to the rescue. The advantage is that the repair can be easily done with your own hands.
In this article we will look in detail at how to seal a bumper, how to choose adhesive for repairs and how to prepare the surface so that you can carry out the necessary repairs yourself.
Which glue to choose
The quality of the gluing directly depends on the quality of the chosen glue. When drying, the glue turns into a full-fledged polymer layer. The point is that after hardening the glue has the same properties as the bumper. For repairs of this kind, special adhesives based on polyurethane or epoxy resin are used.
What is important to pay attention to:
- The adhesive composition must have high adhesion (adhesion of surfaces) to the plastic.
- If heat will be used during painting, the heat should not change the properties of the adhesive in the joints.
- Thermoactive and thermoplastic adhesives can be used if the bumper will be painted immediately after repair.
Below are several high-quality and effective adhesive compositions:
- Weicon Construction
(high strength and elasticity, resistance to various weather conditions). - AKFIX
(high quality and strength, does not require pre-priming, suitable for spot gluing). - Power Plast
(easy to use, gives reliable results). - Moment
(high-quality gluing, low cost, waterproof, but toxic). - Two-component composition for gluing 3M plastics
(has high adhesion to most plastics, does not spread, is easy to sand and paint).
epoxy (polyester) resin must be used as an adhesive material
.
How to achieve maximum effect when gluing plastic parts
To ensure maximum effect when gluing plastic at home, you should:
- accurately determine the material and select the appropriate adhesive for it;
- carefully follow the instructions for use;
- wait for the required time for the seam to gain strength and do not try to use the product ahead of time;
- for outdoor use or for items used in high humidity conditions, you need to choose a waterproof brand;
- despite the declared heat resistance of the adhesive, the parts themselves may not survive this temperature;
- If there is no marking on the product, then you can try dropping a drop of adhesive in an inconspicuous place and see if the material dissolves.
Epoxy resin
Epoxy glue produces one of the strongest bonds and is compatible with many types of plastics.
How to glue a bumper
Reliable and durable repairs require proper preparation of the part and adherence to procedures at all stages: from selecting glue to painting and sanding.
Before proceeding with any manipulations, the bumper must be removed from the car (with the exception of body kits that are broken in many places, they must first be fastened and then removed), and also check what it is made of in order to obtain the desired effect. This information is indicated on the stamp, which is applied to the inside of the product.
Preparatory work
The first stage of repair will be surface preparation:
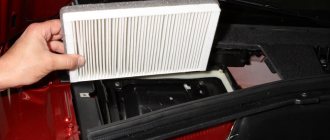
- Clean surfaces from dirt, dust, oil and other contaminants.
- Dry the part thoroughly.
- It is important to degrease the entire surface of the part or treat it with a special chemical composition.
- Treat the surface to be repaired with an abrasive material or a grinding machine.
- The edges of the cracks can be drilled to prevent further expansion.
If you carefully approach the issue of preparation, the glue will adhere better to the surface, which will increase the strength of the repaired product.
Repairing cracks on bumper
The surface is ready, now we begin the repair.
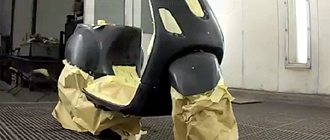
- Cover the damaged area with primer and wait until it dries completely, or seal the outer part of the bumper with foil so that the glue does not leak out. After the glue has dried, the foil is removed.
- Carry out initial gluing from the inner surface of the bumper using special compounds with reinforcing properties. If no primer has been applied, the damaged areas must first be carefully aligned.
- Then you need to apply the adhesive mixture to the front part of the part.
- The glue is applied evenly to both surfaces to be bonded.
- To make the seam stronger, it makes sense to glue a metal or synthetic mesh impregnated with glue on the inside.
- Different adhesives require different drying times, please read the instructions.
Final stage
So, the glue has dried, but the appearance is still far from ideal. Let's move on to the final stage.
- We remove excess material (by cutting or grinding).
- We prepare the product for painting using a primer, putty or other materials.
- Painting the part in accordance with plastic painting technology.
Final work
After the glue has dried and checked the tightness of the resulting seam, you need to remove traces of the work.
To do this, they begin the final stage of restoring the damaged body part. It consists of the following steps:
- Remove the foil from the outside of the bumper.
- Using a grinding wheel or sandpaper, polish the seam to the level of the rest of the bumper surface.
- If necessary, fill the uneven areas with putty. To do this, use wide and narrow spatulas.
- A layer of primer is applied to the treated surfaces.
Paint the treated area
It is important to ensure that the painted area does not stand out on the surface of the body kit
Damage to the bumper spoils the appearance of the car. Restoring a broken body kit can be done at a service center. On average, for 5,000 rubles, you can seal a crack and remove traces of repairs. To save money, the operation is performed at home. The car enthusiast will need to be patient and careful, which will lead to an acceptable result.
In conclusion
Almost any car enthusiast can repair a bumper using glue at home, without causing damage to the family budget. In terms of reliability, a sealed part will not be inferior to a sealed one.
There are many options available on the market and everyone can choose the right adhesive composition.
We recommend watching another method for repairing bumpers in this video:
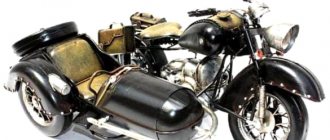
A car bumper is not only a decorative element, it performs an important practical function. This part is used to protect the body from damage in minor accidents. It is the bumper that is the first to suffer in case of unsuccessful parking, hitting a high curb, or in a number of accidents. If a crack occurs, you can find out how to seal the bumper and carry out the repair yourself.
Content:
Additional tuning elements
Motorists, trying to give their vehicle a unique design, tune the bumper. Basically, these alterations concern the installation of the following elements:
- Lip. It is a kind of protrusion, which is located at the bottom of the protective structure. It is made of fiberglass and polyurethane foam, as a result of which the lip is primed and painted to match the color of the car.
- Diffuser. Decorative trim for the lower part of the rear bumper. Foamed PVC is used to create it. Markings are created on the material, after which the sheet is heated with a construction hairdryer and the parts are given shape. They prime and paint, and then attach it to the car using sealant.
- Fangs. A decorative element that is installed on both metal and plastic body elements. For mounting on “plastic”, fiberglass is used. To install fangs on iron parts, use metal and a welding machine.
Also, to give the car an individual look, stickers are placed on the bumpers, or parts are covered with carbon fiber.
Which glue to choose for the bumper
Automotive stores sell a large number of adhesives that can be used to glue a cracked plastic bumper. You should not choose ordinary household products for this purpose. The specialized composition has a higher degree of adhesion and a lot of other advantages: it does not leave stains, is not afraid of moisture and vibration.
To glue plastic on a car bumper, you can buy the following adhesives:
- Weicon Construction. Structural two-component adhesive based on methyl methacrylate, sold complete with an activator. It is suitable for gluing metal, plastic, composites, ultra-strong, does not emit toxic fumes. The glue does not require drying in special ovens; it hardens at room temperature in just 4 minutes.
- Akfix-705. The product is ideal for gluing small pieces, sealing defects on plastic bumpers, moldings, fenders, and is suitable for spot application. Does not require preliminary priming, ensures reliable fixation and long service life of the repaired item. For polymerization, contact of the glue with moisture from the air is sufficient, because, like superglues, it is made on the basis of cyanoacrylate. The kit also contains an activator aerosol, which is used when there is insufficient air humidity or to accelerate the polymerization of the seam.
- Good glue for all types of plastic, fiberglass. They can easily glue cracked plastic parts, remove small chips and dents. Thanks to its reliability and moisture resistance, the product allows you to carry out other types of body repairs and eliminate radiator leaks.
Also, car bumper adhesive can be made based on epoxy resin. It can be used to glue even large pieces, chips, and fill holes in fiberglass parts of a car. For this purpose, epoxy glue is used in conjunction with fiberglass.
After drying, a monolithic compound is formed, which is no different in properties and strength from the bumper itself. Immediately after using the composition, it is important to paint the problem area. Examples of high-quality epoxy-based adhesives include Moment, Mannol, and SeaLine.
Car body kit repair options
How to seal a bumper, but first let’s determine what material the bumper is made of. The latest car models are complemented by metal or plastic parts on the body. Plastic are divided into two types:
- Thermoactive. This type can be subjected to secondary heat treatment. When exposed to high temperatures, it easily takes on any shape due to increased elasticity.
- Thermosetting. They have increased strength and are not afraid of high temperatures or mechanical damage. Products made from thermosetting plastic rarely require repair.
To seal a car body kit, you need to understand the types of each of the two types.
Thermoactive elements are divided into:
- polyethylene;
- polystyrene;
- polypropylene;
- polyvinyl chloride.
Thermosets are divided into:
- polyurethane;
- epoxy;
- fiberglass;
- phenol resins.
Tools and materials
To dismantle the bumper and carry out repairs at home, you will need a number of tools. Some of them are quite expensive, although they can always be replaced with manual tools. Here is a sample list of what a master might need:
- keys, screwdrivers;
- sandpaper with different grain sizes and a block;
- grinding machine with wheels;
- electric drill (mini drill);
- rubber spatula;
- clamps for fixation;
- construction hair dryer;
- soldering iron;
- metal tape (rigid adhesive tape);
- a sharp knife (for example, a stationery knife).
As consumables, you need to purchase putty, primer and paint for the bumper, and, if necessary, mesh to reinforce the crack. You will also need a solvent to degrease the part, high-quality glue, and rags. In order to comply with safety precautions, you need to prepare gloves and safety glasses.
What affects the reliability of gluing
The reliability of the seam is influenced by a number of conditions. All of them are important, and failure to comply with any one can lead to the fact that what is glued at home will fall off, despite compliance with all the others. So:
Compliance of the product material and adhesive composition. Correspondence of the type of adhesive composition to the magnitude of the forces that the connection will experience
The direction of these efforts is equally important. Thus, compounds that produce hard seams are not suitable for repairing, for example, shoes - after all, the sole will bend and twist during use, despite the fact that the tensile force will be small
At the same time, this composition can successfully glue, say, a hook to glass, and hang tens of kilograms on it. Compliance with application technology. Everything is important here - how many seconds or minutes the surfaces need to be compressed, and how to degrease them, and how long to keep the parts pressed against each other. All this depends on the properties of a particular “plastic-glue” pair, is described in detail in the instructions and must be followed verbatim. A deviation of one second in the exposure time or premature start of use of the product can lead to secondary failure. Mechanical part of the process. It is important to thoroughly clean the surface from dust and roughen it. In addition, the direction of pressing the parts against each other must be perpendicular to the surfaces being glued. You should not allow the parts to move mutually after pressing - this will also lead to failure.
Gluing plastic tightly is not so easy. Carefully following simple rules by the home craftsman will allow you to obtain strong and durable connections. The main thing is not to forget about safety precautions: do not inhale vapors of the adhesive and do not allow it to get into food, skin or mucous membranes. If accidentally swallowed, consult a doctor immediately, making sure to take the tube with you.
How to glue a bumper: instructions
If the bumper is cracked, it is better to carry out repairs without delay so that the defect area does not become clogged with dirt. First, the part must be removed by first removing the plugs and disconnecting the fasteners. Severely broken body kits do not need to be removed immediately; they should first be fastened together and then disconnected from the car. Before work, it is important to double-check what material the bumper is made of in order to choose a truly suitable adhesive for it.
Novice craftsmen are wondering whether it is possible not to remove the bumper before repairing and painting? If the product is not properly dismantled, it may burst during manipulation. Only removing the part will eliminate excess stress in the area of cracks and their further increase.
First, it is important to carefully prepare the base that will be subject to application of glue. This will directly affect the service life of the adhesive joint. First of all, wash the bumper, clearing it of dirt and oil, and dry it well. Then do the following:
- remove the coating (varnish, paint) using a grinding machine or a block with sandpaper;
- remove all rust, if any (it cannot appear on a plastic bumper);
- the edges of the crack are drilled with grooves in the shape of a Latin V so that it does not continue to expand, and also for the purpose of more reliable adhesion of the glue;
- degrease the bumper using acetone, alcohol or another solvent;
- sand the product and prime it or coat it with a special adhesion improver;
- leave until completely dry.
Repairing cracks on bumper
First, primary gluing is carried out on the inside of the bumper, using the selected adhesive with powerful bonding properties. Next, the composition is applied to the front part of the part, acting carefully and accurately. If necessary, the areas around the crack can be covered with foil, which will prevent contact of the glue with undamaged areas. From the “wrong side”, if there are large chips, you can apply a mixture of adhesive and soda, since these components turn into durable acrylic-like plastic upon contact.
If the bumper is cracked so that it falls apart into two parts, the individual pieces are combined with each other with an exact fit and secured with metal tape. If necessary, after gluing, clamps are used to clamp the fragments. For reliability, a reinforcing mesh made of metal or synthetics is glued onto large cracks from the inside, impregnated with glue. Wait until the product dries completely according to the instructions. After the clamps are removed, the adhesive seam is sanded to the level of the surface of the part.
Puttying and painting
The sealed bumper needs to be painted with high quality so that its appearance does not cause any complaints. Sometimes puttying is first carried out with a special means for plastic, which will smooth out minimal defects. The layer of putty must be very thin, otherwise it will not stick.
After the putty has dried, the surface is sanded with P1000 sandpaper and primed in 2 layers, the drying time of the first is at least 15 minutes. Then the bumper is painted with decorative auto enamel to match the body color. Apply the paint in 3-4 layers with intermediate drying cycles of 15-20 minutes. The last step is to varnish the bumper to give the repaired part a flawless look. Strict implementation of the entire sequence of actions will help you save on the work of professionals and learn how to fix minor problems with your car yourself.
In this article we will tell you how to glue the bumper so that it lasts a long time and the defect is not visible.
To eliminate a bumper crack, you can carry out independent repairs using two gluing methods:
- soldering the seam, unfortunately this option is only suitable for thermoplastic bumpers;
- gluing the crack with special glue.
Sealing process - preparation
Before sealing the bumper with fiberglass, we recommend conducting a trial compatibility test on a small area of the damage. To determine how to glue the body bumper, carefully study the manufacturer's instructions. The adhesive material must match the surface type of the part.
If there are body kits at the site of damage, they must first be secured and only then removed. At the same stage, accurately determine the material of the spare part to select the desired adhesive base.
This information is on a stamp on the inside of the product. When the mixture is selected, all that remains is to use it correctly in order to correctly restore the spare part after damage.
In order for the repair to last as long as possible, the bumper will have to be pre-treated. The part is disconnected in advance.
Carry out mandatory training:
- thoroughly clean the car buffer from dirt accumulations;
- remove residual oil and dust;
- let the parts dry;
- wipe it with a chemical to degrease it;
- grind the broken surface with an abrasive or a grinding machine;
- if the cracks are too deep, we recommend drilling them out, protecting the spare part from increasing damage.
With the listed procedures, you will achieve stronger adhesion of the glue to the surface, which will guarantee the quality and long service life of the part.
How to glue a bumper: let's get started
Once the surface has been pre-treated, it is time to begin the bulk of the restoration process. Cover the damaged area of the spare part with a primer and wait until the substance dries completely.
The second option: seal the crack on the bumper from the outside so that glue does not leak out of it. To do this, use foil. Once the adhesive has dried, the material must be removed.
Primary gluing from the inner surface of the buffer is carried out with a composition having reinforcing properties. To do this, we recommend using a composition based on epoxy resin with a high degree of adhesion.
If you have previously decided to abandon priming work, then carefully move the damaged areas towards each other
Sometimes the cracked parts are held together with metal staples. However, fixing the two parts from the outside is done with standard paper tape. He will carefully secure the edges of the surface at the same level before painting. After gluing the hole from the inside, the tape will be easier to remove than the staples.
When both parts of the car are securely fixed, apply the adhesive mixture to both parts of the damaged part. Before it dries, glue a metal or synthetic mesh to strengthen the seam.
This can be a painting mesh, which also needs to be treated with adhesive on top. It is impossible to predict the drying time, since each chemical composition takes its own time to dry.
Final stage
When the crack is glued and the adhesive solution is completely dry, the car buffer remains visually unattractive. There is no need to sound the alarm - this is natural, because there is still finishing work ahead.
Let's get started:
- Remove any excess compound on the plastic, carefully cut it off or sand it.
- Prepare the surface of the spare part for further painting. To do this, use a primer, putty or other materials for this purpose.
- The car buffer must be painted according to technology. Such paints are available in car dealerships.
Detailed work on painting a bumper with your own hands in the video:
Results
Repairing a buffer at home is not a difficult task. Therefore, if you have minimal experience in this matter and follow all the instructions, you can quickly restore the part. And you won’t have to spend money on paying a car mechanic.
Glue for car parts has significant advantages. It is cheap, its purchase will not affect the family budget. The method of sealing a cracked buffer with an adhesive mixture is in no way inferior to sealing.
We recommend watching the video instructions on how to glue a bumper with glue yourself:
Mechanical impact on a car bumper as a result of an accident or collision with a high curb leads to the need for repairs. In order not to spend money on car service services, many car owners prefer to do the repairs themselves. Detailed instructions on how to properly glue a bumper with your own hands at home will help you avoid mistakes.
Choosing glue for gluing the bumper
A high-quality adhesive composition should: sand well, fill and restore large damaged spaces, not spread during application, have rapid adhesion, withstand temperature fluctuations after hardening, have high rigidity and mechanical stability.
- NOVOL professional PLUS 710 repair box/repair kit
A ready-made solution for repairing cracks and dents on car bumpers. The set consists of polyester resin, glass mat and hardener.
The material allows you to work with surfaces made of polyester laminate/plastic and metal; Application is possible on an old varnish surface or two-component acrylic primer.
After the adhesive mass has hardened, all that remains is to polish the glued area, putty and paint the bumper.
- TEROSON PU 9225 SF ME, two-component polyurethane-based adhesive
The composition is suitable for gluing various plastic parts in a car, including interior trim.
Bumper repair adhesive interacts with the main plastics suitable for gluing: PP/EPDM, SMC, PC, PA, ABS, PUR.
To increase strength, the manufacturer recommends additionally strengthening the glued parts with fiberglass. A special glue gun is required for application.
- 3M™ 05900 (2 tubes of 150 ml) or 05901 (2 tubes of 25 ml) Plastic Parts Repair Compound
A two-component epoxy mixture designed to repair damage to most common plastics. Bumper adhesive
3m hardens quickly and is then easily sanded.
Once cured, this bumper adhesive conforms to automotive grade plastic.
Questions and answers
How reliable is bumper repair using the gluing method?
Soldering plastic parts is considered the most reliable type of repair. However, this is not always possible. A bumper made of thermosetting plastic does not burn together, as it does not melt, but darkens and crumbles. The cracks on it are glued together. If you use professional glue and follow the technology, the reliability will be high.
What is the best bumper adhesive?
Among auto repairmen, 3M adhesives are the most popular. With their help, you can glue holes, as well as recreate missing fragments. The only negative is the high cost and the need to purchase an activator and a glue gun. At home, adhesive compositions of the middle price segment are more often used - JetaPro and Mannol.
So, the most reliable way to fix cracks on a bumper is soldering. However, it is impossible to produce it yourself: you will need expensive equipment. In addition, some types of plastic do not melt at all. At home, gluing a plastic bumper is most often used. Special two-component adhesives or a set of polyester resin and glass mat will help to seal the crack efficiently and reliably. Prices for material start from 240 rubles. and ends with 4500 rubles. If the application technology is followed, all of the listed types do an excellent job.
Source
How to glue a bumper on a car - instructions using 3M as an example
The scheme for gluing a crack or sealing a hole is generally similar from one adhesive composition to another; there are only some nuances that are indicated in the instructions for the adhesive.
- Cleaning and degreasing the surface.
- Grinding the bonding area - not only the edges of the crack themselves are cleaned, but also the area around it. If you need to glue a large space on the back of the bumper, you can drill several small holes - they will serve as a strength lock on the parts to be joined.
- Repeated degreasing to remove traces of dust.
- To reinforce the surface at this stage, it is necessary to prepare/cut a fiberglass mat or reinforced mesh of the appropriate size. You may need from 1 to 3 flaps - depending on the complexity of gluing. It is better to glue the reinforcing fabric from the inside; this format of work is simpler.
- Depending on the glue manufacturer, an activator is applied to the surface to be restored, as, for example, for 3m.
- Then we apply a thin layer of adhesive mass on the inside. Next, a piece of reinforcing fabric is glued; it must be smoothed out well while slightly pressing into the glue. If necessary, the glue is reapplied and the next layer of reinforcing material is glued on top.
- Now the adhesive mass is applied and parallel smoothed on the outside of the bumper being repaired.
- When the glue has hardened (look at the packaging of your composition), you can begin sanding and subsequent work on repairing the bumper.
Basics
If we are talking about this type of restoration work, such as soldering a bumper, then we should say a few words about the composition of the plastic from which they are made. In our work, we will use either a construction hair dryer, to which a special nozzle is attached, or a hair dryer, which is supplied with the soldering station. Elimination of cracks using this method is carried out by heating the repair area. Each type of plastic has a limiting temperature value, violation of which leads to a loss of elasticity and strength by the plastic. It is also important to know the type of plastic because the electrodes used to solder cracks or weld fasteners must be made of the same material. In this way, the maximum degree of structural strength is achieved.
The main types of thermosets (that is, those that can be reheated and melted) include:
- polypropylene (PP, PP/EPDM, TEO, PP);
- copolymer of acrylonitrile, butadiene and styrene (ABS, ASA, ABC);
- polyethylene (PE, PE-LD, PE-LLD, PE, etc.).
You can find the corresponding symbols on the back of the plastic product.
Tools and materials
Before carrying out restoration work, you will need to stock up on a set of tools and materials for sealing the bumper:
- Keys and screwdrivers. They will be needed to dismantle the body element.
- Sander. Electric drill.
- Sandpaper (grit range from P180 to P320).
- Rags.
- Organic solvent or White Spirit.
- Epoxy resin with hardener. Used for repairing fiberglass parts.
- Two-component composition 3M. (it includes: FPRM components, which are used to prepare liquid polymer in 150 ml tubes, rigid adhesive tape, fiberglass, adhesion initiator (adhesion strength), wide and narrow spatulas, utility knife, safety glasses and gloves).
- Adhesive for car bumper. It will allow the plastic to be firmly glued and prevent the part from being destroyed again in the same place.
To repair bumpers, it is best to use a good adhesive (for example, Moment glue, Power Plast, Weicon or AKFIX). They can do quality work. The glued element will be securely fixed and will last for many years.
After collecting the necessary tools and consumables, and obtaining information on how to glue the body element together, you can begin preparing the body kit for restoration.
DIY repair
For repair you will need:
- soldering station, which will include both a soldering iron and a hot air gun. If you don’t want to overpay, you can buy a hot air gun separately. A regular construction hair dryer can handle the volume of work assigned to a hot air gun. But keep in mind that the nozzle of the nozzle for soldering cracks or fastenings must be quite narrow in diameter;
- electrodes that the device will melt;
- cleaning burr.
Serious repairs to plastic bumpers always begin with cleaning the damaged area. Attach the burr to the screwdriver and clean out the damaged area. The crack should be deepened a little. A few centimeters around the repair area should be free of paintwork or remnants of old putty. Before using the device (hair dryer), degrease and dry the surface.
During the soldering process, the electrodes should lie away from the edge of the cracks. You should direct the hot air gun in such a way that during the uniform lowering of the rod, the air flow is always directed to the junction of the electrode and the damage zone. The essence of the process is that the apparatus producing a hot air stream will melt the lower part of the welded rod and the upper layer of the bumper surface. If you have positioned and configured the apparatus correctly, then a ball of molten plastic should “run” in front of the descending rod. This ensures a strong bond between the materials.
Preparatory activities
Before you glue the plastic bumper, you will need:
- Remove the cracked body element from the car.
- In the body kit that has burst, you will have to drill holes at the ends of the crack. This will prevent further damage to the part.
- Wash and dry the body kit thoroughly. Degrease the working surface of the bumper.
- Using sandpaper, remove the paint in an area from 3 to 5 cm from the edges of the crack. Apply a layer of soil to the damaged area.
- The places where the connection of the restored body element will pass must be carefully sanded. If you have a milling machine, then grooves in the form of a Latin letter V are made on the edges of the crack, which makes the gluing more reliable.
- If the body kit is cracked in many places, without removing it, you will need to fasten all the elements together (using a construction gun), and only then dismantle the element.
Soldering large bumper damage
Numerous cracks, breaks and torn bumper elements can be repaired using thermal methods, in particular soldering. To complete this painstaking work, a small set of tools and materials is required:
- soldering iron with a power of at least 100 W with a wide tip and a wooden handle;
- thin metal mesh, specially designed for thermal bonding of plastic parts;
- knife, wire cutters for processing broken segments;
- screw clamp;
- sandpaper with fine and coarse grains for cleaning seams.
Powerful soldering iron with a wide tip
In preparation for soldering, paint must be removed to the base not only from cracks, but also from torn pieces of the bumper. Moreover, in this case, the body kit is not removed from the car until all the breaks are fastened and fixed by soldering, otherwise the element will lose its exact shape.
The soldering technology is implemented in the following sequence:
- After stripping, wipe the area with degreaser and let it evaporate.
- Align the edges of the cracks and, if necessary, secure them in this position with clamps.
- Using a heated soldering iron, make tacks along the length of all cracks. For high-quality heating, the tip must be immersed in the plastic to a depth equal to half the thickness of the material, and then level the surface of the molten plastic. The distance between the tacks is 1.5-2 cm.
- When tacks have been made on all the cracks, you need to put the broken piece back in place. Fit it to the hole and trim it if necessary so that it fits flush with the surface into the hole.
- Solder the torn segment using tacks, then repeat the operation from the inside. After which the bumper can be carefully removed from the car and work can continue in more comfortable conditions, although this is not necessary, depending on your convenience.
- Perform continuous soldering of all joints on both sides of the body kit. To prevent adjacent tacks from moving apart due to heating, the seam must be soldered with gaps. That is, first the first section between the tacks is welded, then the third, fifth, seventh, and so on. When finished, go back and solder all remaining sections.
- Cut the mesh into pieces 2-4 cm in length. They need to be soldered across the seam in the most intense places - along the edges of cracks, in the middle, at the junction and near the stiffeners. The technology is simple: a steel mesh is placed on the seam and, heated by a soldering iron, immersed in the polymer base of the bumper. At the end, the softened plastic over the mesh needs to be smoothed out.
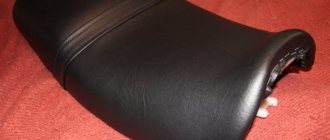
Bumper cleaned and ready for painting
At the end of the soldering procedure, sand the surface of the element, then degrease and paint it in the required color. During further operation, be more careful, since a strong impact may cause the bumper to shatter into pieces, tearing in the same places. To fasten it more firmly, you should use another method - welding with donor plastic.
How to seal a bumper with your own hands
Before starting work, metal foil must be placed on the front part of the body part. Thanks to this, when gluing the bumper with your own hands, the glue will not leak out. Depending on the type of material from which the damaged part is made, the methods by which you can seal a car bumper are somewhat different.
The body element can be made of plastic with the addition of chemical additives (they reduce the likelihood of adhesion). To glue such a part, you will need to reduce the impact of these elements. This can be done by treating the working surface with special chemicals.
The glue must be applied evenly to the damaged bumper elements. When performing the operation, the surfaces to be glued must be well fixed. Otherwise, displacement of parts will occur, which will have a negative impact on the quality of the seam.
In case of severe damage, install a polymer or metal mesh, which is pre-coated with glue. This method of sealing the bumper will increase the quality of the fastening.
Sealing small cracks in the body kit can be done without prior preparation, using special 3M adhesive.
An alternative way to eliminate the defect is to use glue and soda. When gluing, soda is poured onto the pre-treated part and glue is added on top of the substance. As a result, the connection has a high level of strength.
Sealing a crack in a fiberglass bumper is slightly different. When repairing damage, epoxy resin is used, and in particularly severe cases, a fiberglass patch is installed.
Repairing a body element can be done at home.
Methods for repairing cracks in plastic bumpers
To eliminate damage to a plastic car bumper, you can use different methods, which differ in the material used, the degree of complexity of the work, material and labor costs. It is recommended that you familiarize yourself with all the options and choose the most suitable one, taking into account your own preferences and available capabilities.
Polypropylene
When using polypropylene to repair cracks, you need to take into account a number of nuances. Including:
- polypropylene electrodes with a width of about 3-4 mm are suitable for restoration work;
- the material must be melted on the surface of the cracks by heating with a construction hairdryer equipped with a nozzle measuring 4-6 mm;
- when heated, it is important that the polypropylene electrodes quickly melt, but not overheat too much, since this may cause them to lose their original properties;
- Before starting work, V-shaped recesses are formed in the bumper for further placement of the composite material.
Direct repair involves surfacing material onto deformed areas. For convenience, it is worth starting work from the central part of the defect, especially with large scale cracks. Having repaired the middle of the defect, you need to move to the middle of the remaining halves, and then direct the polypropylene electrodes to the free areas.
Polyurethane
A distinctive feature of polyurethane is its softer structure, so when repairing a car bumper, it is better to further strengthen the defect site using furniture staples. Surfacing of polyurethane electrodes is carried out on top of the brackets in such a way that they reliably hold the divided surface.
To repair the bumper, wide strips of electrodes measuring 8-10 mm are used. Staples will adhere better under such polyurethane electrodes. To treat the surface of the material, you will need an appropriate attachment for the nozzle of an industrial hair dryer 10 mm long.
The melting point of polyurethane is about 220 degrees, and when fusing the material onto a cracked bumper, there is no need to exceed this mark.
Otherwise, the structure of the material will collapse and it will gradually evaporate.
See also
What adhesives are suitable for bricklaying and rules for working with compounds
Refractory materials
If the car bumper is made of hard plastic with a high melting point, then it is unlikely that it will be possible to achieve it in a garage. For this reason, parts made of this material are repaired by gluing. To carry out the work you will need: a grinder, an angle grinder, adhesive tape, fiberglass mat and polyester resin. The repair procedure is as follows:
- The edges of the damaged area are treated with a grinding machine, since after cracking microscopic threads remain on them, interfering with reliable adhesion.
- The parts of the crack are connected and glued with tape on the top side.
- Prepare polyester resin for use according to the instructions, which can be found on the packaging with the material. The resin is then applied to the back of the deformed area, covering an area of 50 mm around the defect.
- A thin layer of fiberglass material is placed on top of the polyester resin. If the defect is large, several layers will need to be applied until the thickness of the fiberglass patch reaches the same thickness as the bumper in the damaged area.
- When the applied polyester resin has dried, proceed to work on the outside. A grinder is used to make indentations at the crack site so that its ends converge at the location of the patch on the inside.
- The resulting grooves are filled with fiberglass, which is first coated with polyester resin.
It is important to consider that treating a car bumper with refractory materials, polyurethane and polypropylene electrodes only involves direct elimination of the defect. To completely eliminate the consequences of mechanical stress and restore the appearance of the part, additional work must be carried out - surface cleaning, puttying, priming and painting.
Questions and answers
How reliable is bumper repair using the gluing method?
Soldering plastic parts is considered the most reliable type of repair. However, this is not always possible. A bumper made of thermosetting plastic does not burn together, as it does not melt, but darkens and crumbles. The cracks on it are glued together. If you use professional glue and follow the technology, the reliability will be high.
What is the best bumper adhesive?
Among auto repairmen, 3M adhesives are the most popular. With their help, you can glue holes, as well as recreate missing fragments. The only negative is the high cost and the need to purchase an activator and a glue gun. At home, adhesive compositions of the middle price segment are more often used - JetaPro and Mannol.
So, the most reliable way to fix cracks on a bumper is soldering. However, it is impossible to produce it yourself: you will need expensive equipment. In addition, some types of plastic do not melt at all. At home, gluing a plastic bumper is most often used. Special two-component adhesives or a set of polyester resin and glass mat will help to seal the crack efficiently and reliably. Prices for material start from 240 rubles. and ends with 4500 rubles. If the application technology is followed, all of the listed types do an excellent job.
Preparing the bumper for painting.
- We clean off the excess deposited plastic with an orbital sander at low speed. Use coarse sandpaper no finer than P120. It is not advisable to clean petal circles on an angle grinder. It is better not to use high speeds as the top layer of plastic heats up and spreads over the surface. Subsequently, this smeared plastic may peel off in places.
If the plastic still melts and smears, then it is necessary to reduce the speed or replace the sandpaper with coarser one.
If you don’t have a sander, the excess layer of plastic can be removed with a utility knife blade. You need to place the blade across the seam and, pressing on it, rip off excess material.
- We degrease all surfaces to be painted with an anti-silicone degreaser for cars. Everything is simple here, apply and wipe off with a rag.
- Apply the adhesion enhancer Body plasto fix spray 340 in a thin layer and let it dry for 10 minutes. This adhesion enhancer slightly dissolves the top layer of plastic, as a result of which putty and primer adhere well to it.
- We putty with special putty for bumpers. For example, bumper fix putty from Novol. This putty is very elastic due to the various plasticizers it contains and therefore does not fall off even when the bumper is bent.
- We rub the putty with sandpaper. P80 sandpaper produces lint on the plastic, which is very difficult to remove later with finer sandpaper. Therefore, it is better to use sandpaper no larger than P180. We sand with decreasing sandpaper grain: P180, P240, P320.
- We prime. We take regular acrylic soil, but we must add a plasticizing additive to it in a proportion of 5-10% of the volume of the soil. For example, the additive Elast-o-Actif from Sikkens.
Plastic has a high coefficient of thermal expansion, so putty, primer and paint must be well plastic, otherwise they will peel off. The plasticizing additive gives the soil plasticity and therefore, when the temperature changes, it will not crack or peel off the putty and plastic.
A plasticizer is also added to the paint so that it, together with the primer and putty, expands and contracts with temperature changes.
- We do painting.