02.08.2017
They are steel. They serve and serve, provided they are installed and adjusted correctly. As practice shows, 28,000 km is far from the limit of their service life; on a Courier with such mileage, all cables (gas, brake, clutch) are in good working order and do not cause any suspicion or desire to change them.
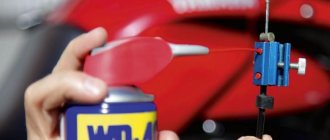
Modern cable sheaths have a plastic tube-sleeve inside. Such cables work very well, easily, and do not require lubrication. However, a little liquid oil won't hurt to prevent the cable from rusting. Do not lubricate such cables with thick lubricants! Dust and fine sand will stick to them, penetrate into the plastic jacket and will tear, wedge and wear out the cable. You will feel it quickly.
The bending of the clip is the result of a fall or a brave force while dragging the motorcycle. The levers on the steering wheel look like their ends are down (not parallel to the steering wheel). In this case, the tip of the cable during operation touches the edges of the installation slot, jams and constantly bends, breaking the cable.
It is difficult for a beginner to notice such a defect - the slots in the levers are located at the bottom. An experienced owner knows that if, when viewed from the front, you can see that the lever is tilted down relative to the steering wheel, then you should, without delay, straighten the place of its attachment, otherwise the cable will not last long.
Lever socket for installing the cable boss. It wears out over time, especially its “blind” part, which leads to cable distortion, bending under load and breaking. Often the cause of accelerated wear of the socket is a manufacturing defect - insufficient depth of the blind hole. On new levers you should immediately drill it deeper; usually you can add 1 or even 2 millimeters. In order not to rip the lever through, it is better to drill while resting the lever on a metal backing. (A small protrusion or hole that appears from excessive deepening of the hole is not terrible.)
The diameter of the drill should be exactly the same or slightly larger than the diameter of the socket. ( mm).
In addition to the above, it is advisable to have bosses of slightly increased length (). Please note: the extension must be “one-sided”. Why? So that the boss does not protrude from the bottom of the lever? - Yes, but this is not the main reason. If the lever breaks and you replace it with a new one in the field, on a long trip you may not have a prepared, drilled lever in stock - and then you will have to put the boss in the new lever “in reverse”, with the short side in the blind part of the hole - then everything is fine will gather.
A few general notes
Control cables are a very good thing. They are much stiffer than hydraulic circuits with rubber hoses (sleeves). Even reinforced, expensive hoses only approach cables in terms of rigidity. However, hydraulics also have advantages.
The hydraulic drive allows you to create multi-circuit, multi-piston brake systems, as well as semi- and automatic combined braking systems, etc. In such systems, hydraulics turn out to be simpler and more reliable than mechanical drives. In simple schemes, for example, in single-piston brake actuators, hydraulics have no advantages over a cable (except, perhaps, for the unification of elements, the use of standard, well-standardized units, and, as a result, the availability of qualified maintenance and repair in any auto repair shop).
In addition, hydraulic drives contain fewer sliding friction pairs, they are easier to protect from dust and sand, and wear less under difficult conditions.
Returning to the question “do they stretch…” - I must say that the cable sheath plays a very important role here. Its serviceability is the key to maintaining the high qualities of the cable drive. The most obvious and annoying defects of the shell are stretching and creases. A cable with such a sheath becomes pliable and “springy”. When you look at the brake pad lever, you can clearly see that it pressed the pads and stopped - and at this time the lever on the steering wheel can still be “pressed”, in the worst case even reaching the stop against the handle. The culprit is the shell. Often, a damaged cable does not even allow, for example, to adjust the brakes - they either “don’t press enough” or constantly “slow down”.
Creases in the cable sheath can be determined by inspection - places of sharp bending are clearly visible. Do not try to straighten such a shell - it will still remain slightly stretched in this place, and the cable will work poorly and not rigidly.
Stretched areas cannot be visually determined - only by the behavior of the cable drive, loss of rigidity, one can indirectly suspect a defect.
In all cases, the only correct solution is to replace the cable sheath, or the entire thing.
The reasons for the appearance of sprains are the rough, “forceful” assembly of the motorcycle, with the application of completely unacceptable tensile forces to the shell. Simply: never pull on the cable sheath with your hands. Another possible cause is motorcycle falls and accidents.)
It happens that over time, scuffs and peeling appear here and there on the outer plastic shell, and rust appears on the exposed spiral steel braid.
If the cable works properly, it is worth taking care of it and “treating it.” Lubricate the bald spots to prevent rust. You can put pieces of heat-shrinkable tubing (sold in radio parts stores) over the defective areas - after heating (for example, with a hot lamp or other method), the tube will tightly cover the shell and will be almost invisible. All this should be done at home/garage by removing the cable from the motorcycle.
Cleaning cables
Occasionally, at least after 6000 km, after a year or two, the cables need to be washed from dirt and lightly lubricated again. This will not be difficult at all if the cable is removed from the motorcycle. Thus, it is advisable to link the cleaning of cables with routine and repair work, plan in advance, and do not forget about this useful operation when the opportunity arises.
Helpful advice. Two bottles of nefras (flushing gasoline) - and the simplest washing device is ready. The bottles must be securely fastened so that one is higher than the other. Place the ends of the rope in bottles. Blow sharply into the neck of the top bottle until nefras flows from the other end of the rope. After which you can do other things - the flushing nefras will flow by itself in the resulting siphon inside the cable, washing it of dirt and oil. In exceptional cases, one bottle is enough.
This weekend I decided to go on a solo run of a little over 300 kilometers to visit a friend. The adventure promised to be boring, but the universal balance decided to intervene. The result is invaluable experience and a small bundle of damaged nerves. I think this experience will be interesting and useful for novice travelers. “So what to do now,” thinks the mature hipster:
The route ran from the hero city of Minsk to Mozyr, through Maryina Gorka, Bobruisk and Kalinkovichi. Something like this is how I marked landmarks for myself so that I could look at the map on my phone less often and follow the directions according to the signs. We had to travel a little over 300 km.
Lyrical digression: I knew about the technique of shifting gears without a clutch for a long time. I decided for myself that the clutch on the motorcycle was installed by smart people and it’s not for me to question their genius. Oh if I only knew...
Oops: about 30 kilometers from Mozyr I felt the already familiar “CRACK!” in the clutch handle. I stopped on the side of the road and wondered how this could happen. FOR WHAT?? Here I can endlessly describe the storm of emotions and the cloud of disappointment that enveloped me. But after a couple of calls to smart, knowledgeable people, I started up without a clutch or any adventures and drove the remaining distance.
Algorithm of actions:
- With the engine turned off, we find neutral (it’s easier on naked bikes, because you can press the clutch directly on the engine with your hand)
- Getting on a motorcycle
- Start the engine, don’t forget to remove the step
- We begin to push off with our legs and roll
- We row with our legs for the amusement of passing cars up to a speed of about 5 km/h
- We stick into first gear and add gas
- Let's go!
Next we switch the method:
- We accelerate in gas transmission
- When accelerating, apply pressure to the gear shift paw with your foot (“pre-pressure”)
- We quickly release the gas a little, but not completely, but just a little
- When releasing the gas and pre-pressing, the gearbox foot will go up/down on its own, we just need to push it all the way
After a dozen shifts, it’s already starting to be possible to do quick shifting without jerking. The process described works for both downshifting and upshifting. I highly recommend watching videos on the topic of quick shifting, since there are plenty of them on YouTube.
My story ended well, since the traffic was very light, without surprises. I safely got to Mozyr, where I repaired the clutch on my own without haste and with a cool mind. After repairs and a snack, my friend and I went into the Polesie wilderness to see the “hobbit house” that he built with his own hands. Photo of the house as a bonus:
Soldering cables
To solder the ends of steel cables you will need acid flux. The most common is zinc (a mixture of zinc chloride and hydrochloric acid). Actually, hydrochloric acid itself would be a fairly good flux - it is easily washed off with water, or simply evaporates without a trace (unlike battery sulfuric acid, which must be thoroughly washed and neutralized with soda.) However, it is better to use acid “etched” with zinc - then after soldering a thin zinc coating will remain on the steel parts as protection against corrosion.
In our garage, as you remember, there is a universal remedy - phosphoric acid. It is not only an excellent flux for soldering stainless steels and bronzes, but also a completely suitable agent for anti-corrosion coating. After its use, protective phosphate films remain on steel parts (like oxide films, but more durable). So, if we are at home, there is no need to look for pickled hydrochloric acid; orthophosphoric acid is quite suitable.
To properly solder the tip of a clutch or brake cable, you need to prepare a wedge from a steel wire at hand (a paper clip, a thin nail, a lady's hairpin). Be sure to sharpen it with a file so that it looks like a thin, long tetrahedral awl. (Like, so to speak, the bayonet of a soldier in the tsarist army.) The wedge should be about 10 mm long, do not cut off the excess part yet. Lubricate the wedge with acid and tin it, completely wipe off excess solder with a rag or shake it off.
The end of the cable must be degreased - rinsed in nefras, slightly warmed up, rinsed again. Heat the tip with a soldering iron and shake out the remaining solder from it with a sharp blow.
Place the tip on the cable, insert the wedge from the end, between the wire strands, with force, as deep as possible. Apply a drop of acid to the end of the cable, and apply molten solder with a soldering iron (or other method). The acid instantly evaporates, the tin-lead solder is absorbed into the cable strands and fills the tip. After cooling, the sealed end must be washed to remove acid residues with warm water or soda solution. Cut off the excess end of the wire wedge, trim the end and smooth it with a file.
Perhaps the solder will penetrate the cable further than the tip, 1-2 centimeters. There is no harm in this, but excess deposits must be removed with a soldering iron or simply carefully cut off with a knife.
The described method - with a wedge - has proven itself in practice. The author resolders all new cables purchased at the store in this way. There are many other ways of sealing tips, as well as ingenious techniques for making tips from scrap materials (nuts, wires, etc.)
Check the tips (caps) of the shell as well. By the way, they are easily removed if necessary. Sometimes the hole in them is made unevenly, and the cable constantly touches and rubs. Fix it.
Finally, about installing cables on a motorcycle. In addition to distortions in the levers and jamming in the grooves, there are other errors. Often, inattentive mechanics screw in the adjusting sleeve (“tensioner”) deeply, so that when the lever is released, the tip of the cable rests against it. This is unacceptable and should be corrected immediately.
It is very important that the cable in its original position is not loaded. This means that the clutch cable must have some minimum slack when the clutch discs do not begin to “squeeze out” immediately, not earlier than the first quarter of the lever stroke. Incorrect adjustment of the clutch drive and constant load on the cable lead to wear of the cable, shell, mounting sockets, the release mechanism itself, and to “floating” clutch settings.
The same applies to the brake drive. Thus, for the excellent disc brake of the ZiD-200 “Courier” motorcycle, the most important condition for smooth and trouble-free operation is sufficient movement of the mechanism, which means that excessive “pulling” of the cable is inadmissible. The tension (an unfortunate term in this case) of the disc brake cable must be such that the brake lever can make a working stroke from its stop, in no way being limited by the drive cable.
As for the gas handle, the requirements are similar, but it should be noted that excessive free play is also unacceptable in this drive. If the adjusters are too loose, the end of the cable may unexpectedly pop out of its socket in the throttle body. And on the ZiD-50 “Pilot” motorcycle, a curious situation can arise when (on a Jikov carburetor) the tip of a weakened cable either falls into its socket or catches on its very edge - and the engine behaves mysteriously, unpredictably and incomprehensibly for the driver - then suddenly produces full power, otherwise it gets lazy...
CABLE: REPAIR
EASIER THAN BUYING A NEW (moto 8/99 page 72)
“In fact,” someone will object, “why solder a broken cable, because it’s easier to buy a new one? Moreover, this thing is now in short supply and is inexpensive.” “Yes,” we agree, “if the cable store is around the corner.” If a little further, then you will spend more time going there than repairing an old cable - it’s so simple and quick to do.
There is another reason that can motivate a biker to take up a soldering iron. Anyone who has tried to install a “horned” handlebar on their motorcycle has encountered the fact that standard control cables, as a rule, are short. The way out of the situation is to use long cables from Tula scooters, but they often have to be shortened and modified locally. Or you can make a completely homemade cable using the sheaths and ends from two old ones, and at the same time make it immediately to the length that is required.
But for the process to really take a few minutes, you need to know some simple rules, which we will try to tell you about. The tool you will need, of course, is a soldering iron, and not just any one, but with a power of at least 100 W. And since we are going to solder steel, we need to do it with acid flux. That is, soldering acid is needed: professionals add the term “etched”. It is easy to obtain at home. To do this, you need to throw several pieces of zinc, taken, for example, from an old battery, into ordinary hydrochloric acid. When the process of gas evolution stops, drain the resulting liquid - and you have the same “etched soldering acid” in your hands.
Now let's get started.
| The simplest case: the tip breaks. The malfunction is very typical for “Dnieper” cables, where the boss is made in the form of a rough stamping of sheet steel, and the role of the tip is played by a wire wound around the tip of the cable and soldered with ordinary soft solder. If the tip breaks, it will not be possible to reuse the tip due to its absence as such. Therefore, let’s consider an alternative option (and, by the way, much more reliable). To be sure, first tin the tip of the cable using the mentioned acid flux, then put two MZ nuts on it (it is better if they are brass: they are easier to solder. But steel can also be used), leaving a protrusion of 2-3 mm, then solder thoroughly. Be careful: before starting the operation, do not forget to put the boss on the cable! |
| Photo 2. Clamp the resulting tip in a vice and use a small hammer to carefully rivet the protruding tip of the cable. Then solder everything thoroughly again. You may need to do a little work with the file to get the new tip to fit easily into the boss and not protrude from it. |
| Photo 3. It happens that the cable frays not at the tip, but at the point where it exits the sheath. In this case, you will have to make a new core for the old sheath using the “original” bosses and tips. First, unsolder the lugs from the old cable scraps. If this cannot be done with a soldering iron, a blowtorch or just a gas torch will help out: heat the tip in its flame until the solder melts, and then quickly remove it from the cable with pliers. By the way, when soldering the tip onto a new cable, do not forget to slightly rivet its protruding end, as in photo 2. |
| Photo 4. To make a new core, you will need a piece of steel cable. As a rule, on domestic motorcycles a cable with a diameter of 3.5 mm is used to drive the clutch, and a cable of 2 mm in diameter for the throttle. They are often sold in hardware stores and markets in coils of 10 meters or more and come in two types. The first set consists of several thinner cables, and in the second the strands of wire are immediately twisted into one thick cable. Preference should be given to the second type, as it will ensure smoother operation of the drive. But now the required piece of cable has been measured and it remains to be bitten off somehow. You should not try to do this with wire cutters or side cutters - the tip will certainly unravel and it will be difficult to work with in the future. It is better to take a sharp chisel and cut the cable on an aluminum or copper plate. You can use pliers, as shown in the photo. If you pre-solder the snacking area, the result will be simply excellent. |
| Photo 5. If you were careful and noticed chafing in the cable before it finally broke, then you can repair it without replacing parts at all. But first, the damaged area must be thoroughly rinsed with a brush dipped in gasoline, especially if the cable has been lubricated. Solder will not stick to oily metal. |
| Photo 6. In the case when only a couple of veins are torn off, it is enough to simply irradiate the damaged area properly, and everything will be fine. If, on the contrary, the same number of veins “remained alive”, and the rest were torn off, then it is safer to do so. If possible, braid the broken wires back to their original position, and then take a thin stranded wire, strip it and wrap it around the damaged area, as shown in the photo. Then everything needs to be soldered thoroughly. As a rule, the cable moves in the sheath with some clearance and its slight thickening will not interfere with this process. You can do it more competently: unsolder one of the tips, remove the cable from the sheath and, turning it upside down, solder it back. In this case, at the point of friction there will be an undamaged area, and the repaired area will move inside the shell. Such a cable will last no less than a new one. |
| Photo 7. Now, finally, let's return to the high handlebars and the question of how to lengthen the cable sheath. You will need a piece of metal tube 15-20 mm long, the inner diameter of which is equal to the outer diameter of the shell. The ends of both shells must be carefully cut off with the same sharp chisel and placed inside the tube so that the junction is located in the middle. That's all the technology is; make the core from a suitable cable in the manner described above. |
| Photo 8. Good manners suggest lubricating a freshly made or repaired cable. There are many ways to do this, but perhaps the most convenient of them is with a syringe. Attach a tube or hose of a suitable diameter to its end, take about 2 ml of oil and proceed as shown in the photo. It is better to take thicker oil: something like TAD-17 or MS-20. After such an “injection”, it will be useful to hang the cable in a vertical position and leave it there for several hours so that the oil spreads well inside and the excess flows out. |
| Photo 9. The previous method is best suited for the throttle cable with its small tip. It is impossible to lubricate a clutch or brake cable this way: the bosses get in the way. In this case, we will do things differently. Take a bottle and pour some oil into it. At the top of the cable sheath, wrap electrical tape to resemble a cork. Plug the bottle with a stopper so that the end of the cable together with the boss is inside, turn it over and move the cable up and down by the free end until the oil appears on the opposite side. If you heat the bottle with something (have you not removed the burner yet?), then excess pressure will form in it and the process will go much faster. You can take a plastic bottle and squeeze it with your hand to get the same effect. |
As you can see, science is simple and its secrets are not complicated. We hope that the above rules will help you avoid the situation where “the motorcycle is in the garage, the cable is broken, there is no spare, I’m walking.” And we repaired the old one too. Easily.
The material was prepared by the Operations and Testing Department.
