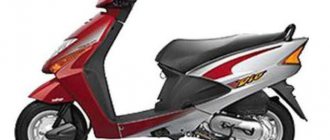
Characteristics and tuning of the QMJ 157 engine
Various two-stroke and four-stroke engines are used to power Chinese scooters. The most popular are four-stroke motorcycles, which include the QMJ 157 power unit. Engine capacity is 9.2 liters. With. has one 150cc cylinder and is copied from the Japanese GY6 Honda engine model. The drive from the motor to the drive wheel is carried out through a variator included in the delivery package of the engine. Wanting to increase the speed that a motorcycle or scooter develops, they often perform engine tuning.
Engine QMJ 157 - characteristics and general description
Like most equipment produced by Chinese manufacturers, the QMJ 157 four-stroke engine is reproduced from its Japanese counterpart. The power unit installed on a Honda scooter was taken as a prototype. The motor has undergone long-term testing under various operating conditions, proving itself to be reliable, trouble-free and durable.
Various two-stroke and four-stroke engines are used to power Chinese scooters
All that remains for Chinese engineers is to adopt a proven design and begin mass production. How successful the motor turned out can be judged by its area of application. The one hundred and fifty-seventh engine model, the power of which is enough to accelerate a full-size two-seater scooter, is today installed both on expensive scooter models - Honling, Forsage, and on budget scooters like the Viper Storm 150. This power plant has become legendary among fans of Chinese scooters.
The limited speed threshold of the scooter, associated with the relatively small cubic capacity of the engine and the developed power, forces tuning enthusiasts to modernize the engine.
When planning to improve a fairly good motor, you should first familiarize yourself with its technical characteristics. Let's consider the operating parameters of the engine.
Compared to 50cc four-strokes, it has quite good cubic capacity and power. The cylinder has a volume of 149.6 cm3, and the maximum power reaches 6.8 kW. The piston has a diameter of 57.4 mm and a stroke of 57.8 mm. At maximum power, the revolutions reach 7.5 thousand per minute. At 6 thousand revolutions per minute, the maximum torque is 9.8 Nm. Idle speed ranges from 1600 to 1700 per minute. The engine weighs a little - 27 kg.
Before you start using it, you should break in the engine and drive the scooter for 2000 km in compliance with the speed limit. With proper running-in, the engine service life reaches 25,000 km. The motor quickly and dynamically accelerates the scooter with the driver and passenger. A run-in engine does not require intervention and can operate for a long time without major repairs. Then it will be necessary to replace the rings, which does not require a major investment.
This power plant has become legendary among fans of Chinese scooters.
Scooter engines: review of Chinese models 139QMB and 157QMJ and D1E41QMB
Despite all the variety and variety of Chinese scooters on Russian roads, their engines belong to only two categories. This is a two-stroke scooter engine and a four-stroke one.
These categories differ greatly in the number of models produced, so let's start with the largest category - the 139QMB four-stroke scooter engine. Its history began at the end of the last century, when in the 90s the Honda branch developed the first such scooter engine model, and today it is called KYMKO. Ten years later, China adopted this development and, together with Honda, began mass production. How good the final version turned out can be judged by the fact that scooter engines labeled 139QMB are regularly purchased from Japan and sold there under the Honda brand.
The 139QMB scooter engine has already become a legend in the motorcycle world, and Hongling Corporation, which officially produces it, installs this engine not only on motorcycles of its own brand, but also successfully sells them for assembly at prices of other motorcycle brands. The recognition of this scooter engine is simply colossal: the marking is located on the left side of the crankcase. The serial number begins with 139QMB, followed by the product number in the production batch.
The 139QMB scooter engine is practically flawless, it can be treated with some degree of carelessness or negligence (but, of course, in moderation). The warranty usually covers the first 5 thousand kilometers. This distance is necessary for the scooter engine to allow grinding in of all its units and components. Once the initial parameters are passed, the lifespan of which the 139QMB scooter engine is capable is about another 20 thousand kilometers. And this is at an average speed of 90 km/h. The engine power is more than enough for a full-size 2-seater scooter.
Some Chinese corporations decided not to look for easy ways and created their own unit. This scooter engine is marked 1P39QMB, and in terms of its external characteristics it is an exact copy of 139QMB. But if you look in more detail, the differences are clearly striking. The 1P39QMB scooter engine is assembled without adjusting the clearances in all valves. The same negligence can be seen in the carburetor, which requires mandatory adjustment and cleaning before starting. In the hands of an experienced scooter rider, the engine will, of course, work, but its main purpose is to make the scooter even less expensive. All budget options that are good for several trips are equipped with just such engines.
The engine of the scooter model 1P39QMB will not have proper dynamics if it has not been run in before use. Only after 2 thousand kilometers does it enter the optimal phase of operation, but after 10 thousand kilometers its performance drops sharply.
The 157QMJ scooter engine models can be produced in two volumes - 150 and 125 cc. see. They are installed on more expensive scooters “BM”, “Honling”, “Forsazh” and others. In terms of reliability and functionality, the 157QMJ scooter engine is an absolute copy of the 139QMB. Also, many design details in it are reminiscent of mass-produced Japanese analogues.
The service life of such engines is already an order of magnitude higher and amounts to 25 thousand kilometers. It has powerful acceleration coupled with very high speed. Their main drawback (if this can be considered a drawback) is their higher cost compared to the previous model. But having bought a 157QMJ scooter engine once, this purchase will serve faithfully for many years, without requiring major intervention in its operation.
There is only one two-stroke scooter engine made in China. Its model is D1E41QMB. It has a chain reverse gear, which fundamentally distinguishes it from all other representatives of this class of units. Reliable operation of such a scooter engine is achieved by adding oil to gasoline (proportion 40 to 1). The engine's lifespan is short - about 10 thousand kilometers, and subsequent repairs are required. It is necessary to replace the rings, which in terms of monetary investment will not be an expensive process. This scooter engine cannot handle speeds that exceed 50 km per hour.
Engine device
Beginning scooter riders, if they need to repair the motor, try to understand its design. Diagram 157QMJ will help you obtain information about the structure of the power unit and its components. Having dealt with it, you can not only purchase the necessary spare parts for the 157 QMJ engine, but also correctly perform the work of assembling and disassembling the engine. Structurally, the motor is practically no different from its GY6 counterpart. The 157 QMJ has the same cylinder-piston group, clutch, crankcase, camshaft and muffler.
The bearing numbers, sizes of silent blocks and gears, diameters of the variator pulleys and the design of the kickstarter, generator and electric starter also correspond. The engine is cooled by the oncoming air flow. Starting is carried out from an electric starter or kickstarter. Torque is transmitted through a variator, which is an automatic integral transmission.
Depending on the design features of the scooter on which the engine is installed, it can be equipped with a CVT having an extended box. The engine is equipped with a standard power system, providing fuel consumption reduced to 2.5-3 liters per hundred. The power unit operates quite quietly, providing almost silent acceleration of the scooter during maneuvers.
The motor is equipped with a standard power supply system
Replacing a 157QMJ engine generator on a scooter with a three-phase one
After installing a voltmeter showing the voltage of the on-board network, it became clear that the standard generator and voltage regulator leave much to be desired - with the headlights on (two 35W lamps), the voltage at idle was only about 12V, while driving on the highway - about 13V. Which led to a constant undercharging of the battery and a lack of peace of mind for me :). The light on the scooter is constant, the pinout of the standard generator and LV are as follows:
Generator – 3+1+1 connector, in the green 4 pin block the leads of the power windings and ground are separated. Separate terminals go to the ignition sensor and the ignition winding output. The voltage regulator has a 6-pin connector.
To replace it, a generator (stator + rotor), 11 coils and a pH with a 6-pin block were purchased from the store. All three phase. RN without markings, most likely something from a scooter (in this store most of the spare parts are carried from this supplier).
Engine tuning QMJ 157
Why do they tune a fairly reliable engine? Those who like to modernize their scooter explain the need for tuning by the limited speed threshold and the desire to increase power. The fact is that the engines of most scooters, having reached maximum speed, begin to run wild. This not only increases fuel consumption, but also significantly reduces the service life of the engine.
The design of the engine makes it possible to increase its cubic capacity from 150 to 170 cubic meters. To modernize, it is necessary to purchase a number of spare parts, as well as correctly perform the work of disassembling and assembling the motor.
It is important to properly break in the power unit after tuning. Let us dwell in detail on the complex of these issues.
Required spare parts
To carry out engine modernization work, you must purchase the following spare parts:
- four-valve cylinder head with a sports camshaft. The head includes rubber seals, a set of studs, a gasket and a camshaft chain;
- carburetor having an intake manifold with a diameter of 30 mm and equipped with a gasket. Installing a CVK Racing sports carburetor will provide power to the engine after increasing the cubic capacity;
- working cylinder with a sleeve with a diameter of 61 mm and a piston of the appropriate size. You will also need a piston pin, a pair of circlips, compression rings, an oil ring with a retainer and a paper gasket.
After tuning, it is important to properly break in the power unit
. By performing simple calculations, you can make sure that replacing a standard piston with a diameter of 57.4 mm with one increased to 61 mm will increase the volume of the working chamber to 169 cubes. At the same time, the piston stroke length, equal to 57.8 mm, remains unchanged.
Disassembly
Having purchased all the spare parts necessary for tuning, you should study the procedure for disassembling the engine. It is technically possible to complete the entire scope of work without dismantling the power unit itself from the scooter frame.
Engine tuning 157QMJ GY6
The 157QMJ 150cc engine is a fairly common type of engine, which is now installed on Chinese scooters and is a copy of the Japanese Honda GY6 engine. The characteristics and service life of this 4t engine allow it to be subjected to tuning.
In this article, we present to your attention the tuning of the GY6 engine using the example of the YIBEN YB150T-15 scooter, namely an increase in piston volume from 150 cc to 170 cc. It is worth noting that the modernization of the scooter was carried out in Australia, which introduces adjustments to the prices of spare parts for tuning. The so-called collective farm is minimized here, tuning can be called bourgeois and scooterists who want to save money will not be suitable.
The marketing name of the prototype scooter in Australia is Ozooma 150 Maxx, released in 2007, however, this is not important, since these engines are installed on many models of Chinese cubic scooters, for example Viper Storm 150. The moped owner does not need to upgrade to a more powerful scooter model with 250cc engine. The purpose of upgrading the motor from 150cc to 170cc is to add a little top speed to the scooter, up to about 100 km/h without spinning. An untuned Yiben 150 scooter can travel approximately 80 km/h over a long distance without the risk of causing damage to the power unit. Another goal was to complete this entire upgrade without removing the engine from the scooter.
What spare parts to buy for tuning 157QMJ
4 valve cylinder head with sport camshaft, consisting of a new head, head cover, rubber seal, four long studs, metal spacer and large cam chain.
Sports carburetor 157QMJ CVK Racing 30mm complete with 30mm intake manifold and gasket.
Cylinder and piston , diameter 61 mm, complete with piston pin, two retaining rings, 2 compression rings and an oil scraper ring with retainers, as well as a paper gasket.
According to my calculations, the scooter engine volume before tuning (with a piston of 57.4 mm and a stroke length of 57.8 mm) is 149.63 cm 3, and after replacing the piston with a 61 mm one with the same stroke - 169 cm 3.
Dismantling the engine 157qmj 150 cc
As you remember, I set myself the goal of disassembling the 157qmj piston engine without removing the power unit itself from the scooter.
So, we remove the carpet, the seat, the trunk (toilet), the plastic near the seat, and then the exhaust pipe, leaving the muffler in place.
I advise you to tighten all the bolts in place, since some of them are of different lengths, and it is simply impossible to remember the location of each of them!
Now remove the air filter assembly and carburetor. By the way, we will also replace the filter, since its throughput will be insufficient for a 170cc cubic capacity. Instead we will install a red 38mm UniFilter.
Removing the 157 QMJ carburetor is easy, just release the fuel hoses from the clamps, disconnect the throttle cable and the starter enrichment wires. We are also replacing the stock carburetor with a 24mm intake pipe.
The QMJ 157 engine is covered with plastic casings - this allows additional circulation of the cooling air flow and protects the engine from dirt. By unscrewing a few screws we can easily remove the plastic. I advise you to throw old rags on the floor, which would absorb drops of oil from the engine and also prevent dust from rising. The workplace must be clean!
We remove the cover with the rubber gasket of the 157 qmj gy6 cylinder head by unscrewing four 8 mm bolts. The breather hose that was originally connected to the air filter will now be connected to the new oil trap (more on that later).
We unscrew the four nuts (12 mm) securing the camshaft bed, cylinder head and cylinder. Carefully remove the upper part of the camshaft bed, holding it.
Before removing the camshaft, unscrew the chain tensioner adjustment cap and loosen the tensioner itself (with a small flat-head screwdriver clockwise) and remove the timing chain from the camshaft sprocket.
Unscrew the two bolts and remove the tensioner.
In order to remove the 157QMJ cylinder head, you need to unscrew two more 8 mm bolts. Carefully remove the cylinder head.
Remove the cylinder from the studs. The metal gasket cannot be reused.
Using thin pliers, remove the piston pin retaining ring and separate the piston and connecting rod.
Due to the greater height of the 4-valve cylinder head, it is necessary to replace the 4 studs on which the CPG and cylinder head are twisted.
How to correctly install the studs of a 157qmj cylinder? The original studs are unscrewed using two nuts screwed onto the stud. You need to unscrew the bottom nut counterclockwise. When screwing in new studs, lubricate the threads with blue thread sealant. The two bolts on the right side of the engine that secure the cylinder do not need to be replaced.
Photo report: Dismantling the engine 157QMJ of the Atlant scooter (150CC)
The 157 QMJ engine with a volume of 150 CC, which we will be disassembling today, is installed on scooters that are very popular in Russia and have different trade names: Atlant, Racer, Pioneer; there is no particular point in listing all the scooter models on which this engine is installed.
What can you say about this engine? In general, the engine is not bad, there is little potential for tuning, it has a very reliable kickstarter mechanism, this engine is equipped with a powerful generator that allows you to install additional electrical appliances, and so on. etc.
Unfortunately, it will not be possible to place all the stages of engine disassembly in one article, therefore, by analogy with previous articles on engine disassembly, the article will contain links that will lead you to a page where the disassembly of an individual mechanism or assembly will be described in more detail.
- Reassembly and repair of the 157QMJ engine is described in detail in the article: Repair and assembly of the 157 QMJ engine of the Atlant scooter (150 SS)
- We roll the engine out of the frame, details in the article: How to remove the engine from a scooter frame
- We remove both variators, details in the article: How to remove a scooter's variator using available tools
- We remove the cooling casings and the generator, details in the article: How to remove the generator from a scooter engine
- We remove the starter, details in the article: How to remove the starter from a scooter engine
- We remove the rear wheel, details in the article: How to remove the rear, front wheel of a scooter
We drain the oil, place the engine on some clean surface and begin disassembling the engine by removing the piston; how to remove the piston is described in detail in the article: How to remove the piston from a scooter engine
We unscrew all the fastening bolts on the engine cover and tap it with a wooden mallet on all sides.
We remove the cover without losing the guide bushings - there are two of them (marked with arrows).
Remove the starter idler gear
Using an old unnecessary screwdriver and a hammer, unscrew the overrunning clutch nut (left-hand thread).
Remove the nut and washer
Remove the overrunning clutch gear from the shaft
We take out the separator
Unscrew the two bolts on the oil pump housing
Remove the overrunning clutch from the axle
Please note how much the oil pump drive chain is stretched - it will have to be replaced.
We remove the key from the trunnion
We insert a tin rod or stick under the tooth of the oil pump sprocket and unscrew the nut.
Remove the sprocket from the oil pump drive axis along with the chain
We take out the oil pump axle and put it somewhere away
Unscrew the last mounting bolt
We tap the crankcase halves on all sides and separate them, without losing the guide bushings (shown by arrows).
We insert a slightly sharpened rod into the center of the crankshaft journal and use a hammer to knock the journal off the kickstarter gear (one gentle blow is enough for this).
We remove the crankshaft and timing chain from the half
Motor assembly 157QMJ
Installation of gaskets and rings
The most important part of the assembly was making sure the spacers and rings were aligned correctly. Pay attention to the channel in the cylinder - install the gasket without blocking this channel, as it allows oil to lubricate the cylinder head. The gaskets were treated with a special Hylomar sealant, which provides a good seal and prevents engine oil leaks.
compression rings have a designation (T1 - upper, T2 - lower), with which they need to be installed towards the top. The bottom three rings (not marked) form the oil scraper ring, a wavy ring sandwiched between two metal rings. All three rings must be placed so that the gaps between them are at a distance of 120º. This can be achieved by conditionally dividing the piston into three even parts (approximately like the letter Y). The main thing is to ensure that none of the ring spaces coincide with one another, to prevent compression and oil leakage.
Now you need to carefully install the piston along with the rings into the cylinder. I advise you to lubricate the inner surface of the cylinder with a small amount of oil.
Lubricate the paper gasket with sealant 30 minutes before installation, align it with the holes and channels and install the cylinder on the studs. Make sure the piston is installed with the IN designation facing the intake manifold.
After the hole in the piston for the pin and the hole in the connecting rod coincide, we install one cotter pin in the piston, and on the other side we advance the piston pin until it rests against the lock ring. Then install the second cotter pin. You need to carefully check that the retaining rings are securely seated in the grooves on the piston - there is no need to take risks here! I recommend initially lubricating the piston pin with engine oil.
After making sure that everything is installed in accordance with the requirements described above, we push the timing chain through the window in the cylinder. While holding the cylinder, make sure that the piston moves in the cylinder freely and without jamming (to do this, rotate the crankshaft by hand using the generator bell). I advise you to set the piston to top dead center and see if the T mark on the generator bell matches the projection on the engine. If it doesn’t match, draw a new mark with a marker and use it in the future. In this case, the mark does not coincide with TDC.
Installing a new timing chain
The camshaft chain needs to be replaced because the stock one is already shorted. As you remember, a long timing chain was included in the engine tuning kit. In order to replace the chain without completely disassembling the motor, you need to separate the links of the old and new chain, and then connect the two chains. Then carefully rotate the crankshaft until the new chain is on the surface. We disconnect the short chain and connect the links of the tuned chain.
We put the cylinder head on four studs (not forgetting about the metal gasket and 2 guide bushings), pushing the chain into the head window. Now we install the piston at TDC, and the camshaft so that the two small holes are parallel to the wall of the cylinder head, and the large hole is located on top, as in the figure. We put the chain on the timing sprocket and screw in the two bolts securing the cylinder head and cylinder.
It's time to put on the upper part of the camshaft bed and secure it all with four nuts and washers. The nuts on the stud must be tightened in a diagonal order.
Lubricate the tensioner gasket with sealant. Before installing the chain tensioner, you need to turn it fully clockwise (with a small flat-head screwdriver), in this form we install and screw in the two chain tensioner mounting bolts. Then carefully release the screwdriver. Don't forget to tighten the tensioner plug to avoid loss of compression and oil.
157QMJ Valve Adjustment
We install the generator flywheel and camshaft at top dead center, take a set of feeler gauges and adjust the valve clearance by 0.05 - 0.1 mm for each valve. We tighten the locknuts with a 9mm wrench and check the gaps again. If the valve clearances have decreased, we carry out the procedure again.
Spark plug GY 6
Before tuning the scooter, my GY 6 engine had an NGK C7HSA spark plug installed and I decided to replace it with an NGK IRIDIUM IV CR8EIX, which is ideal because it is “colder” and better suited for the gasoline with which I fill my moped (98 BP Premium Unleaded).
Oil catcher
After installing the new exhaust tract gasket, exhaust pipe, plastic engine cover and carburetor, it's time to think about oil catcher placement. Fortunately, there is somewhere to place it - we will not install an air filter now.
We connect one end of the oil trap using a 1/4″ fuel hose to the breather (cylinder head cover), and the other is connected instead of the dipstick, which allows oil vapor to return back to the engine crankcase . The entire oil trap assembly fits behind the front plastic and is accessible by lifting the scooter's seat.
Scooter carburetor and air filter
Sometimes irritating is poor-quality rubber in fuel hoses, which crack and cause leaks. To fit the new carburetor onto the intake manifold, I had to connect it using a 32 mm industrial hose and two clamps.
It’s the same story with the air intake: to install a unifilter, you can buy a 42 mm rubber hose and a clamp.
air filter with a length of 100 mm and a diameter of 38 mm. Before installing it, it is necessary to lubricate the filter with special impregnation or oil. Read more in the article Maintenance of foam air filter. This zero resistance filter is the ideal solution as it provides maximum air flow and minimal contamination (located just above the wheel fender).
A Full Free economizer was installed on the fuel line to minimize gasoline consumption while increasing power.
Photo report: How to check a scooter's generator?
Just like that, without minimal knowledge of electronics, at least at the school curriculum level (like mine) and a simple multimeter tester, you won’t be able to test the generator, don’t even dream about it.
Before taking on such work, you should at least be able to use a tester and understand that current can be alternating or constant, know what an electrical impulse is and what resistance is. Do you know all this? Have you held a tester in your hands? If yes, then let's not hesitate. Checking the functionality of the generator should begin with measuring the voltage that the generator itself must generate and transmit through wires to consumers. We look at where the wiring harness from the generator comes out of the engine - we move along it until we reach the connector with which the generator is connected to the on-board network of the scooter.
On the vast majority of scooters, the alternator connector looks something like the picture. In the common connector, there is one plug and two wires that are connected to the scooter’s on-board network through round terminals.
The plug combines the connectors of the two main windings of the generator: The working winding (yellow wire), which ensures the operation of the headlights, turn signals, lights and other consumers. And the control winding (white wire), the control winding provides voltage control in the main winding of the generator. That is, when the voltage in the operating winding of the generator increases above the specified limits, the relay-voltage regulator supplies current to the control winding of the generator, due to which the voltage in the operating winding of the generator drops to the specified limit. When the voltage drops, the reverse process occurs.
In this generator, the main windings are wound with thick copper wire on six coils.
The third winding of the generator, which is usually called high-voltage or inductive, and the magnetic induction sensor of the generator are connected to the scooter’s on-board network through round terminals.
High-voltage winding of the generator - ensures the generation of high alternating voltage (the voltage in this winding can reach 160 V or more), which directly enters the switch where it is rectified, then accumulated in the capacitor and at a certain moment in the form of a pulse is supplied to the ignition coil.
In this generator, the high-voltage winding is wound with a thin copper wire on two coils. The high-voltage winding coils are carefully insulated on the outside.
There are generators in which the high-voltage winding is wound on only one coil.
A small clarification: ignition systems in which a DC CDI type switch is installed, the high-voltage winding does not participate in the formation of a spark charge on the spark plug, so there is no point in checking it. Scooter manufacturers install a generator with a high-voltage winding, but do not use it (meaning ignition systems with a DC CDI switch). It's just wound on the generator and that's it. I will say more: due to the fact that the winding is not loaded with anything during operation of the generator, over time it simply burns out.
An example of a generator, on two coils of which a high-voltage winding that is not involved in operation is wound. I checked this winding - the tester showed an open circuit, which confirms the above.
The resistance of the generator's inducing winding is always greater than that of the other windings. The wire coming from the inducing winding of the generator is almost always red and black.
The magnetic induction sensor, when a special ledge on the generator rotor passes past it, generates an alternating pulse that opens a theristor through which the switch capacitor is discharged to the ignition coil.
Sensor in person
Ledge on the generator rotor
The wire coming from the magnetic induction sensor is almost always blue-white.
A small educational program: Traders and collective farm tusks, magnetic induction sensor of the generator, CDI ignition systems - called the Hall sensor. My dear ones... Maybe that's enough already. Where does this illiteracy come from? Magnetic induction sensor of the generator, CDI ignition system, namely this system is discussed in this article - has nothing to do with the hall sensor! And don’t listen to these hucksters and “gurus” who say the opposite...
We switch the tester to the alternating current (ACV) measurement mode to a range of 200 V and no less. We remember that the voltage of the inducing winding can reach 160 V or more, so the measurement range of the voltage of the inducing winding must be at least 200 V.
We disconnect the plug and round terminals of the main harness - connect one probe of the tester to ground, connect the other to the terminal (black-red wire) of the inducing winding of the generator. Turn on the ignition and turn the engine with the starter. A fully operational pickup winding should produce approximately the following values.
