Features of purchasing motorcycle parts at Moto Life Market
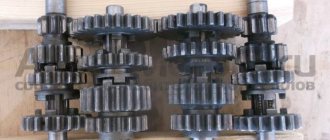
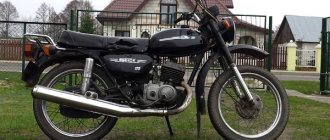
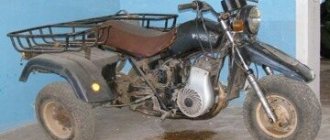
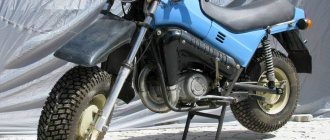
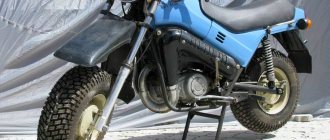
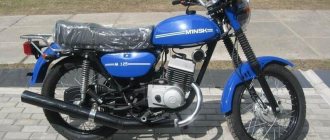
If a rarity originally from the Soviet Union needs repair, then replacing original parts with Chinese analogues is not always possible; you need spare parts from the USSR. Parts for Ant and Tula scooters are presented in a wide range in the USSR Motorcycle Parts store. We only have high-quality components made to strict requirements from trusted manufacturers. We know all the intricacies of repairing Soviet motorcycles, so you can safely contact our managers for advice - they will advise the best option and send spare parts within the agreed time frame.
content .. 41 42 48 ..CHAPTER V.
CHASSIS OF MOTORCYCLES “URAL”, “DNEPR”
The chassis of a motorcycle includes the frame, rear suspension, front fork, wheels, tires, brake system, saddles, side trailer (sidecar), tail.
MOTORCYCLE FRAME “URAL”, “DNEPR”
The frame is the base of the motorcycle on which its components and assemblies are installed and secured. The Ural and Dnepr motorcycles have welded, double, non-separable frames, made of special profile steel pipes. Frames differ in the design of the rear wheel pendulum suspension arm, the distance from the axis of the frame head to the axis of the rear suspension shock absorber hinge, and the distance from the axis of the head to the axis of the pendulum arm hinge. In Fig. Figure 5.1 shows the design of a motorcycle frame with rear wheel suspension. The pendulum arms are connected to the frame using silent blocks. Vertical forces arising from road unevenness are absorbed by spring-hydraulic shock absorbers. The hinge joints of the shock absorbers with the pendulum and frame are also made of silent blocks.
The swingarm has a rigid U-shaped structure, its open rear part is closed by the axle of the rear wheel. The left pendulum pin is removable. It is inserted into the split clamp on the left side of the base and secured in place with two bolts. Each bushing, which is called a silent block, consists of two halves 9 inserted into the frame. When tightened with bolt 8 through washer 7 and cover 6, the rubber of the silent block is compressed, fitting tightly to the frame hinge body. When the pendulum moves, the trunnion rotates only due to spring deformations of the rubber. Therefore, when operating a motorcycle, you need to ensure that the silent blocks are securely tightened with bolt 8. The design of the sidecar wheel pendulum is similar. To remove the pendulum, you must perform the following operations:
— Unscrew the bolts securing the shock absorbers to the pendulum;
— disconnect the wires that go to the rear light;
— unscrew the bolts that secure the rear shield;
— Unscrew (partially possible) the upper shock absorber mounting bolts;
— remove the shield;
— unscrew the bolts 8 tightening the rubber bushings 9;
— become external covers 6 and washers 7;
- Unscrew the nuts of the tightening bolts and remove the internal tightening block;
— dismantle the left removable pin, external rubber bushings, shaped washer 10, pressing down on the left side of the lever near the base, turn the end of the lever and remove it.
The stroller pendulum is removed in the same way. Assemble the pendulum with the frame in the reverse order.
The silent block of spring-hydraulic shock absorbers consists of an internal metal sleeve to which rubber is vulcanized. Therefore, during disassembly, the bushing is not removed separately, but knocked out along with the rubber. It is convenient to knock out the bushing with a bushing mandrel, which has the same diameter and thickness, so that impacts through the mandrel hit the rubber and not the bushing.
The engine is attached to the frame using two long studs; the same studs secure the exhaust pipe clamps and the driver's footrests. The footrests are height-adjustable when the stud nuts are loosened. In this case, you need to pay attention to the position of the outer step; it should not press the brake pedal.
An anti-theft lock is inserted into the steering column on the left side. To lock the motorcycle, turn the steering wheel all the way to the right, insert the key into the lock cylinder, turn the key and press it on the cylinder, while the cylinder should sink into the column and insert the pin into the slot of the steering column rod. After this, the key is placed in its original position and removed. If the key is inserted tightly and the cylinder enters tightly, then they need to be lubricated. It is impossible to unscrew the locking screw of the cylinder, because in this case all the parts may fall apart.
The sidecar frame is attached to the motorcycle at four points. The two lower ones are on collet clamps, the two upper ones are on stretchers.
Rice. 5.1. Frame and rear wheel suspension: 1 - rear wheel shield, 2 - shock absorber, 3 - rear suspension arm, 4 - frame, 5 - removable axle, 6 - clamping cover, 7 - special washer, 8 - bolt M 10x25, 9 — silent block bushing; 10 - special washer
Rice. 5.2. Rear wheel suspension arm: 1 — suspension arm; 2 — coupling bolt; 3 — washer; 4 - nut; 5 — suspension arm; 6 — spacer sleeve; 7 — washer, 8 — bolt; 9 — oiler; 10 - bolt; 11 — protective glass; 12 — special washer; 13 - removable trunnion; 14 - silent block washer;
The sidecar (side trailer) is installed relative to the motorcycle in a certain position. This is determined by the camber and toe of the wheels of the motorcycle and sidecar. A motorcycle with a properly installed sidecar “holds the road” well and is easy to control. Otherwise, it will pull to the side, which will lead to intense tire wear and increased fuel consumption.
content .. 41 42 48 ..
The very beginning - the frame
I greet everyone, ladies and gentlemen, who is not indifferent to domestic technology. Today I want to talk about small modifications to the frame for my future motorcycle. So after completely disassembling the motorcycle, I set about finalizing the skeleton for my project. First of all, I removed the homemade terrible side stand and cut off the welded mount under it, then cut off the plate on the right where the charging relay was attached since it will interfere with me in subsequent modifications, then I completely cut off the steering column lock (I have it, like 99% of owners This Pepelaz didn’t have a key, and I don’t see the point of having one on a stroller), and there was a case when a friend apparently had a spring burst and the lock jammed the steering wheel while driving and he got into an accident. I completely removed the lock (though there was still a hole where the pin went in, but this is not so scary because there is welding work ahead).
Then I started trying on the parts that I plan to install on the motorcycle in the future. Namely, a bracket for symmetry for the second arc, like on the Ural Tourist motorcycle, suddenly you want to ride alone (the bracket was cut from the donor frame)
I tried on and marked the area for attaching the side panels so that nothing would interfere with them, and so did they.
I found a place for a side stand (again useful for a single person)
Marked the mounting locations for the seat platform
And of course, I decided to strengthen the lower cross member of the frame where the center stand bracket is welded, because this is their disease. The motorcycle is quite heavy, and when you put it on the stand, for example to remove the rear wheel, there is so much pressure from the lugs of the stand that the tube on one side is dented and on the other it just starts to tear. My pain was so pronounced that the footrest simply turned inside out. I completely cut out the tube and in its place asked the turner to turn a solid round piece, so as to be sure. The last part cut was the seat bracket, which is located near the tank, since I had a solid saddle, and although I plan to leave the same one, it would not hurt to be able to replace it with separate ones if desired, and even with minimal loss of time and without the use of welding. Fortunately, in modern Urals, this problem has been solved by installing a unified platform with the ability to screw a separate saddle bracket to it and adjust the fit (closer or further from the steering wheel). The photo is just above...
After trying it on, I began making different fasteners:
1) Under the seat I prepared two strips onto which the platform will be screwed
2) On the sides in the area of the battery, I prepared two small plates behind the covers for the possibility of attaching some small things.
3) Under the tank, along the top pipe of the frame, I prepared a plate to allow the installation of relays there to relieve the load on the electrical system.
4) Prepared brackets (factory-made) for installing safety bars produced by KBMTS
5) Prepared the side stand bracket from the “Wolf” for subsequent welding to the frame, because It has been verified that if you simply screw it to the engine mounting stud, then under the weight of the motorcycle it begins to turn inside out and simply tear the metal.
6) I prepared a round timber instead of the old tube for installing the central step, as well as the bracket itself for it.
After a test fitting of the parts and marking out where the frame would be attached, I took the frame to a welder I knew and together with him we got to work. We welded everything just fine and welded some old seams, welded the hole for the steering column lock.
Then, after the welding work, I returned to the garage and refined the welding seams and trimmed some brackets.
Even the use of partially painted parts with the use of modern fasteners significantly transforms the old frame. Now it is ready for sandblasting and powder coating, but unfortunately some difficulties greatly slowed down my work and the frame had to be placed in a corner for an indefinite period.
I thank everyone who read my entry simply by chance and, of course, regular readers, everyone has full tanks and a great mood, I hope I won’t make you wait long for the next entry.
Tags
- Ural
- frame
- restoration
- welding
- bracket
- step
- lateral
- covers
- revision
- area
- separate
- solid
- fastener
- arcs
- tourist
