TYPES OF CARBURETTORS
Carburetors of VM and TM snowmobiles differ from each other in the shape of the throttle valve. The TM has a rectangular throttle valve that allows more air to be supplied to the snowmobile engine. Control of the throttle valves is made easier, since it is carried out through one rod with one spring, and in VM - springs in each carburetor.
The carburetors on ROTAX engines are positioned high enough to ensure that fuel for operation flows into their float chamber by gravity. Therefore, in order to raise the fuel to the required height, you need to have a snowmobile fuel pump. Fuel pumps, used on equipment with a carburetor power supply system, are of the diaphragm type, using alternating pressure generated in the crankcase of a two-stroke engine during its operation to pump fuel. The pump has two types of valves, inlet and outlet. Slam-shut type valves that pump fuel in one direction only. The pumps are also equipped with automatic safety valves built into the design and used to prevent fuel from flowing through the pump when the engine is stopped.
When the snowmobile piston moves away from the snowmobile crankshaft, negative pressure (vacuum) is created in the crankcase. When the piston moves in the opposite direction towards the crankshaft, excess pressure is generated in the crankcase. These pressure fluctuations cause the snowmobile's fuel pump diaphragm to vibrate. When negative pressure is applied to the diaphragm, the fuel pump inlet valve opens and the outlet valve closes. Fuel tends to fill the fuel pump chamber. The atmospheric pressure pressing on the fuel in the fuel tank forces the fuel to fill the fuel pump chamber. When excess pressure from the engine crankcase is applied to the diaphragm, the exhaust valve opens and the intake valve closes. In this case, the fuel, under the influence of pressure on the diaphragm, tends to leave the fuel pump to the carburetors.
Design features of the K-126 model
The carburetor of the K-126 model of the GAZ-53 is a two-chamber part with a descending flow of the combustible mixture. It also has a mechanically driven economizer with an accelerator pump.
Its body consists of an upper, middle and lower part, each of which is connected with screws, and fuel will flow into the float chamber through a strainer. As a starting device, the K-126 carburetor has an air damper - it has an air valve, which is designed to prevent the formation of an enriched mixture at the moment when the engine starts. And each of the two cameras has its own autonomous idle system.
GAZ-53 carburetor size
ADJUSTING THE SNOWMOBILE CARBURETOR
One of the conditions for improving output parameters is the use of a carburetor with a larger flow hole. However, simply enlarging the bore will not improve these parameters. At low speeds, these parameters can only worsen. The carburetor bore must match the engine design. Additionally, it can be said that not only maximum performance and maximum speed, but also the stability of the engine must be taken into account. It should be remembered that increasing the carburetor will only add little power. The engine and carburetor must be selected together.
The operation of a carburetor is based on the physical principle that when air passes through a Venturi, its speed increases sharply due to a decrease in pressure in a place located behind the Venturi. The fuel, located in the float chamber of the carburetor under the influence of atmospheric pressure, due to the pressure difference, tends to rise through the jets to the place of discharge, where it is picked up by the air flow, mixed with it and in this form is supplied to the engine. When the engine stops, the air pressure in front of the constriction, behind it and in the float chamber is equalized, and the fuel supply therefore stops.
A fuel level control system in the float chamber is necessary to maintain stable engine operating parameters. This purpose is served by two floats hingedly connected to a needle shut-off valve. When the fuel level in the float chamber rises, the floats, together with the shut-off needle, rise and the needle closes the passage hole located in the needle valve seat. Fuel flow stops. When the fuel level in the float chamber decreases, the floats with the shut-off needle are lowered, the passage hole opens, and fuel enters the carburetor float chamber. This maintains a constant fuel level in the carburetor float chamber.
Checking the fuel level in the float chamber involves measuring the distance between the float chamber needle valve flag and the base surface of the carburetor. Next, compare the measurement results with the specifications specified in the “SNOWMOBILE REPAIR AND SERVICE MANUAL” (SHOPMANUAL) for the desired snowmobile model. You can adjust the level by changing the position of the flag.
Idle speed is a mode of engine operation when the engine rotates at a very low angular speed, and the throttle valve is closed or open very little. The air flow is very small and its speed is not high enough to create sufficient vacuum to supply fuel. The idle system automatically comes into operation.
When the throttle valve is closed, fuel is metered through the pilot jet, mixing with a small amount of air, the amount of which is adjusted using the tuning screw. Then, the air-fuel mixture prepared in this way is supplied through the bypass hole into the engine, providing idle operating parameters.
If the throttle valve is opened slightly, the air flow speed increases, creating the vacuum necessary for fuel to flow through these channels.
In this system, there are two parameters that can be changed: the position of the air volume adjustment screw and the size of the pilot jet.
The throttle valve, located in the intake air duct, serves to control mixture formation in its low and middle position. The size of the cutoff on the throttle valve affects the acceleration dynamics. Throttle valves are numbered from 0.5 to 4.5 through 0.5, depending on the size of the cutoff on the throttle valve. Flaps with designations from 1.5 to 3.5 are common. The larger the designation, the larger the cut, the greater the air flow and the leaner the mixture. The throttle function can be considered as another air control system.
When the throttle valve is open between 1/4 and 3/4, fuel is metered using a conical needle located inside the needle jet. When the needle rises, the gap between it and the walls of the nozzle increases, which makes it possible for an additional increased amount of fuel to pass through.
The taper of the needle is determined by calibrations, depending on the required amount of fuel for a particular engine.
Example: 6DH7 , where:
6: symbol for the length of the needle and the size of the carburetor in which it is used (No. 6: 30-38 mm, No. 7: 40-44 mm);
DH : If the designation contains one letter, then the needle has one conical part, if two - two, if three - three (D: cone size of the upper part of the needle, H: cone size of the lower part of the needle).
7: Material, type of coating and the beginning of the second cone on the needle.
Interpretation of needle jet letters depending on the cone angle. Each letter, starting with letter A, shows an increase in the cone by 0.25°. Example: D=1°,
E=1.25°, F=1.5°, G=1.75°, H=2°. These designations apply to one-, two- and three-cone needles.
There are five grooves at the top of the needles, numbered 1 to 5 from top to bottom. Number 3 is the middle groove, the main point for installing the retaining ring. The position of the locking ring on the needle affects the quality of the mixture. Setting the locking ring to position 1 or 2 makes the mixture leaner. Setting the locking ring to position 4 or 5 makes the mixture richer.
Do not forget to install a plastic washer under the retaining ring on those models that are equipped with it.
The size of the needle jet determines the needle that is used in the carburetor. However, if you need to change engine parameters or for other reasons, you can install a larger jet. For example, when at full open throttle the flow through the needle jet is less than through the main jet.
Main jets are available in sizes from number 50 to number 500. The number designation corresponds to a specific flow rate, but not necessarily to the orifice size.
If the engine is not running smoothly or is overheating, check the main jet for possible contamination or deposits that could block the passage.
The fuel supply system through the main jet begins to operate when the throttle valve is opened approximately 1/4 part. At the middle throttle position, the amount of fuel supplied is prepared by the main jet and the combination of the needle jet and needle jet. The main jet measures the amount of fuel when the throttle valve is open to a large amount. At wide open throttle, fuel is metered by the main jet only, as long as the fuel flow that can pass through the needle jet is less than through the main jet.
Main jet sizes may vary depending on altitude, temperature and changing input data. Information on this can be obtained from the list of jets of various sizes for the adjustment of all types of engines, serial and their modifications, as well as for all altitudes above sea level and temperatures.
Operating principle of the air damper
The presence of two full-fledged operating positions allows you to qualitatively regulate the quantity and volume of the enriched fuel mixture entering the ignition chamber of the internal combustion engine. Below (Fig. 2) is an analysis of each of the air damper positions.
Open channel position. The flag is raised, the additional fuel mixture supply channel is open. Additional fuel enters the engine combustion chamber, and the power unit develops maximum power.
STARTING PUMP
The starting pump consists of a cylinder, a piston with a ring and two valves. The starting pump is connected to the fuel supply line, between the fuel tank and the fuel pump. As the piston is pulled out of the cylinder, the intake valve opens and the exhaust valve closes due to the vacuum created in the cylinder. In this case, the fuel enters the cylinder, filling its internal cavity. When the piston moves back, increased pressure is created in the cylinder, closing the intake valve and opening the exhaust valve. The fuel is pushed out of the cylinder by a piston. A portion of fuel from the starting pump is supplied to the intake manifold. Usually two or three strokes are enough. When the engine is hot, there is no need to use the starting pump. When the weather is very cold, it is recommended to rotate the piston three to four turns before bleeding. This will prevent possible jamming of the piston during operation.
Preparatory work
We warn you in advance that you can adjust the carburetor when:
- Spark plugs are working properly
- The ignition is set correctly
- The fuel pump is working properly
- The required gap is set on the device to automatically interrupt the current in the circuit.
It is also recommended to clean the carburetor itself, wash it of carbon deposits, and clean all channels and jets. In general, it is better to buy a repair kit, which includes all consumable parts, including jets, and after washing, install everything new, including gaskets.
After cleaning, carefully put everything back together and be sure to pay attention to the gaps, they should be within normal limits.
CARBURETOR ENRICHMENT SYSTEM
When the snowmobile engine is cold, the fuel mixture should be rich when starting the snowmobile. The carburetor enrichment system differs in operating principle from the starting pump. Fuel is not injected into the intake manifold. It is necessary to set the enrichment lever to the maximum raised position. The cable will lift the plunger located in the carburetor, opening the fuel inlet, air inlet and outlet.
When the engine starts, a vacuum is created in the intake manifold. Due to the vacuum, fuel is sucked through the starting nozzle into the emulsion tube, where it is mixed with a small portion of air. This mixture, passing under the plunger, is mixed with air coming from the carburetor inlet. Finally, the mixture passes to the engine inlet through the outlet of the enricher.
Since the operation of the enrichment is based on vacuum, you must remember that the throttle valve must be closed when it is operating. The plunger position is adjusted using a special device, and this position is fixed with a lock nut.
Operating principle of the air damper
Thanks to two air damper positions, the Mikuni carburetor on the Buran is the most dynamic and sensitive fuel supply mechanism among all snowmobiles in this class. This air damper has become truly unique among most snowmobiles operating in harsh winter conditions, in severe frost.
The presence of two full-fledged operating positions allows you to qualitatively regulate the quantity and volume of the enriched fuel mixture entering the ignition chamber of the internal combustion engine. Below (Fig. 2) is an analysis of each of the air damper positions.
In the standard position, when the lever is lowered, the additional channel that serves to supply the enriched fuel mixture is closed. The snowmobile engine receives only the amount of fuel that is directly supplied by the carburetor.
Open channel position. The flag is raised, the additional fuel mixture supply channel is open. Additional fuel enters the engine combustion chamber, and the power unit develops maximum power.
Carburetors: adjustment, problems and maintenance
As a “calibration tool” we use a drill with a diameter of 1.5 mm.
Why exactly 1.5 mm? Because it is precisely this diameter that best corresponds to the throttle position at idle. Using the throttle valve position screw, we achieve a tight passage of the drill between the window wall and the throttle valve skirt, naturally from the cylinder side, because at the inlet the skirt is cut at an angle. According to the service manual, Polaris recommends using a 6.1mm drill bit and inserting it from the inlet side of the carburetor (where the throttle skirt is angled). We make a cut (notch) with a file or file on the idle speed adjustment screw. This is the largest screw with a spring. We noted the position, then unscrew the screw 90 degrees. (a quarter turn) counterclockwise - this will correspond to the maximum idle speed.
We repeat the operation on the second carburetor and then place the carbs side by side.
We press the throttle trigger approximately halfway and see if the dampers are open synchronously. Then we fully squeeze the gas trigger, both valves should open completely on the cylinder side, the valve skirt will stick out by 4 mm (approximately). If there is no synchronization, then we adjust the tension of the cables.
Adjust the position of the main fuel jet needle. This is the needle that is installed on the throttle valve. The needle should be on the second notch from above (the pointed end of the needle is located towards the bottom). If you need more “undermining” when opening the throttle, then install the needle stopper in the third groove (this is the middle).
Next, tighten the mixture quality screw (yellow and small screw) completely. ATTENTION!!! There is no need to be overzealous with effort! Twist gently. Then unscrew the mixture quality screw half a turn (180 degrees), the same on the second carburetor.
Carefully pull off the rubber seal of the starting enrichment cable casing. Then slightly pull back the casing of the starting enrichment cable; the free gap should be approximately 1 mm. We check the gap by slightly turning the starting enrichment flag, see how the casing has tightened and by how much. ATTENTION!!! This adjustment must be made without unscrewing the enrichment needle, i.e. assembled on the carburetor!
Next, we assemble everything, start it, and warm it up. If there is a need, we carry out additional adjusting the idle speed (the largest screw with a spring), noting how many degrees the screw was turned. On the second carburetor we do the same thing simultaneously!
Happy snowing to you!
Wednesday, April 30, 2014
Carburetor adjustment!
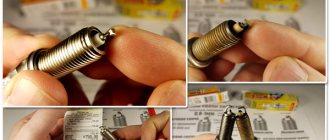
The easiest way to check whether a pit bike's carburetor is set correctly is by the color of the spark plug.
We unscrew the candle and look at the color:
- Brick color - the mixture is correct
- White - poor mixture
- Black smoked - rich mixture
Jet
- If it gets rich, we reduce the jet by two orders of magnitude.
- If it becomes lean, we increase the jet by two orders of magnitude.
- If we are close to the target, we change the jet in the range ± 1.
- If, when you sharply apply the gas and release the throttle, the speed seems to hover at the top point for a few seconds, and then reluctantly drops, this indicates a lean mixture.
- If, when you sharply apply the gas and release the throttle, the speed drops and sags almost until the engine stalls, and then rises and levels out to idle, this indicates a rich mixture.
Screw quality
- By twisting, we lean the mixture.
- By unscrewing it, we enrich it.
- So we tighten the quantity screw, listen to the motor and count the number of revolutions.
As soon as the speed starts to drop, we stop. We remember the position and twist it until it stops, counting the revolutions. So we know one limit value (for example, at 1.5 turns of the quality screw from the stop, the engine speed began to fall). - Now we begin to twist in the other direction (unscrew), listen to the engine and count the revolutions of the screwdriver.
The engine speed should first begin to rise, because we are enriching the mixture, and then begin to fall, because the mixture has become too rich. We record the number of revolutions of the quantity screw when the engine speed began to fall. Now we know the second limit value (for example, at 4 turns of the quality screw from the stop, the engine speed began to fall).
- Removing the carburetor and filter
- We disassemble the carburetor down to the screws, wash everything in gasoline, and blow out all the holes with a compressor.
- Reassemble the carburetor in reverse order, keeping it surgically clean. We unscrew the quality screw two turns, and tighten the idle screw almost all the way. The needle is in the middle position.
- I wash the filter with a special product, or Fairy, if it is just foam rubber (from a filter box), and rinse it in gasoline.
- We dry the filter and thoroughly saturate it with special oil, let it soak, and squeeze out the remainder, without enthusiasm.
- We put everything back together and install it on the pit bike.
- We put a new clean candle.
- Next, we look at the gas hose and gas filter (if installed). Kinks in the hose are not allowed. The filter should be blown freely without creating resistance.
- We check the presence of gasoline in the tank (at least 500 g.)
- After all the manipulations, we look for a deserted, flat road. Let's start a pit bike. Warming up. Using the XX screw, we lower the idle to stable. Then we go all the way in a straight line and ride at an active pace for about 5-10 minutes.
- We unscrew the spark plug and look at the insulator
- If it is ashen white, the mixture is too lean.
- If it is pale with a brownish tint, the mixture is too poor.
- If it is the color of coffee with milk, or a brick tint, the mixture is what you need!
- If it is darker (coffee with a small amount of milk), the mixture is slightly richer.
- If it is dark brown or black, the mixture is too rich.
Source
How to adjust the location of the device float
An important condition for high-quality engine operation is the correct location of the float inside the design chamber. To check that the location adjustment (P) is correct, do the following:
- remove chamber (P) 11 and gasket from the carburetor;
- make sure that the part used to mount float 9 on the vertical plane is symmetrical;
- When placing the carburetor, which is installed with the top down on a flat surface, measure the height between the surface of the body and the top of the contact tab. Keep the ruler in a vertical position, parallel to the axis (P) along with the center of the main jet passage.
To adjust the height, bend the contact foot (P) until the desired value is reached, i.e. 23.9 mm.
Replacing the jet
The selection of carburetor jets is carried out according to the markings. The number of each part in the set must correspond to the diameter, according to the table. When choosing a set of carburetor parts, decide what power and take-off speed will suit you. If you are setting nominal dimensions, then everything is simple - you must first select a kit. This is the most important job when purchasing. It should be remembered that 80% of the parts on the market are from China
Pay attention to this when choosing them. Then you can make repairs
To carry it out we will need to remove the carburetor from the engine. This will make further work more convenient
The carburetor removal diagram is described in other articles on the site; the only thing you need to pay attention to is the gasket between the carburetor and the engine housing
After removing the carburetor with a screwdriver, unscrew the screws securing the cover. We remove it and use a flat screwdriver to unscrew the fuel and air jets. On air ones, it is necessary to disconnect the emulsion tubes. Then new parts are installed or old serviceable jets are cleaned. For greater confidence, it is necessary to calibrate the jets on a special stand. “Incorrect” parts should be removed, but this operation cannot be performed independently.
Before installation, all carburetor parts must be washed in cleaning liquid, dirt and carbon deposits removed, and all channels cleaned. We are starting to install new jets. In this case, the correct location of each part of the mechanism must be observed. The jets on the carburetor must be placed according to the markings.
After assembling the device, install it on a new gasket and tighten the fastening nuts. Primary adjustment and tuning is carried out using the mixture saturation and idle speed adjustment screw. These operations will allow you to start the engine. We connect all the hoses and wires, install a new air filter. We make sure that all parts are in place and securely fastened. We test run the engine. Now we need to adjust the operation of the motor and warm it up.
After looking at the engine temperature data, we adjust its operation.
Having completed all the operations of installing jets and adjusting the carburetor reliably and in compliance with all instructions, think about how much fuel you will save.