001_MOTO_0910_060
Fortunately, Evgeniy Borisovich Parshin kindly agreed to share his many years of experience in preparing champion motorcycles. And he invited me to his workshop - a racing mechanic's paradise.
The principles of tuning the suspension of road and motocross motorcycles are similar, the goal is also the same - to ensure good and maximum long contact of the wheel with the road. But offroad means relatively flat areas and steep hills, loose and hard, wet and dry. Yes, and you can drive through the same section in different ways - by rolling in, skidding, or leaning against the “side.” And all this in different combinations and at different speeds! It is therefore not surprising that a delicate compromise has to be sought. It's amazing that it can be found at all.
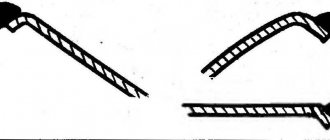
But first, just like on a road motorcycle, you need to set the suspension height. The principle of operation is the same. We outline control points for measuring the suspension travel (for example, the lower points are the wheel axles, the upper one in front is the lower yoke, the upper one in the back is the edge of the rear wing) and measure the distances between them in a free state (motorcycle on a stand), under the weight of the motorcycle itself (on wheels ) and with a rider in gear. Attention: from the front we measure along the fork legs, from the back - perpendicular to the ground (see figure)!
Fuel level in the float chamber
The next step is to set the correct fuel level in the float chamber. I do it like this. (The carburetor is in a vertical position.) We have a fuel supply hose, I start blowing into it and start closing the float. The moment I feel that air no longer passes into the float chamber is the moment the fuel supply to the chamber is closed. At this moment, the float must be in a strictly horizontal position (the carburetor is vertical). If this condition is not met, bend the float tongue. We also make sure that the shut-off needle does not allow fuel to pass through when closed and that there is no exhaust on it.
002_MOTO_0910_060_no_copyright
As a rule, the suspension travel of enduro and motocross motorcycles is 280 mm (range from 250 to 300 mm). Under the weight of the motorcycle, the front and rear suspensions should sag by 30 mm. With the rider, it's 80mm at the front and 100mm (or 30% of the travel) at the rear. The adjustment tolerance is plus or minus 5 mm. These 5 mm “back and forth” have a significant impact on the position of the motorcycle (the fork angle changes) and, accordingly, the weight distribution. If the suspension height cannot be adjusted in static conditions, it means that springs of a different stiffness are needed. A softer spring at the rear causes the front wheel to slide outward in corners. This setting is suitable, for example, for sand - the motorcycle does not bury itself - but at the same time the “hydraulics” must be left “clamped”. Conversely, for hard terrain, where maneuverability and responsiveness of the motorcycle come first, it is better to increase the spring tension, moving more weight to the front wheel.
The fork loading can also be changed by adjusting the position of the stays in the yokes (within 3–5 mm) and, on some motorcycles, the position of the rear shock absorber. But the need for this arises only when the standard position of the motorcycle for some reason does not suit the rider (some are used to the rear rack, others to the front).
| WHY DON'T WORLD CLASS RACERS USE FACTORY FORKS AND SHOCKS? Are they of poor quality? No, the quality is excellent, but they are designed to satisfy both beginners and experienced riders. An elite racer on such a suspension will be able to drive a very fast lap or two, but will be forced to adapt his driving style to the motorcycle, will get tired faster and will not show a decent result in the race. At the same time, two drivers of the same build and skill level can have completely different suspension settings just because of different driving styles. |
Setting up hydraulics is much more difficult. Ideally it goes like this:
But inexperienced pilots often have a different algorithm: let’s turn this screw (wheel) and see what changes. This approach also has a right to life, but you still need to understand the general principles and make it a rule not to change more than one adjustment at a time and write down all changes, otherwise you can screw it up so much that the only way out is to return to the basic settings.
The second most important thing after spring preload is adjusting the shock absorbers for rebound. Many do not attach much importance to it - and in vain. Here's a real example. When the wheel hits a bump, the shock absorber compresses. But what happens if, due to high rebound resistance, he does not have time to fully decompress before the next bump? That's right, it will shrink again, even stronger. Thus, soon the shock absorber stops compressing and working on the road altogether. It will give the impression that you need to release the compression, but in fact - release! Therefore, if, when driving over a series of bumps at a good speed, you begin to feel that the motorcycle has become stiffer, that it is crossing on the road, that the steering wheel is hitting your hands, do not rush to turn the compression adjustment, but instead slightly unscrew the rebound screw. What happens if the rebound force is not enough? Everyone’s favorite speed bumps or natural potholes similar to them will help you understand this. If, when moving over a bump at a moderate speed, the fork worked, but immediately jumped up, the adjustment is rather weak.
How to properly set up a motorcycle suspension?
Among all the maintenance work on two-wheeled vehicles, adjusting the motorcycle suspension occupies a special place. It allows you to ensure maximum safety for the rider and improve the capabilities of the equipment, since the stability of the motorcycle depends on the correct settings of the chassis. In theory, adjusting the suspension should take a minimum of time and effort, since it only allows you to change six basic parameters. However, practice shows that such work requires long hours and even days spent studying instructions, expert recommendations and test runs. We will tell you how to properly adjust the suspension of a two-wheeled vehicle so as not to encounter problems in any driving mode.
Basic adjustments
The main parameter that you have to change when setting up the suspension is spring preload. It is installed based on the sagging of the motorcycle in two positions - under its own weight and under the weight of the rider. It is worth understanding that the amount of sag directly depends on the length of suspension travel - for a road motorcycle it should be equal to 20–30% of this figure. The sagging of a motorcycle under its own weight should be in the range of 5–10% of the suspension travel. Therefore, for a sportbike with suspension travel of 120–130 mm, the sag value under its own weight will be 7–15 mm, and under the driver’s weight – 25–40 mm.
Spring preload adjustment is done using special nuts that are located on top of the main chassis components. On the fork they are located on top of the stay tubes, but on the rear monoshock absorber they are located in its upper part, next to the base of the spring. To adjust the suspension, you will need a standard hex wrench - it is advisable to use a new tool that will not slip, disrupting the optimal parameters.
To set the correct suspension settings, you need to measure the sag of the motorcycle in two positions (racers call these values free sag and driver sag, respectively). First, you should place the motorcycle on a special repair stand or on a large concrete block in order to evenly hang both wheels. Now you need to select the point from which the measurement will be taken. At the rear, it is best to place a mark on any noticeable element of the cladding, and at the front - on the lantern or on the lower edge of the windshield.
You need to measure the distance not to the tire, but to the wheel axle, so that the results are as accurate as possible. After recording the results, lower the motorcycle to the ground and repeat the measurement - you should get a difference of the same 7-15 mm if we are talking about road vehicles. For the third measurement, you will need an assistant to take measurements and take notes.
After first unloading the wheels, place the motorcycle back on the ground, and then jump on it, swinging to achieve compression on both parts of the suspension. Sit up straight and put your feet on the footrests - you can hold on to the wall with your hand so as not to fall. At this time, the assistant should take the required measurements and record the results. The procedure should be performed three times, each time hanging the motorcycle and lowering it down - the cause of the error may be excess friction in the fork, so the end result will be the arithmetic average of these three measurements. Remember that when further adjusting the suspension, you should not touch the preload adjustment, as otherwise you risk making your motorcycle uncontrollable.
Fine tuning
We've dealt with springs, now it's time to move on to shock absorbers, which play an equally important role in the operation of the chassis of a two-wheeled vehicle. Modern motorcycles have two damping adjustments, which are responsible for low-speed and high-speed operation of the shock absorber. This is not at all about the speed at which the vehicle moves, but about the pace of movement of the shock absorber rod - low-speed movement corresponds to sagging during acceleration and sudden braking, as well as during turns, while high-speed movement allows you to dampen vibrations caused by driving on a road with poor surfaces.
004_MOTO_0910_060
Rebound and compression adjustments are often linked. For some shock absorbers, they are generally connected to one - common - screw. It is better to start with rebound and only then move on to compression. Compression adjustment allows you to find a balance between ride comfort and wheel grip. The faster you go, the more load the suspension takes and the stronger the compression resistance should be. In general, for high-speed aggressive riding you usually need to loosen the rebound a little, add resistance to the fork compression and tighten both rear shock absorber adjustments. If there is separate adjustment of “fast” and “slow” compression, this is the guideline for them. When moving the suspension less than 1/3 of its travel, we work with “slow” compression, and more than 1/3 with “fast” compression.
Sometimes you can get lost in the process of setting up your suspension. In a figurative sense. It happens that after long experiments it seems that the ideal is somewhere close. But a couple more clicks - and instead of the expected success, you get a motorcycle with a disgusting suspension. In this case, you need to take a break, return all settings to factory settings and start over.
| WHEN TO REPAIR A SHOCK ABSORBER? Naturally, adjusting a faulty shock absorber is like stitching up a torn tire. The first signs that the unit needs repair or, at a minimum, disassembly are oil leaks on the rod, cavities and rubs on its surface, knocks or too easy movement. If, when lifting the motorcycle by the tail at the end of the rod stroke, the rebound force of the shock absorber suddenly disappears, it means that gas has escaped from the compensation tank (as a rule, it is under a pressure of 10 atm). Or maybe half the oil leaked out. If there is oil on the rod (pipe), it means there is dust and water inside the shock absorber. Manufacturers often declare the shock absorbers of modern motorcycles to be non-separable and do not sell spare parts for them. However, in practice they have to be disassembled, at least to change the oil. Unfortunately, the price of a unit reaches 30–50 thousand rubles, so many people choose repair between replacement and repair. When disassembling a fork or monoshock, all adjusting screws must be unscrewed. Don't forget to write down your previous settings! |
What to do if there is no rebound or compression adjustment? First of all, read the instructions and make sure that they really are not there. Often we have no idea about the hidden abilities of our motorcycles! If there really are no adjustments, you will have to adjust the hydraulics by selecting oil with a different viscosity. (Or by selecting a washer in the “pyramid” on the rod, but this is higher mathematics, in which many “pros” swim, so we’ll talk about it another time.) There are oils on sale with a viscosity from 2.5 to 20, but more often in total, 5, 7.5 and 10 are used. As a rule, it is not worth changing the viscosity by more than 2.5 units. The desired viscosity can be obtained by mixing oil of a different viscosity in the appropriate proportion. For example, draining half a liter of “five” and “ten” each, we get a liter of “seven and a half”. Just do not mix oils from different manufacturers, otherwise the result is not guaranteed! If you don’t know what oil viscosity is needed, the guidelines are as follows: for the front fork - 7.5, for the monoshock absorber - 5. If the hydraulics are of poor quality, then its characteristics will noticeably change after “breaking in”: due to increased clearances, it will become softer. Therefore, for example, shock absorbers of used (especially domestic) motorcycles, as a rule, require more viscous oil. For the winter, you can fill in oil with a slightly lower viscosity. However, keep in mind that when the shock absorber operates, it heats up. Therefore, if the suspension performance suits you, just change the oil before the onset of cold weather. The fact is that if there is water in the old oil (sucked from puddles or just condensation), the emulsion may freeze.
How to adjust the shock absorber of a motocross motorcycle
The video shows how to correctly adjust the rear shock absorber preload to set the correct sag (SAG) using the example of a KTM XC-F 250 with a WP shock absorber. Each motorcycle has its own meaning, see the service manual. Preload must be adjusted for the specific rider in full gear.
Below the cut are additional links to a video about rebuilding the shock absorber from this motorcycle:
Tools and spare parts from the video:
Fastway Billet Shock Preload Collars: ebay.to/2rKrOuP
Preload adjustment key: ebay.to/2tXkb50
Music: * Alpha Hydrae -Keratine rust and clear soul * Sunsearcher – Ambient Cool
Comments ( 11 )
- Answer
- Answer
- Answer
Yes, 10 cm is for cross and enduro.
I found the following general recommendations: For racing and track driving, SAG is set to 20-30% of the full possible suspension travel. For city driving 30-35%. The SAG setup is a balance between comfort and handling.
You conditionally need to make 30%.
Those. you measure while hanging, for example 100 cm is obtained. Then you measure while sitting on a motorcycle. The difference should be 30%, i.e. 30 cm.
Well, in general, you need to navigate according to your own feelings. If the suspension is hard, then the preload needs to be reduced (weaken the spring); if it is too soft, then, on the contrary, tighten it.
- Answer
- Answer
- Answer
- Answer
- Answer
- Answer
I think there is a little confusion in the terminology. Static sag is the difference between the fully unloaded suspension and the distance when the rider is fully equipped on the motorcycle. Static sag = unloaded suspension - loaded suspension. Actually, in your calculations, what is called suspension travel 170 mm is the desired sag. Therefore, calculating sag using sag is not entirely correct.